
- First Name
- Daniel
- Joined
- Mar 30, 2026
- Threads
- 2
- Messages
- 15
- Reaction score
- 28
- Location
- PG County, MD
- Vehicle(s)
- 2026 TRD ORP
- Thread starter
- #1
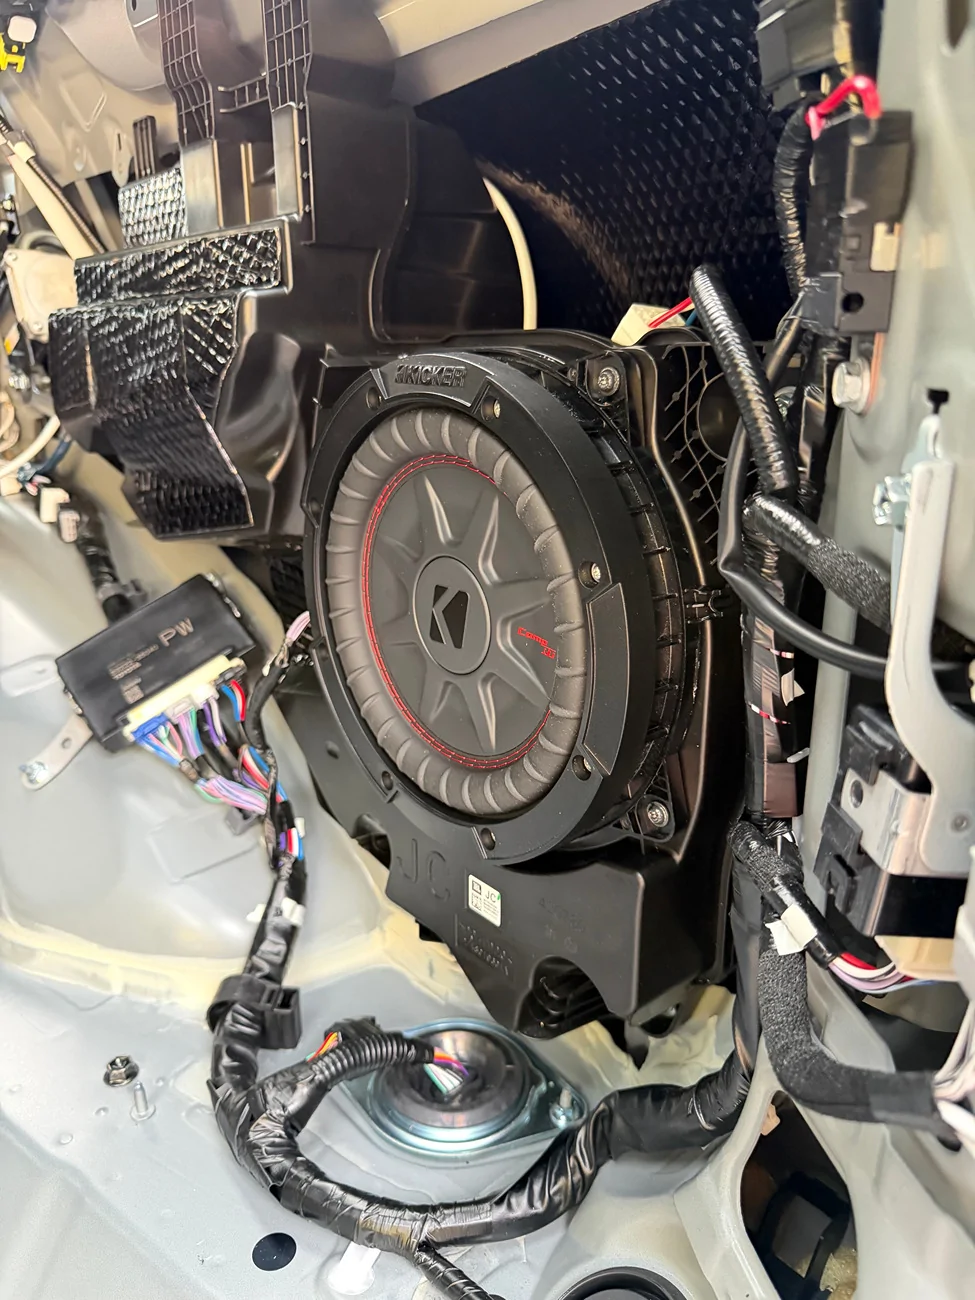
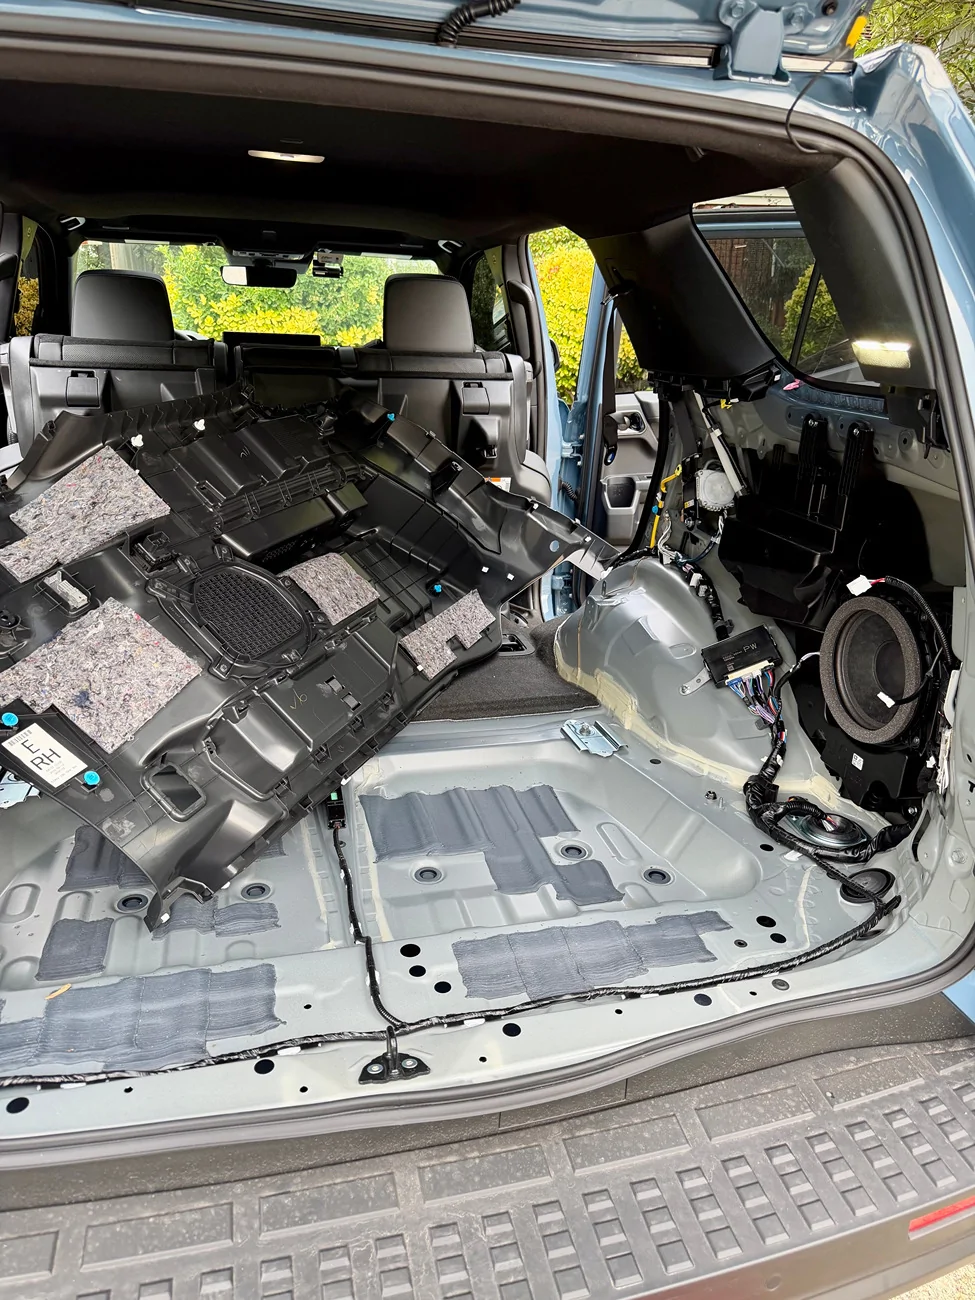
Just finished swapping out my oem JBL sub for a Kicker compRT8 pushing 300W. The goal was to keep it clean and looking 100% oem without losing any cargo space. This took quite some time as there isnt much info online and I had to spend hours on chatGPT, youtube and constant tinkering. Toyota really didnt want people customizing their sound system and made everything much more difficult than it couldve been. Hopefully this can help out others looking to do a similar mod.

Basic parts list:
- Kicker compRT8 (I used the 4ohm version and wired in parallel to achieve 300W @ 2ohms, I'd suggest getting a 2ohm version)
- Audio Control AMC-1.300 (LOC and amp, needed to restore bass dropoff)
- Taco Tunes harness (bought the package but all I needed was harness #1)
- Recoil OFC complete amp wiring kit +40A fuse

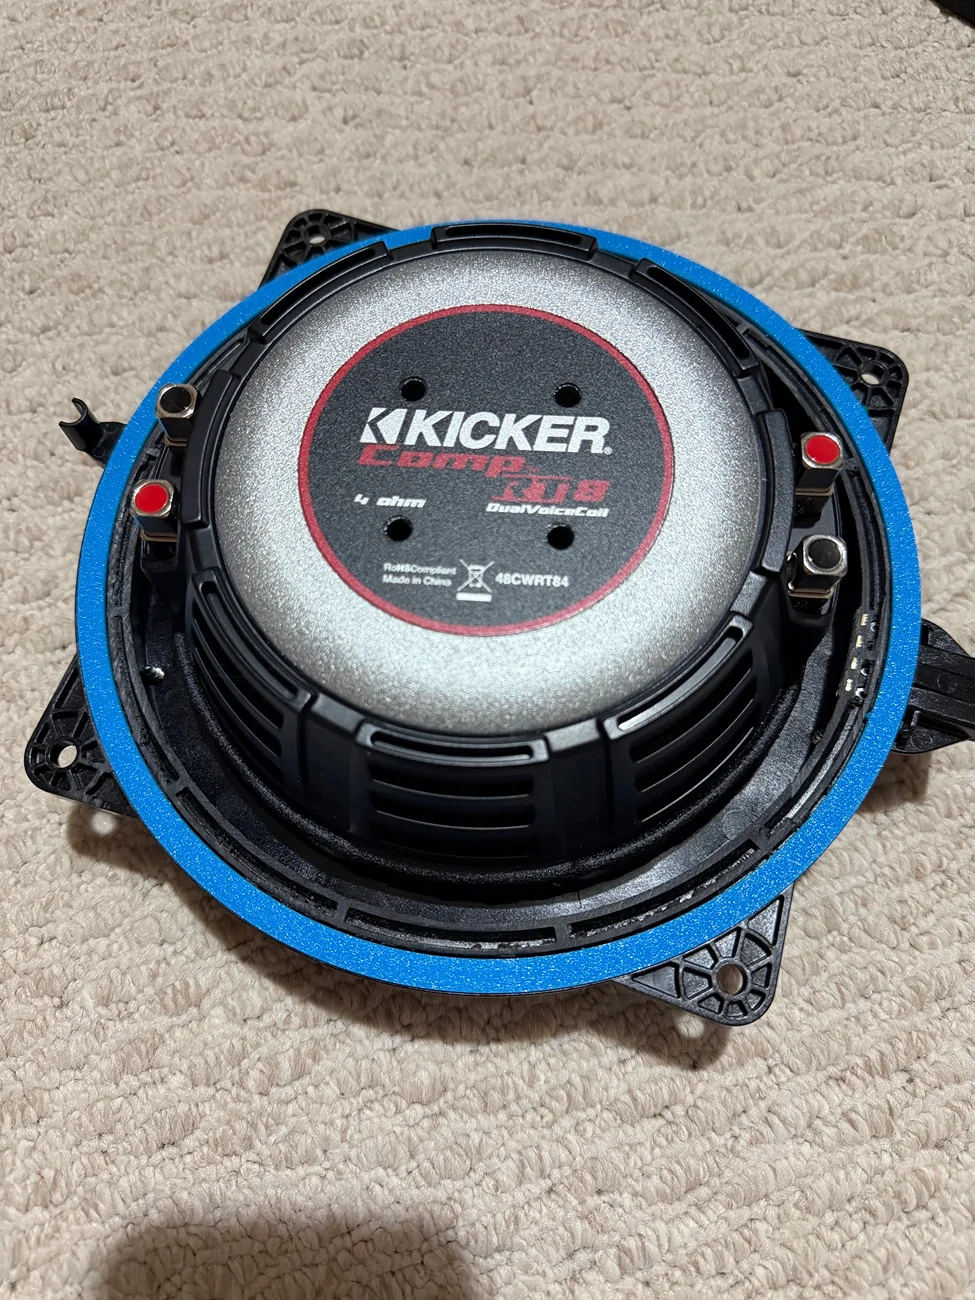
Check out the difference in the magnet sizes! The oem sub speaker is a joke and weighs a small fraction of the kicker.
The oem sub comes out easily as its help on by 4 screws, however, the mounting bracket is built into the speaker. I used a band saw to seperate the two, but you can do so by clipping the arms of it (photo above) just before the slim outer ring. I would also try to preserve the silicone seal around the bracket as mine was damaged in the process. I ended up 3d printing another seal using standard 95A tpu filament and secured it with e6000 rubberized glue. I dont believe there are any brackets that you can buy for this, so if youre unable to fabricate one fromt scratch, def reuse the oem bracket. I thought about 3d printing custom bracket using PA6CF, but figured this would be the path of least resistance.
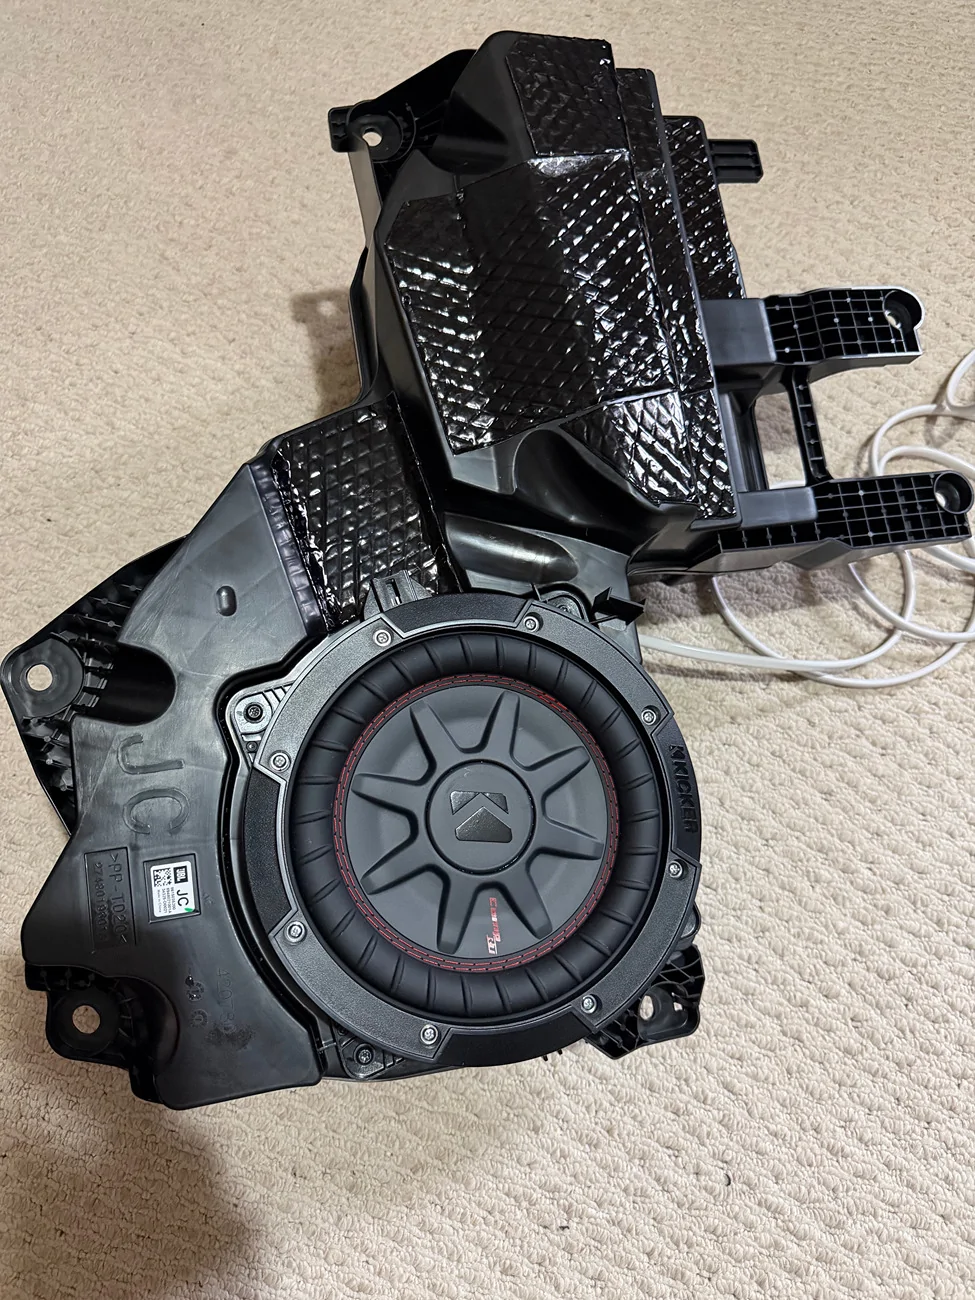
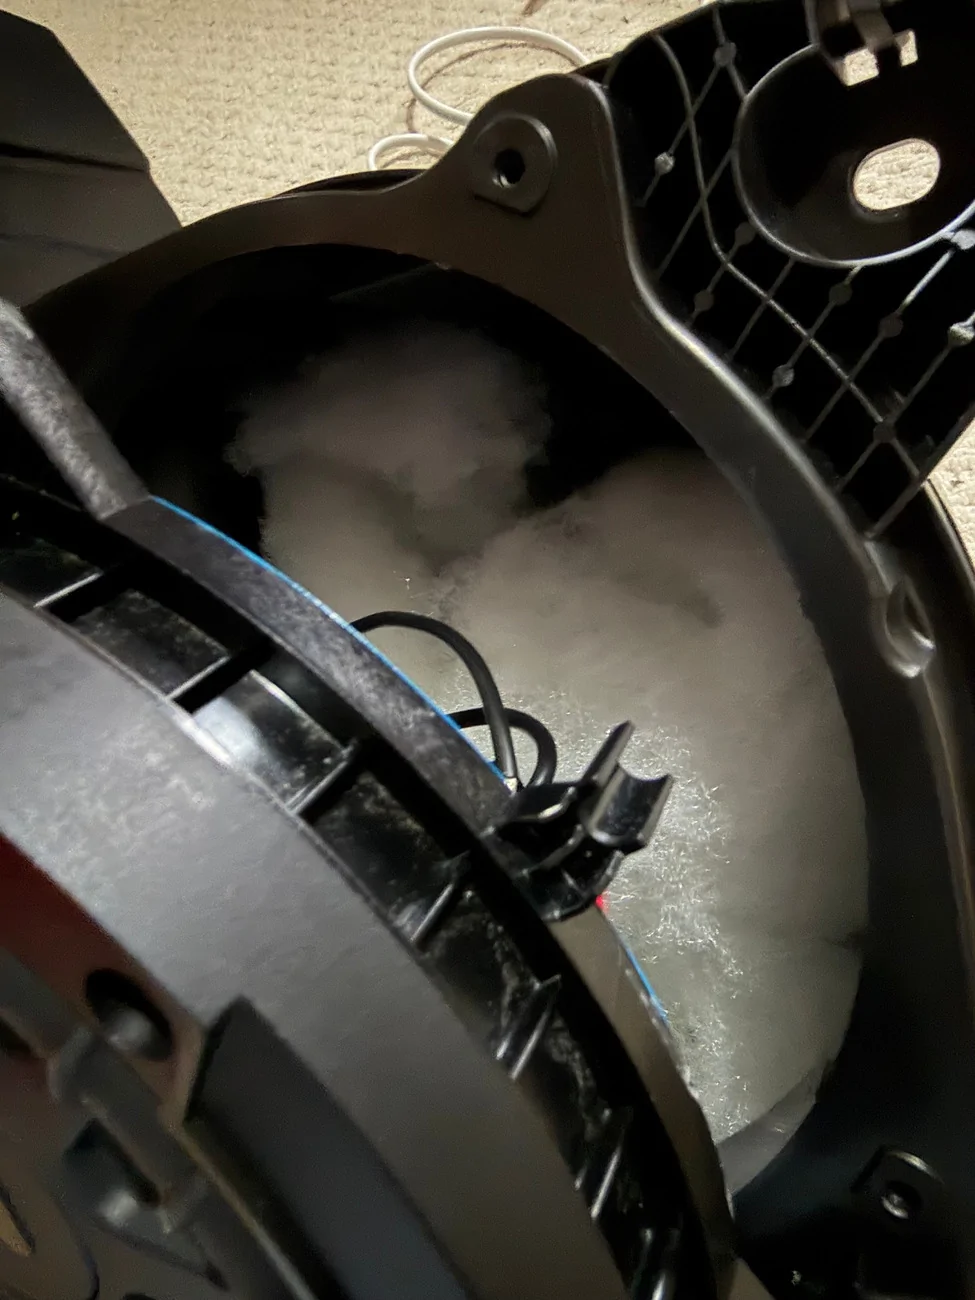
I figured as I've put so much time into this project, might as well do the extra steps to add dynamat to the oem box and also added 3oz of polyfill. Both should help achieve a deeper, better sounding bass. Dynamat was placed on most flat surfaces on the front and back of the box. I didnt bother doing the sides.
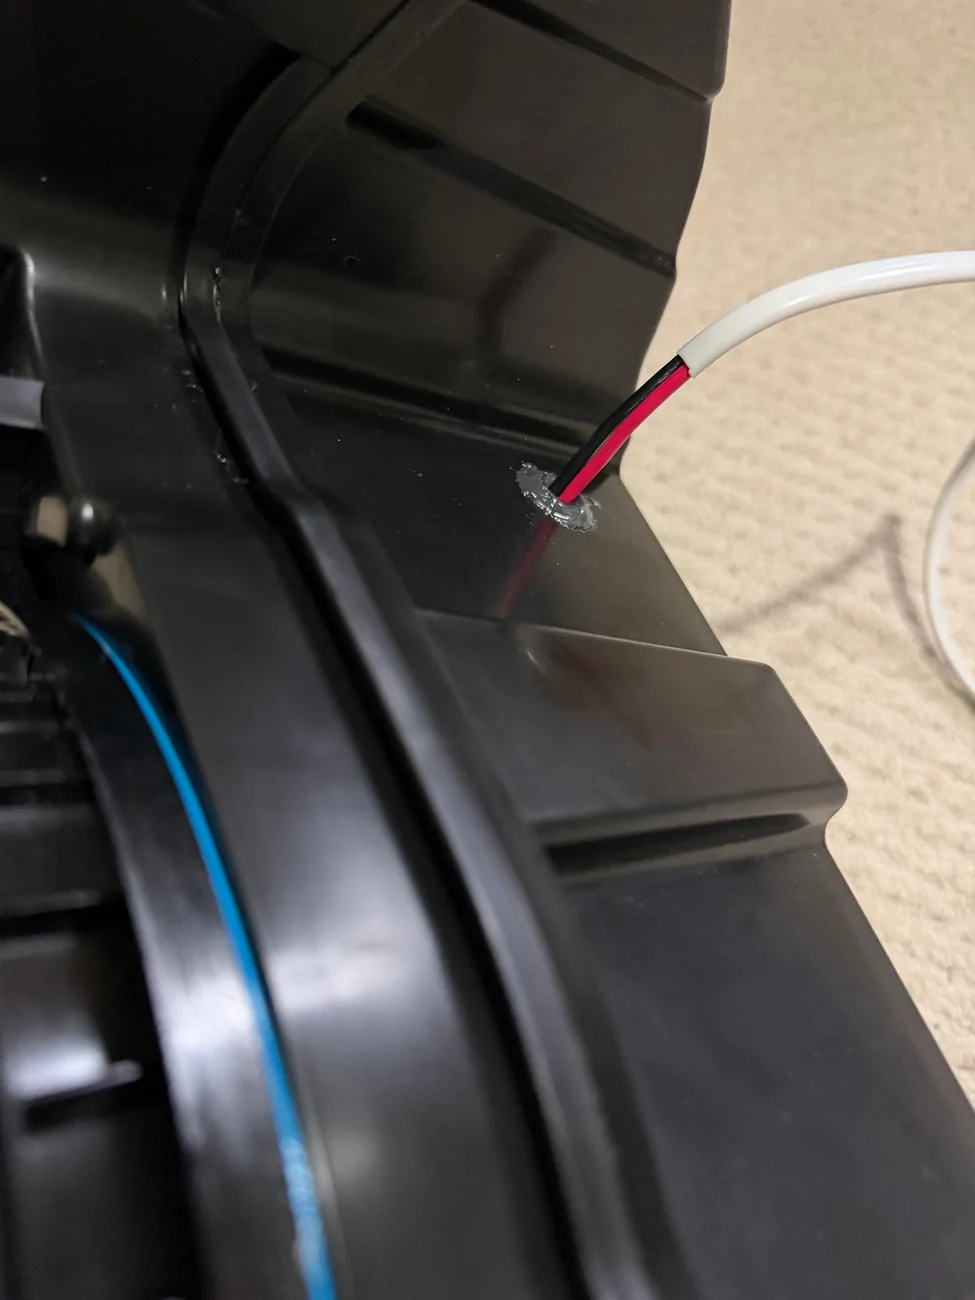
There is no factory wire passthrough so I had to drill out a hole and place a rubber grommet to pass the speaker wires through. The grommet was further reinforced using JB weld on both sides to keep it aright or from popping out entirely.
When mounting the kicker sub, the inner diameter of the oem bracket had to be shaved down a pinch to get it to fit. Holes also had to be drilled to accpet the kicker. There was very little tapping surface once the new screws were placed in, so careful pressure had to be used to prevent stripping what little material the screws had to grab on. Other other side doesnt have enough space for bolts and nuts, so instead a liberal amount JB weld was used to reinforce the screw ends.
More dynamat was used to the flat surfaces behind the sub box.
The speaker wire was wrapped and secured in several places using harness tape. Forgot to take pics but it was routed along the passenger side next to other factory wires. It was then routed underneat the passenger seat carpet and then through the center console to the driver side.
The oem amp sits under the driver seat and the taco tunes harness #1 was installed under the carpet. The ACM-1.300 turns on automatically so I didnt need hanress #2 for the remote turn on cable. The ground cable connects directly to the ACM and I found a random hole under the driver seat to secure to.
From top to bottom:
1) Power cable to the battery
2) Ground cable
3) Speaker input cables from Taco Tunes harness #1
4) Bass control knob
5) Speaker output cables connected to Kicker sub
The bass control knob sure would look nice mounted onto one of those blank buttons... but I'm tired. Velcro it is.
The ACM-1.300 didnt fit under the driver seat, even with the air ducts removed. It currently sits in front of the driver seat but may try to move under the passenger seat.
The power cable was routed through the grommet on the drivers side. Theres a small nipple that can be cut and acess is prettry straightforward. Taped a thin aluminum rod to the end of the power cable to push through. Theres another grommet on the passenger side if you want to go that route.
So, the kicker speaker sticks out just a bit and makes contact with the rear quarter trim. Its mostly the speaker bezel that makes contact so I dont believe it'll affect the sound much, but I'd either chose another sub with a thinner bezel or make a thinner mounting bracket if I had to do it all over again. But in any case, everything closed up for the most part. Theres only one or two clips near the top that doesnt quite clip in, but structurally its still held in secure by bolts.
Thats about it... I'm still trying to fine tune the accubass on the ACM-1.300, but it sounds amazing on certain songs. Need to adjust the threshold to a smooth transition once the factory bass rolls off. I like having the amp where it is now (in front of drivers seat) as I can easily adjust turning, but thinking of evetually moving under the passenger seat where theres more room.
If you have any advice as to making this project a little easier or cleaner, please chime in!
Basic parts list:
- Kicker compRT8 (I used the 4ohm version and wired in parallel to achieve 300W @ 2ohms, I'd suggest getting a 2ohm version)
- Audio Control AMC-1.300 (LOC and amp, needed to restore bass dropoff)
- Taco Tunes harness (bought the package but all I needed was harness #1)
- Recoil OFC complete amp wiring kit +40A fuse
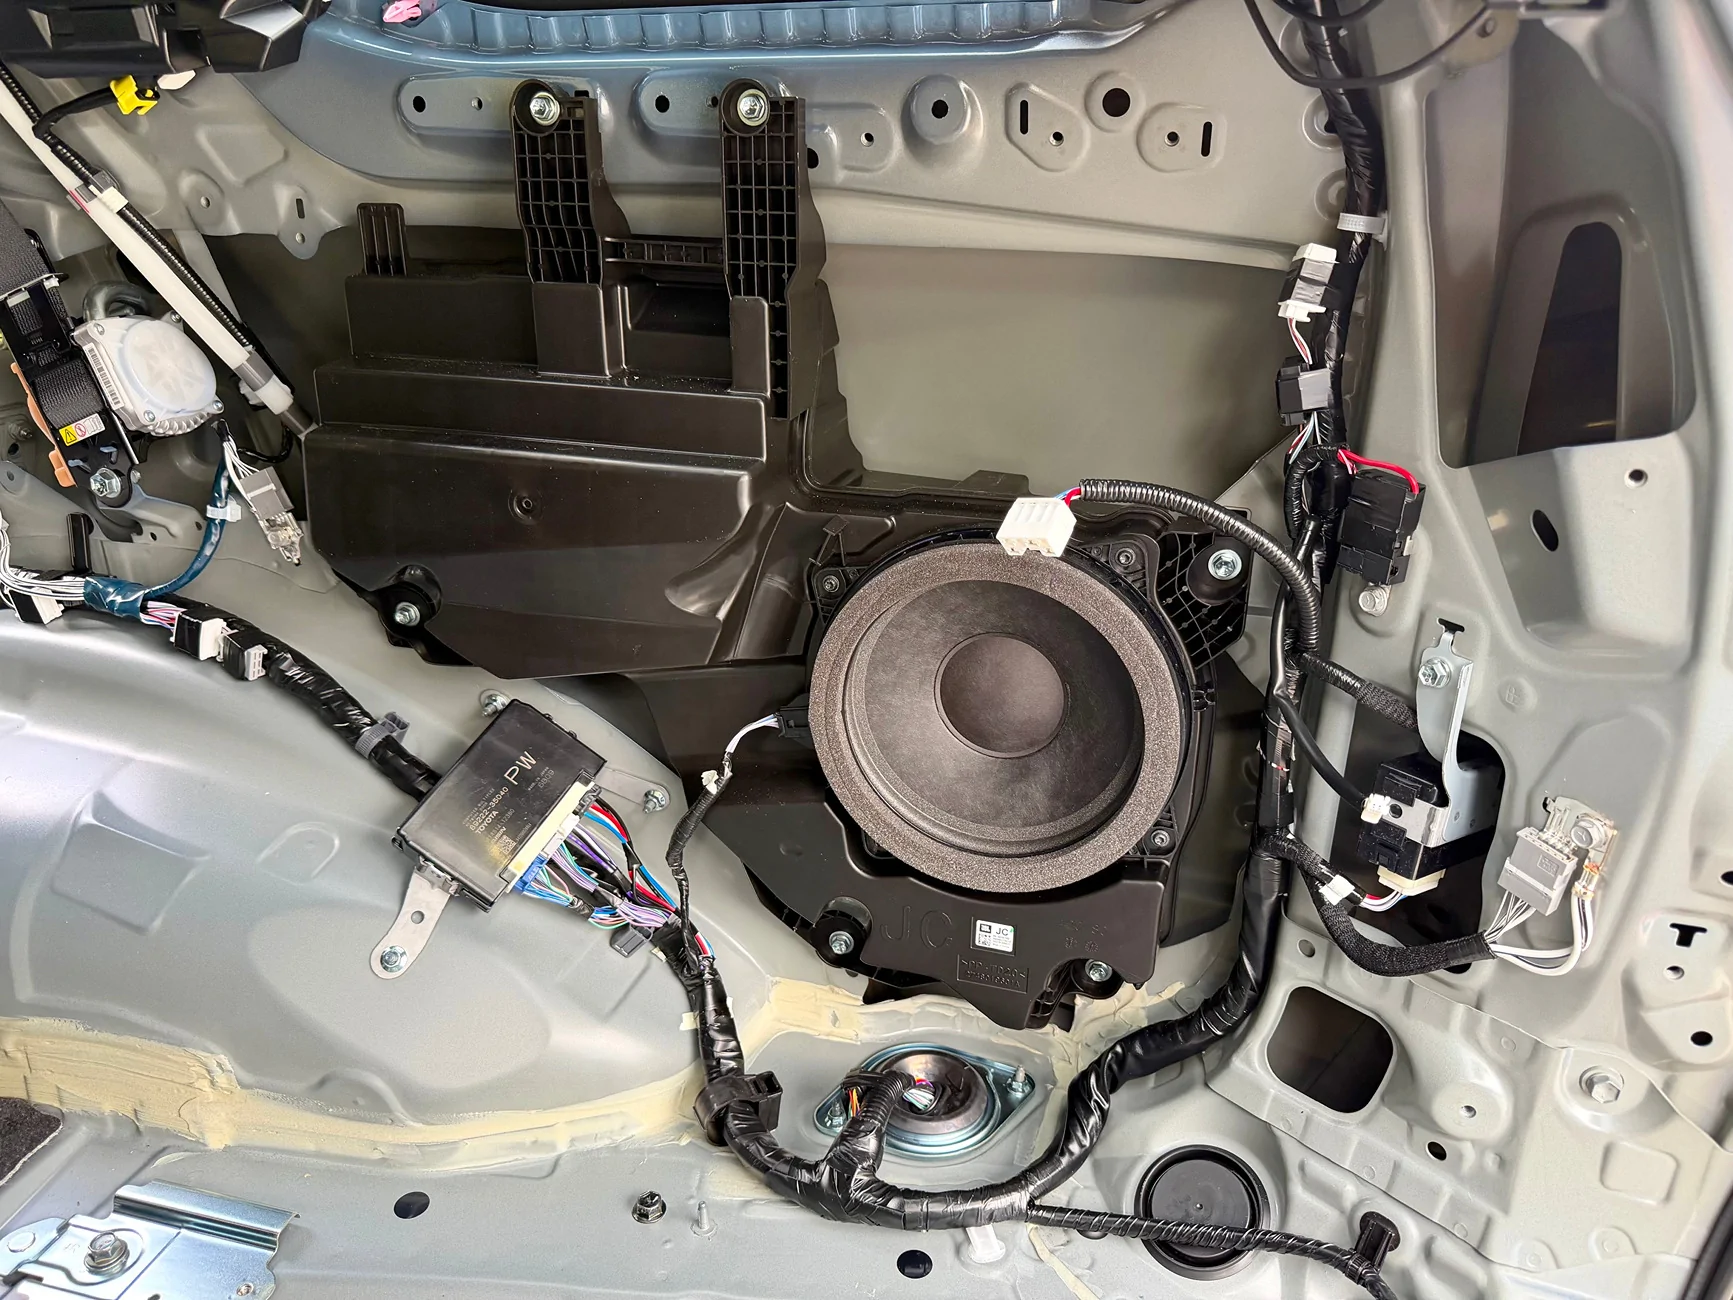
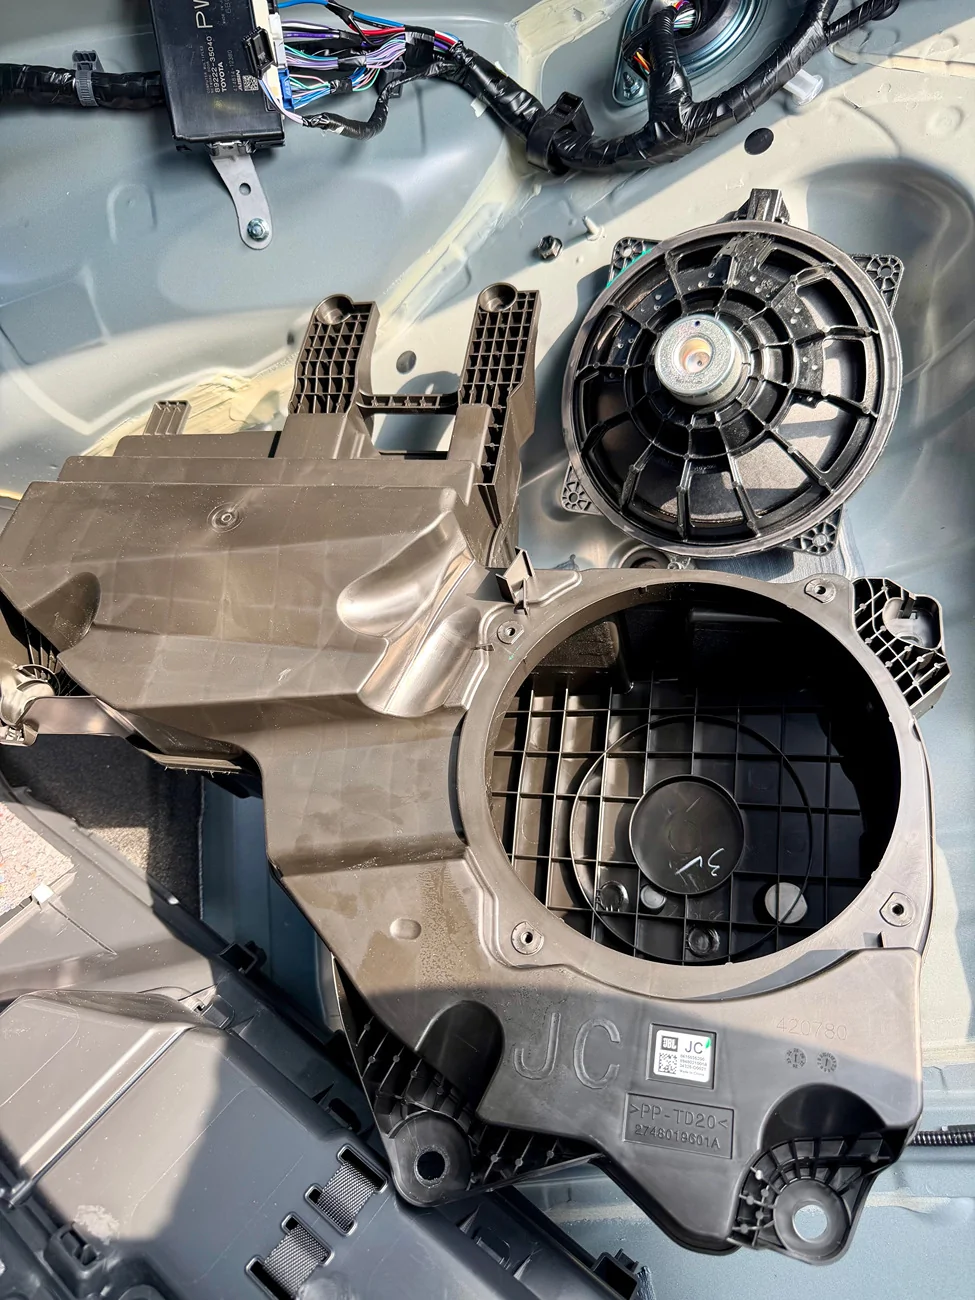
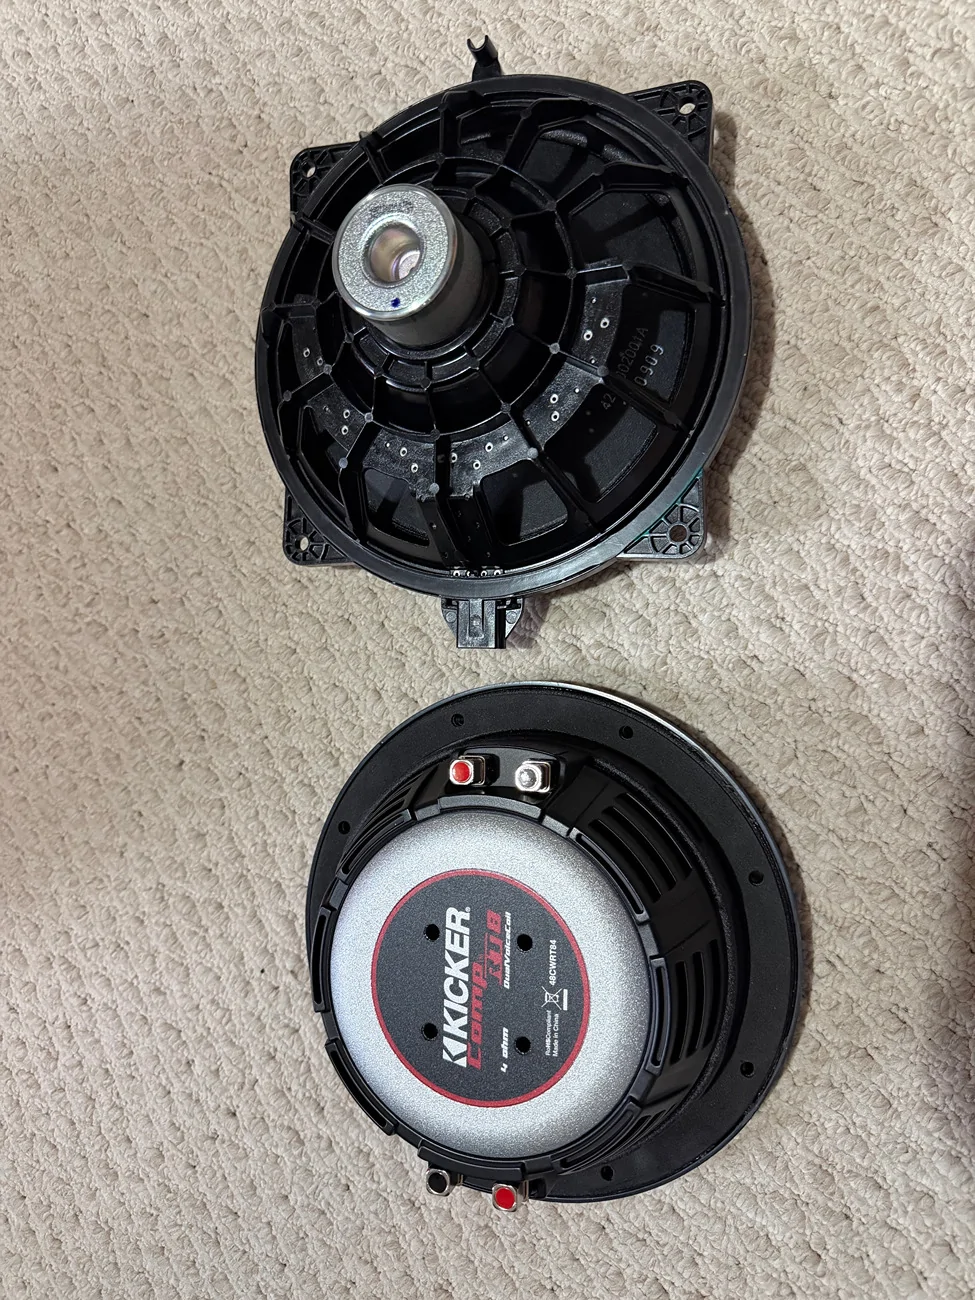
Check out the difference in the magnet sizes! The oem sub speaker is a joke and weighs a small fraction of the kicker.
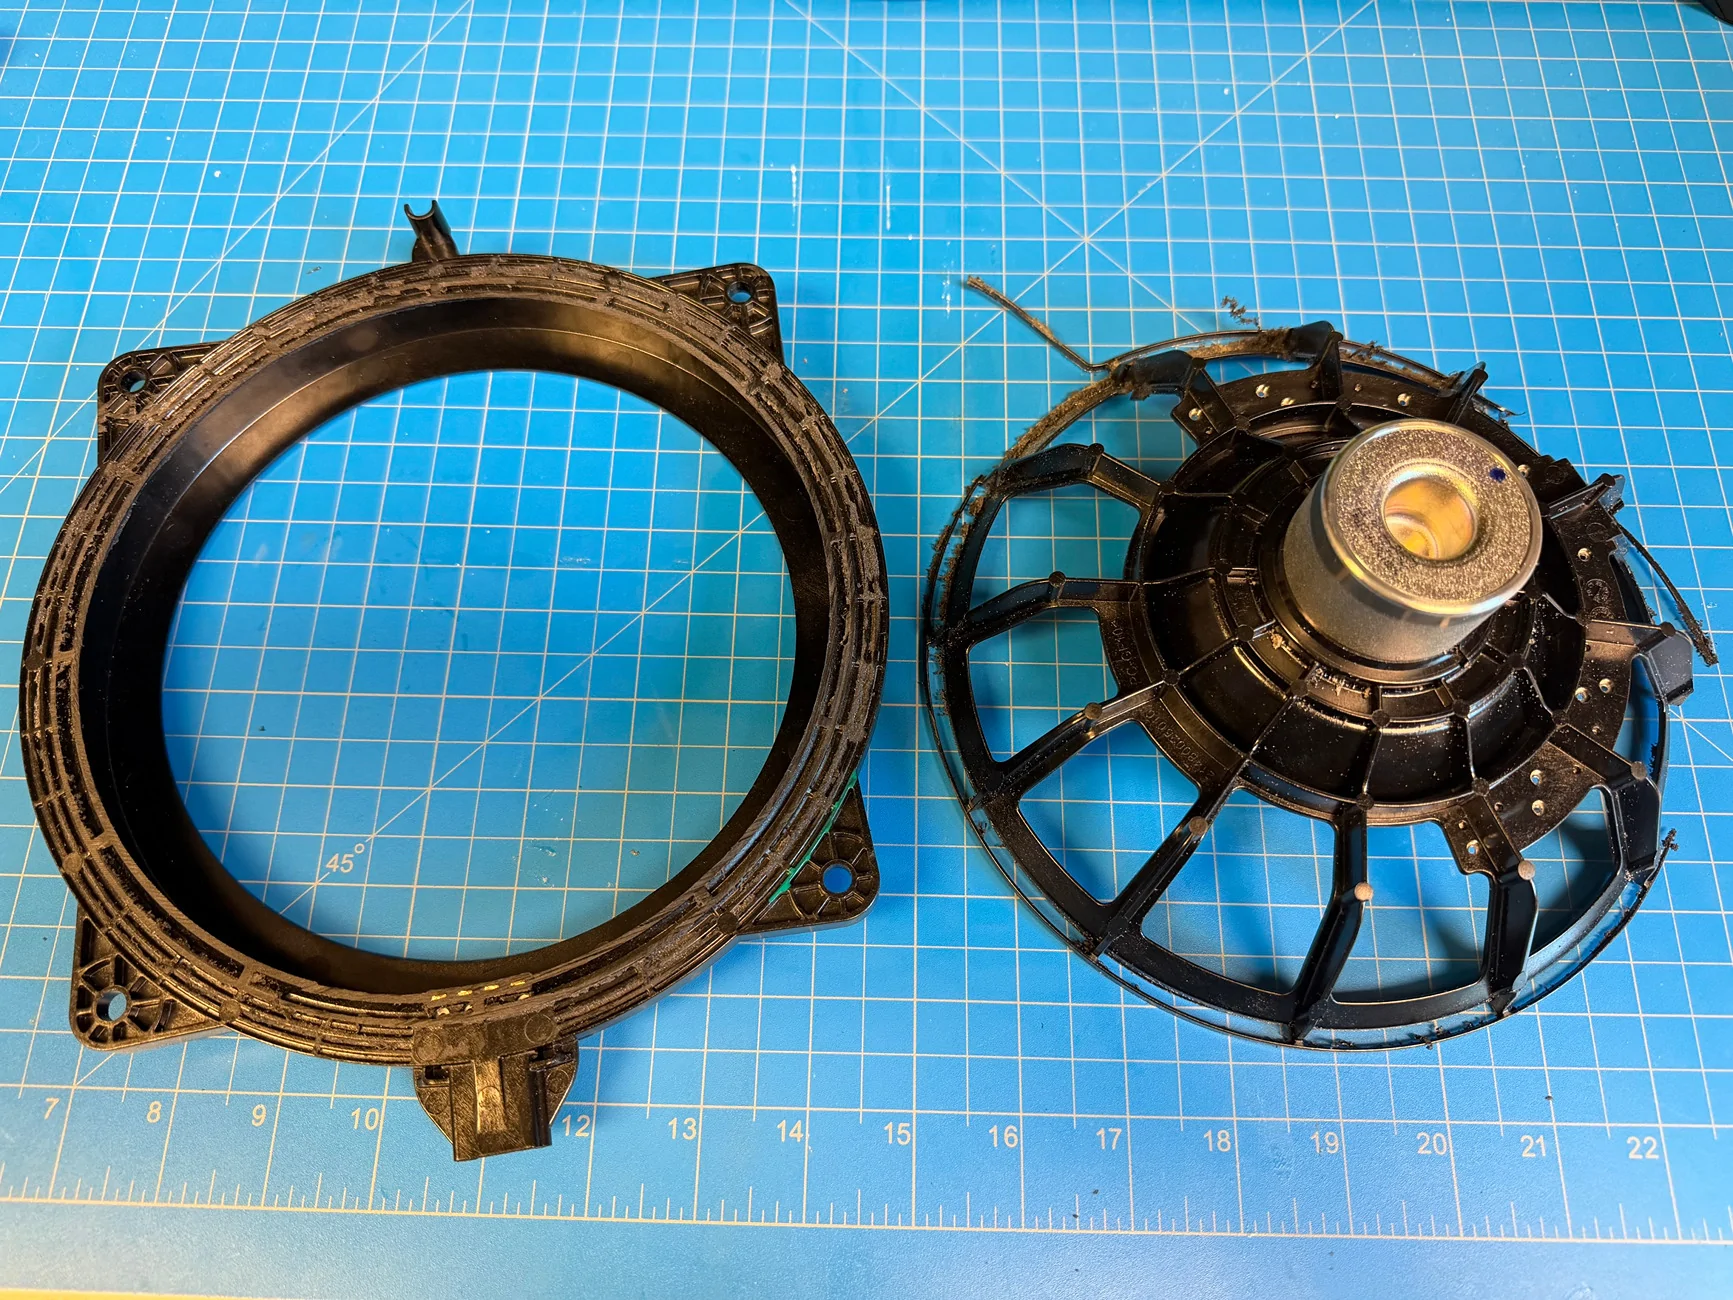
The oem sub comes out easily as its help on by 4 screws, however, the mounting bracket is built into the speaker. I used a band saw to seperate the two, but you can do so by clipping the arms of it (photo above) just before the slim outer ring. I would also try to preserve the silicone seal around the bracket as mine was damaged in the process. I ended up 3d printing another seal using standard 95A tpu filament and secured it with e6000 rubberized glue. I dont believe there are any brackets that you can buy for this, so if youre unable to fabricate one fromt scratch, def reuse the oem bracket. I thought about 3d printing custom bracket using PA6CF, but figured this would be the path of least resistance.
I figured as I've put so much time into this project, might as well do the extra steps to add dynamat to the oem box and also added 3oz of polyfill. Both should help achieve a deeper, better sounding bass. Dynamat was placed on most flat surfaces on the front and back of the box. I didnt bother doing the sides.
There is no factory wire passthrough so I had to drill out a hole and place a rubber grommet to pass the speaker wires through. The grommet was further reinforced using JB weld on both sides to keep it aright or from popping out entirely.
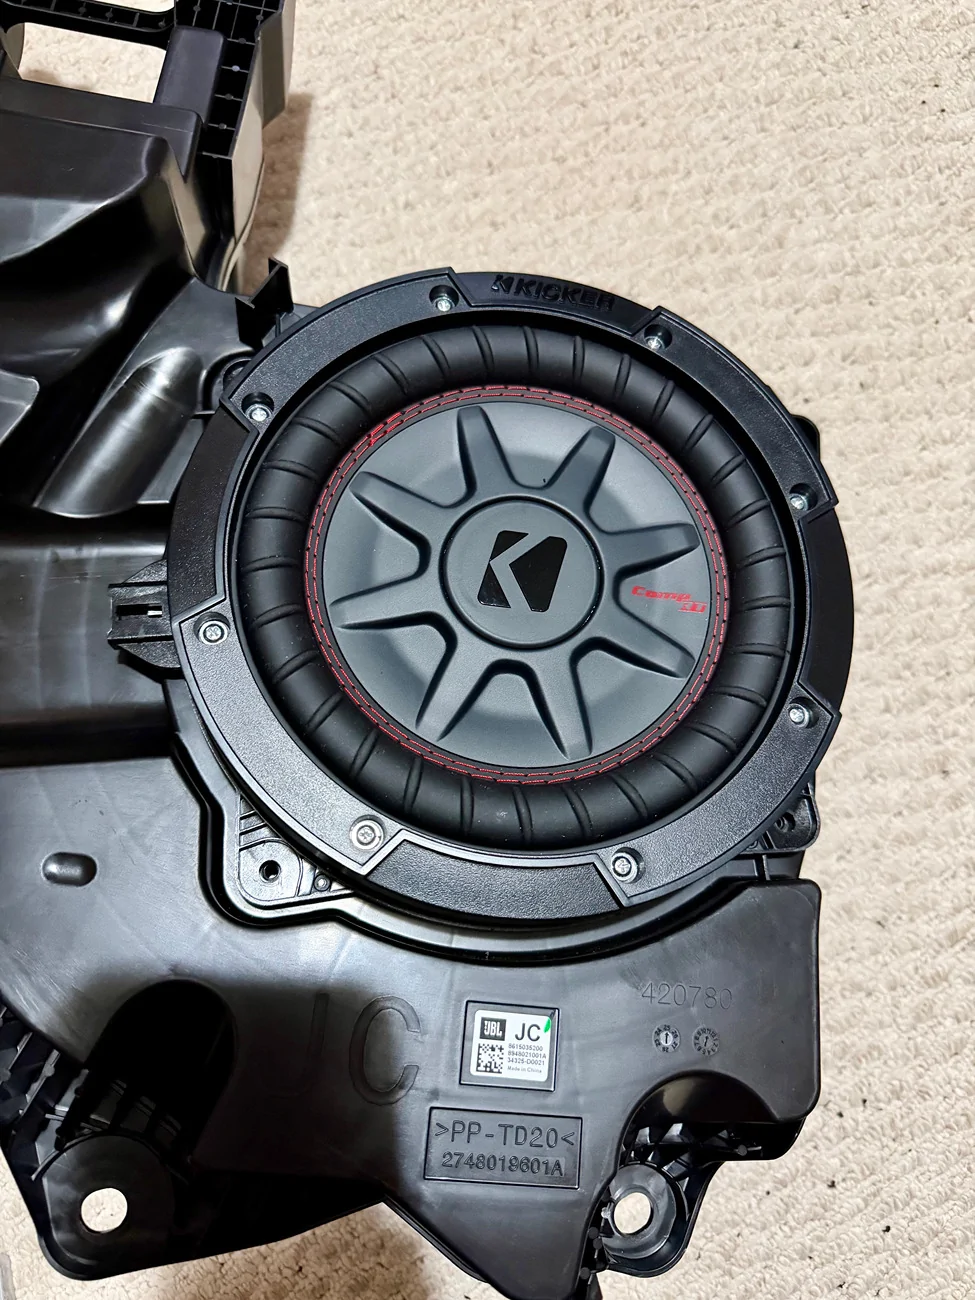
When mounting the kicker sub, the inner diameter of the oem bracket had to be shaved down a pinch to get it to fit. Holes also had to be drilled to accpet the kicker. There was very little tapping surface once the new screws were placed in, so careful pressure had to be used to prevent stripping what little material the screws had to grab on. Other other side doesnt have enough space for bolts and nuts, so instead a liberal amount JB weld was used to reinforce the screw ends.
More dynamat was used to the flat surfaces behind the sub box.
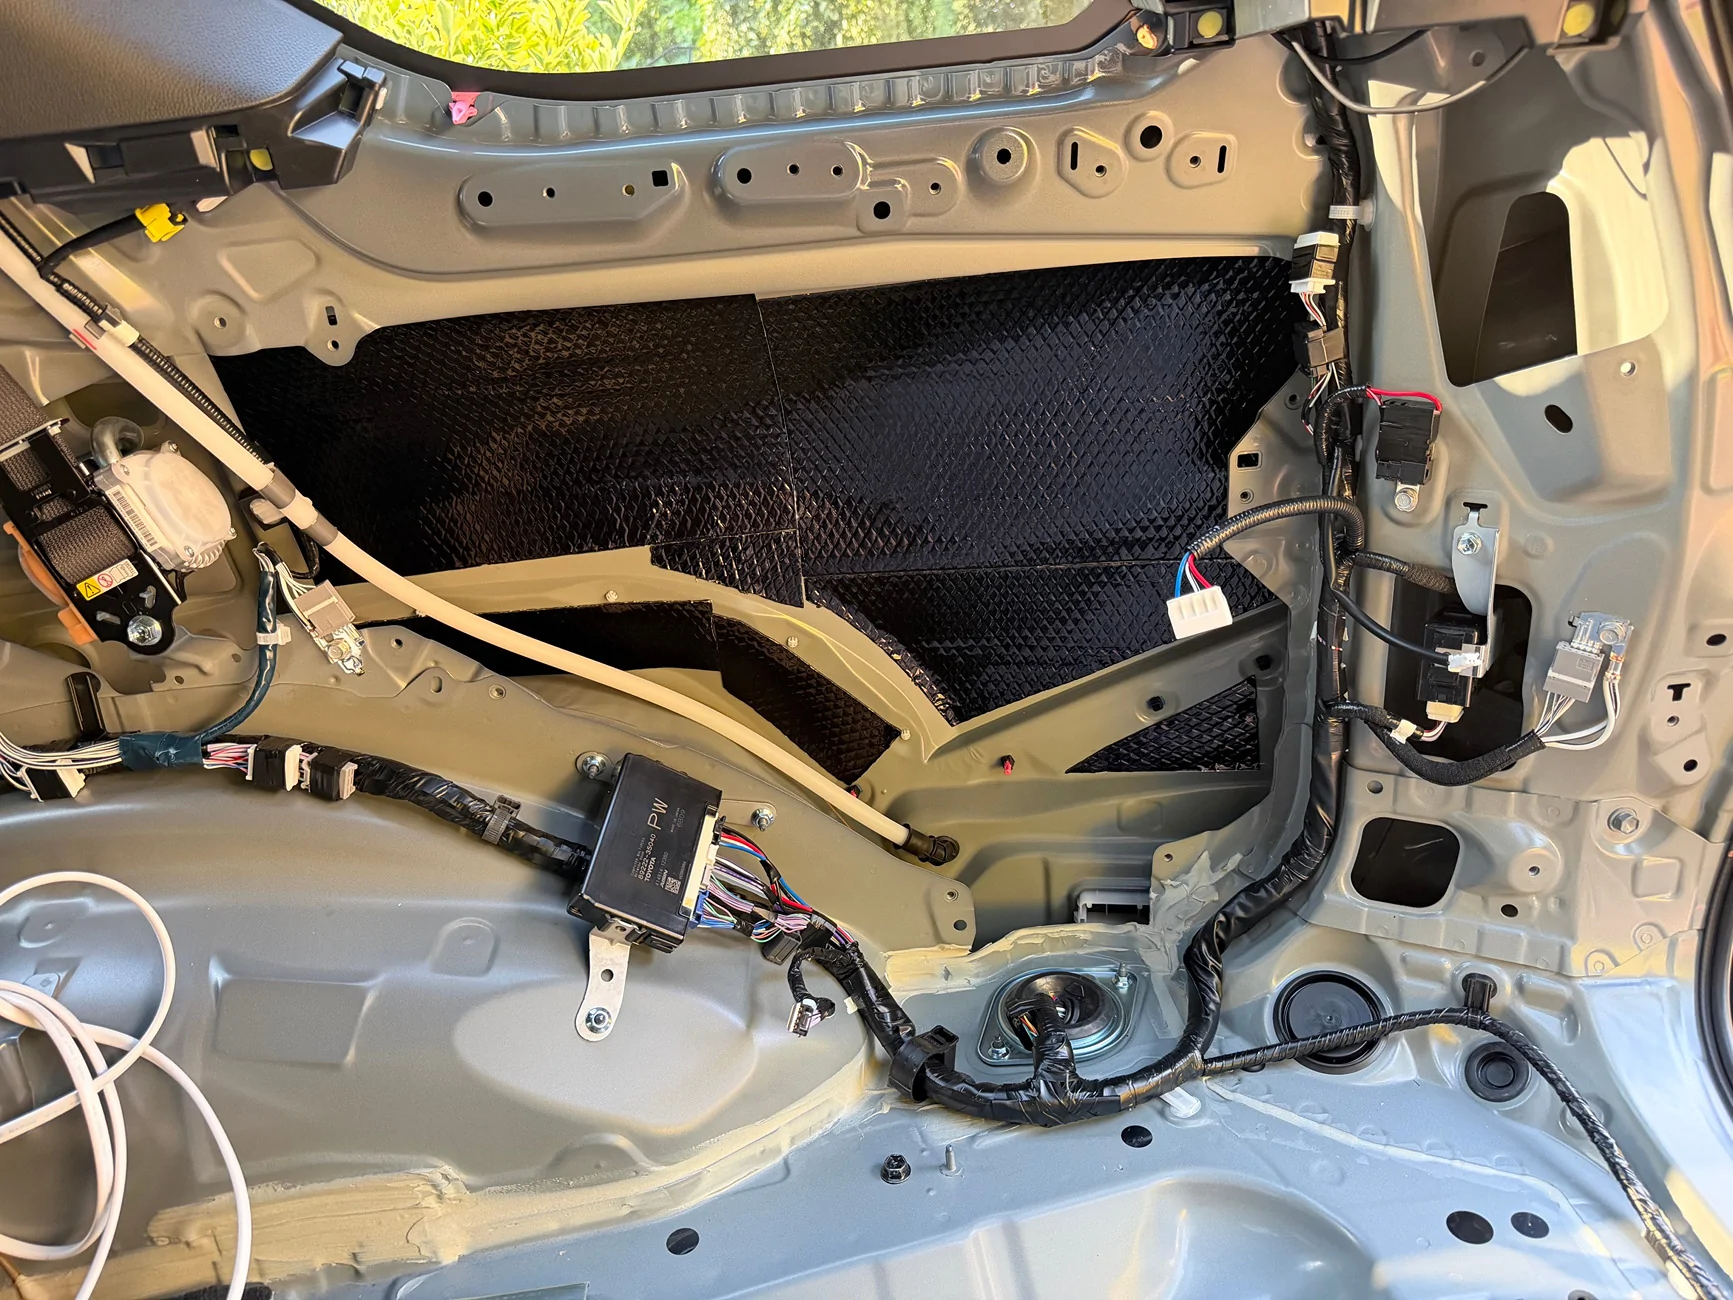
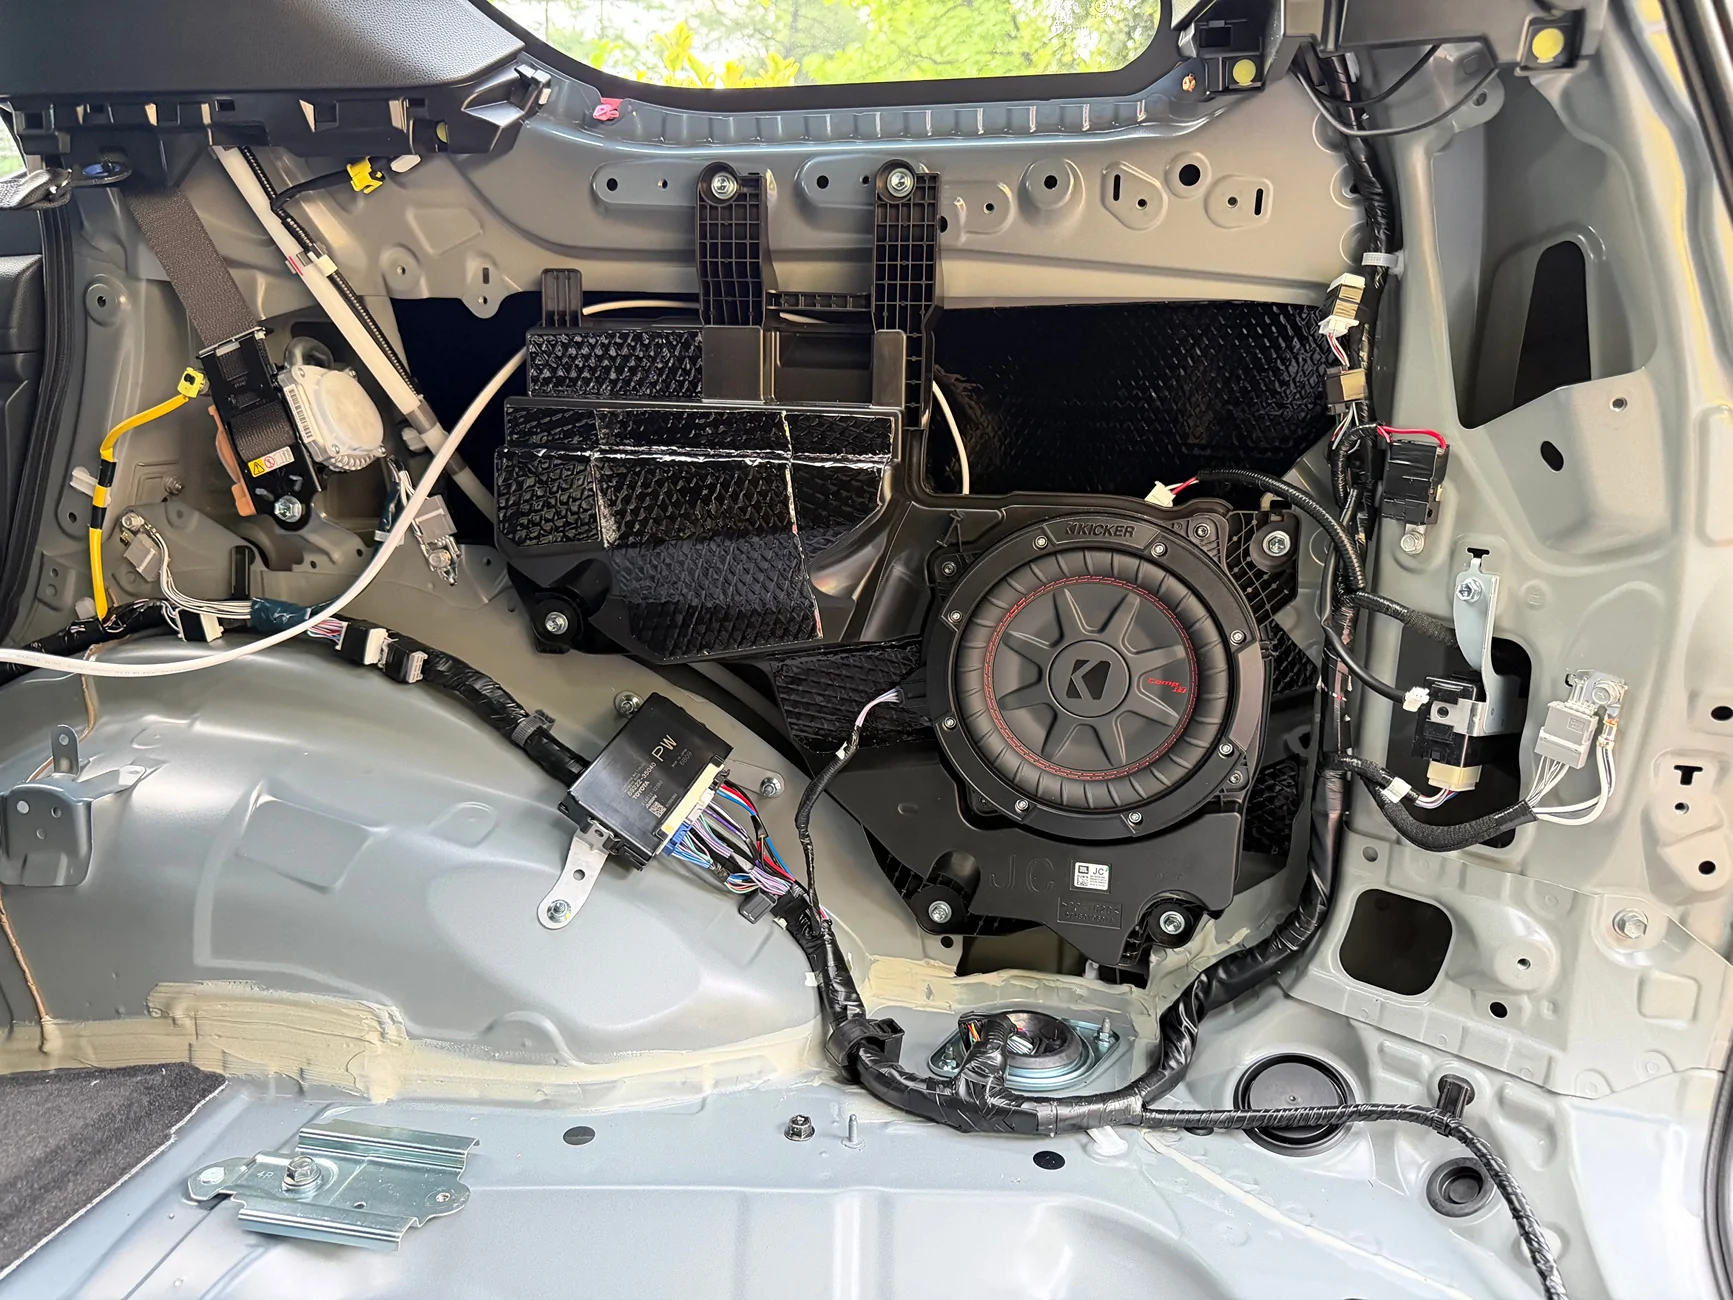
The speaker wire was wrapped and secured in several places using harness tape. Forgot to take pics but it was routed along the passenger side next to other factory wires. It was then routed underneat the passenger seat carpet and then through the center console to the driver side.
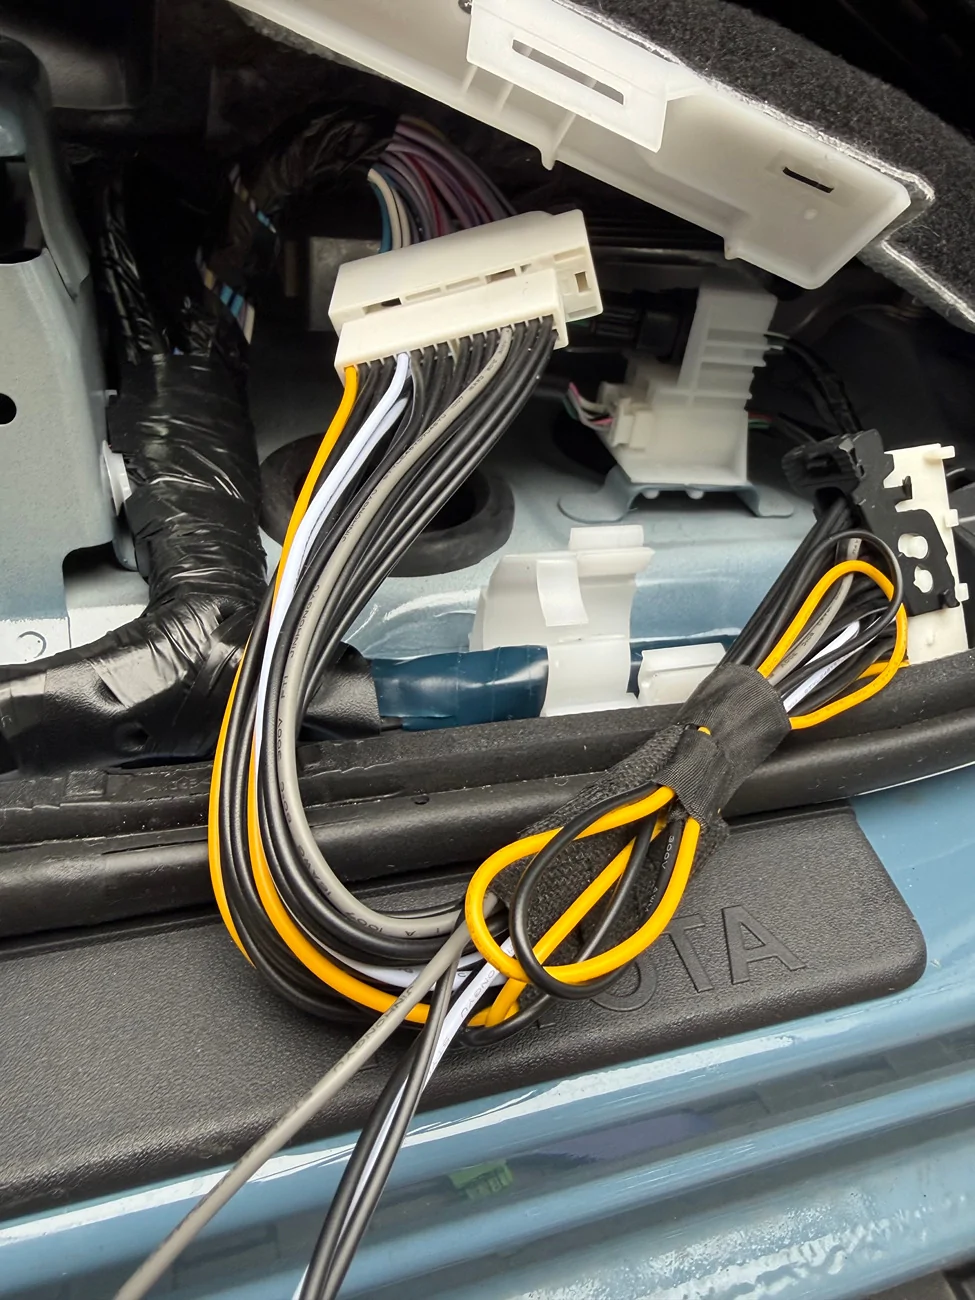
The oem amp sits under the driver seat and the taco tunes harness #1 was installed under the carpet. The ACM-1.300 turns on automatically so I didnt need hanress #2 for the remote turn on cable. The ground cable connects directly to the ACM and I found a random hole under the driver seat to secure to.
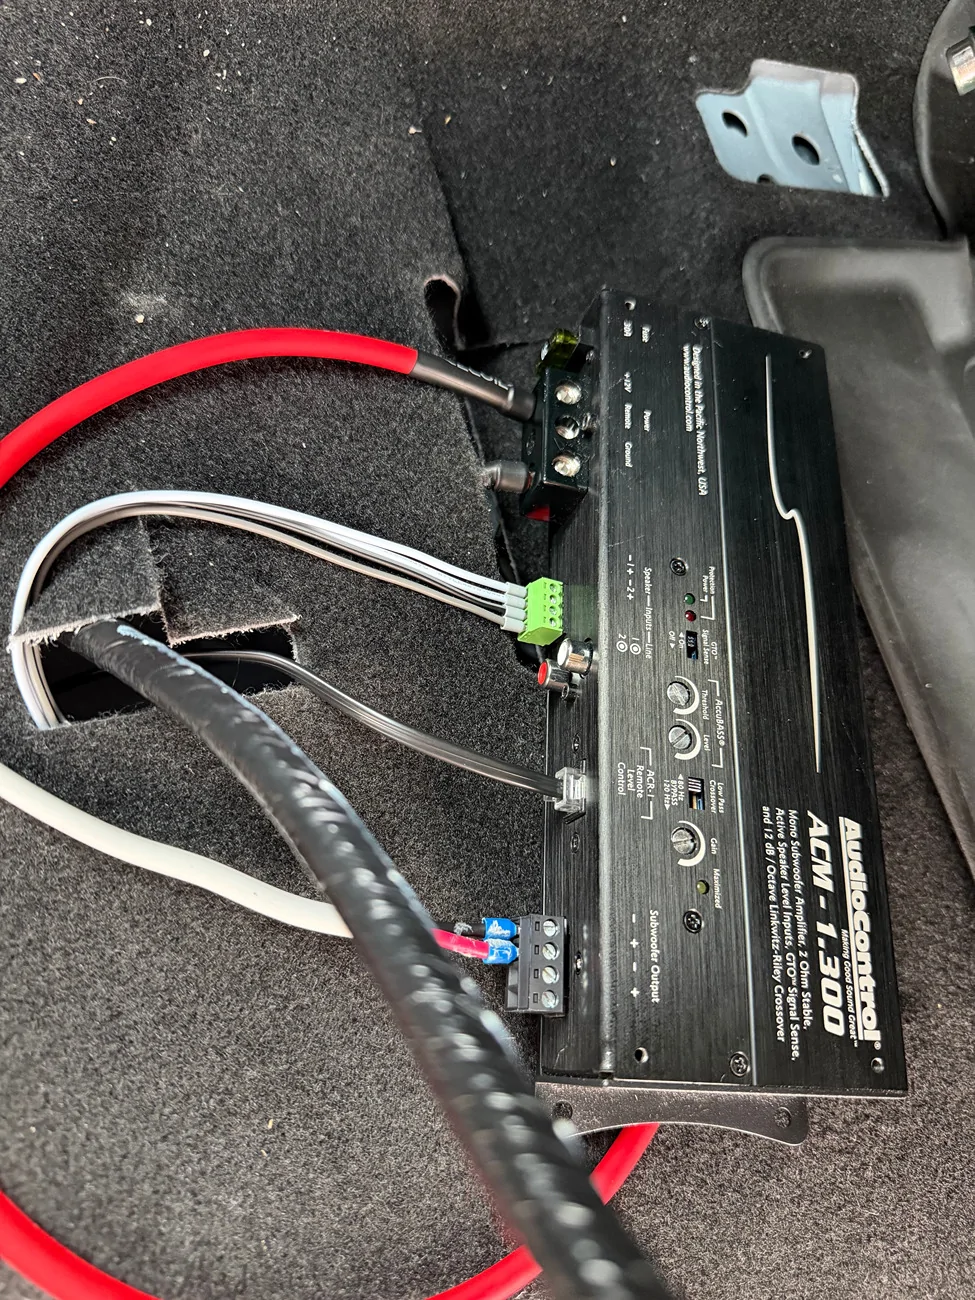
From top to bottom:
1) Power cable to the battery
2) Ground cable
3) Speaker input cables from Taco Tunes harness #1
4) Bass control knob
5) Speaker output cables connected to Kicker sub
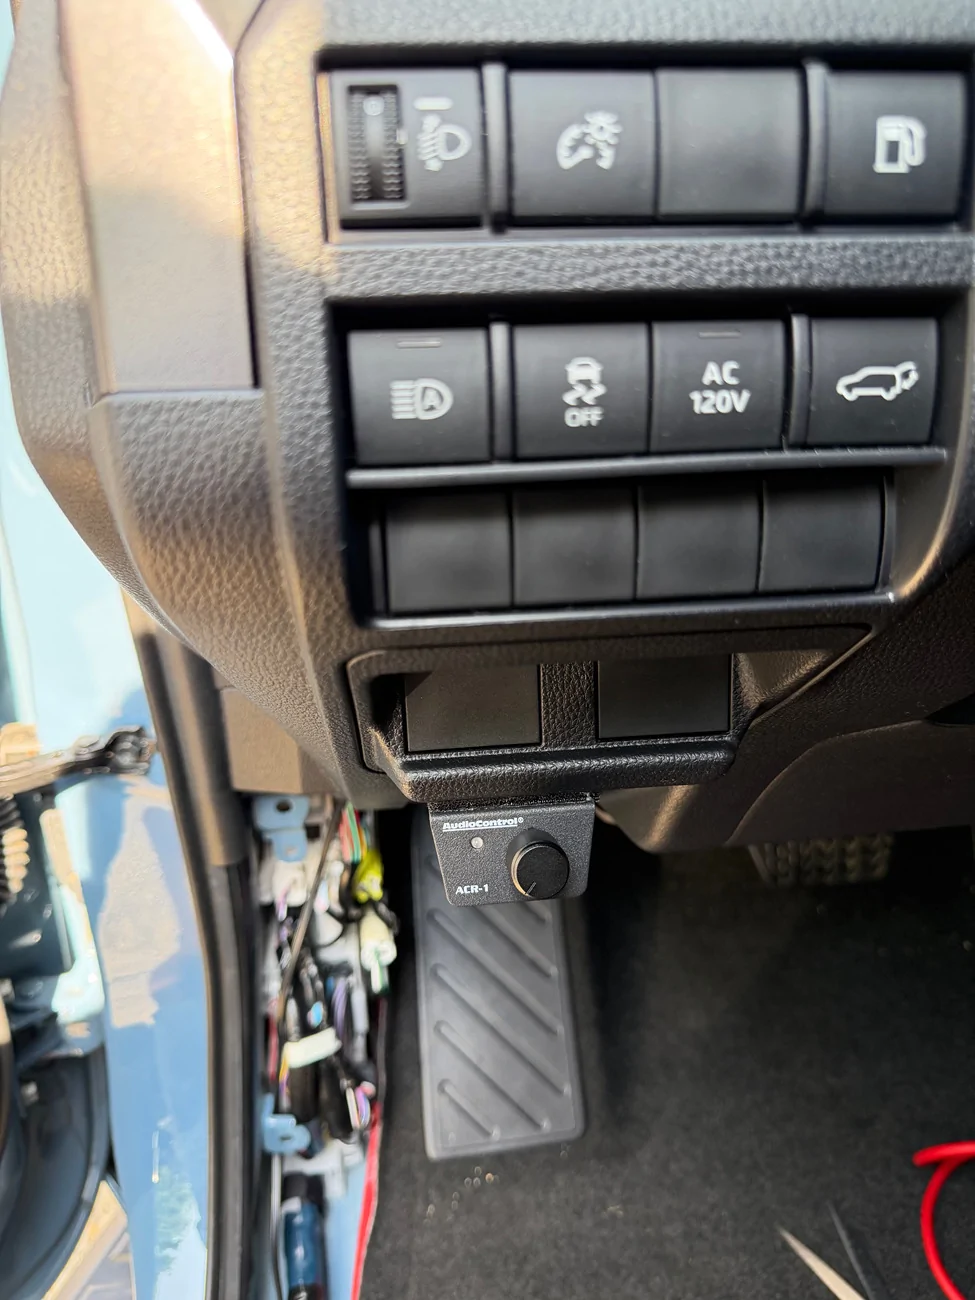
The bass control knob sure would look nice mounted onto one of those blank buttons... but I'm tired. Velcro it is.
The ACM-1.300 didnt fit under the driver seat, even with the air ducts removed. It currently sits in front of the driver seat but may try to move under the passenger seat.
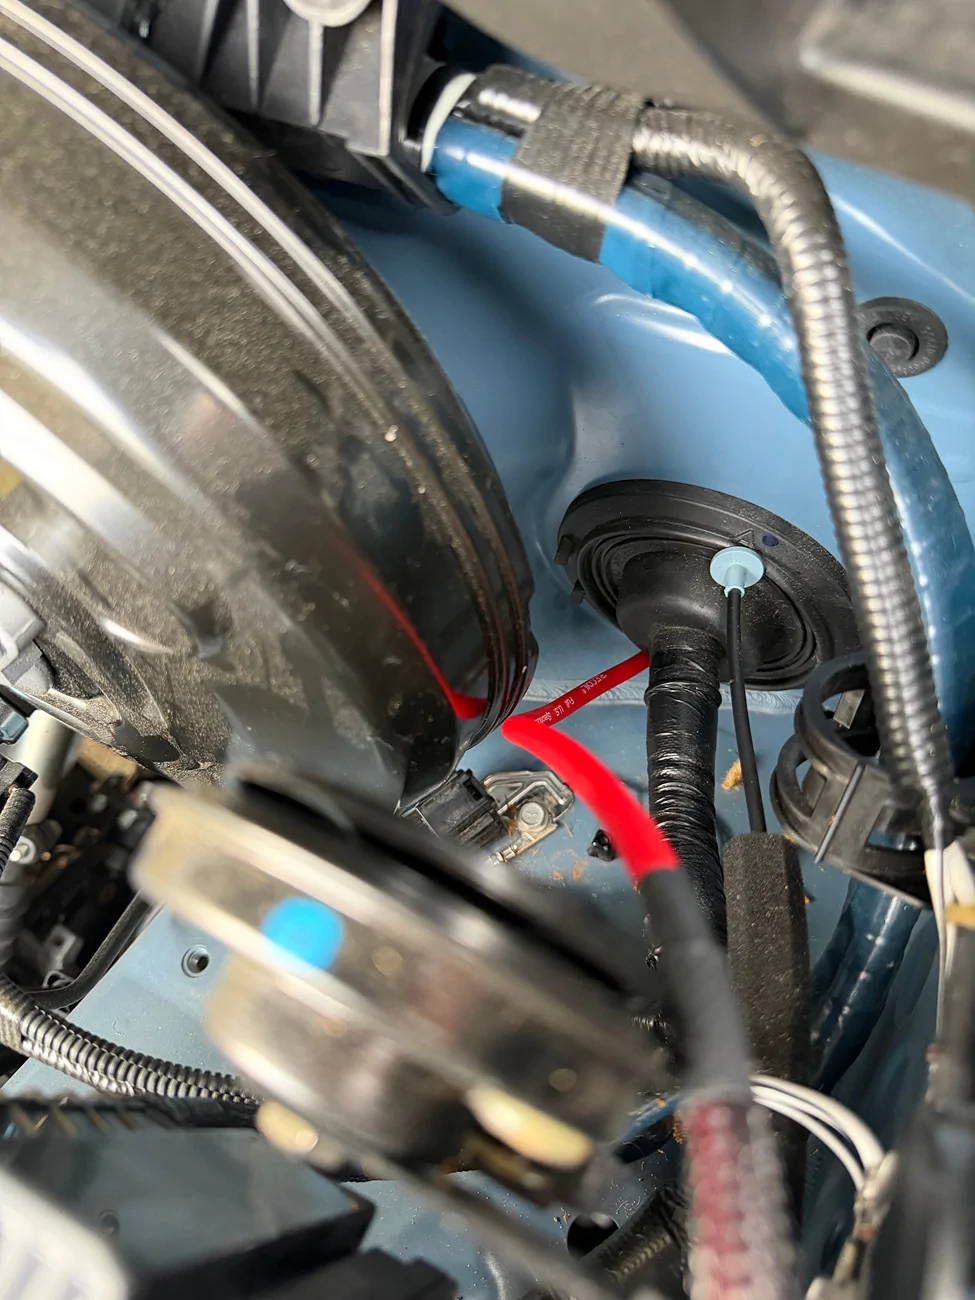
The power cable was routed through the grommet on the drivers side. Theres a small nipple that can be cut and acess is prettry straightforward. Taped a thin aluminum rod to the end of the power cable to push through. Theres another grommet on the passenger side if you want to go that route.
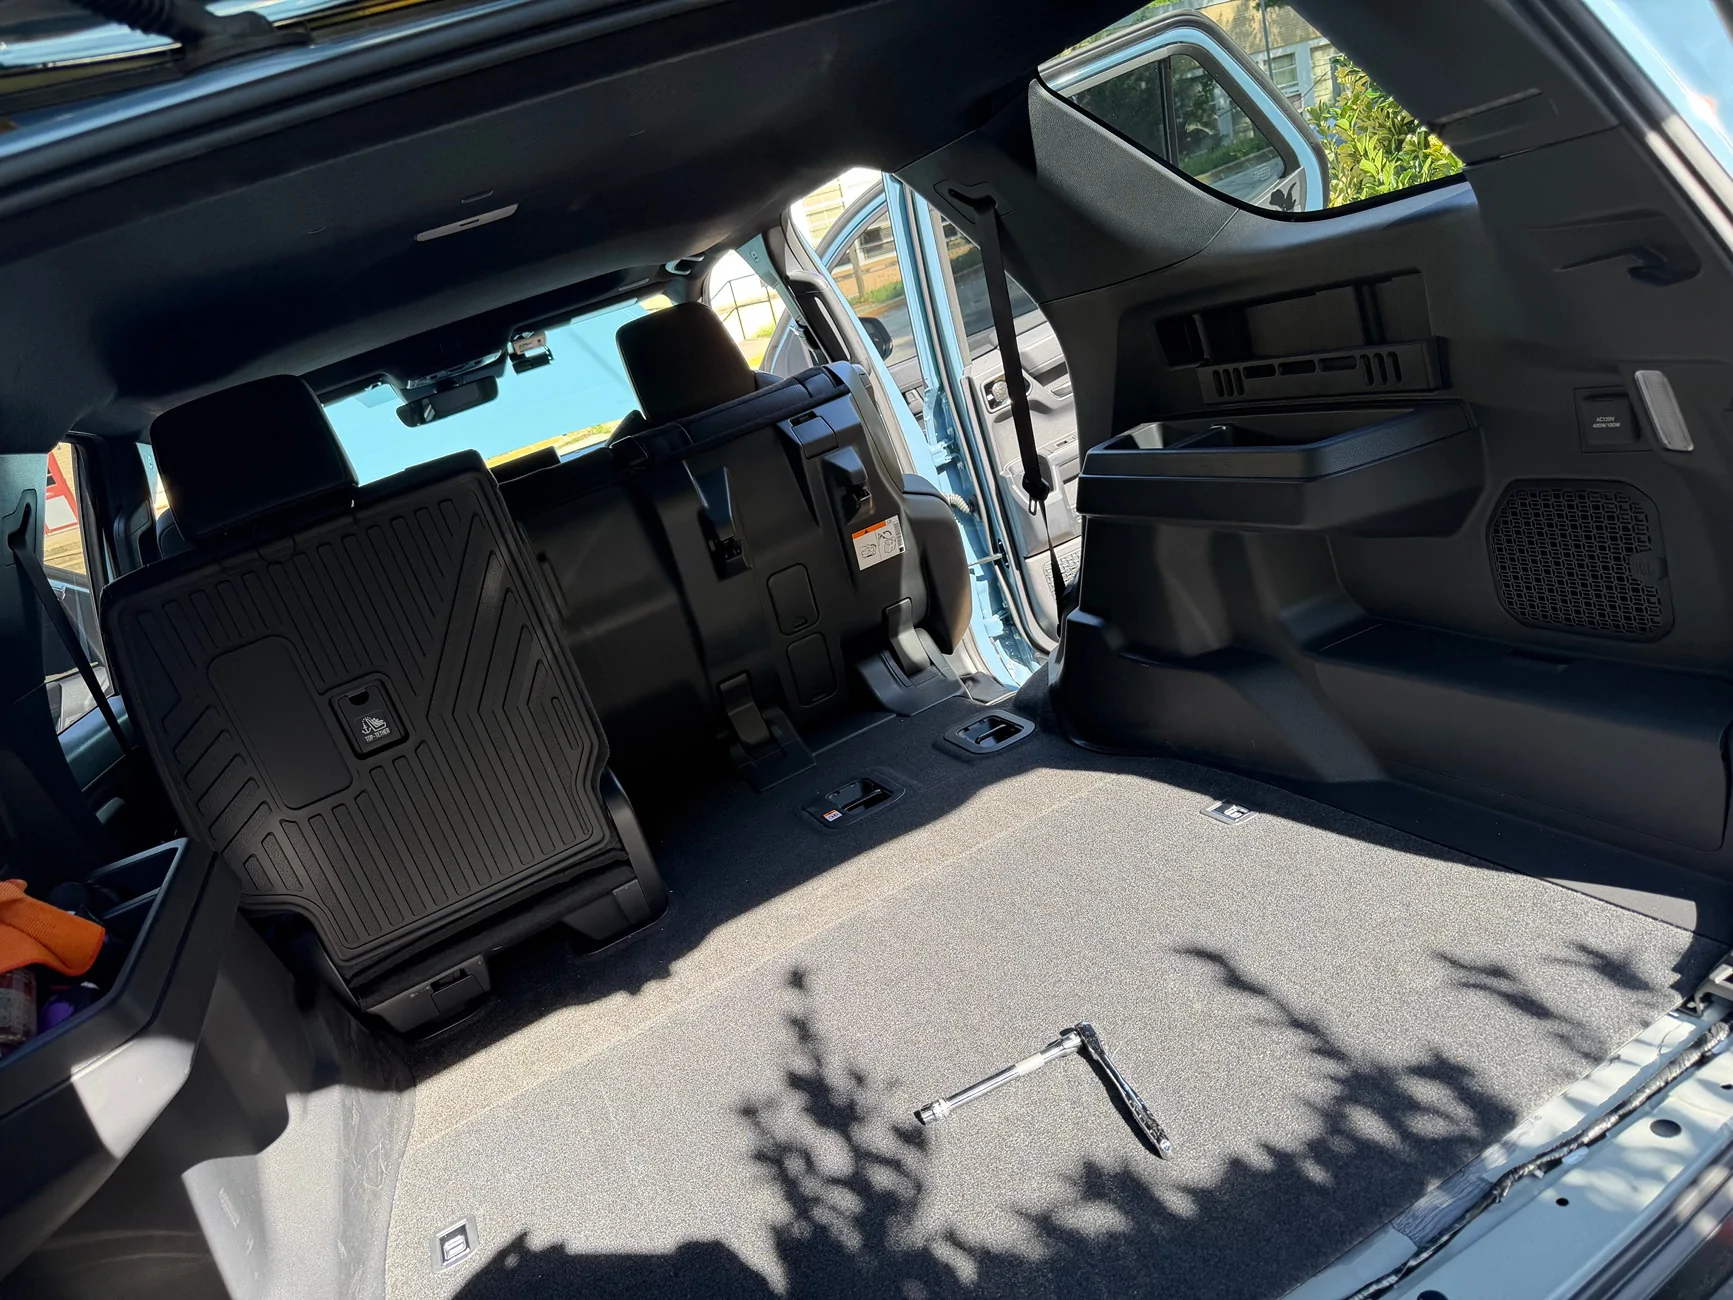
So, the kicker speaker sticks out just a bit and makes contact with the rear quarter trim. Its mostly the speaker bezel that makes contact so I dont believe it'll affect the sound much, but I'd either chose another sub with a thinner bezel or make a thinner mounting bracket if I had to do it all over again. But in any case, everything closed up for the most part. Theres only one or two clips near the top that doesnt quite clip in, but structurally its still held in secure by bolts.
Thats about it... I'm still trying to fine tune the accubass on the ACM-1.300, but it sounds amazing on certain songs. Need to adjust the threshold to a smooth transition once the factory bass rolls off. I like having the amp where it is now (in front of drivers seat) as I can easily adjust turning, but thinking of evetually moving under the passenger seat where theres more room.
If you have any advice as to making this project a little easier or cleaner, please chime in!
Sponsored
Last edited: