- Joined
- Feb 1, 2025
- Threads
- 49
- Messages
- 790
- Reaction score
- 426
- Location
- Not made in China
- Vehicle(s)
- Bicycle
Thanks. I will take a look.
Sponsored
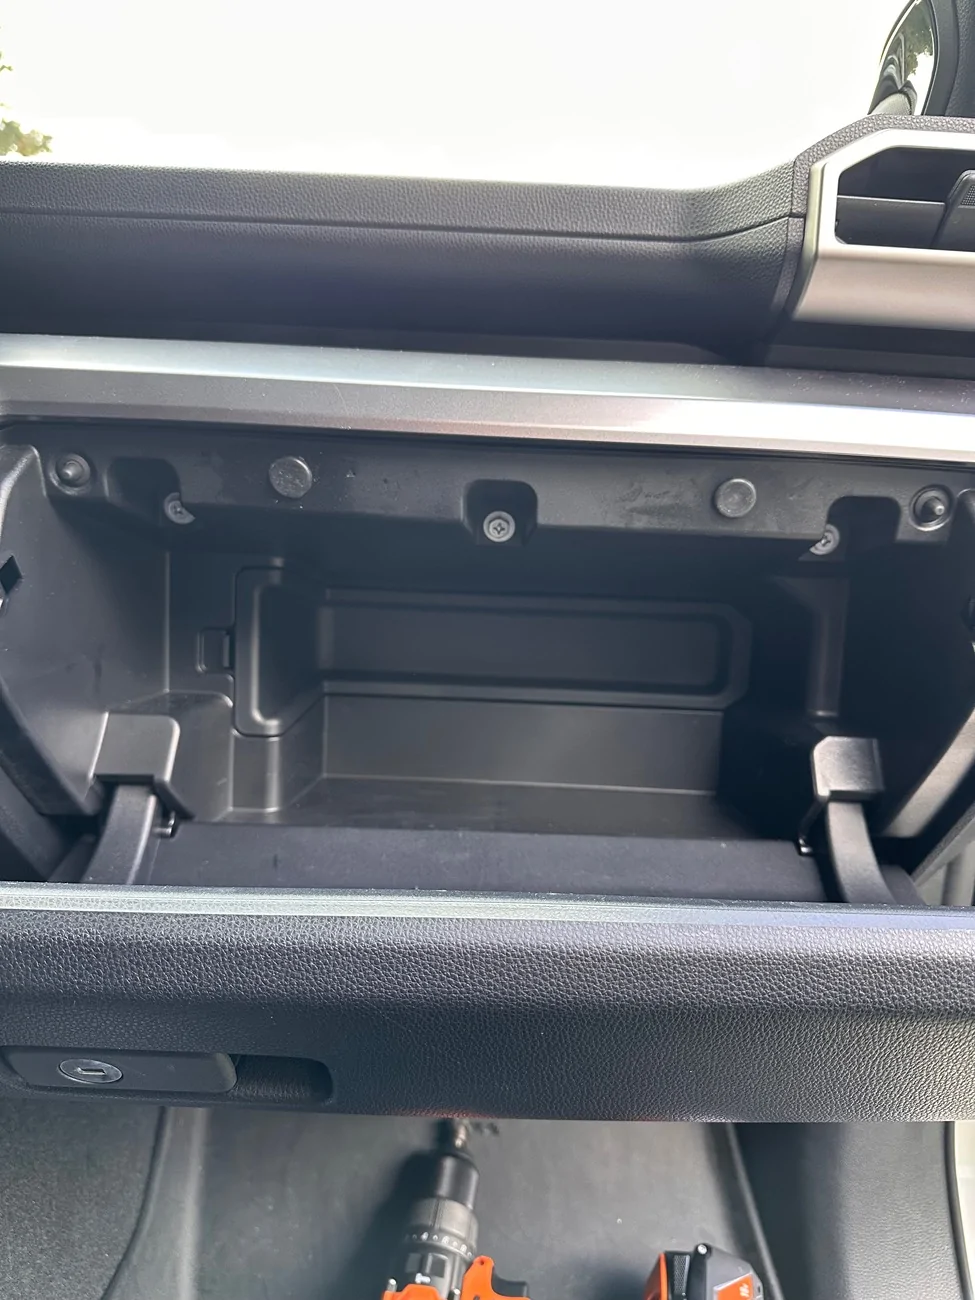
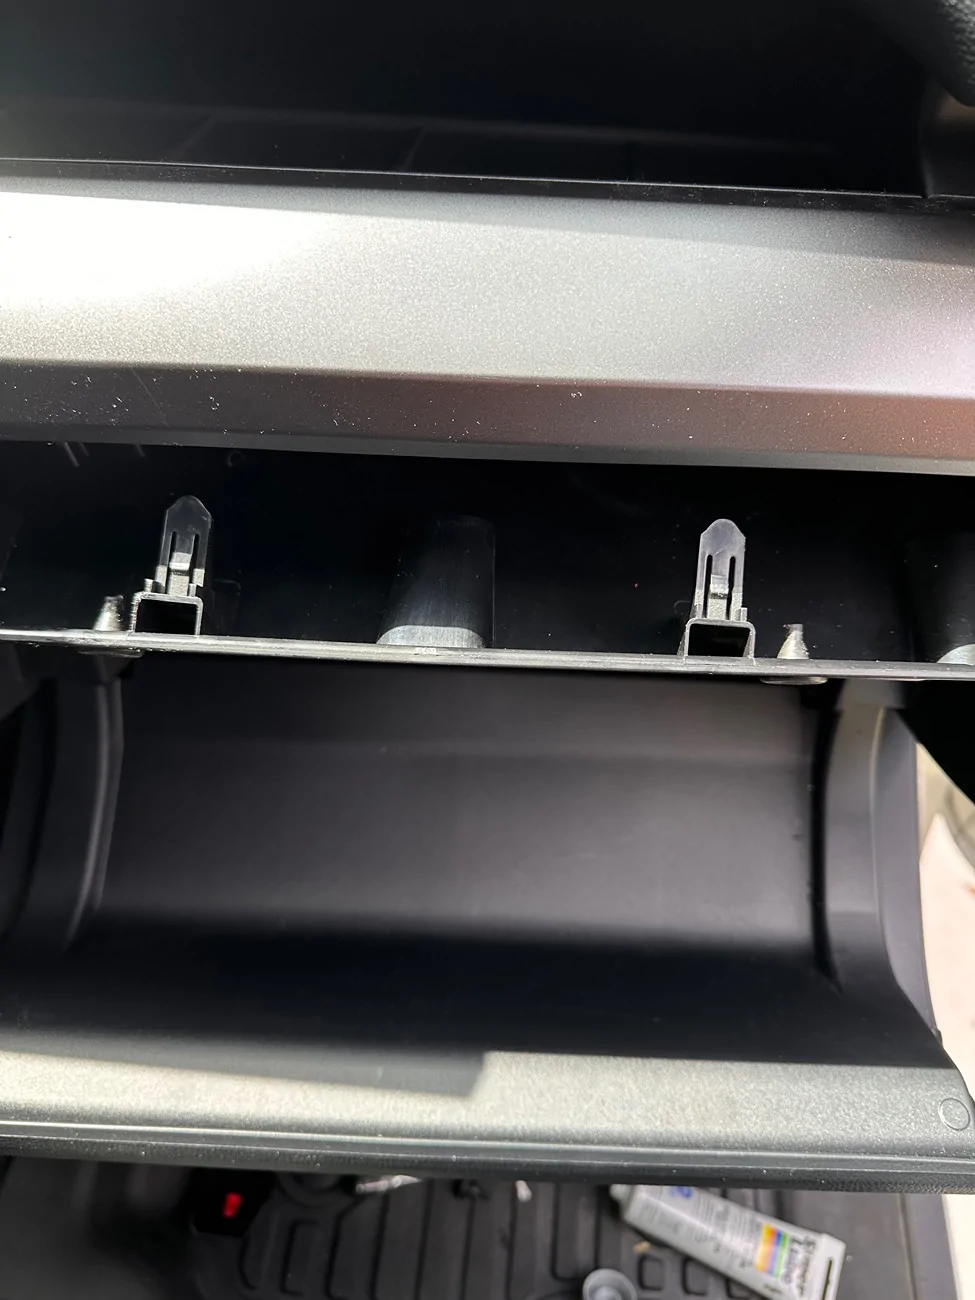
Measured the 2026 Trailhunter hybrid it’s 13x13mm.Thanks for sharing this!
Fitted perfectly. Nice and snug!Measured the 2026 Trailhunter hybrid it’s 13x13mm.
Thanks for the file.

Ender 3. I printed with ABS highest qualityThat print looks really good. What printer do you have?
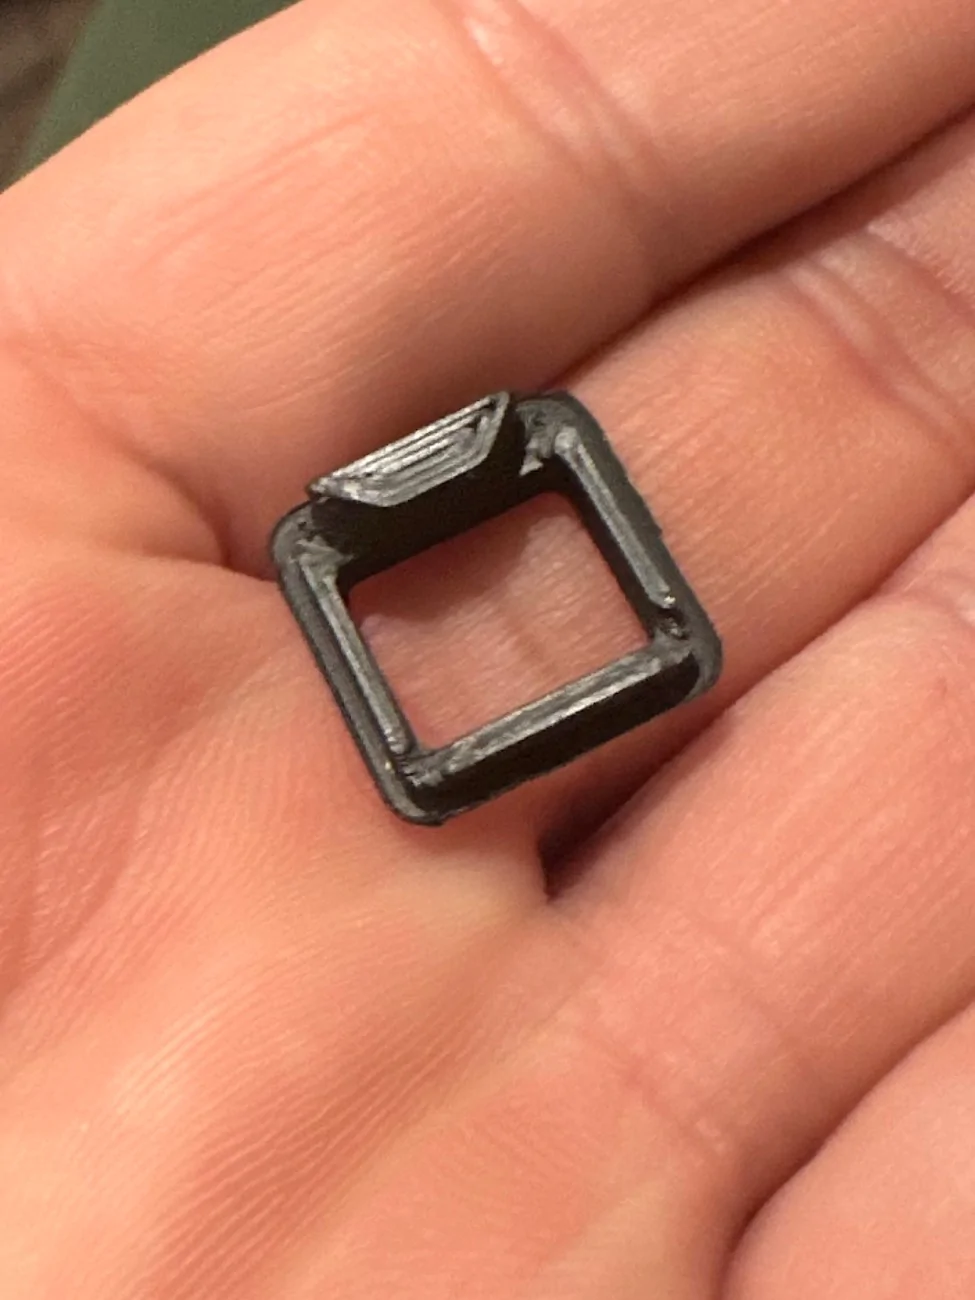
Well I mean I did write right in the readme:Ender 3. I printed with ABS highest quality
And used the first design provided by the member. The fancy one was breaking.
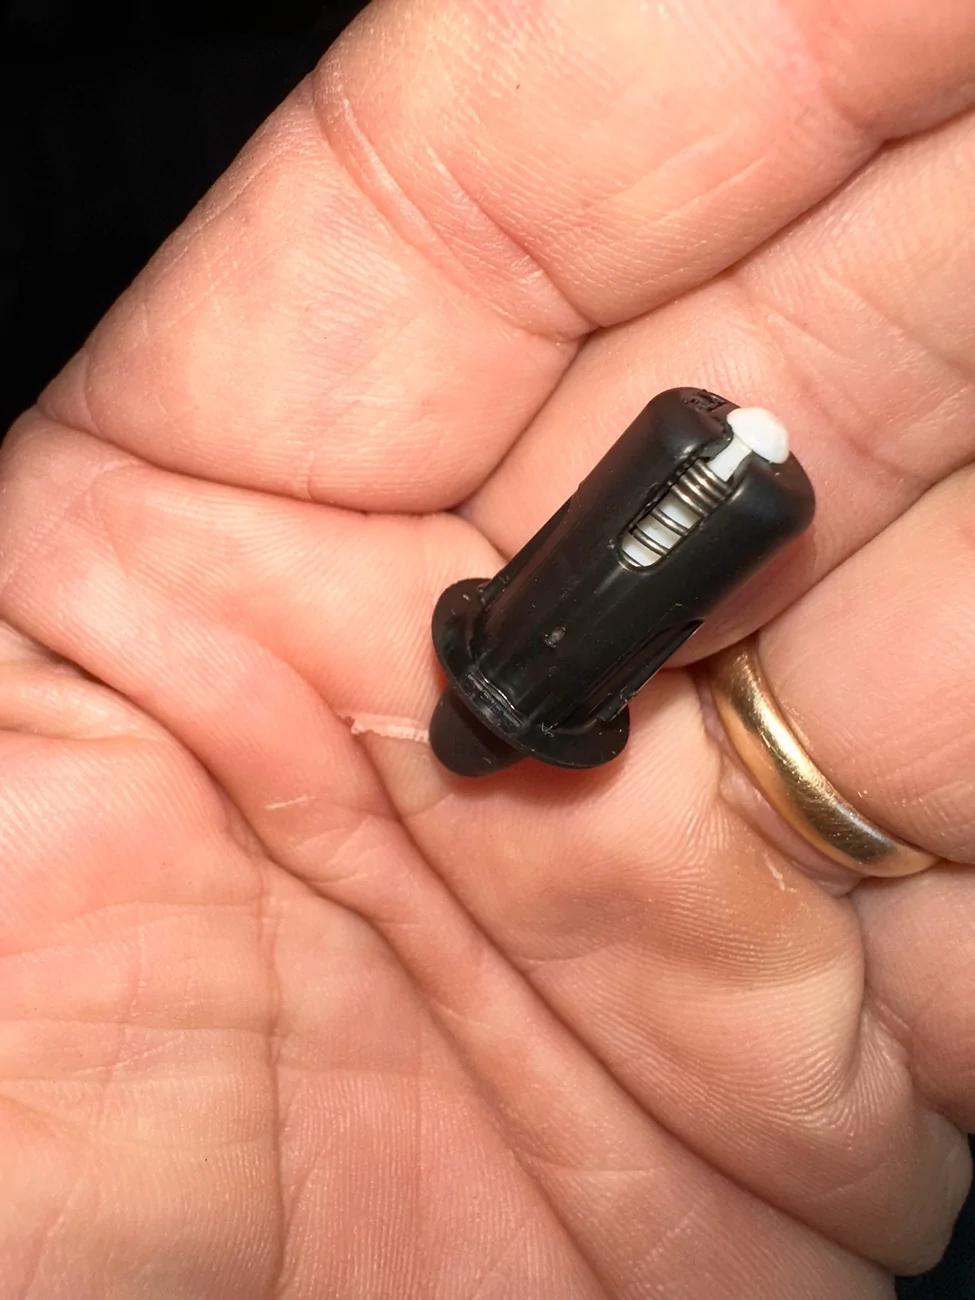
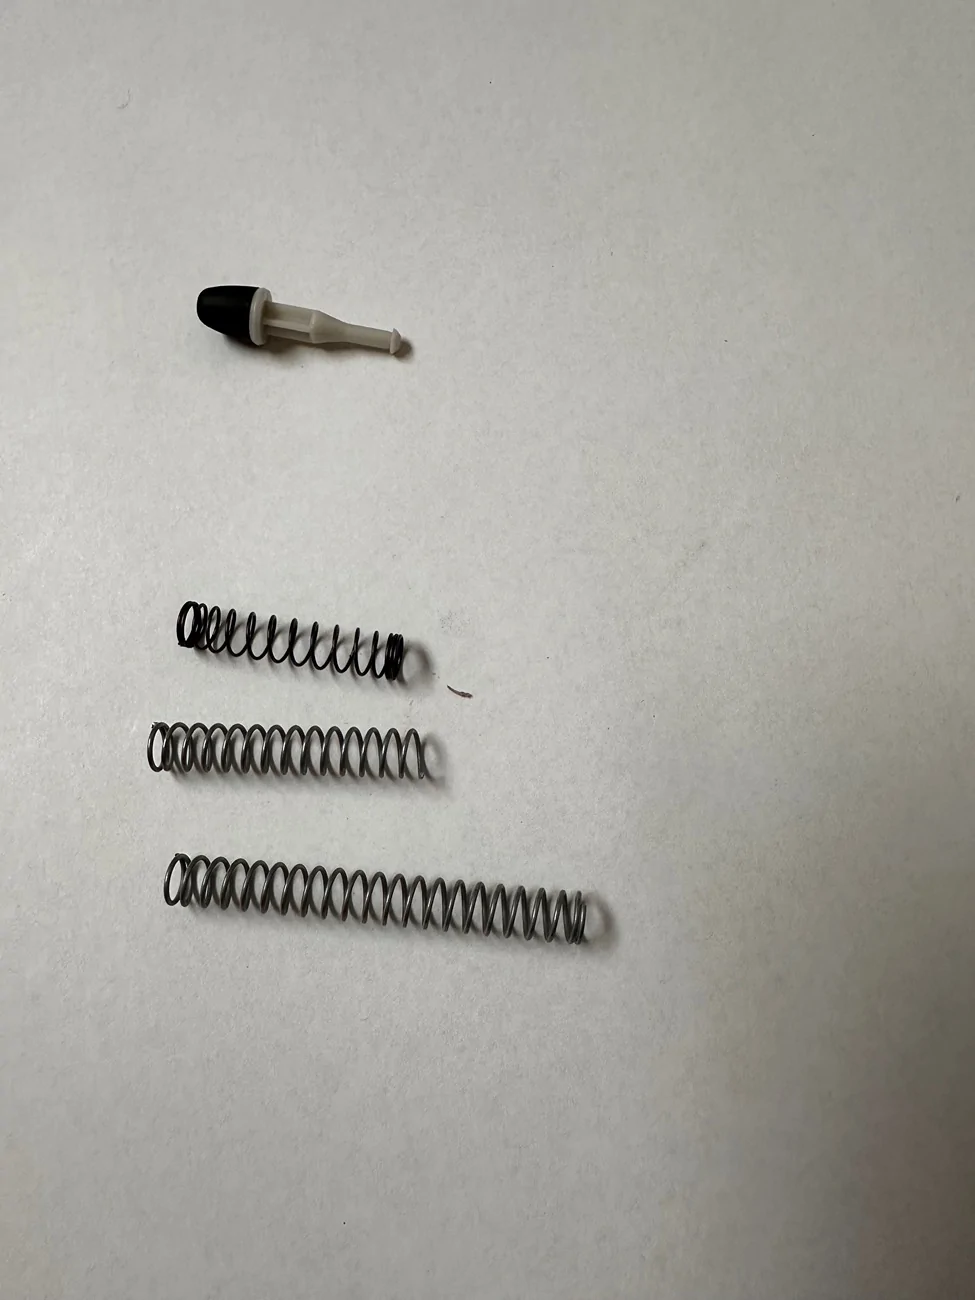
This is great. Thanks for the recipe.This is how I corrected it. The two spring loaded plungers on each side got upgraded to a stiffer spring. I tried stretching them first, but, made no difference. They actually went back to their original length. I then added the rubber bumpers. No more plastic on plastic violence when you close it. It worked out fantastic.
What parts and from where please your solution is my preferred style.This is how I corrected it. The two spring loaded plungers on each side got upgraded to a stiffer spring. I tried stretching them first, but, made no difference. They actually went back to their original length. I then added the rubber bumpers. No more plastic on plastic violence when you close it. It worked out fantastic.
Yeah no blame’s only big thanks.Well I mean I did write right in the readme:
"This version is probably not good to print at home on a normal FDM printer because the tabs will likely break off.
So this is really only for getting commercially printed using SLS or MJF."
The default version is designed for FDM.
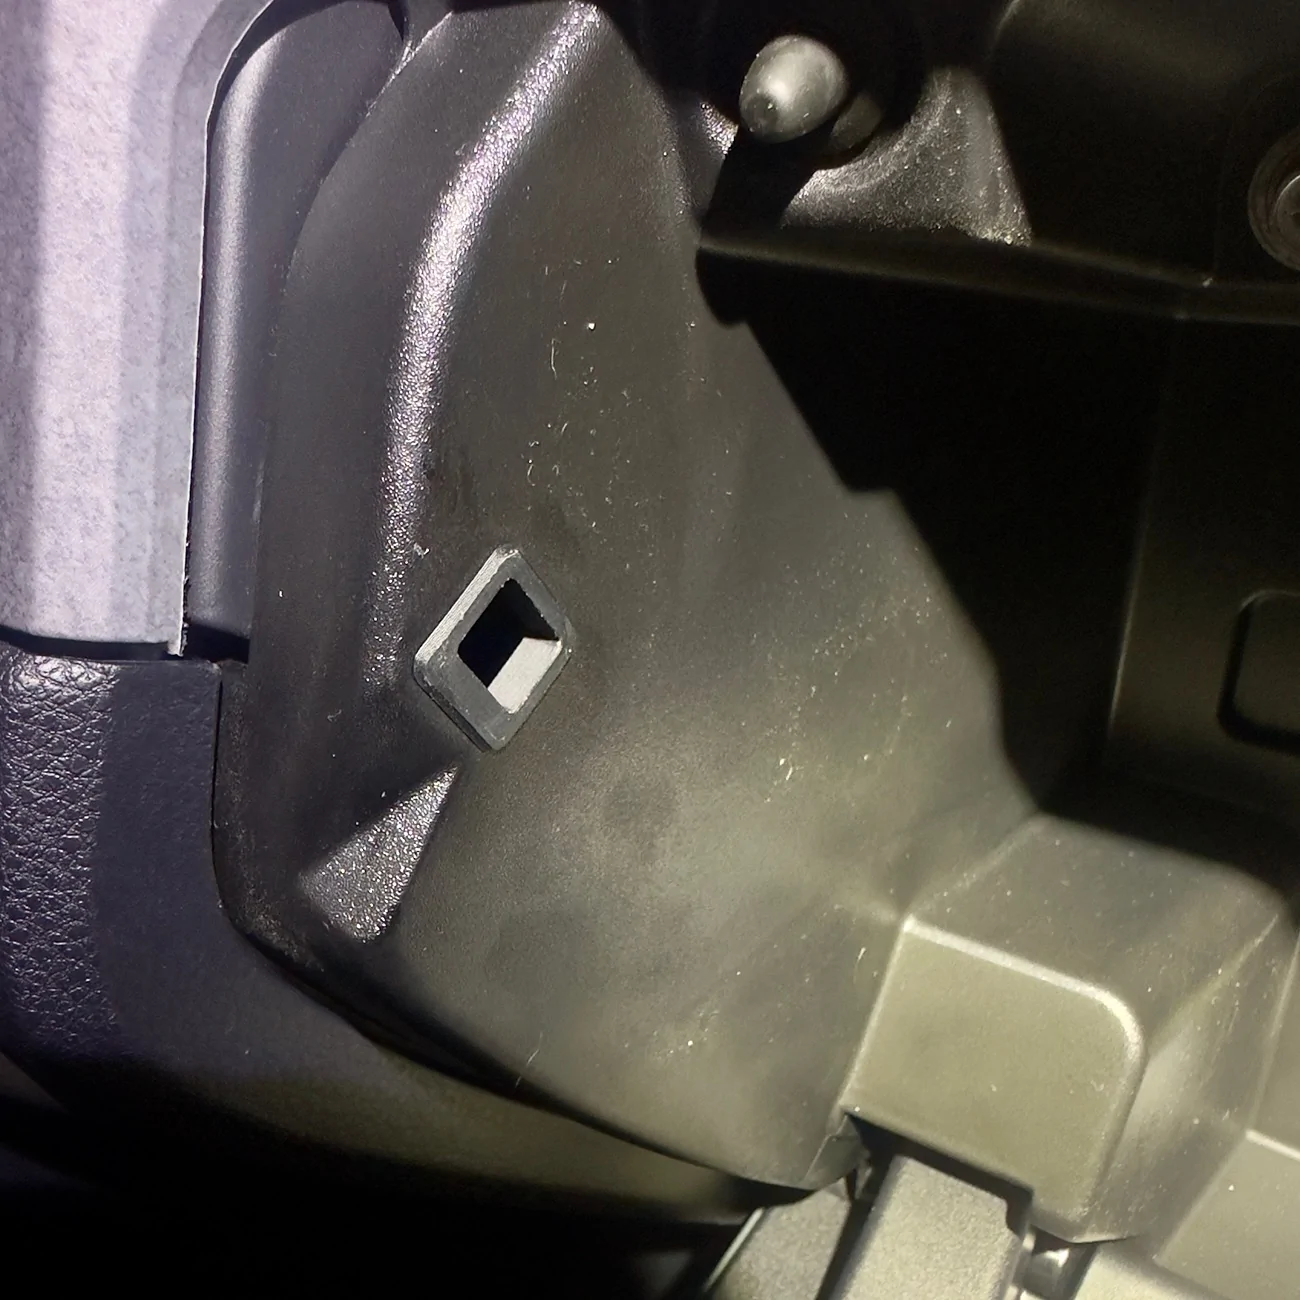
Did you not get 4 of them? 2 should be different sizes. Was checking all the reviews on these before ordering.The Lifestyle ones dont fit my Gen6. I will need to look closer and use a file probably.
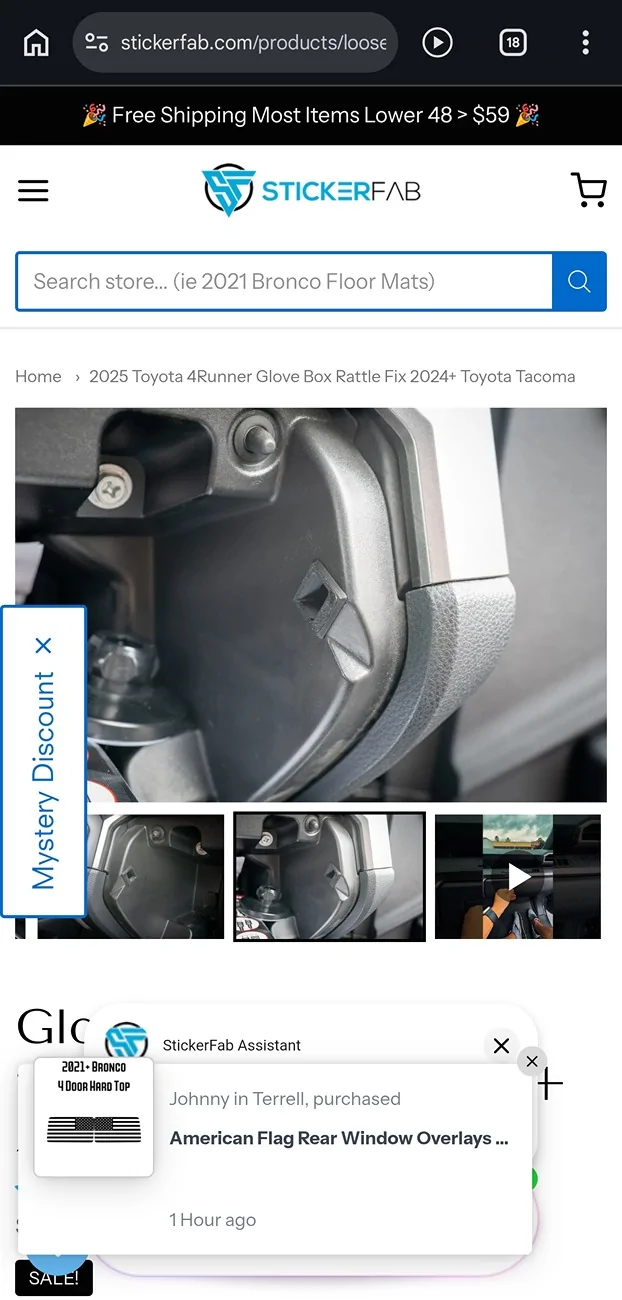
No accounting for taste in their cancerous pop-up hell ridden site. Nice to have options though. 4Runner Lifestyle ones look a bit more polished. These look on par with what OP posted. Probably stole his file and started selling them.Stickerfab now has a fix out for this as well. $13.
https://www.stickerfab.com/products/loose-glove-box-fix-2024-tacoma-2025-4runner?keyword=glove box