- First Name
- Vince
- Joined
- Jan 5, 2025
- Threads
- 23
- Messages
- 148
- Reaction score
- 276
- Location
- Hood River, OR
- Vehicle(s)
- 2017 4Runner TRD Off-Road Premium; 2025 4Runner iForce MAX TRD Off-Road Premium
- Thread starter
- #1
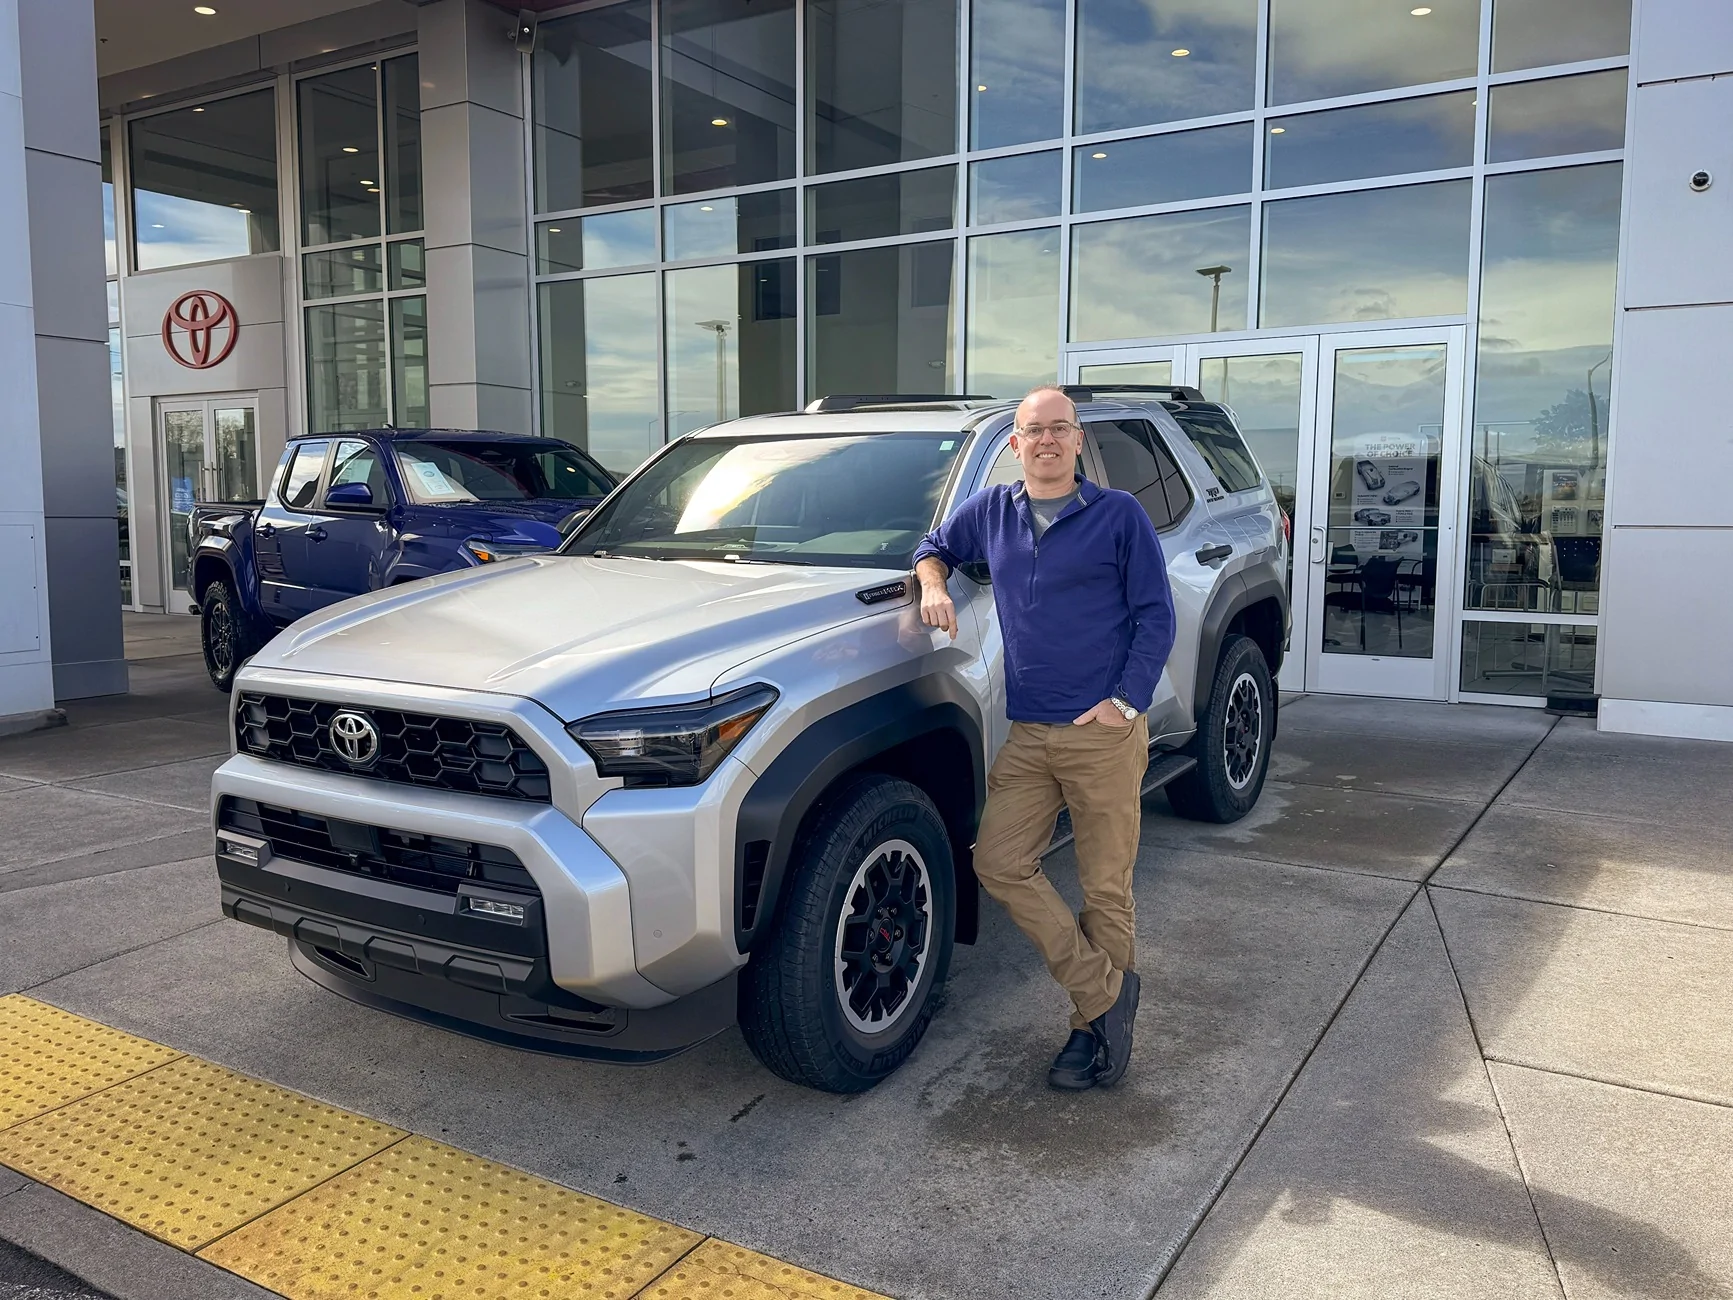
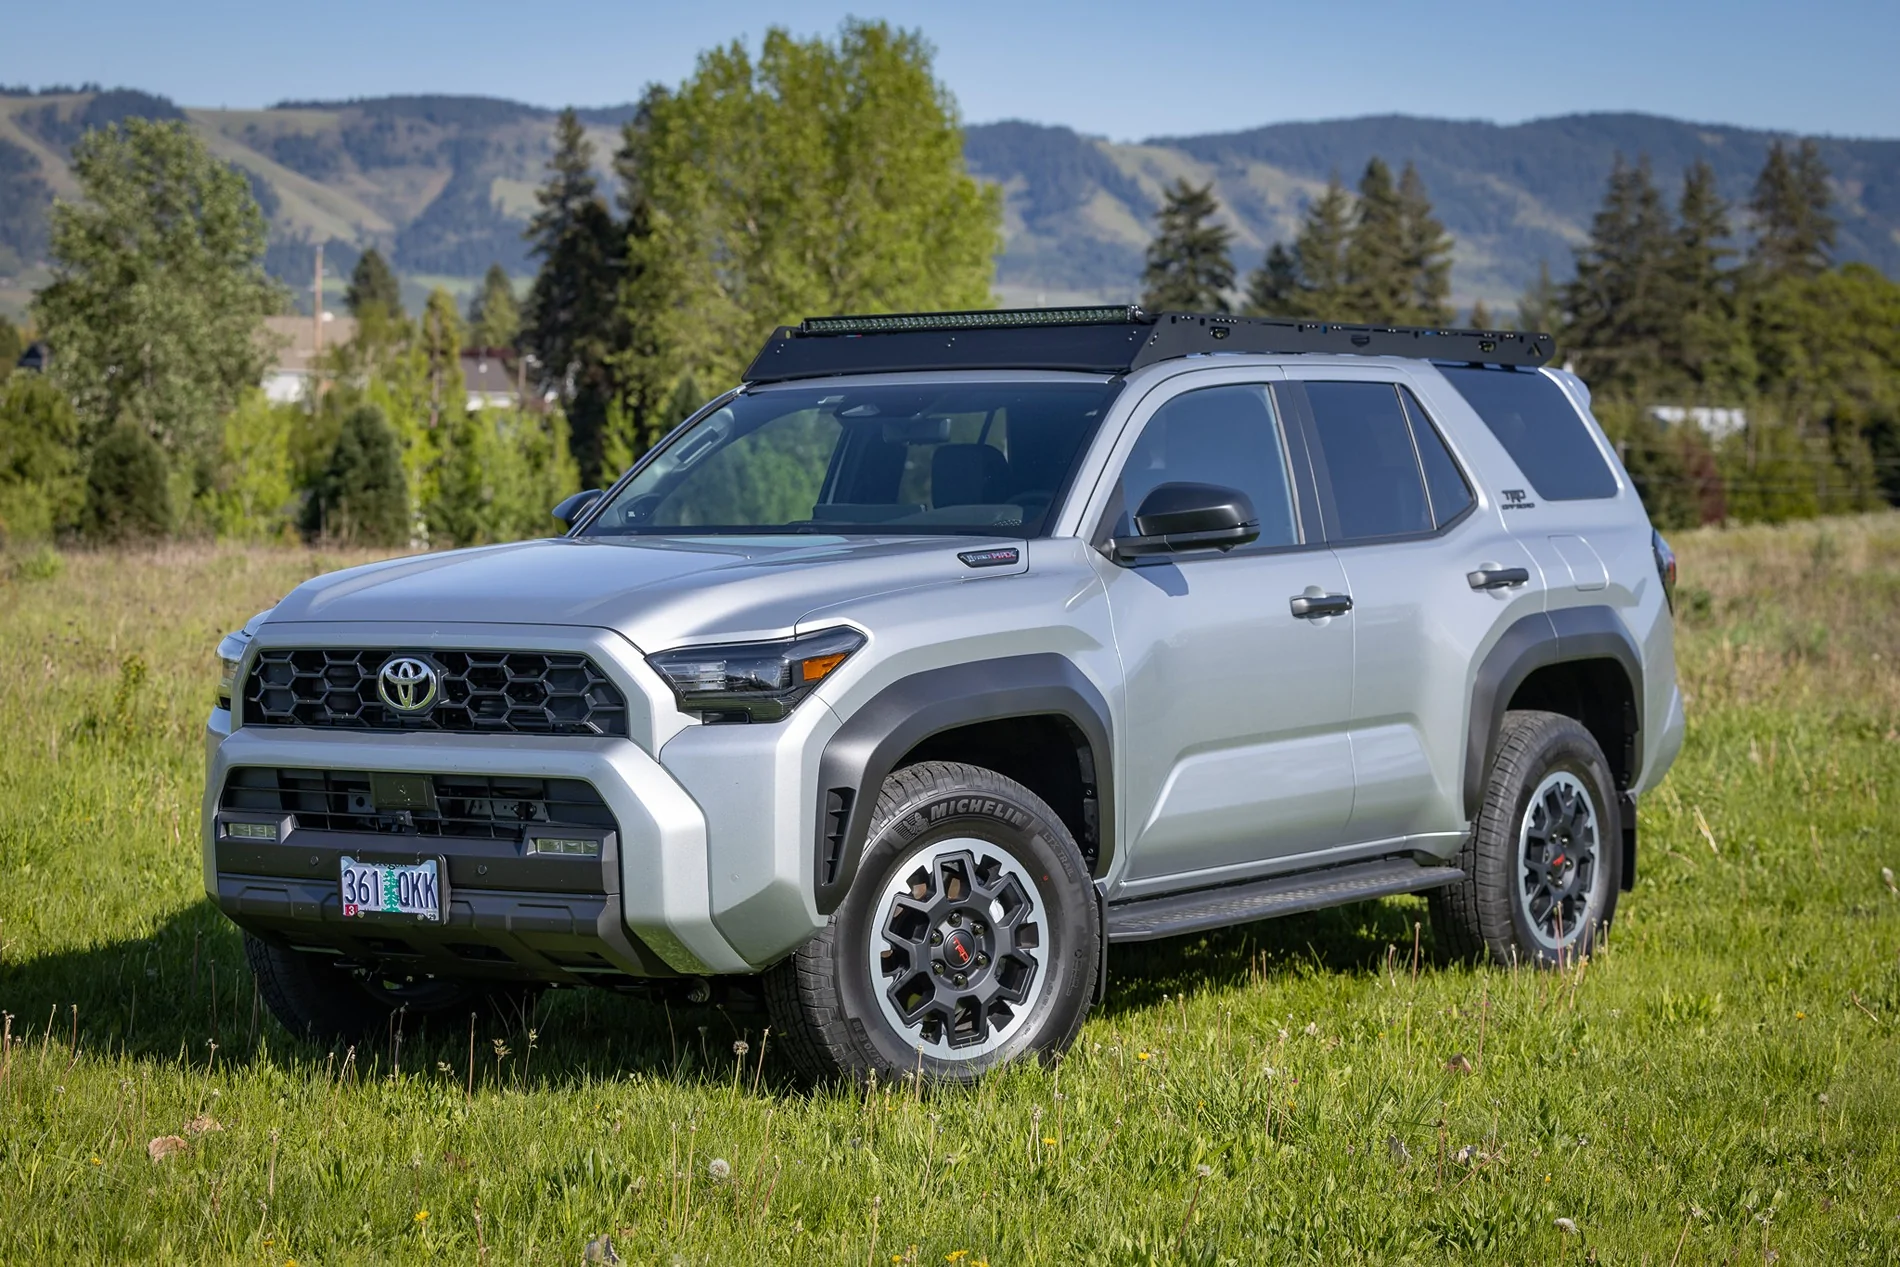
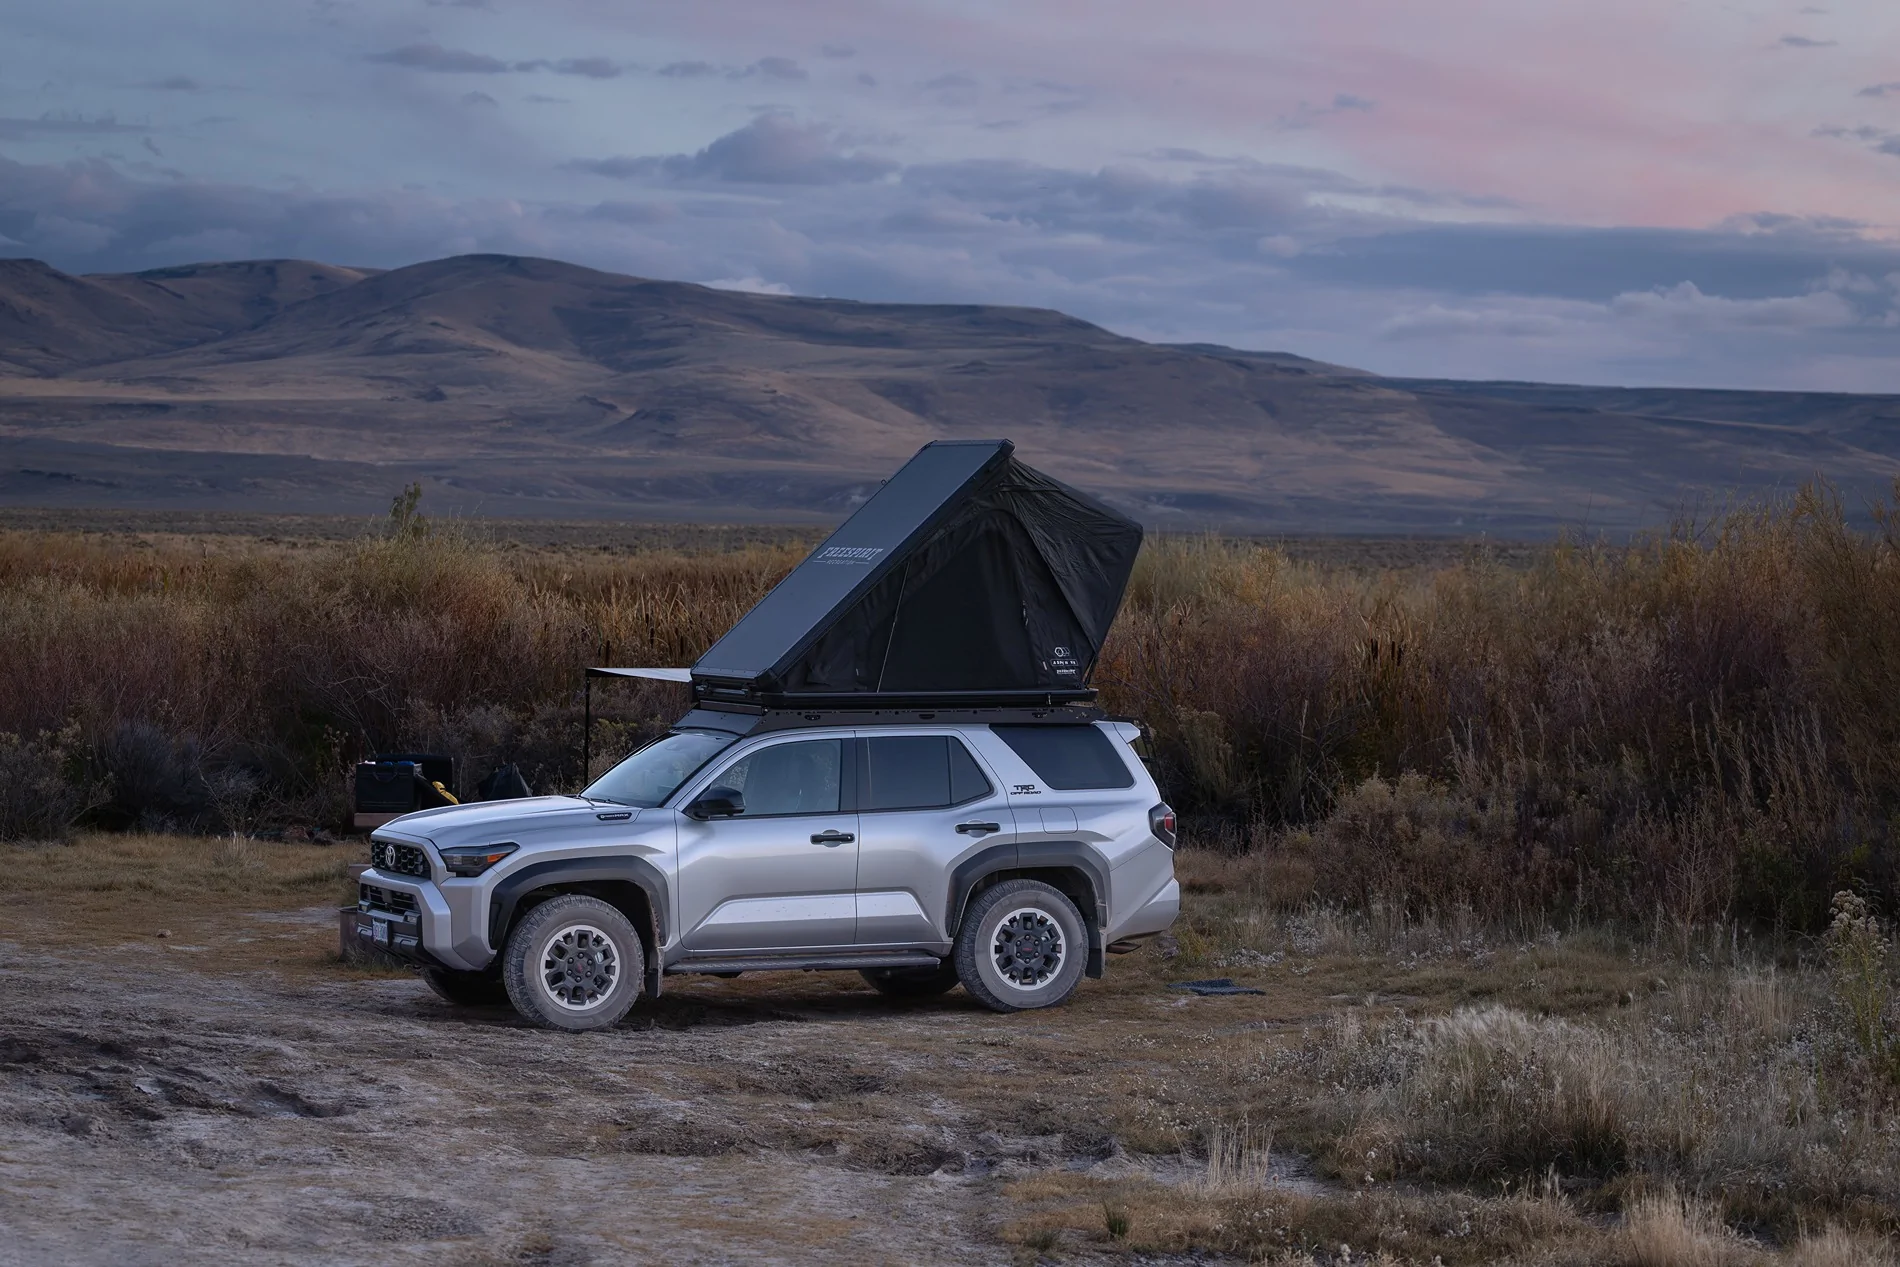
One year ago, I took delivery of my 2025 Toyota 4Runner TRD Off-Road Premium iForceMAX. It was one of the first 50 6th Gens to arrive at the Port of Portland, and I was psyched! I’d done the research and had my dealer (Columbia Gorge Toyota in The Dalles) place a factory reservation for the exact model and options I wanted. It now has 13,000 miles on it, and I’ve taken it on overlanding adventures in 3 states and 2 countries (

 ).
).
I bought the 6th Gen as a replacement for my 2017 5th Gen 4Runner, and my intention was to customize it to be the perfect Pacific Northwest adventure vehicle. Most days, it's my daily driver, so I wasn’t looking to modify the suspension, wheels and tires. What I wanted was a capable vehicle for multi-day camping and overland/off-roading trips. I mostly drive Forest Service roads and class I/II “soft-road” conditions in remote areas, so I need to be self-reliant in terms of electrical power and recoverability, but didn’t need lift kits or skid plates.
In this post, I’m going to recap the evolution of my build and link back to some of my previous posts on the forum for anyone who wants more detail. Here’s a rundown of the products I’ve put into my offroad adventure build:

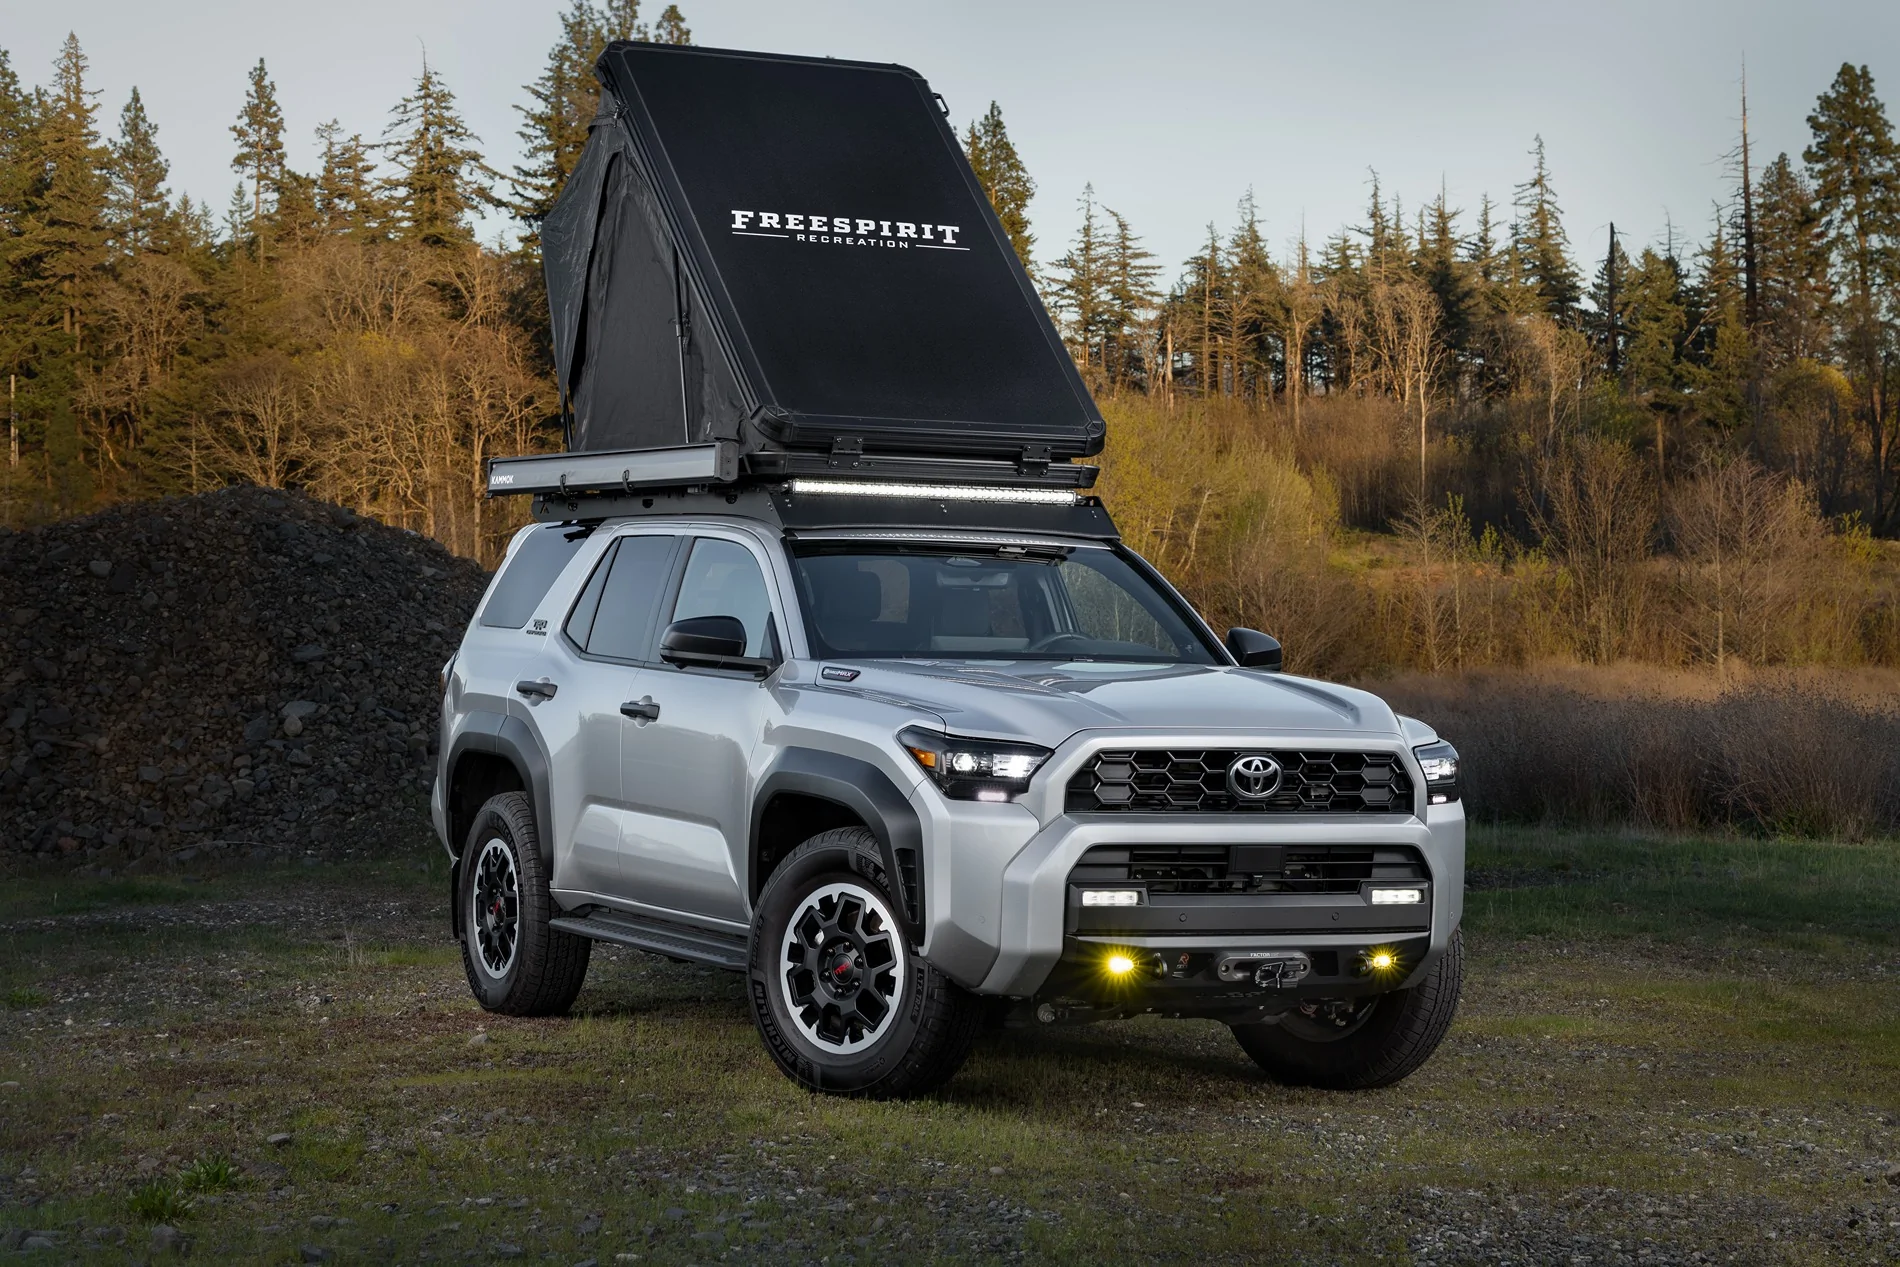
ROOF RACK COMPONENTS
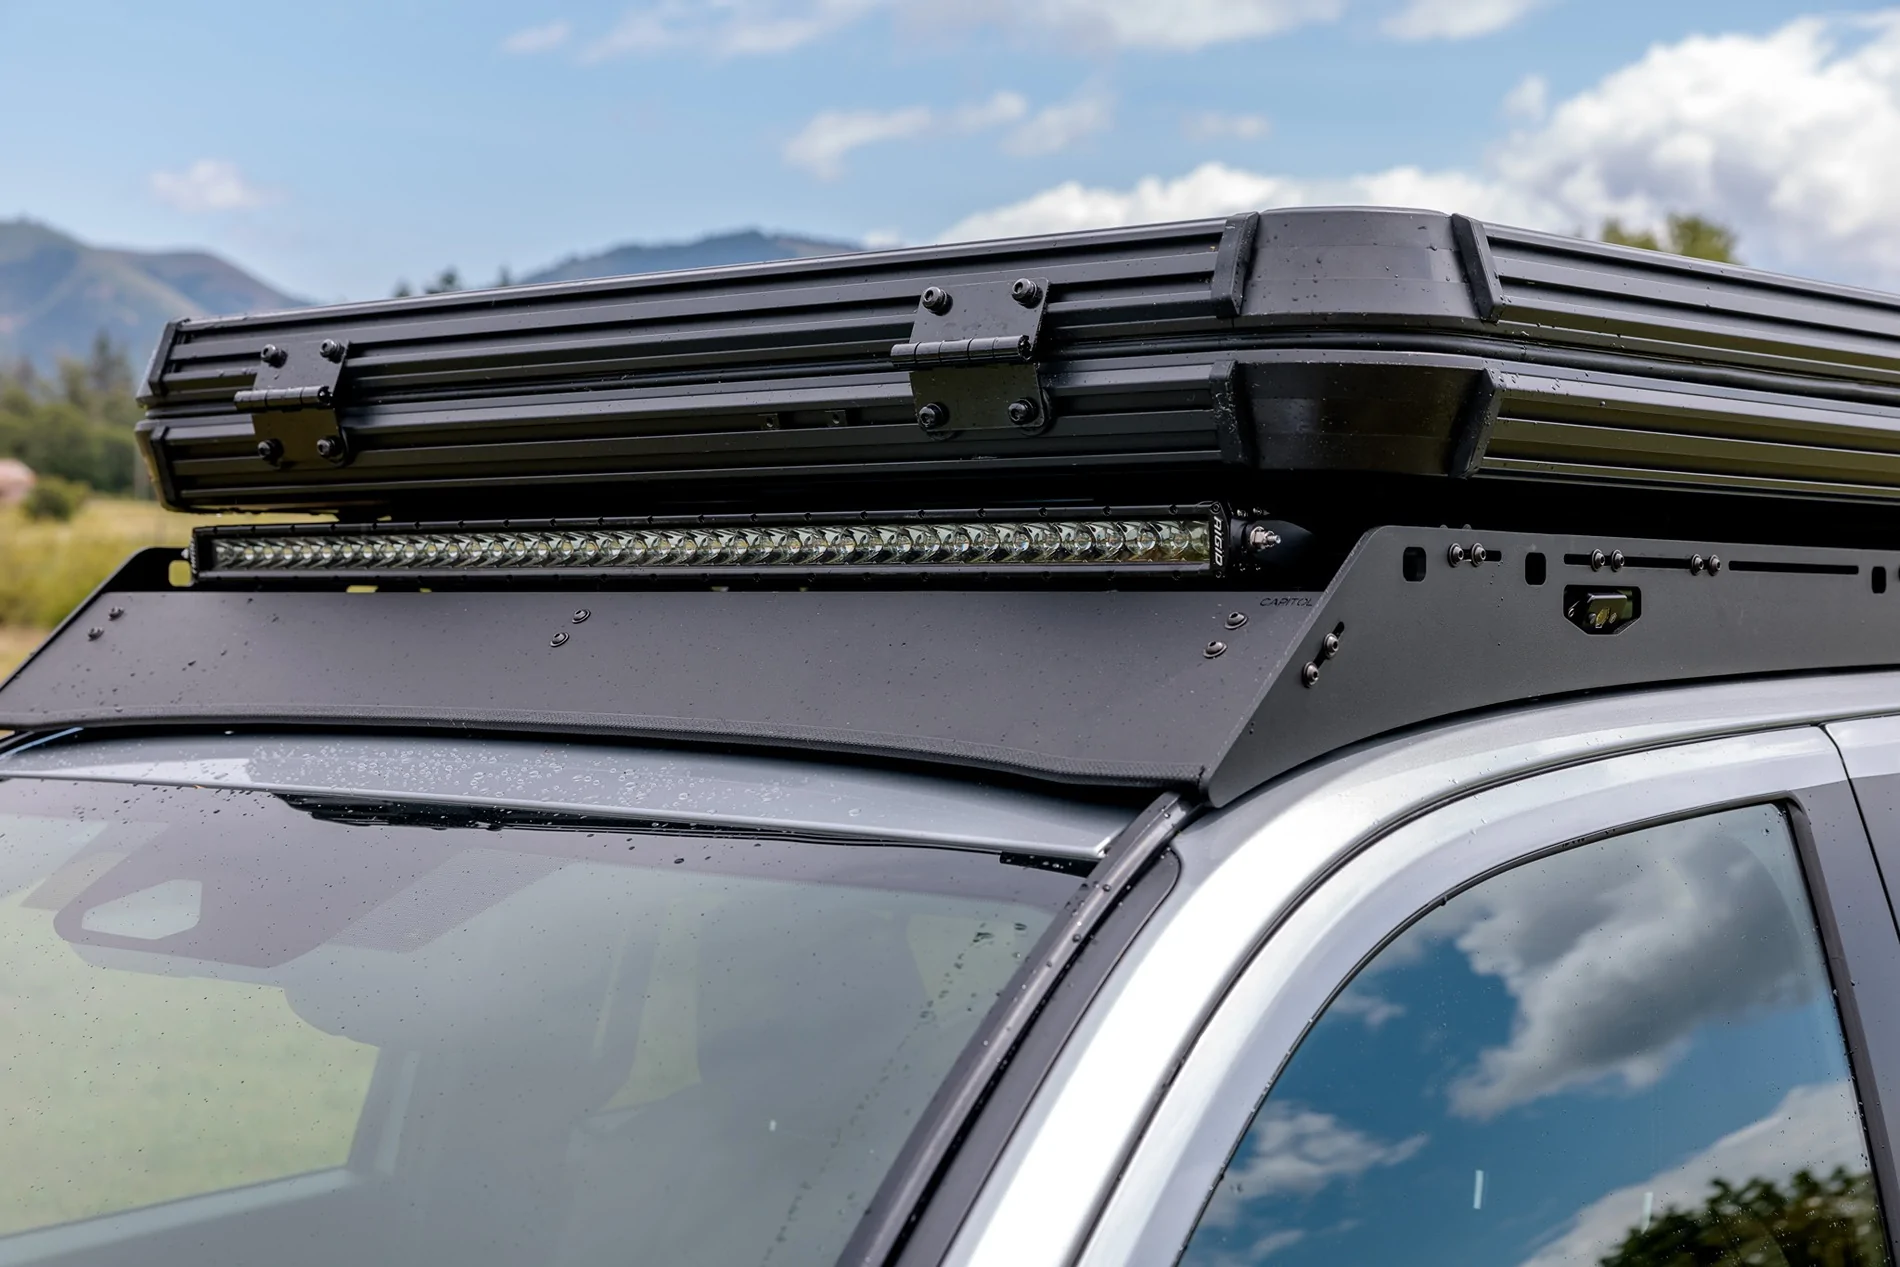
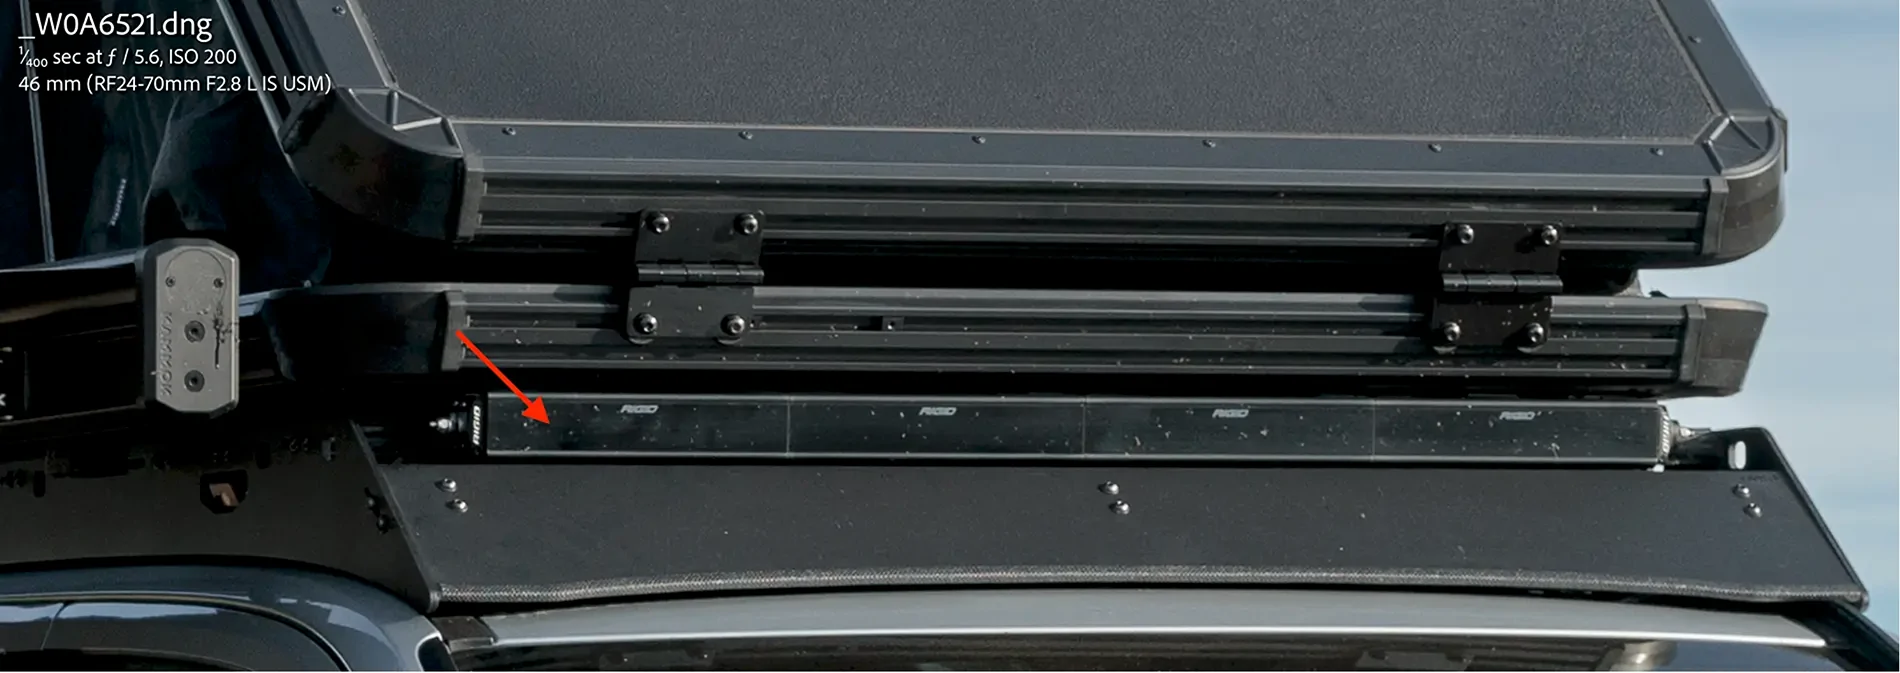
Sherpa Capitol Roof Rack (with half-height cutout in the wind fairing for 40" light bar)
This is the thing I get more questions about on the forums than anything else. I chose the Sherpa Capitol rack because of its ease of installation, no drilling, rock solid platform, versatile configurability, minimal wind noise, and Sherpa's brand reputation. I ordered and installed mine as soon as they came out (late-April 2025) and have no regrets. You can see the conceptual render here, and read the details of the actual install and first impressions here.
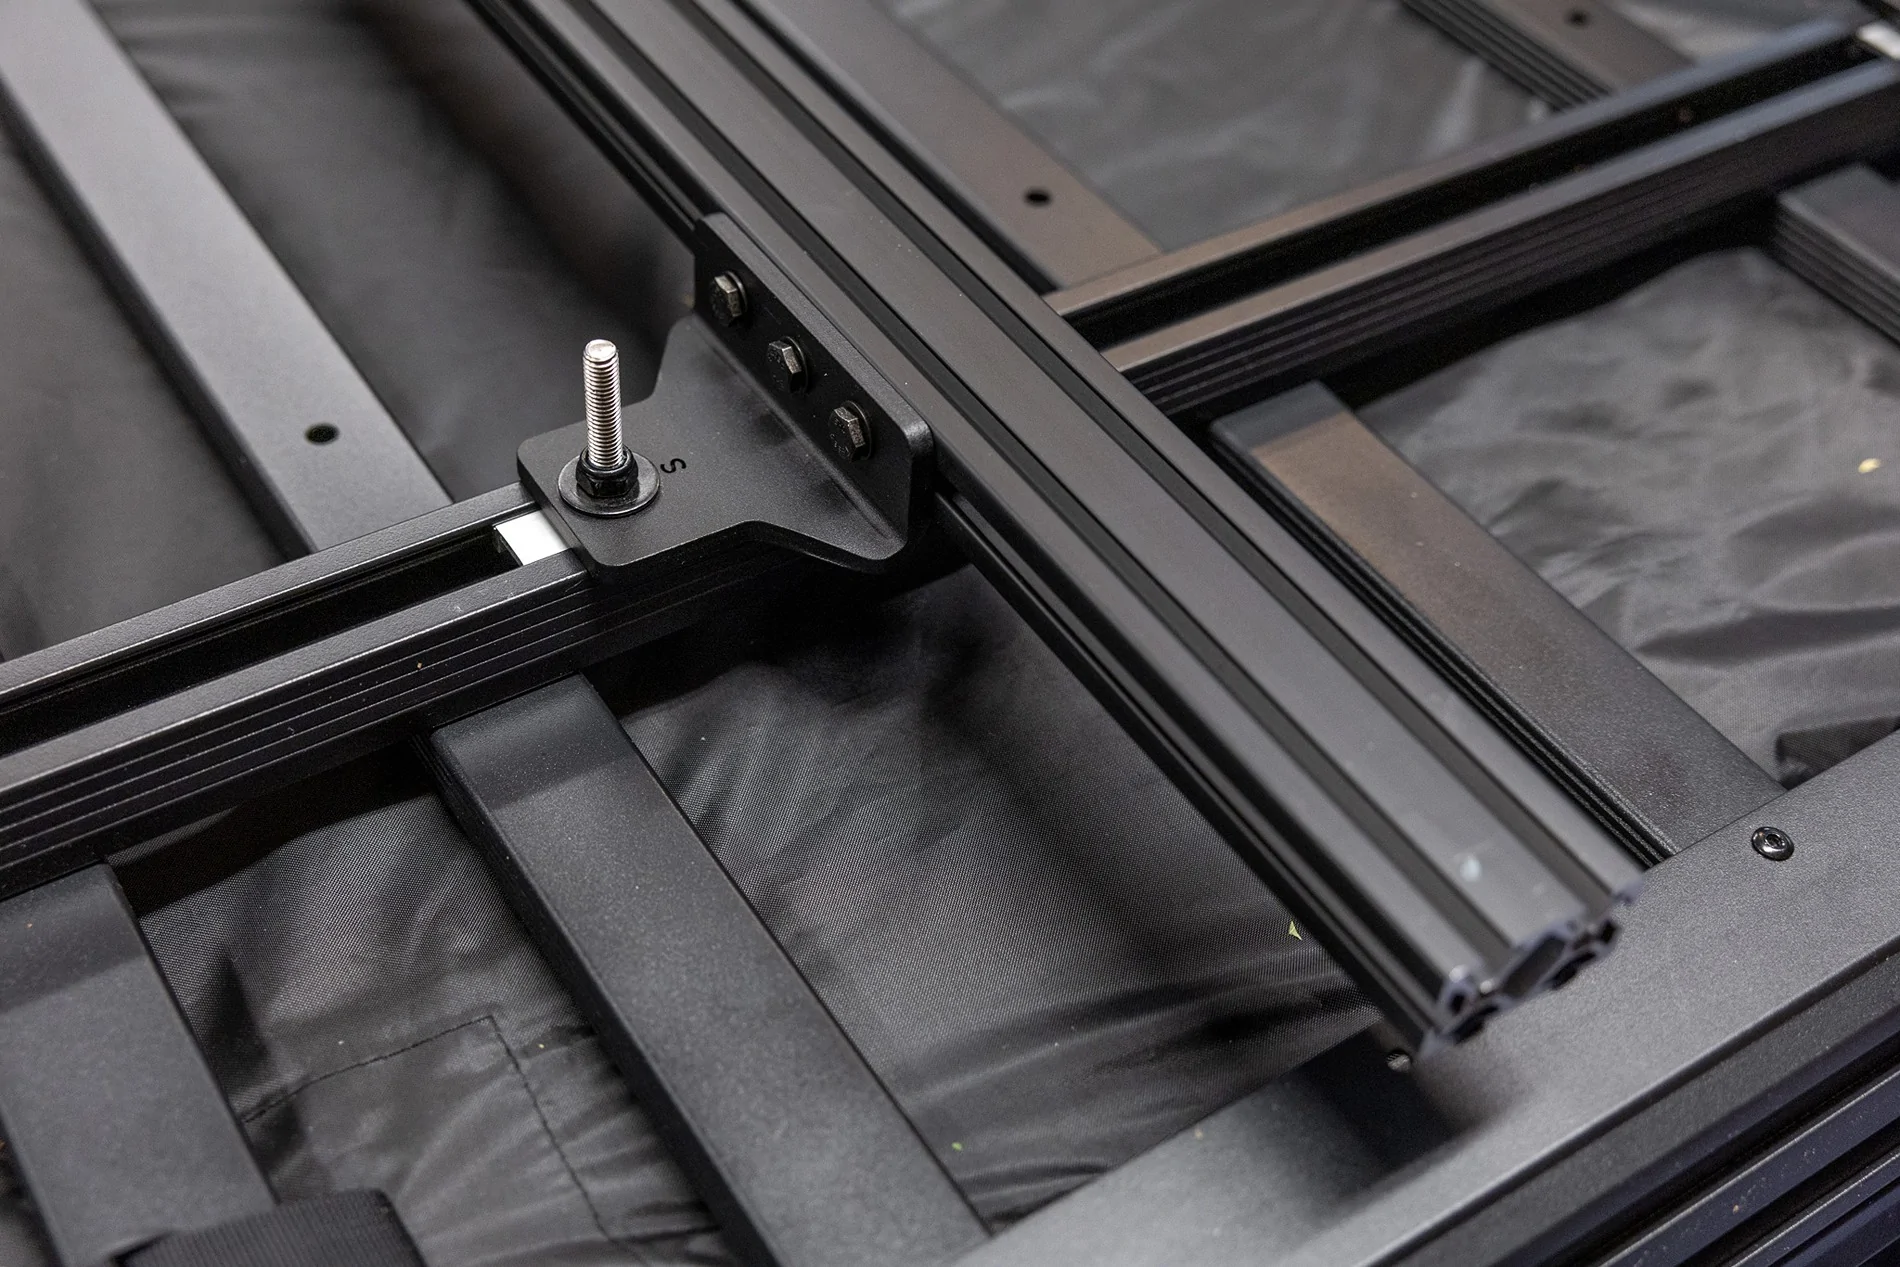
Sherpa Tent Mounting Brackets (.5" standoff for the Free Spirit Recreation Aspen V2 RTT)
I used these tent mounting brackets to pre-install the Sherpa crossbars to the rails on the bottom of my tent. Then, by loosening the buttonhead bolts on the side rails of the Capitol Rack and bowing them out slightly, I (and three friends) were able to lower the tent right into position and tighten everything down. Sooo much simpler than trying to reach underneath with a socket wrench to try and tighten things…
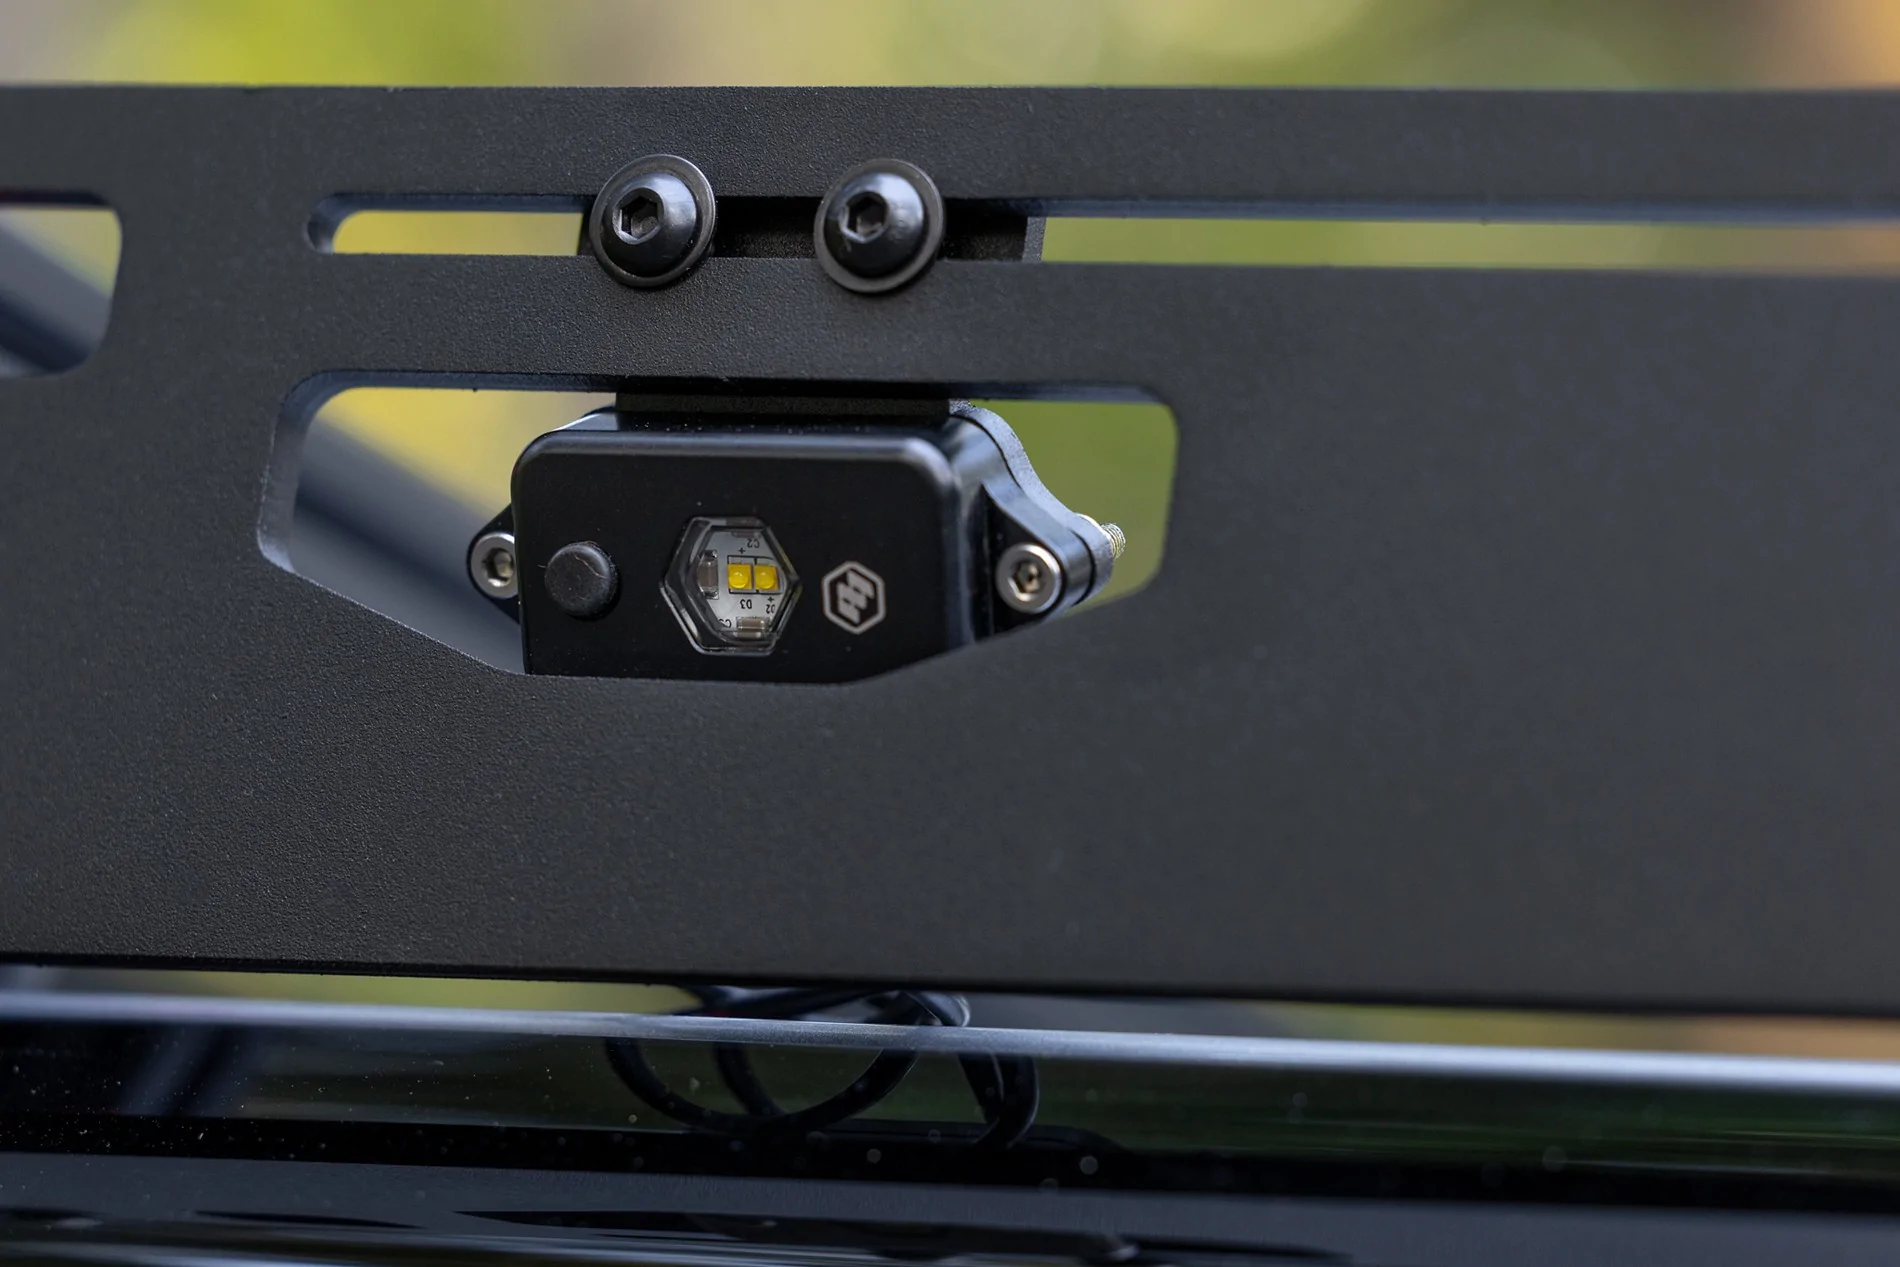
Sherpa Handle Light Brackets (4 - for the Baja Designs Rock Lights)
I mounted these Sherpa light brackets on the inside of the Capitol Rack rails so that the Baja Designs Rock lights would be recessed and protected. The opening is plenty big enough to access the switch and allow for wide light spread in the adjacent work area.
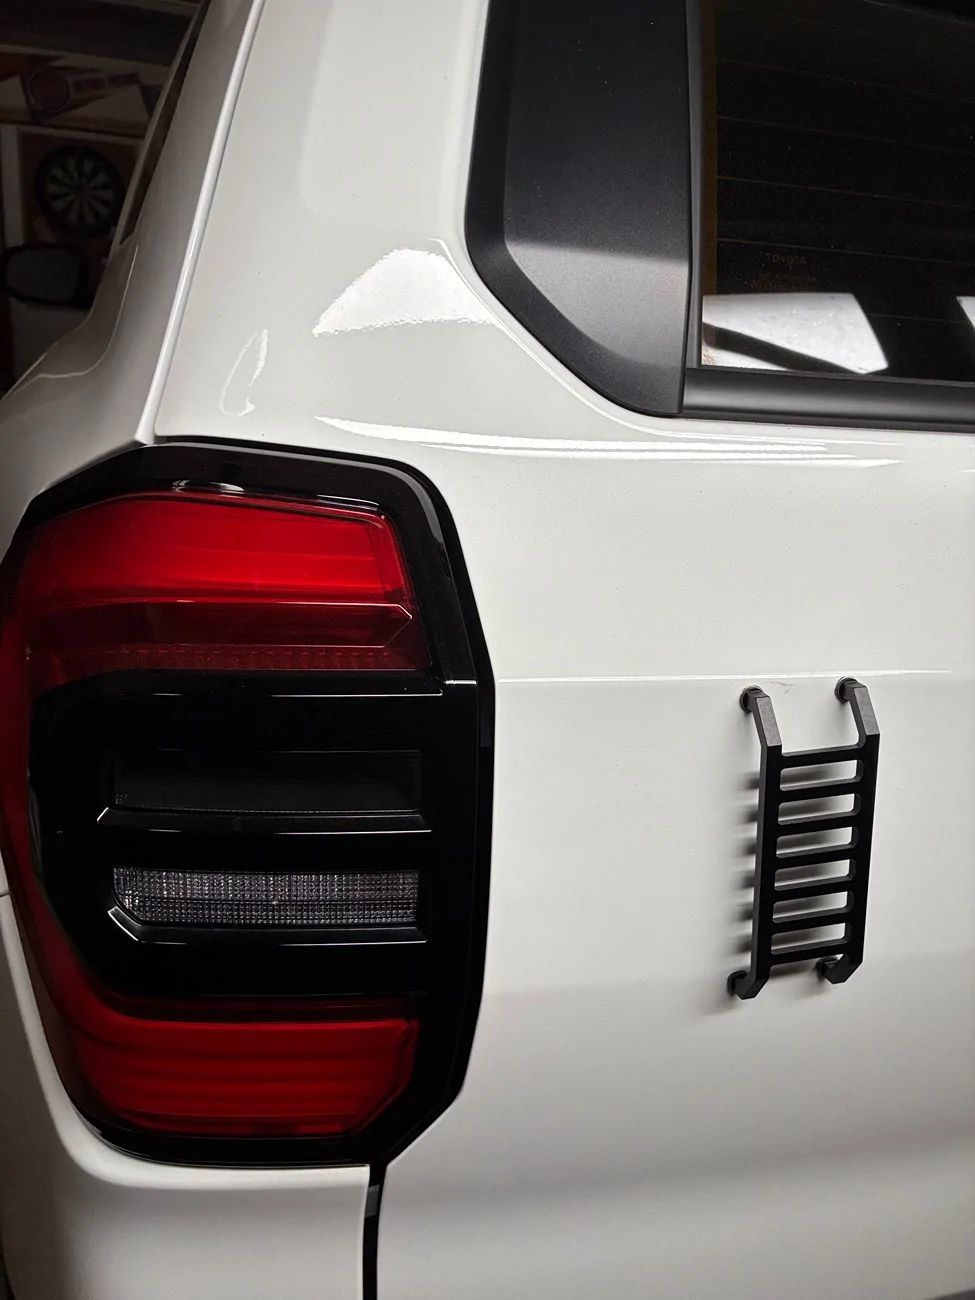
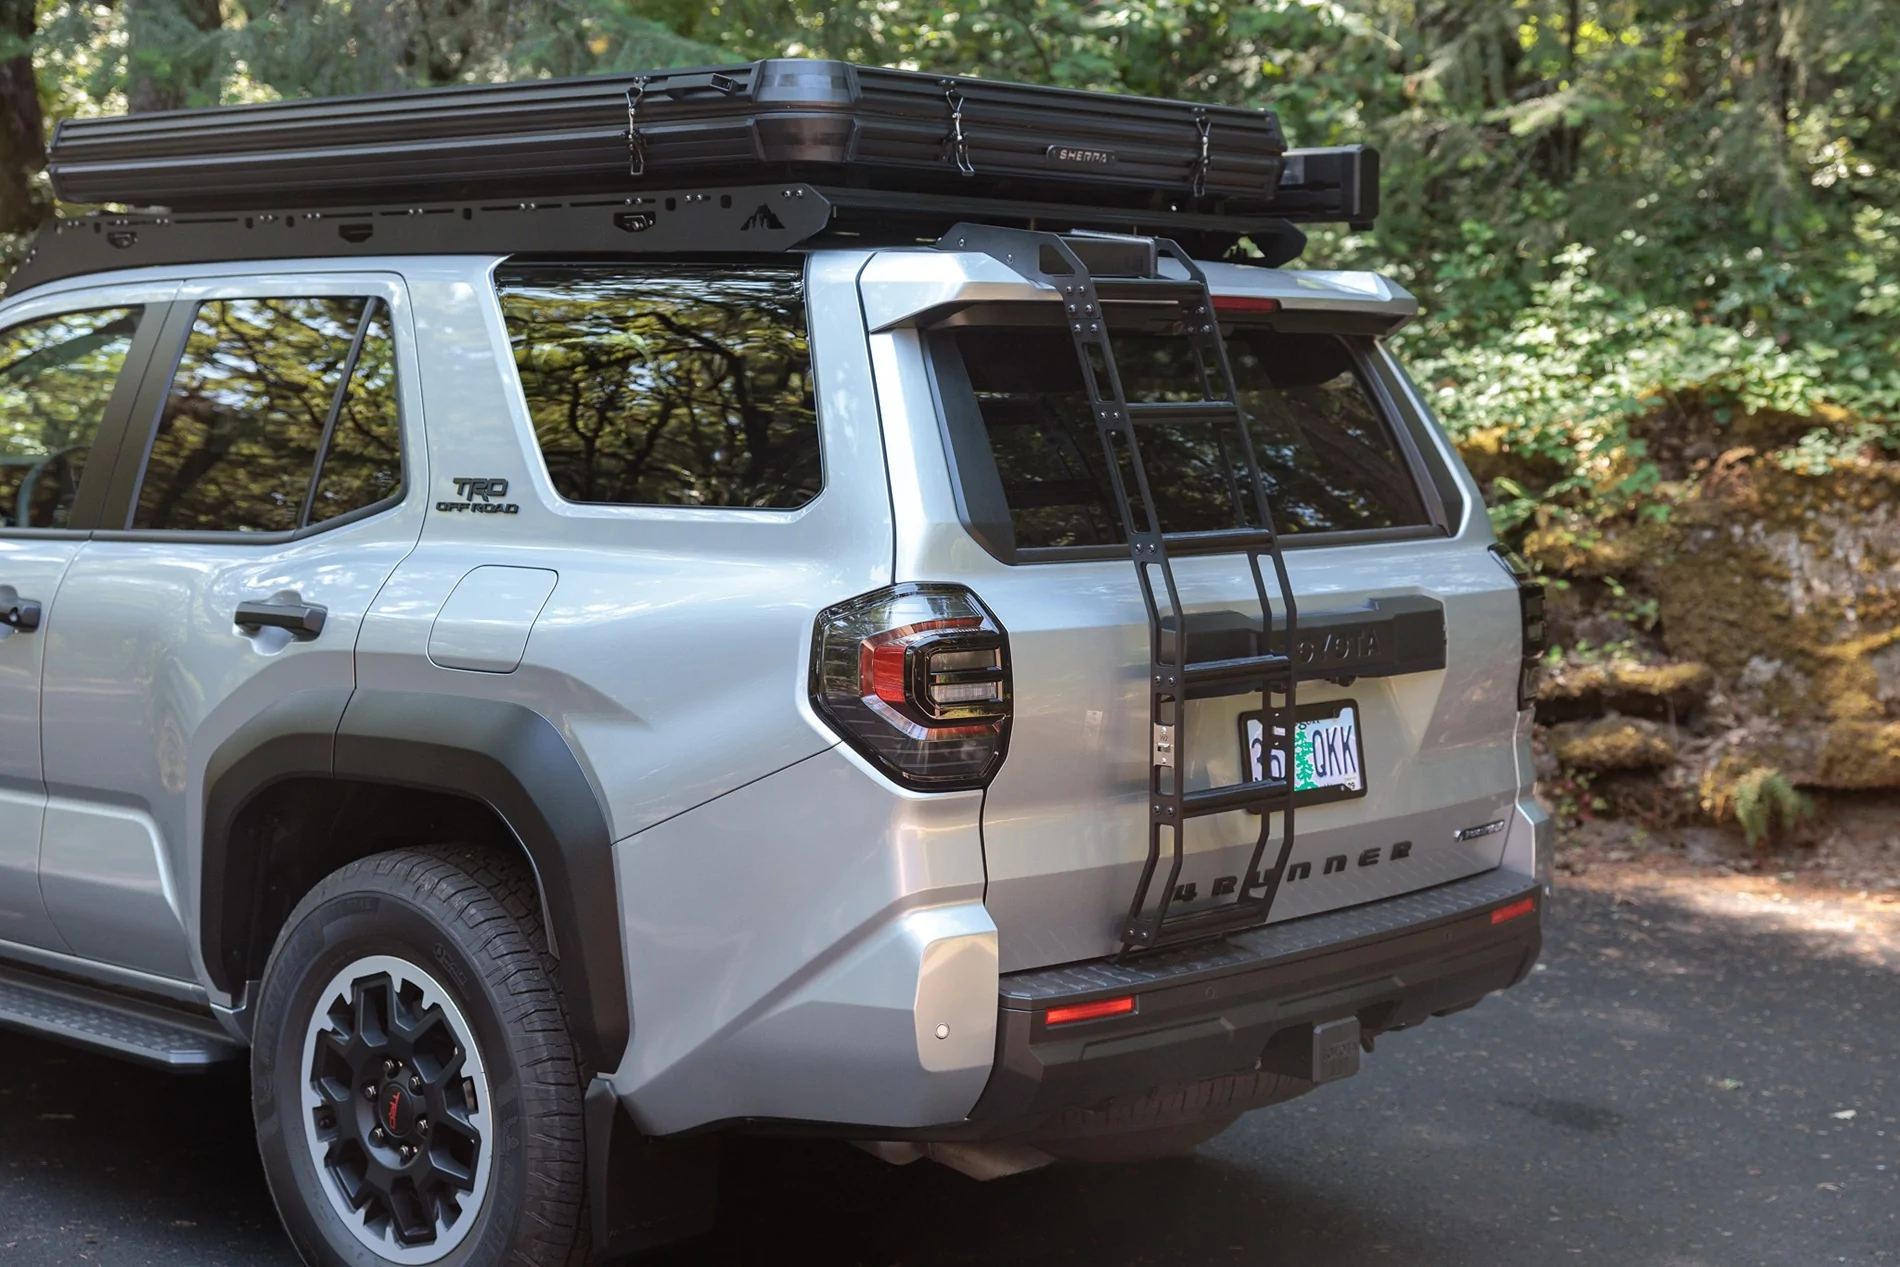
Westcott Designs Rear Hatch Ladder
I’m really happy with the Westcott Designs rear hatch ladder. The mount on the rear hatch is *super* solid. You do have to drill some holes, but that’s why it’s solid. I was also pleased that the ladder does not seem to strain the motor that raises and lowers the rear hatch, and the clearances between the bottom of the ladder and bumper, as well as between the ladder and the RTT are perfect. You can read about my install here. Also worth noting, it really doesn’t interfere with the rear camera or the towing camera (if you have the tow package).
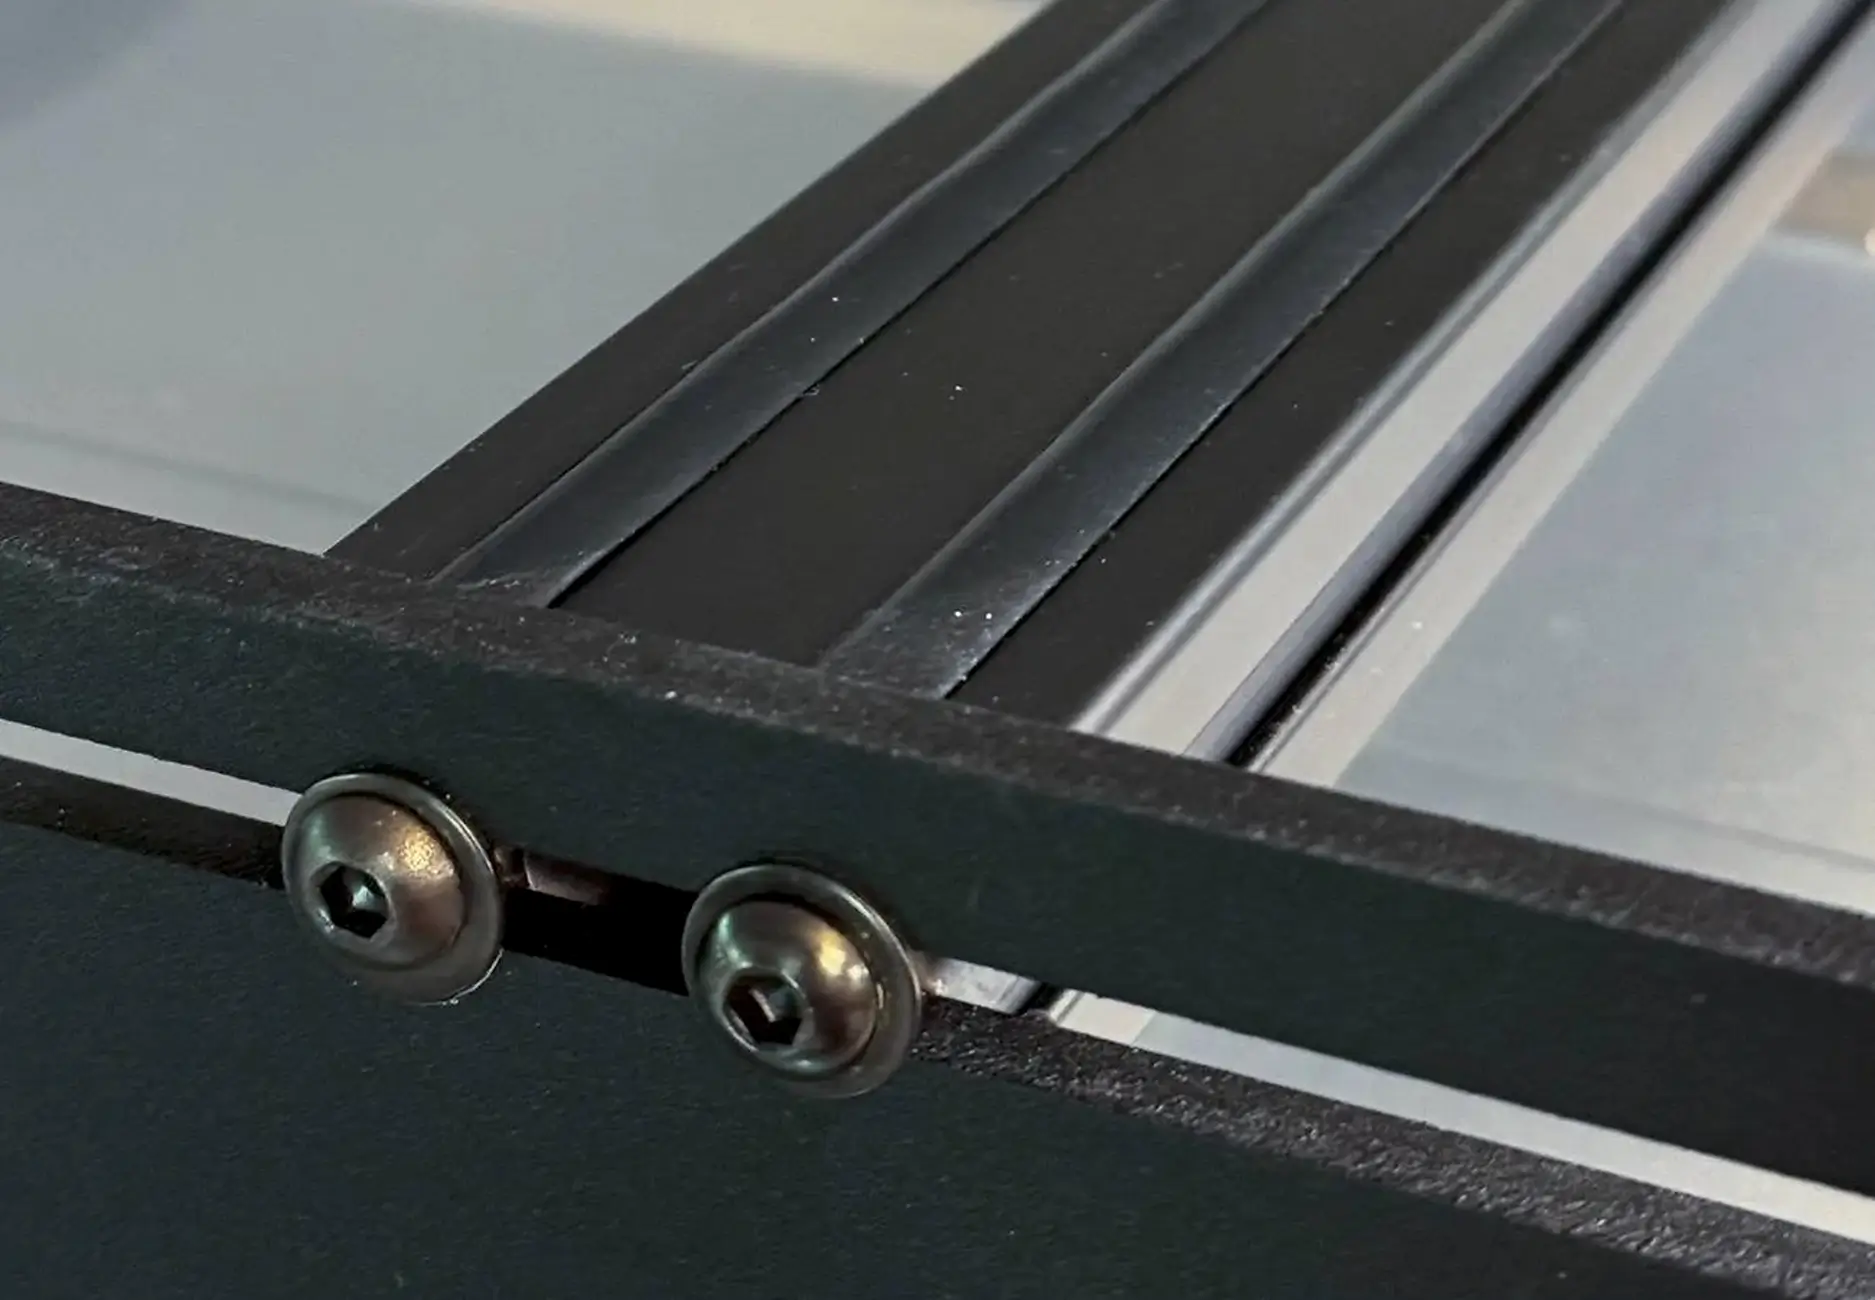
T-slot rubber beading inserts for roof rack crossbars
One thing I discovered after installing my Sherpa rack is that the top channels in the crossbars tend to accumulate water when you wash the car, or when it rains, and then it tends to slowly seep out and drip down the side of the 4Runner. To mitigate this, I installed some rubber beading. See more here. I suspect these also help dampen any potential vibration between the RRT and the roof rack.
LIGHTING COMPONENTS
RIGID SR-Series Pro 40" Spot/Flood Combo (Midnight Optics)
This LED light bar fits just perfectly on the Capitol Rack with the cutout in the wind fairing. It is tucked in with a very low profile, but puts out an incredible amount of light when you need it. It draws about 18.5amps, and is wired into my SwitchPro 9100 panel for fusing and switching.
RIGID SR-Series Pro Covers (10" — you need to order 4 of them)
These black plastic covers snap onto the front of the RIGID light bar when it's not in use. Two big benefits are that you don't risk having rocks or bugs hit the lens, and it also may be required by law in some states that regulate the use of non-street legal lights. Cheap insurance, and it helps protect and hide the light bar when it's not in use.
Baja Design Rock Lights with Switch (4 - Clear/White lens)
I’ve got four of these mounted on the roof rack to provide side illumination around camp and in the work area beneath the Kammok awning. Because they are individually switchable, you can turn on/off only the ones you need. I wish they would remember their powered state between power cycles, because when I power the Rock Lights off from the main SwitchPros keypad, they don’t turn back on again until I manually press the power buttons on each Rock Light.
 - 2025 4Runner TRD ORP Hybrid Build _W0A4976")
Baja Design S2 Pro 1X2 Fogs with Amber Lens (Amber - Spot/Driving Combo)
These lights are SAE-certified but very bright, and they cut through fog or rain quite well. The amber tint definitely reduces eye stain, and when mounted in the CBI covert bumper, they are positioned down low (so as not reflect light back at the driver) and work well in sub-optimal driving conditions. The included mounting brackets are certified to work with the CBI Super Stock Covert Bumper, and were easy to mount, aim, and secure to the bumper behind the opening.
 - 2025 4Runner TRD ORP Hybrid Build _W0A4970")
Lasfit 7443 LED Front Switchback LED Turn Signal Light | T3 Series
I upgraded the front turn signal bulbs with the Lasfit T3 7443d Switchback LED Front Turn Signal Light, which functions as both a brighter amber turn signal flasher, and a regular white running light which turns on with the DRL and headlights. It replaced the only halogen bulb in the 6th Gen 4Runner and is much brighter, and provides more lighting functionality due to the fact that it supports CAN bus communication for the multi-function output that the 4Runner provides.
 - 2025 4Runner TRD ORP Hybrid Build Lasfit-Switchback-T3-Series-Turn-Signal")
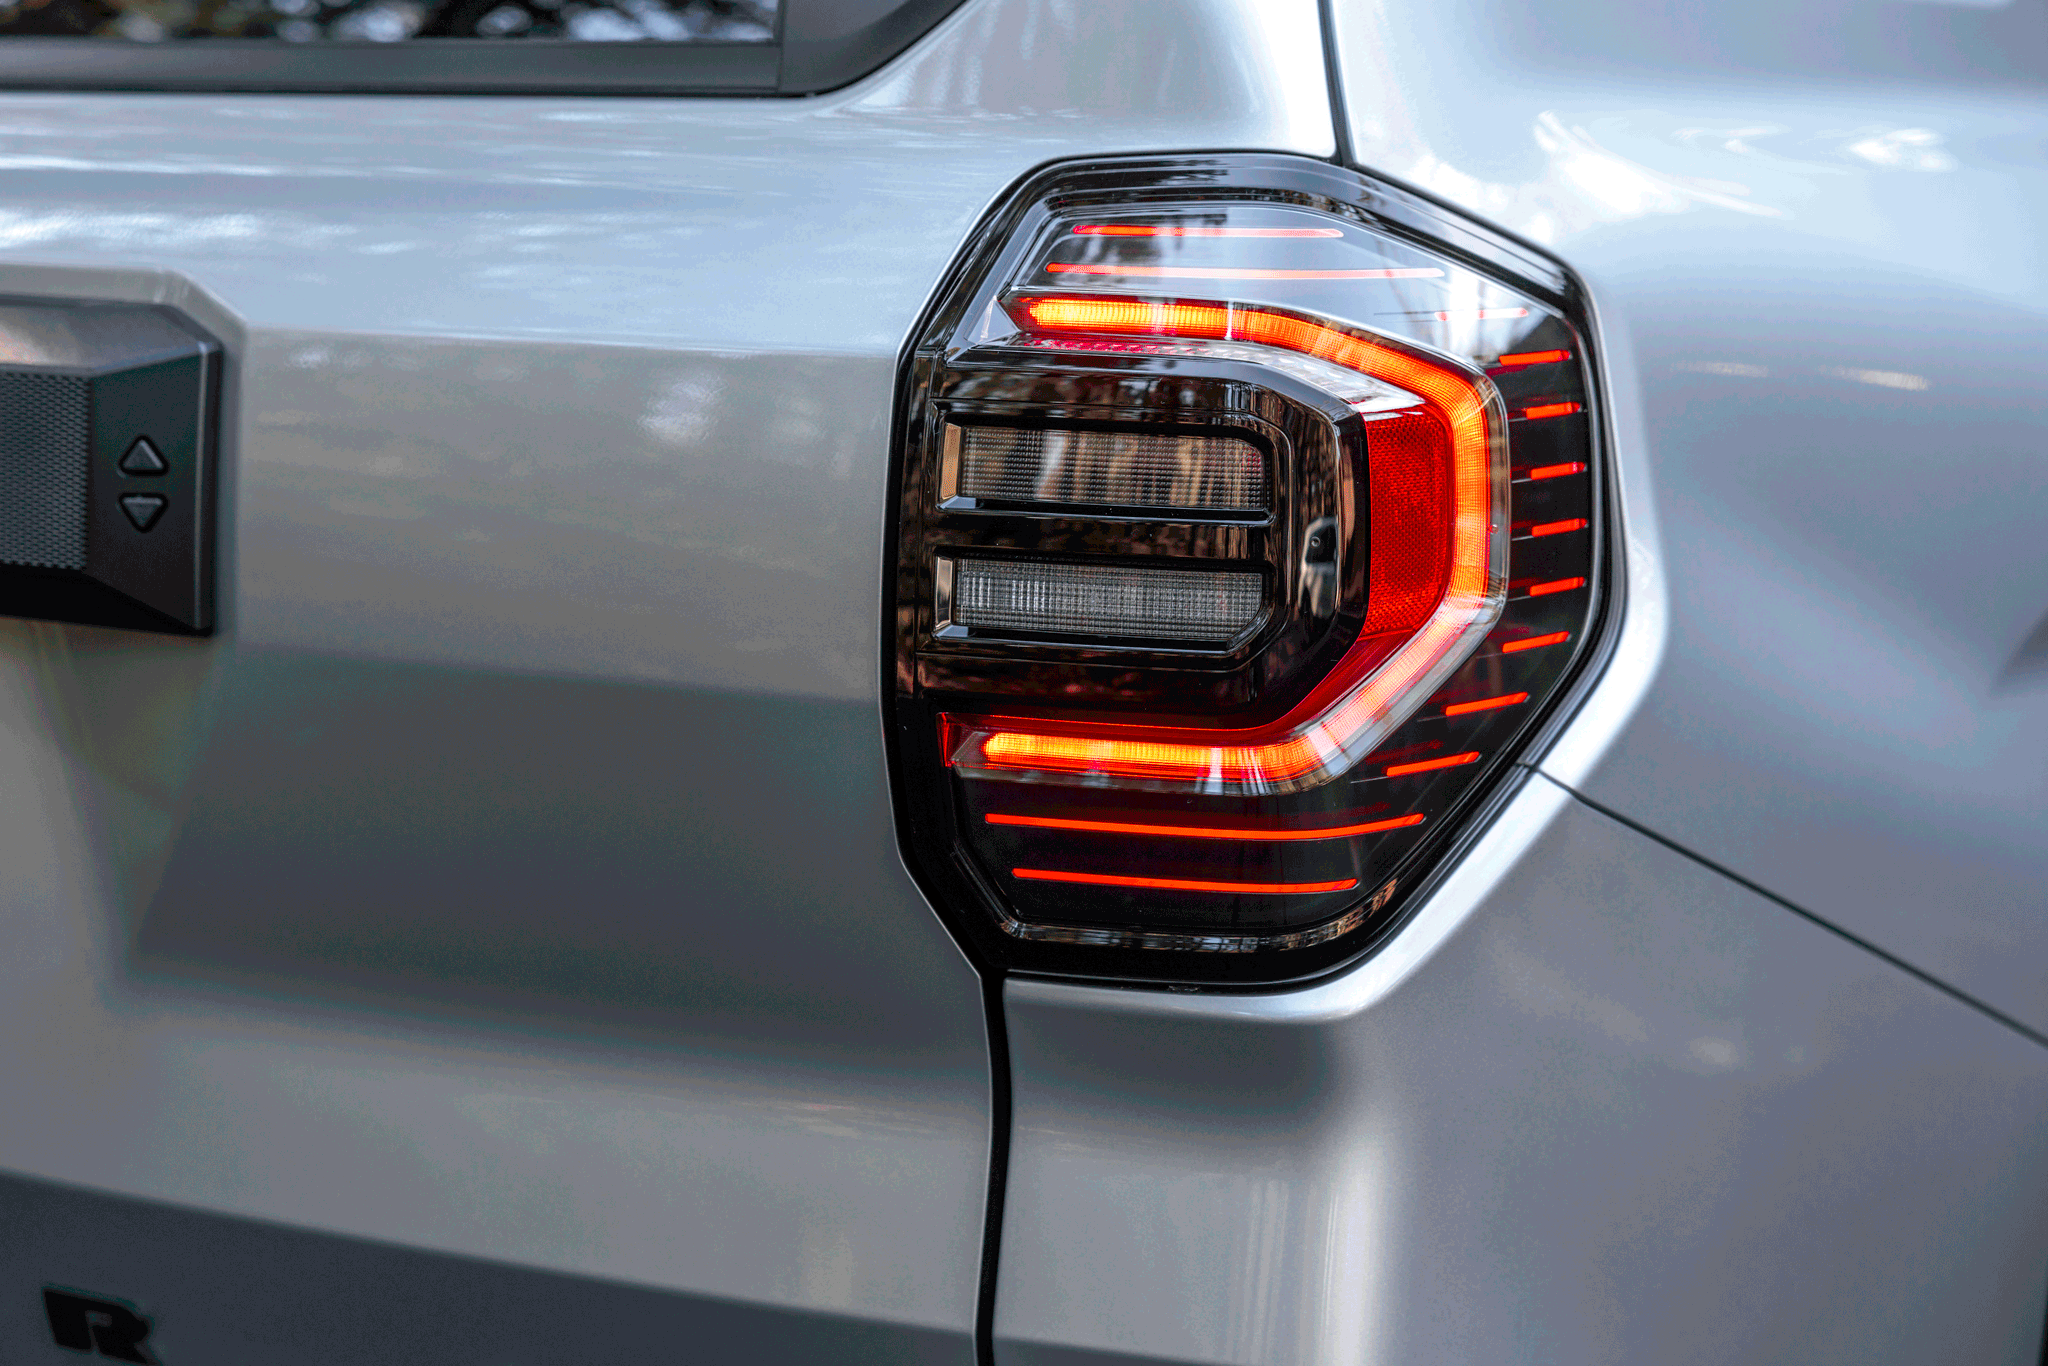
Toyota Premium Smoked Rear Tail Lights (Toyota OEM parts)
Not much to say here... I just liked the look of these TrailHunter premium tail lights better than the red tail lights that came standard on the TRD Off-Road Premium. I was able to order a pair from a Toyota parts dealer online for about 30% off, so wait for the sales if you're thinking about doing this. Also, I was able to sell the old red ones on the forums for $300, so the net cost wasn't too bad.
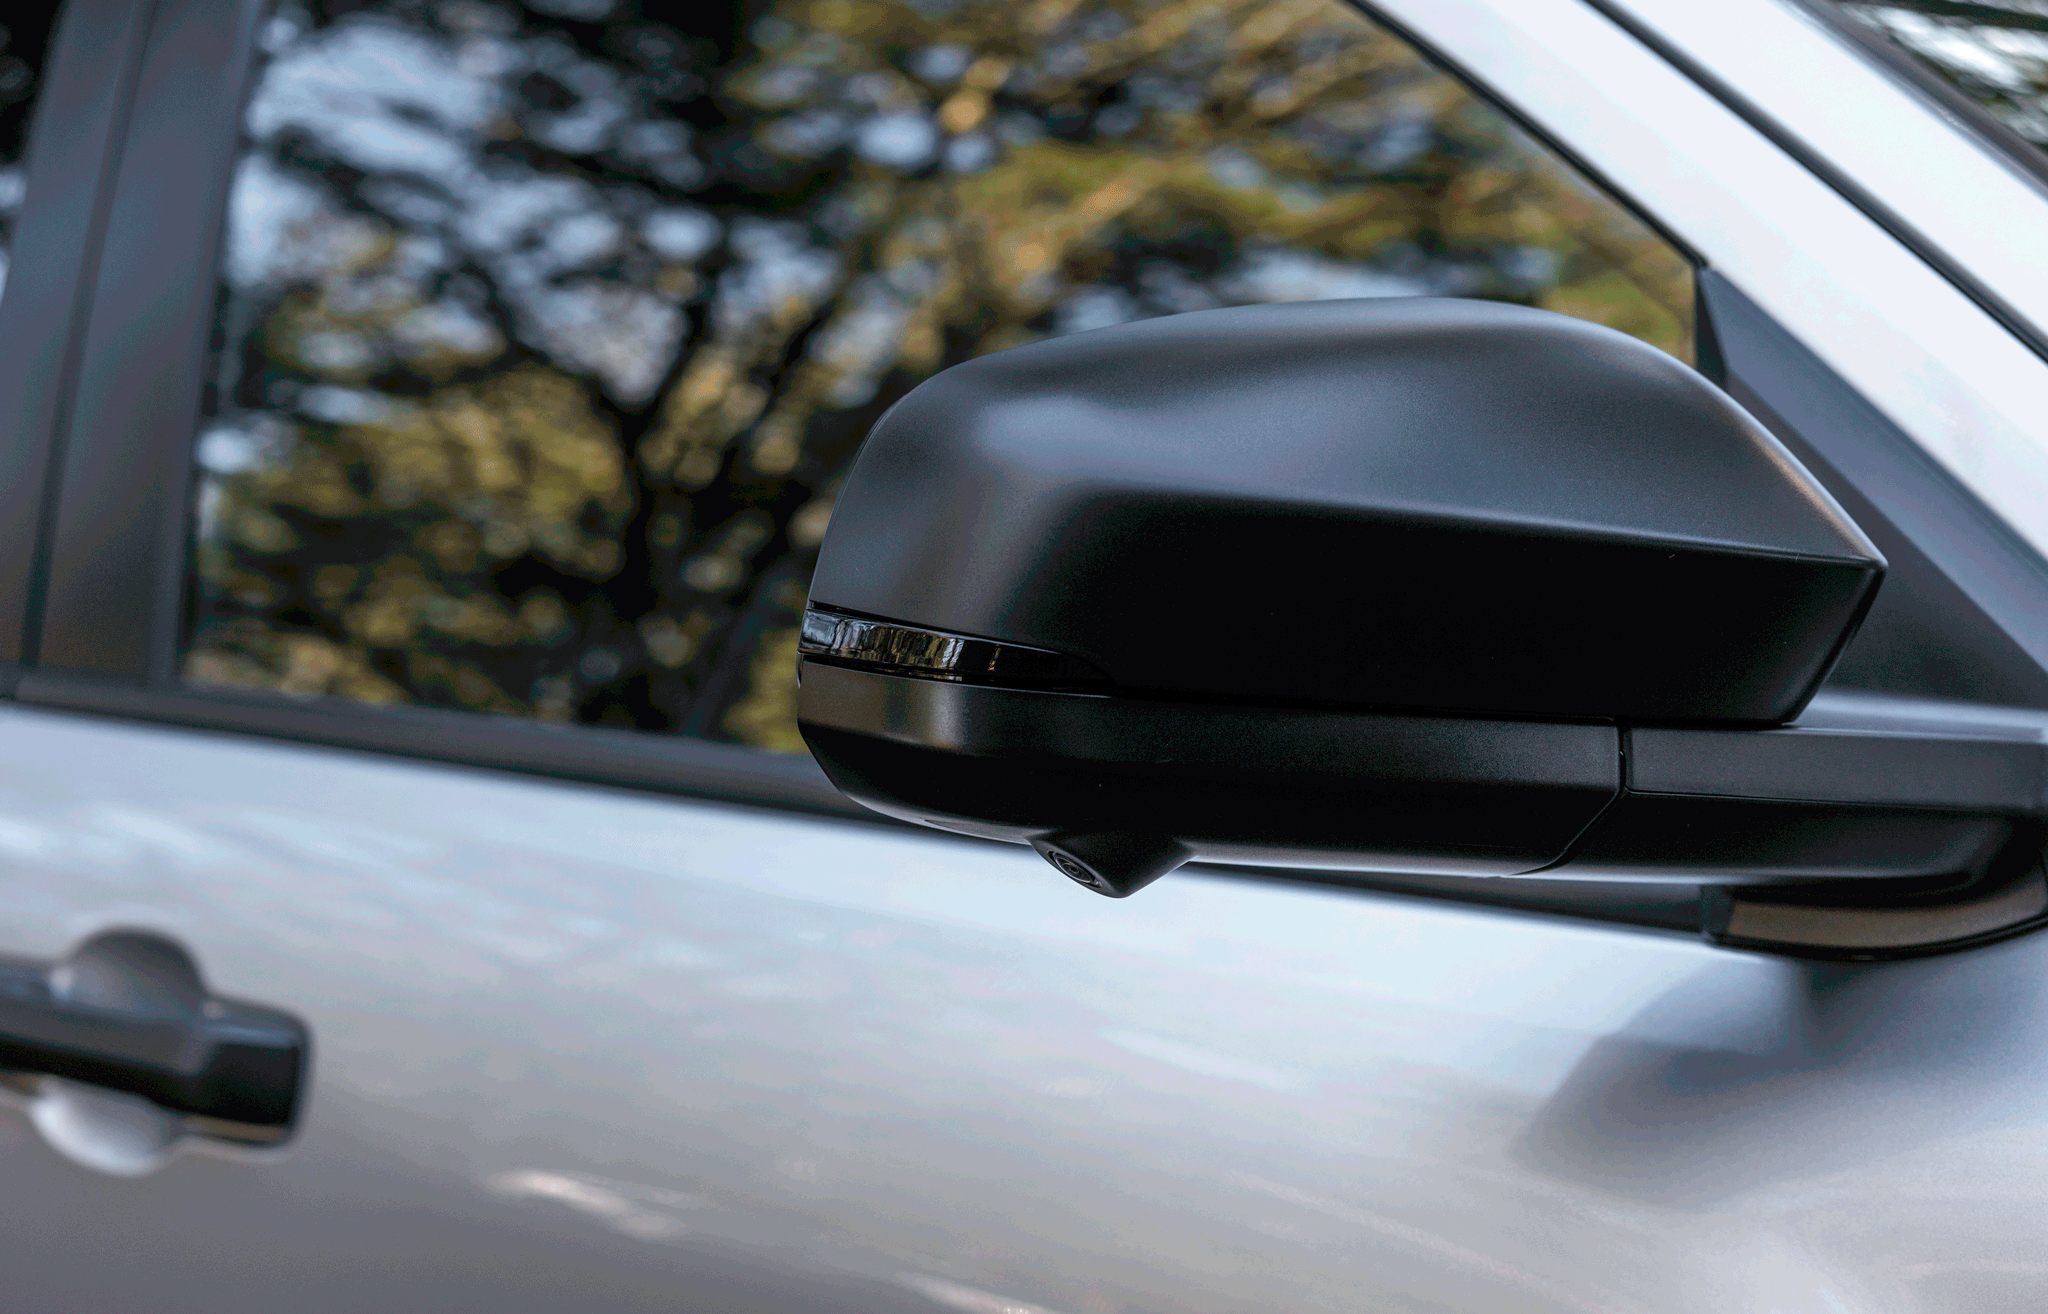
Sequential Turn Signals for side view mirrors (4Runner Lifestyle)
This was an inexpensive upgrade, but I like the blacked out look and the aesthetics of the sequential LED signal lights.
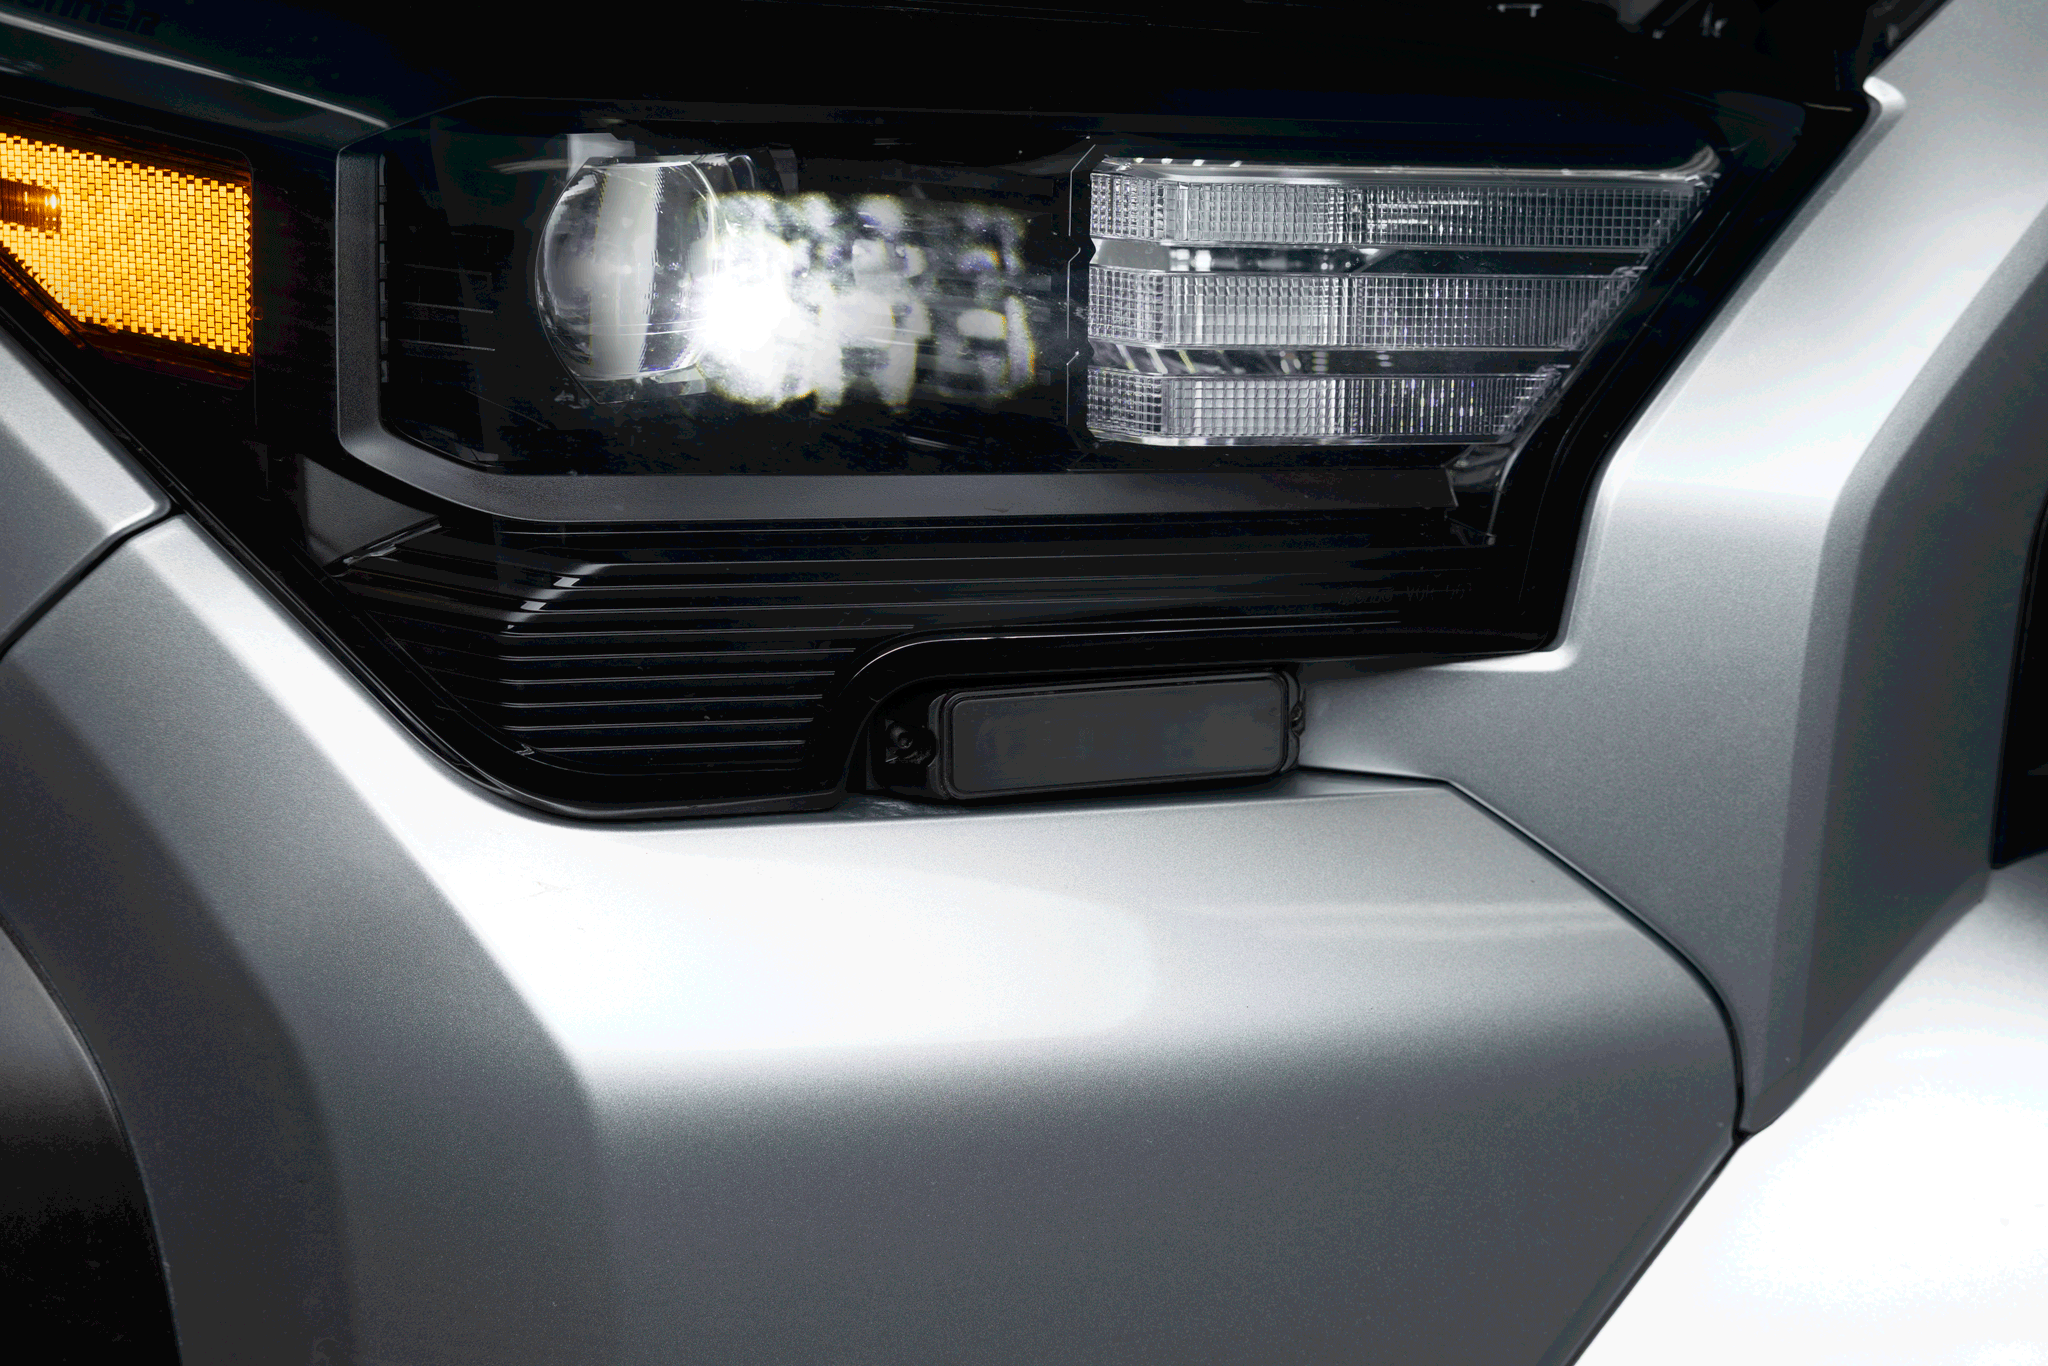
Wicked Warnings LIN-6 clear/white safety strobes (with smoked tinting)
There is a little notch beneath the headlight module that I decided to use for a safety strobe. You can read more about the details here, and if you scroll to the bottom, you can see some pictures of how I installed it. These strobes are bright, and have about 20 different flash patterns.
ELECTRICAL COMPONENTS
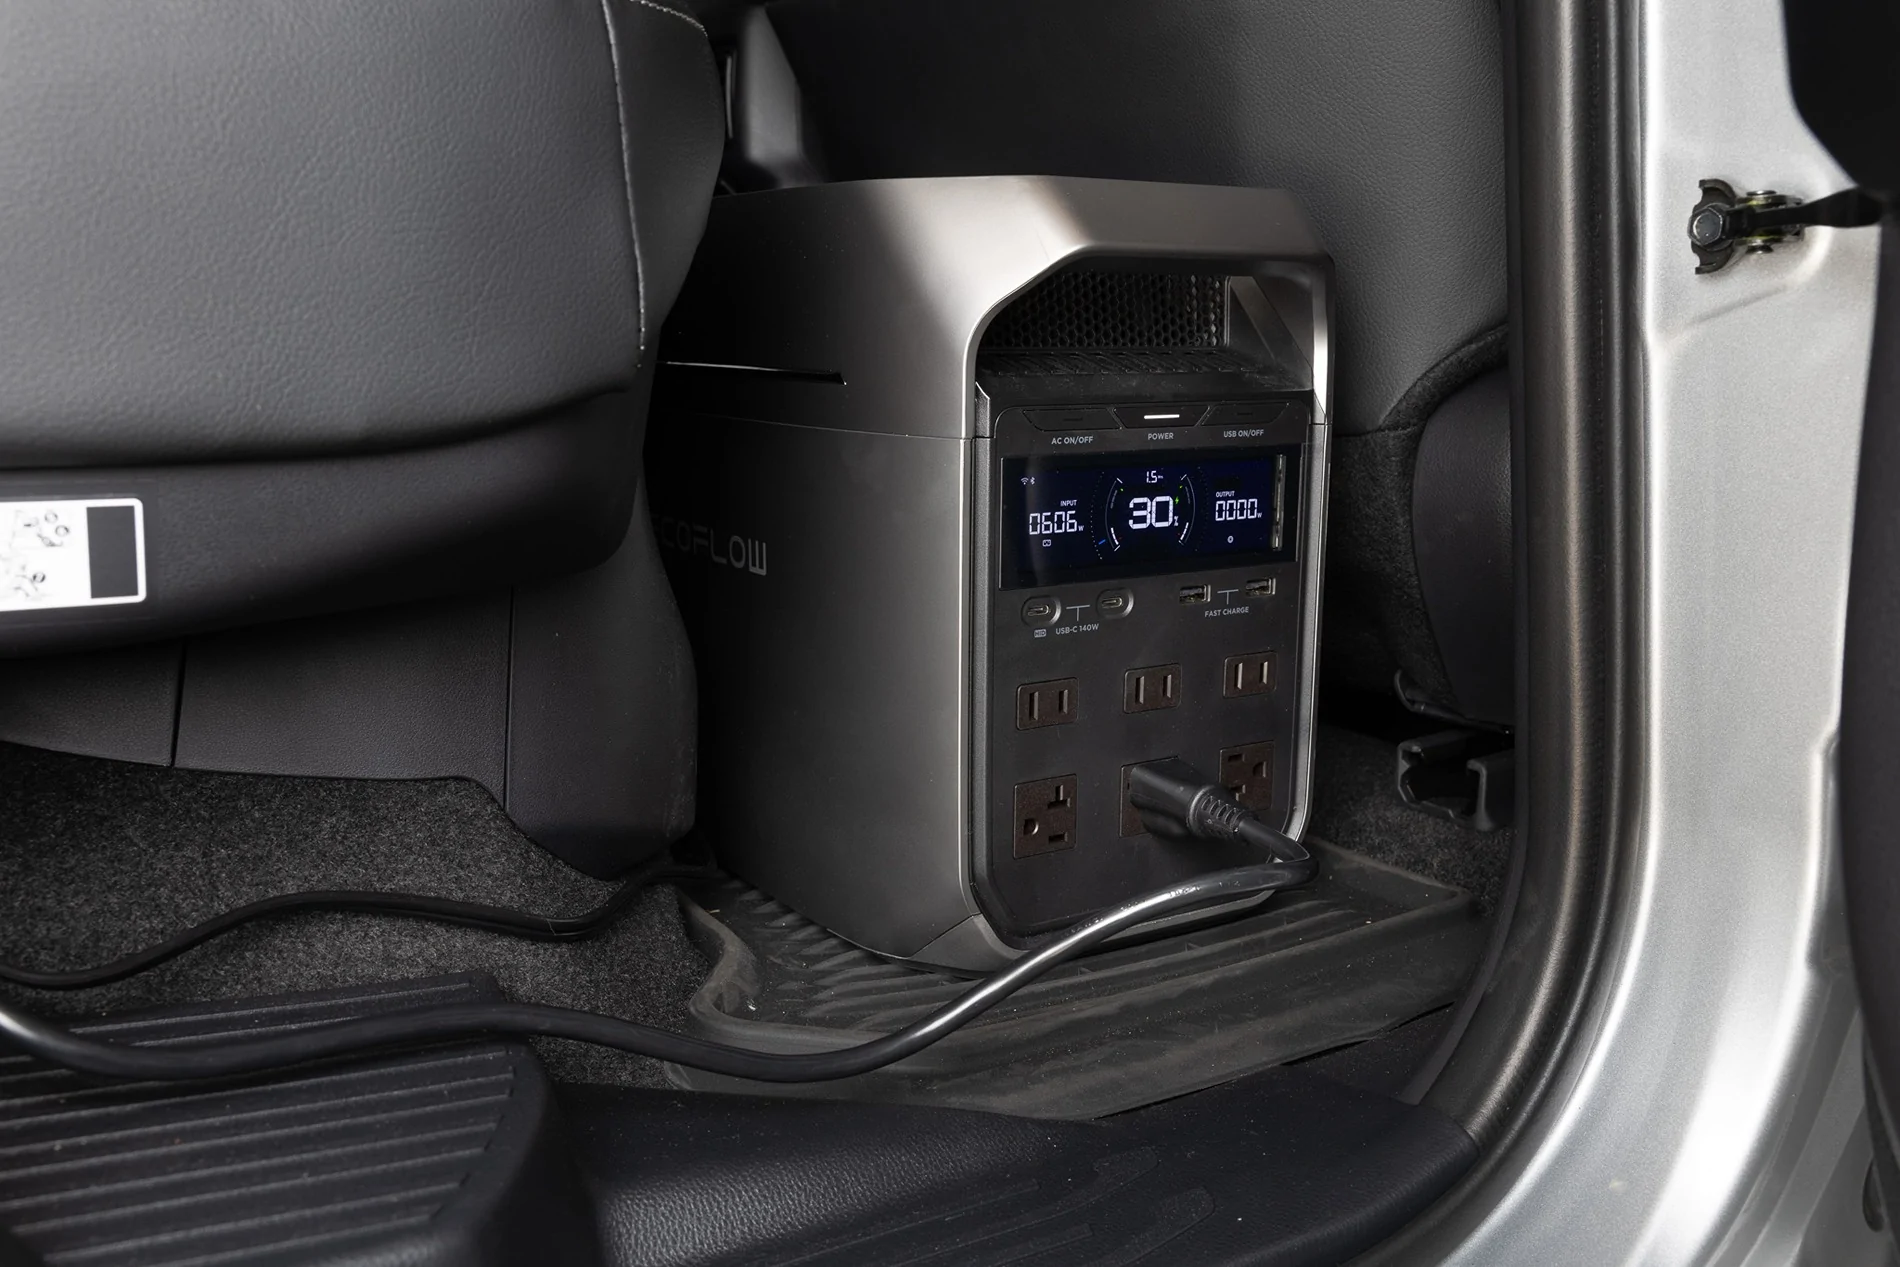
EcoFlow Delta 3 Plus Portable Power Station
The EcoFlow Delta 3 Plus acts as the coach battery powering my refrigerator and other 12V accessories. I posted more about it here. Basically, it charges off the 2400W AC 120 outlet behind the center console when I'm driving, and it's 1024Ah can power my Dometic CFX3 refrigerator for 2-3 days easily without needing to recharge.


SDHQ 12 Volt Power Relocation Kit
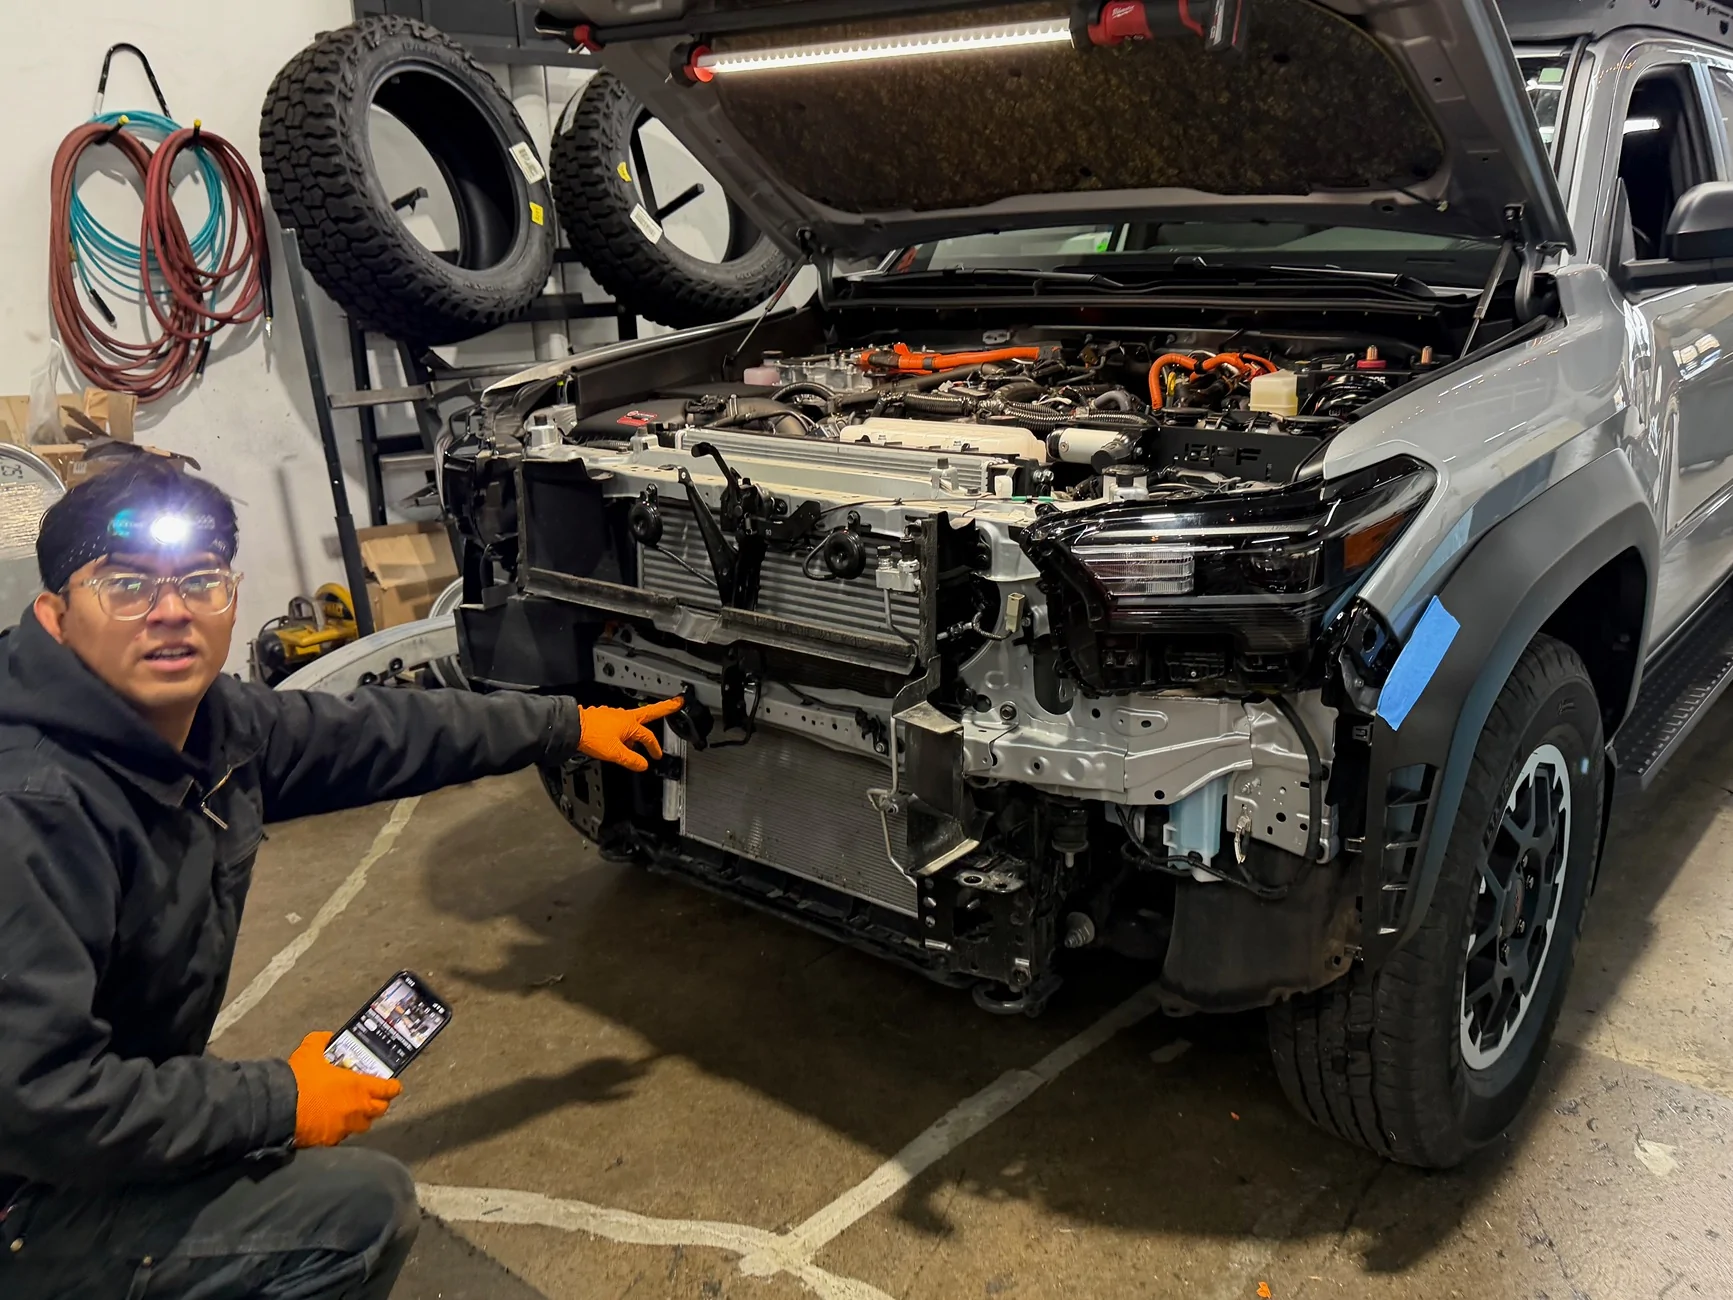
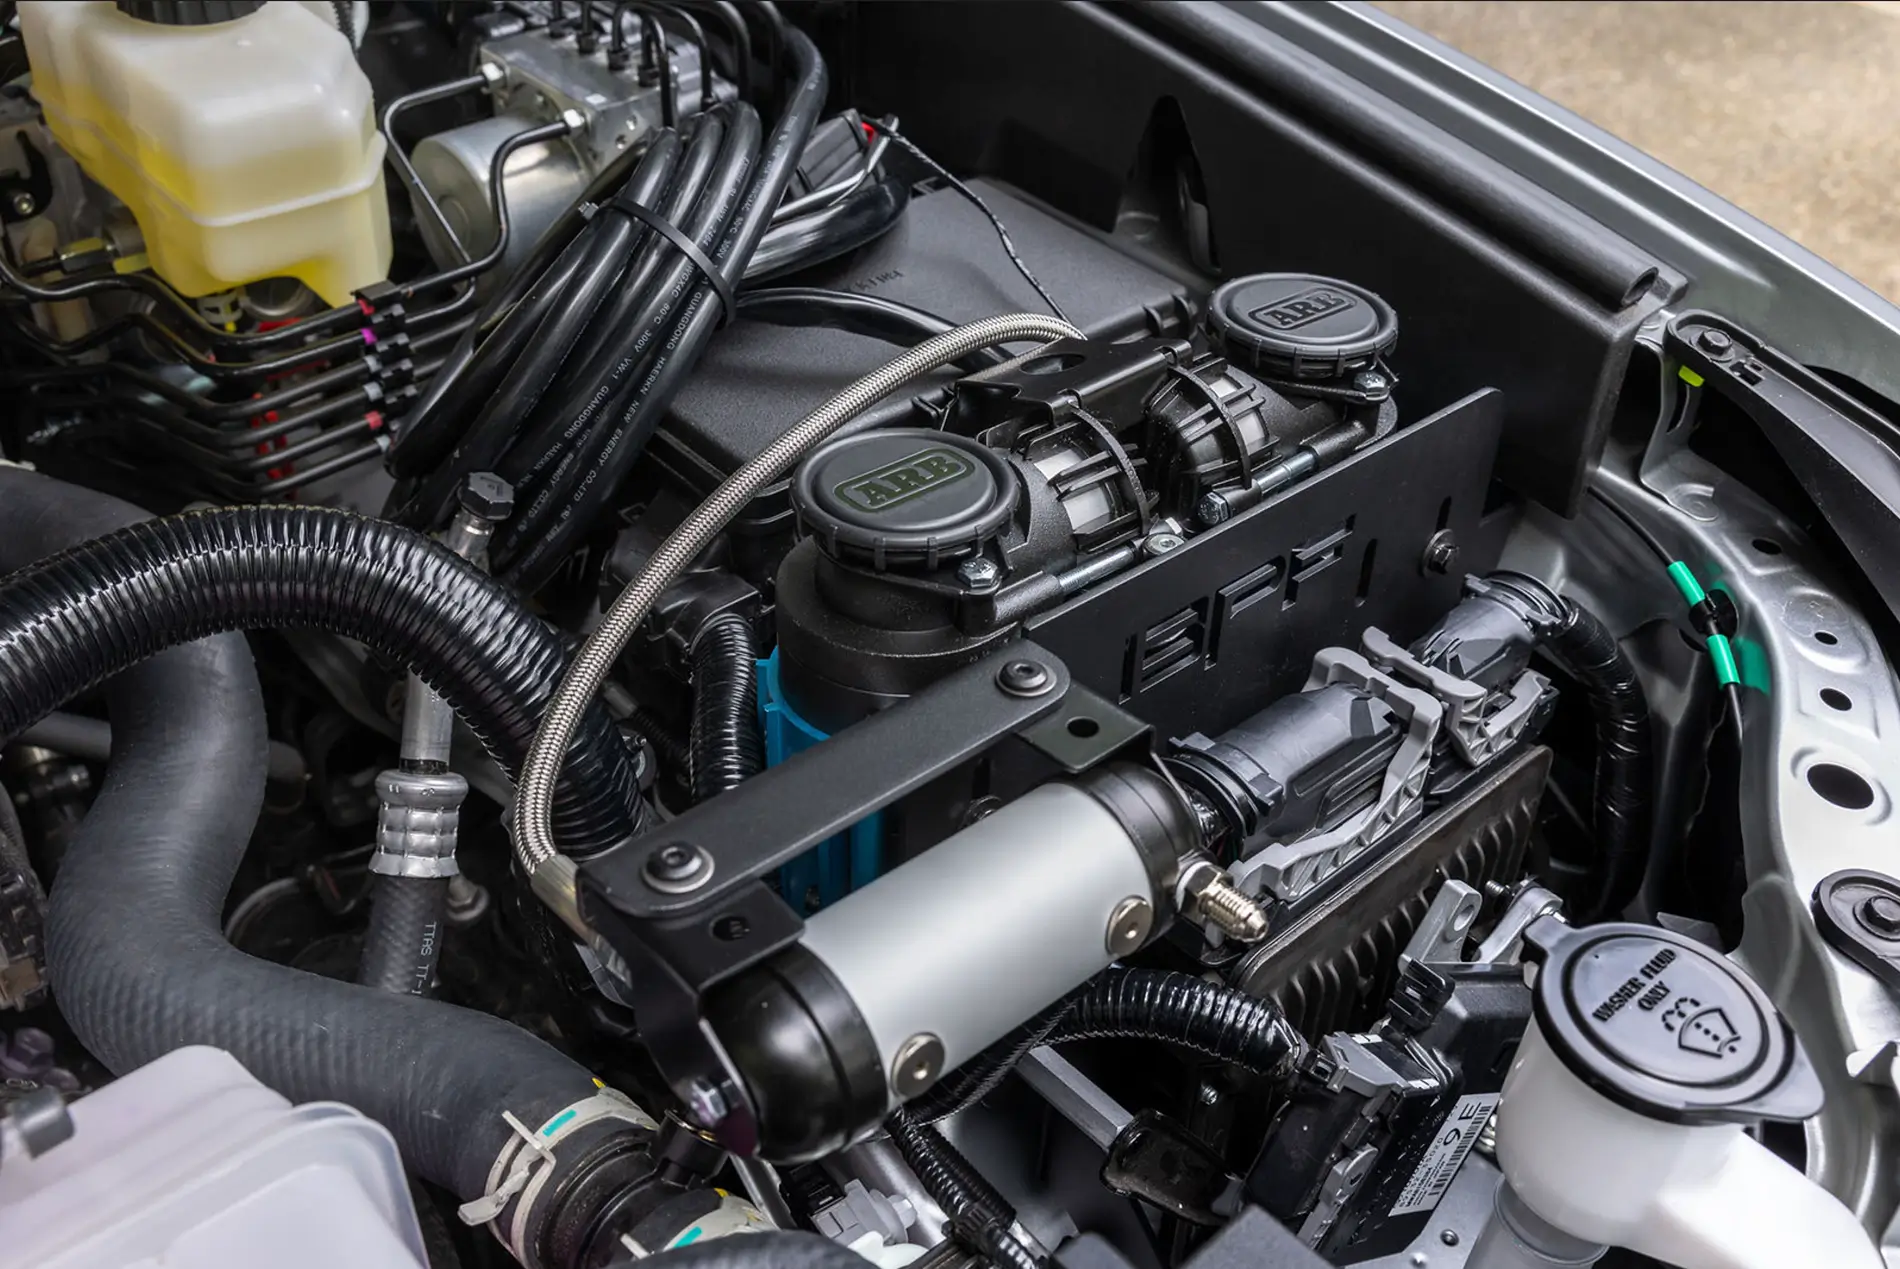
This kit from SDHQ provides everything you need to run 0 AWG cables from the starter battery in the rear cargo area up to the engine bay. The battery terminals sit on a platform that mounts over the master brake cylinder and gives you clean power up front for demanding accessories like winches and compressors.
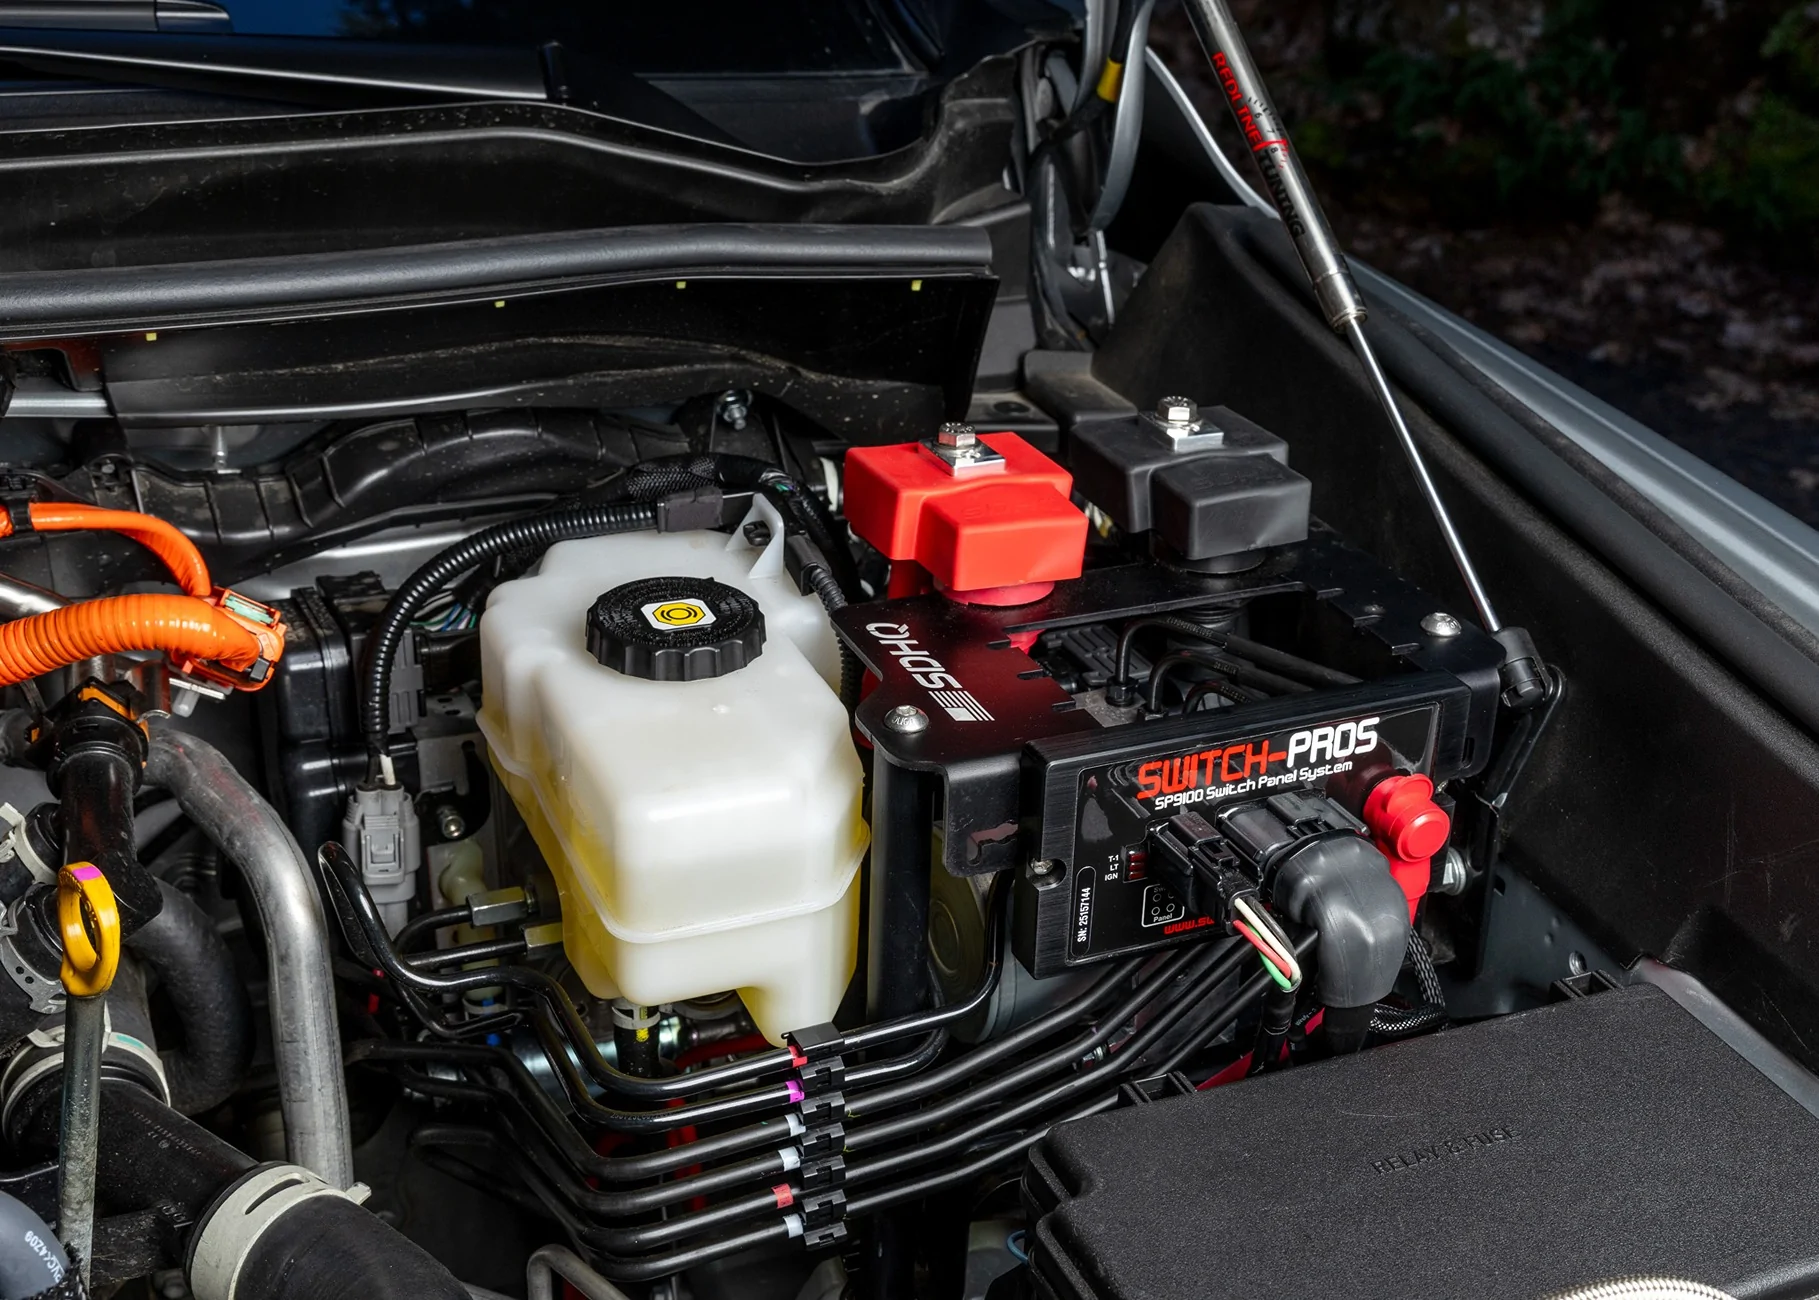
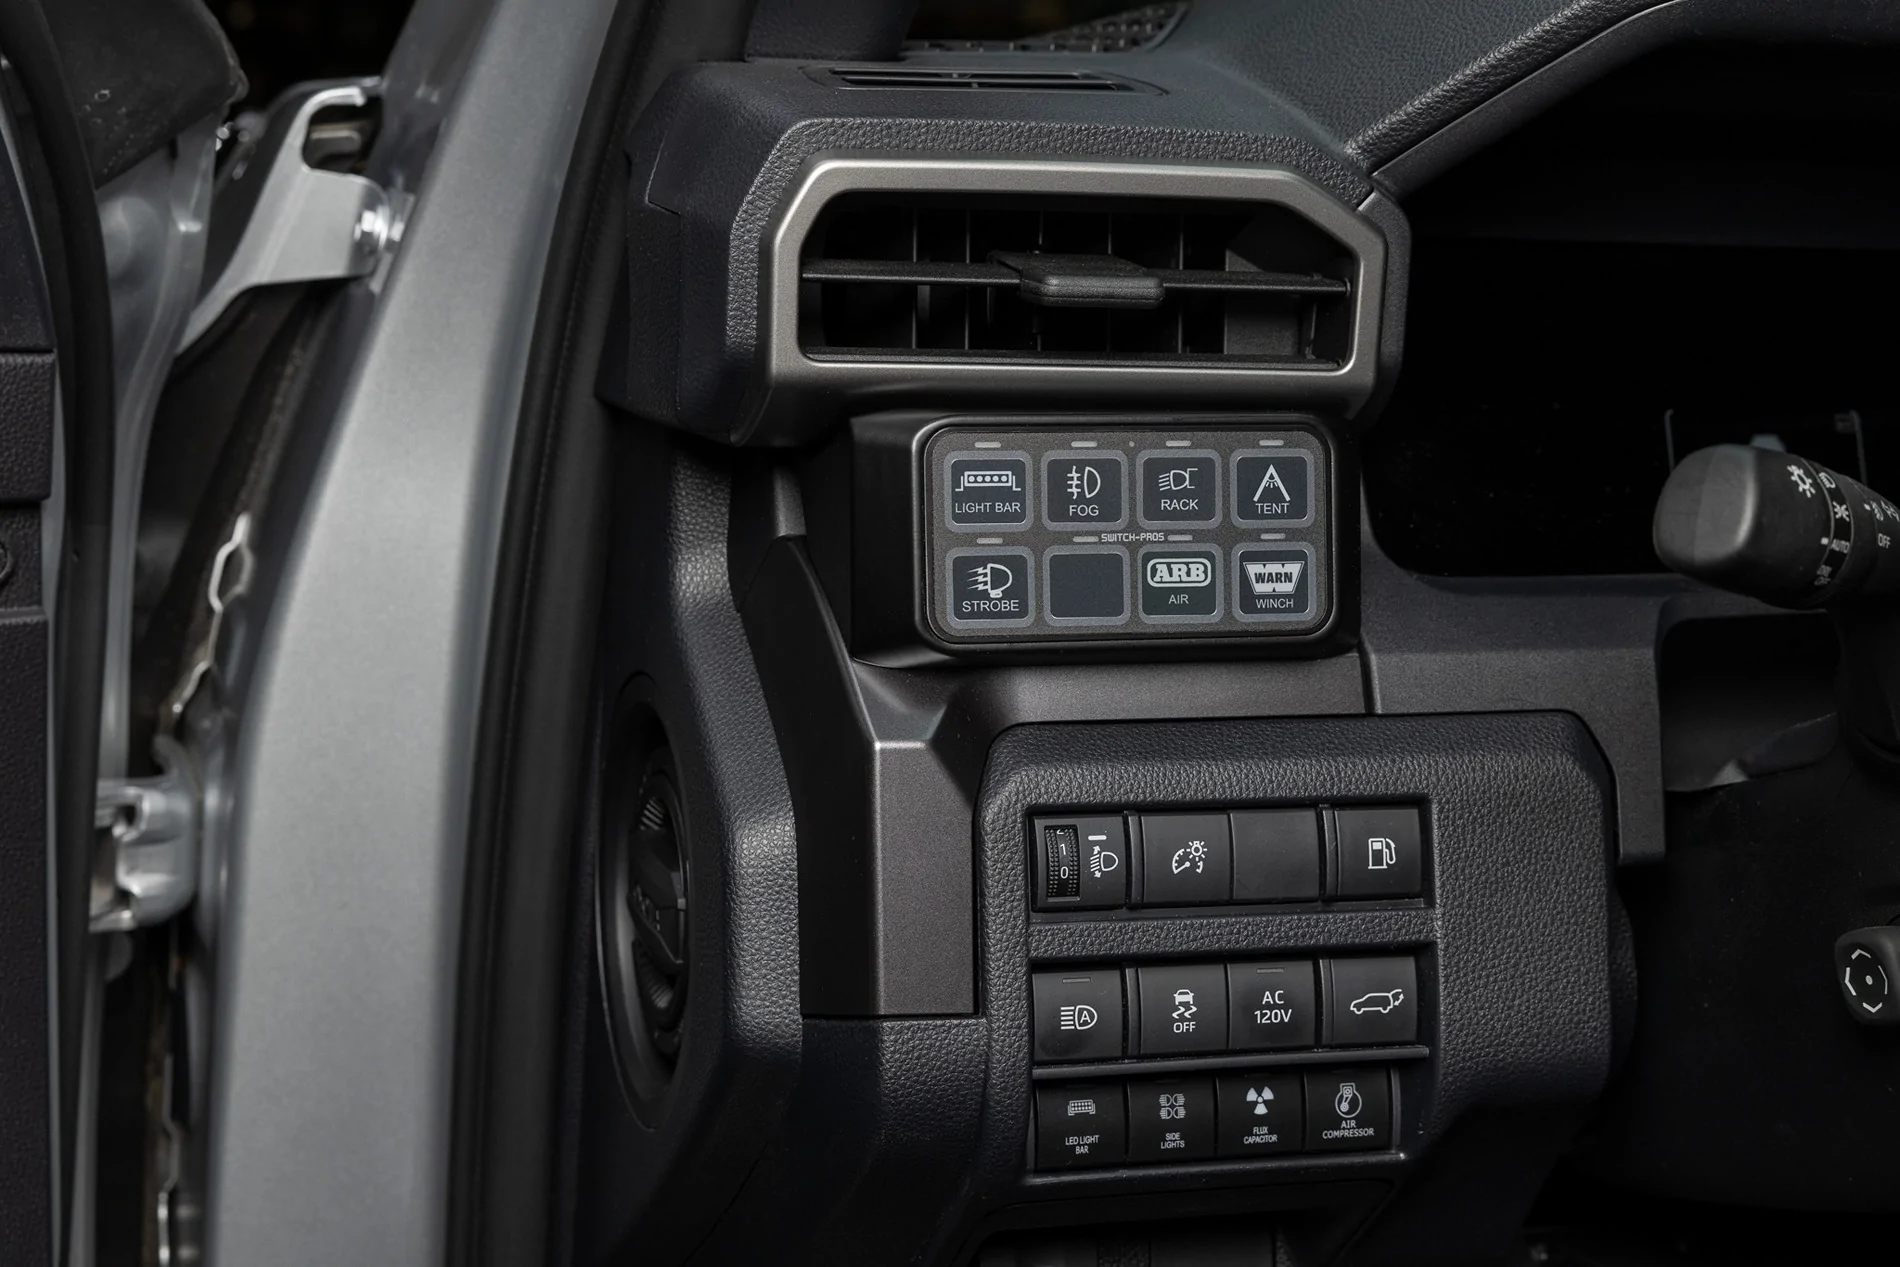
SwitchPros SP9100 Power Panel System
You can also see the SwitchPros 9100 control module mounted in the photo above as well. It gets power directly from the SDHQ terminals, and provide all the fusing, switching and programming logic to control eight 12V accessories.
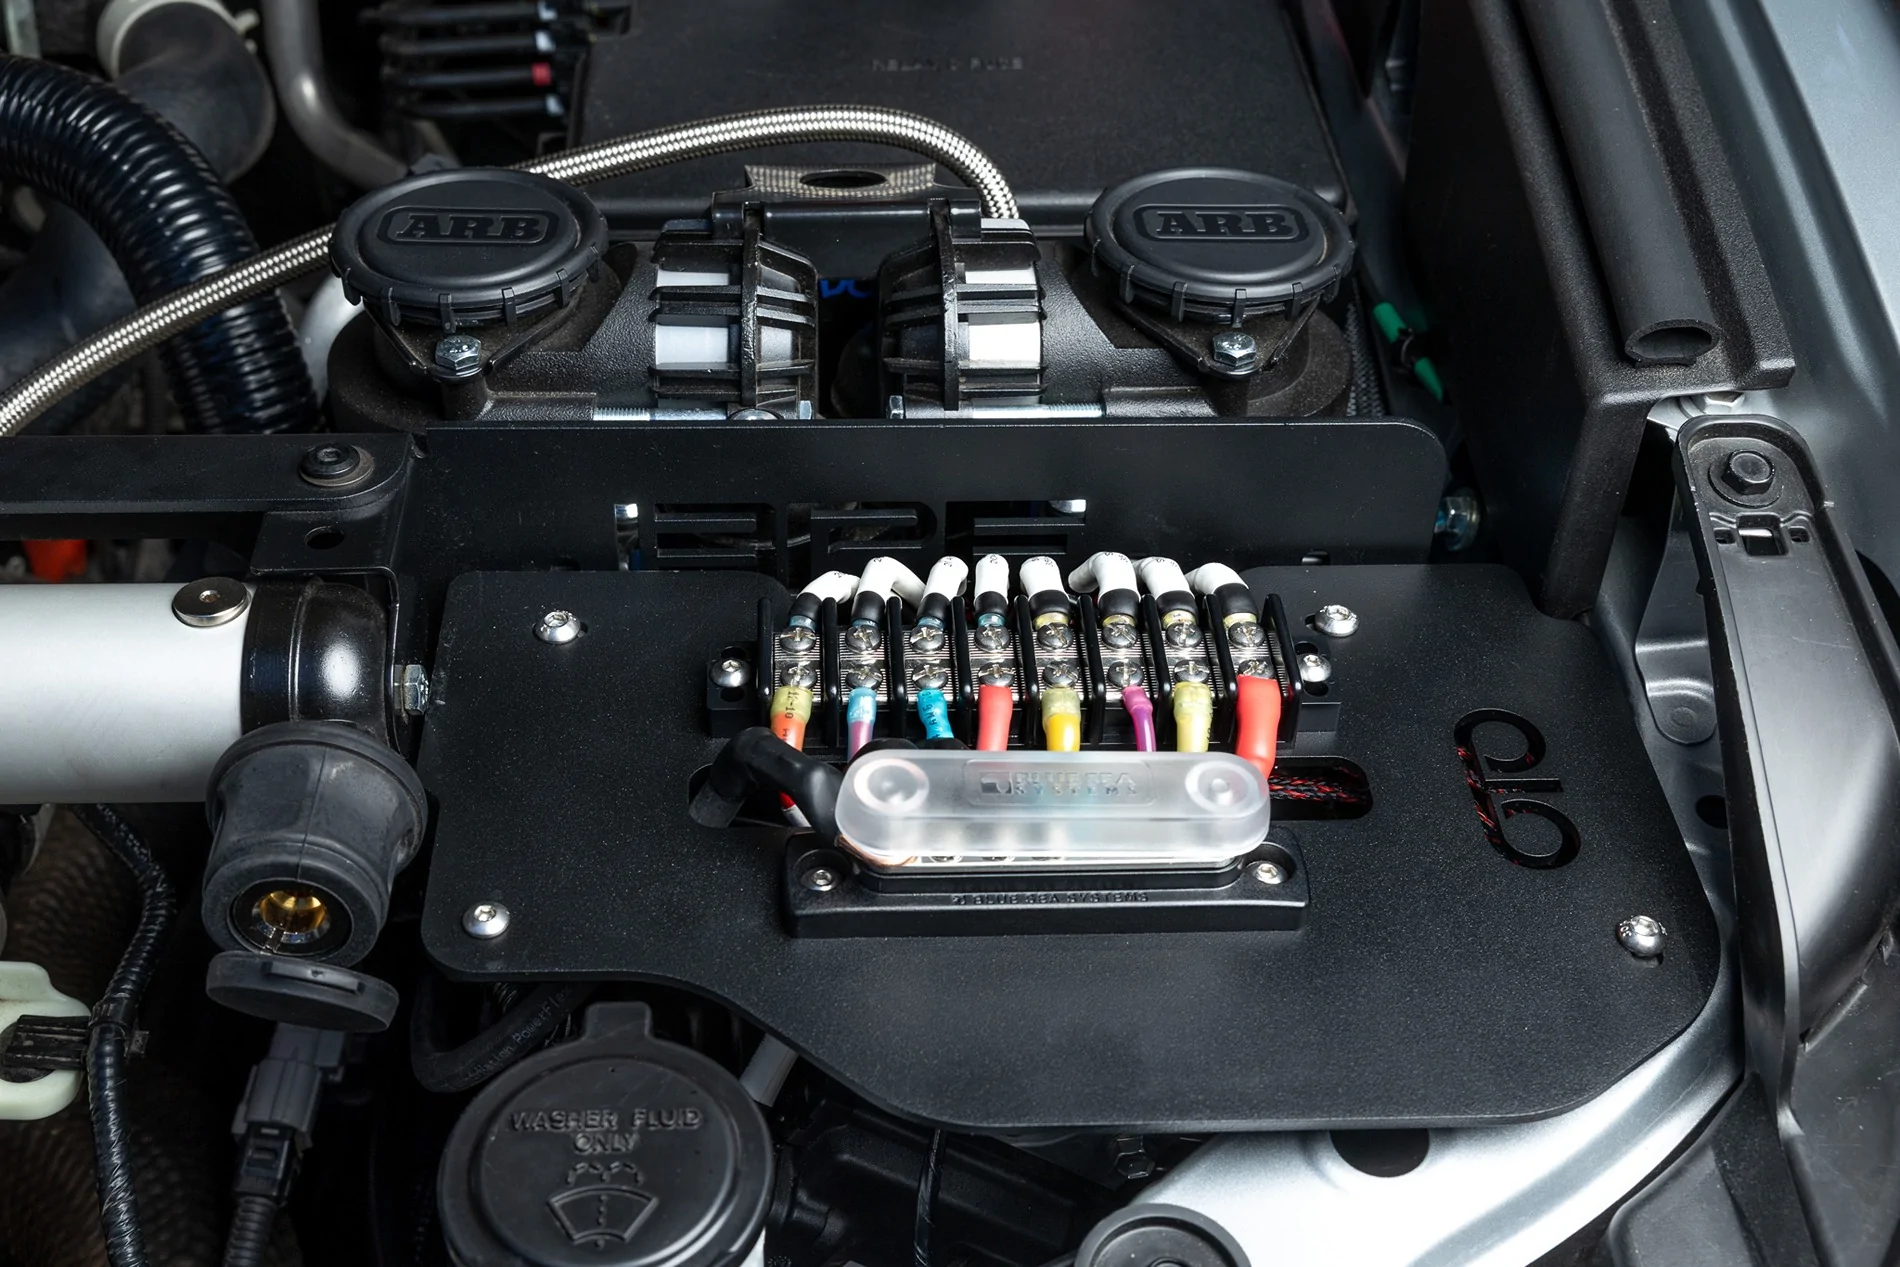
I worked with Phil Gragg at OTO to design a custom, powder-coated aluminum terminal block where all of the wiring terminates on a BUS block and ground block. It keeps everything neat and organized. You can see that the terminal block panel piggy backs off the Bullet Proof Fabricating mounting bracket for the ARB compressor.
Westcott Designs Mounting Bracket for SwitchPro Keypad
This keypad mounting bracket is a solid piece of billet aluminum that was anodized and matches the finish in the 4Runner perfectly! It is truly OEM+. I shared some details about the install process here.
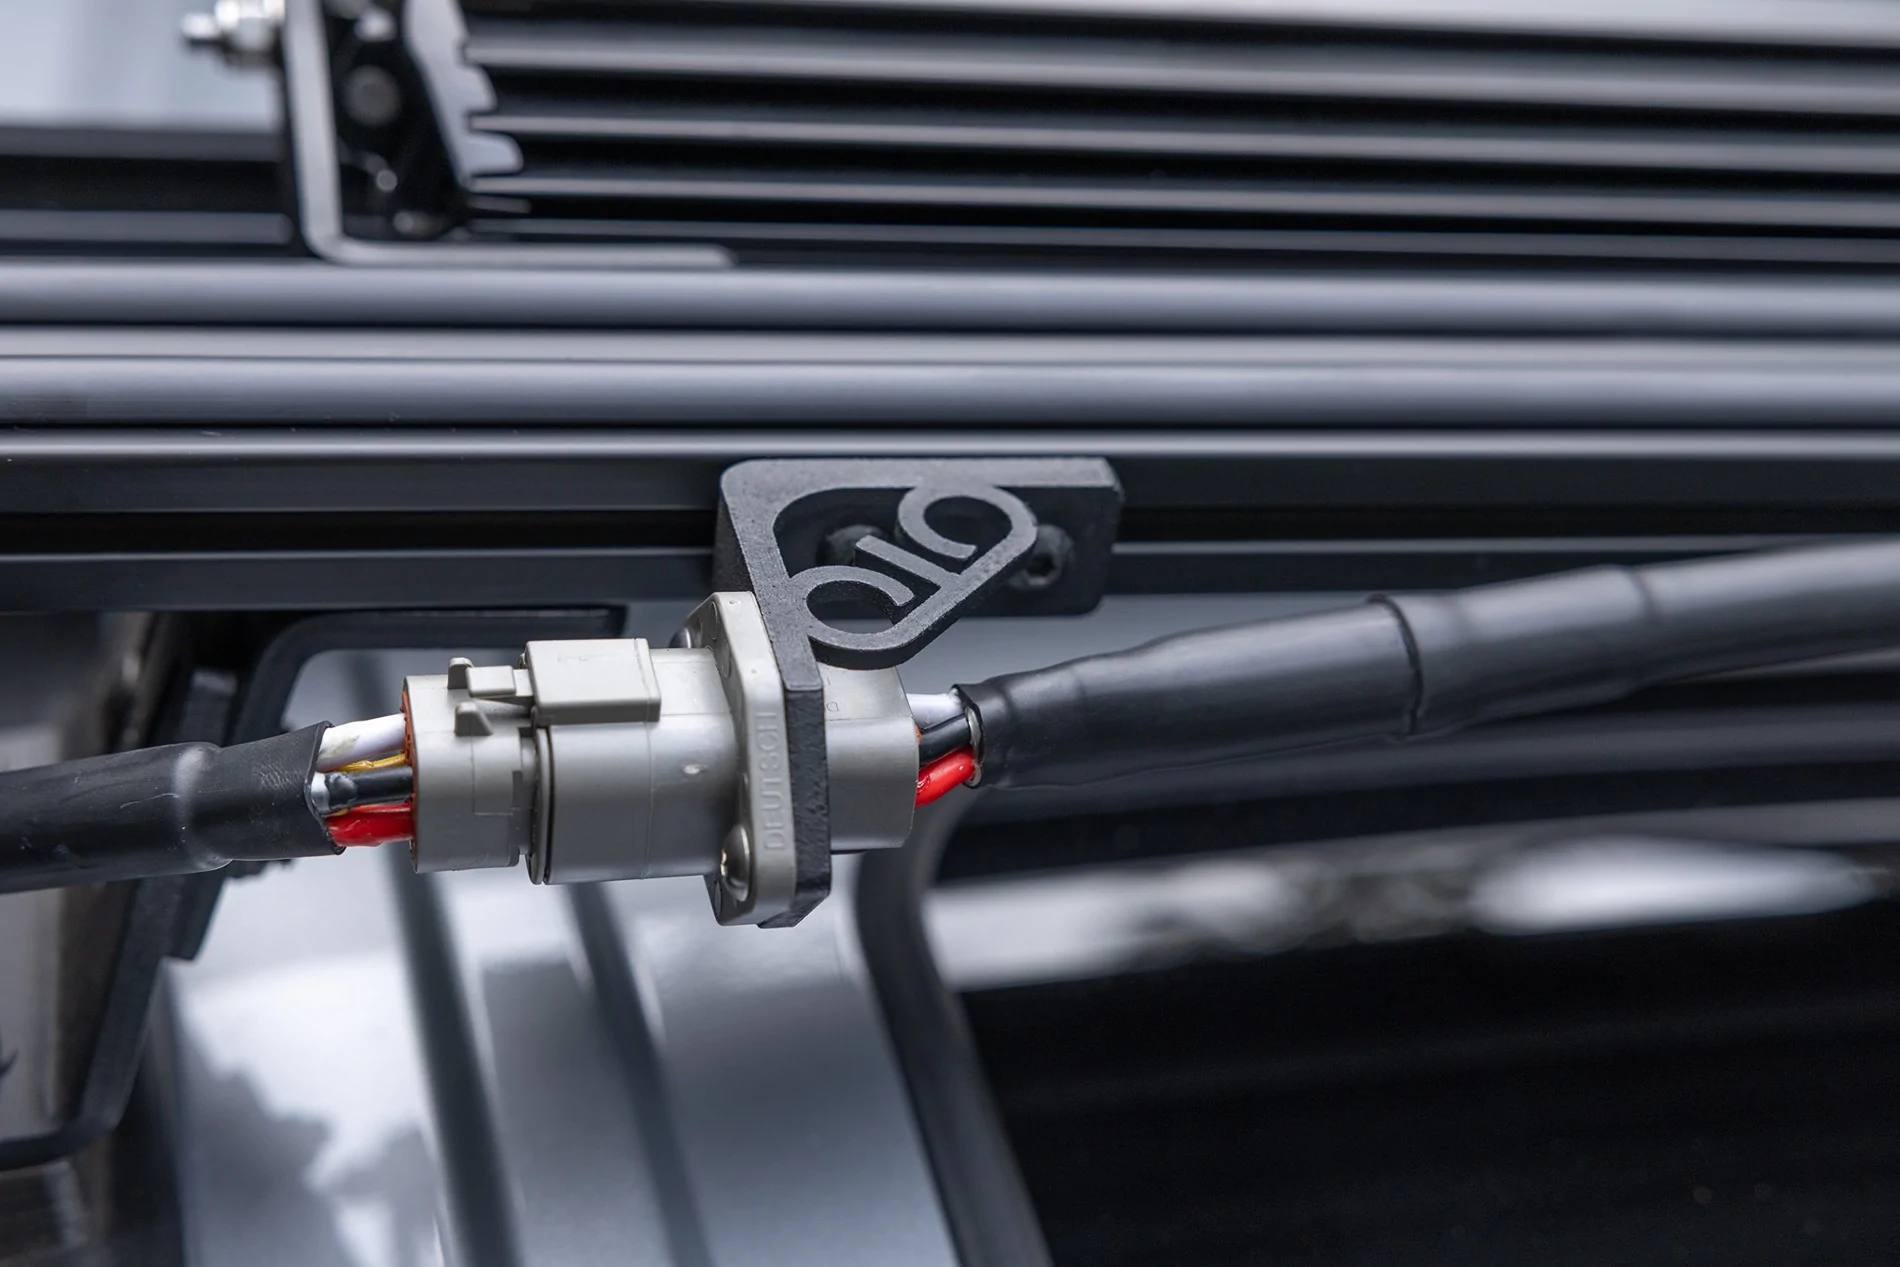
Running 12V Power to the Roof Rack (for lightbar, camp lights, and tent power)
I did a fairly extensive write-up about how I ran power from the SwitchPros up to the roof rack here. This provides power for my 40” light bar, the Baja Designs camp lights, and tent power for lights and iPhone charging. Somewhere down the road, it could also be repurposed for solar panels or a Starlink receiver.
RECOVERY COMPONENTS
CBI Super Stock Covert Front Bumper
I installed the CBI Super Stock Covert Recovery Bumper on my TRD ORP hybrid and I've been really happy with it. Total install time (including the WARN EVO 10-S) was about 4.5 hrs, and the hardest/scariest part was just cutting and finishing the edge of the plastic bumper cutout.
I found this Milwaukee Oscillating Multi Tool to be the best way to cut the plastic bumper with precision and control, and it left a very clean cut edge that just needed a light sand to eliminate any remaining small burrs.
The port holes on the front are big enough to reach the manual clutch / free spool switch or correct spooling issues, and I am running mine with both the OEM wireless controller and the optional WARN bluetooth controller.
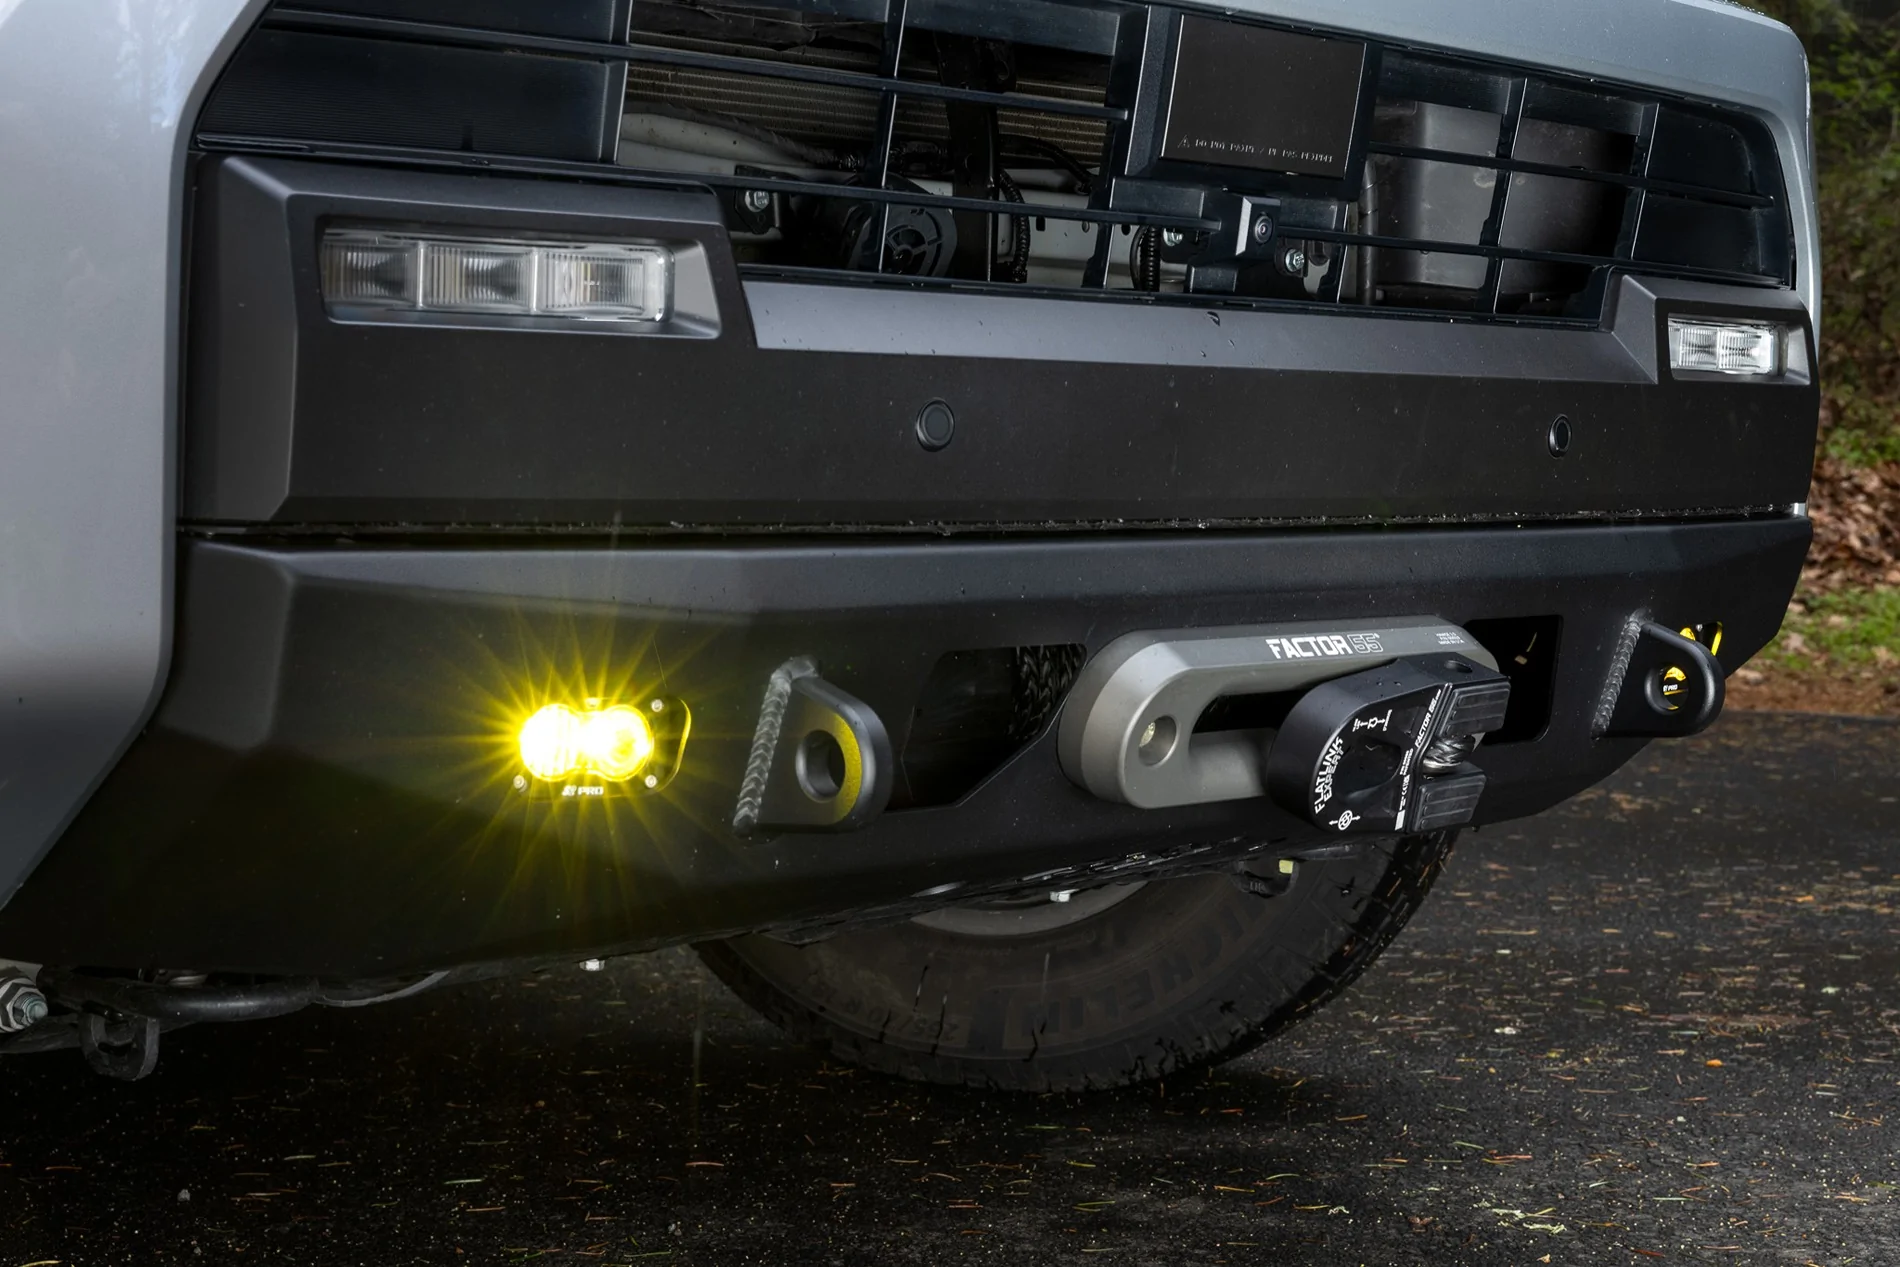
Warn VR EVO 10-S Electric 12V DC Winch with Synthetic Rope
The WARN EVO 10K winch with synthetic rope is tucked into the CBI bumper, but there is good access to the free spool lever. The rope feeds out through a Factor 55 Fairlead for Synthetic Cable and terminates with the Factor 55 Flatlink E Shackle. I also got a Factor 55 Rope Retention Pulley. I haven't needed to use it yet, but I look forward to getting some practice soon!
ARB 12 Volt Twin Motor Onboard Air Compressor
I did a comprehensive write-up on the install for the ARB Twin Motor Air Compressor using the BPF mounting bracket here.
SCC SZ451 Super Z6 Low Profile Tire Chains (for 265/70 R 18 tires)
If you're running the stock wheels and tires on the TRD ORP, I recommend the Peerless / SCC SZ451 Z6 Low Profile Tire Chains. They are very easy to put on and take off, fit snugly with no loose cables or anything to damage your wheel well or trim. I've run them on my last 3 vehicles and swear by them. They come in a soft-sided blue case which fits nicely into the hidden storage tray behind the rear passenger seats.
 - 2025 4Runner TRD ORP Hybrid Build _W0A4990")
NOCO Boost HD GB70 2000A Jump Start Battery
This thing has saved my bacon a few times when I've drawn the starter battery down just a little too far. The SwitchPros system has a low voltage disconnect setting which is supposed to prevent the starter battery from getting too low, but it's nice to have this in my back pocket so I don't get stuck out in the boonies with a dead battery.
 - 2025 4Runner TRD ORP Hybrid Build _W0A4993")
CAMPING GEAR
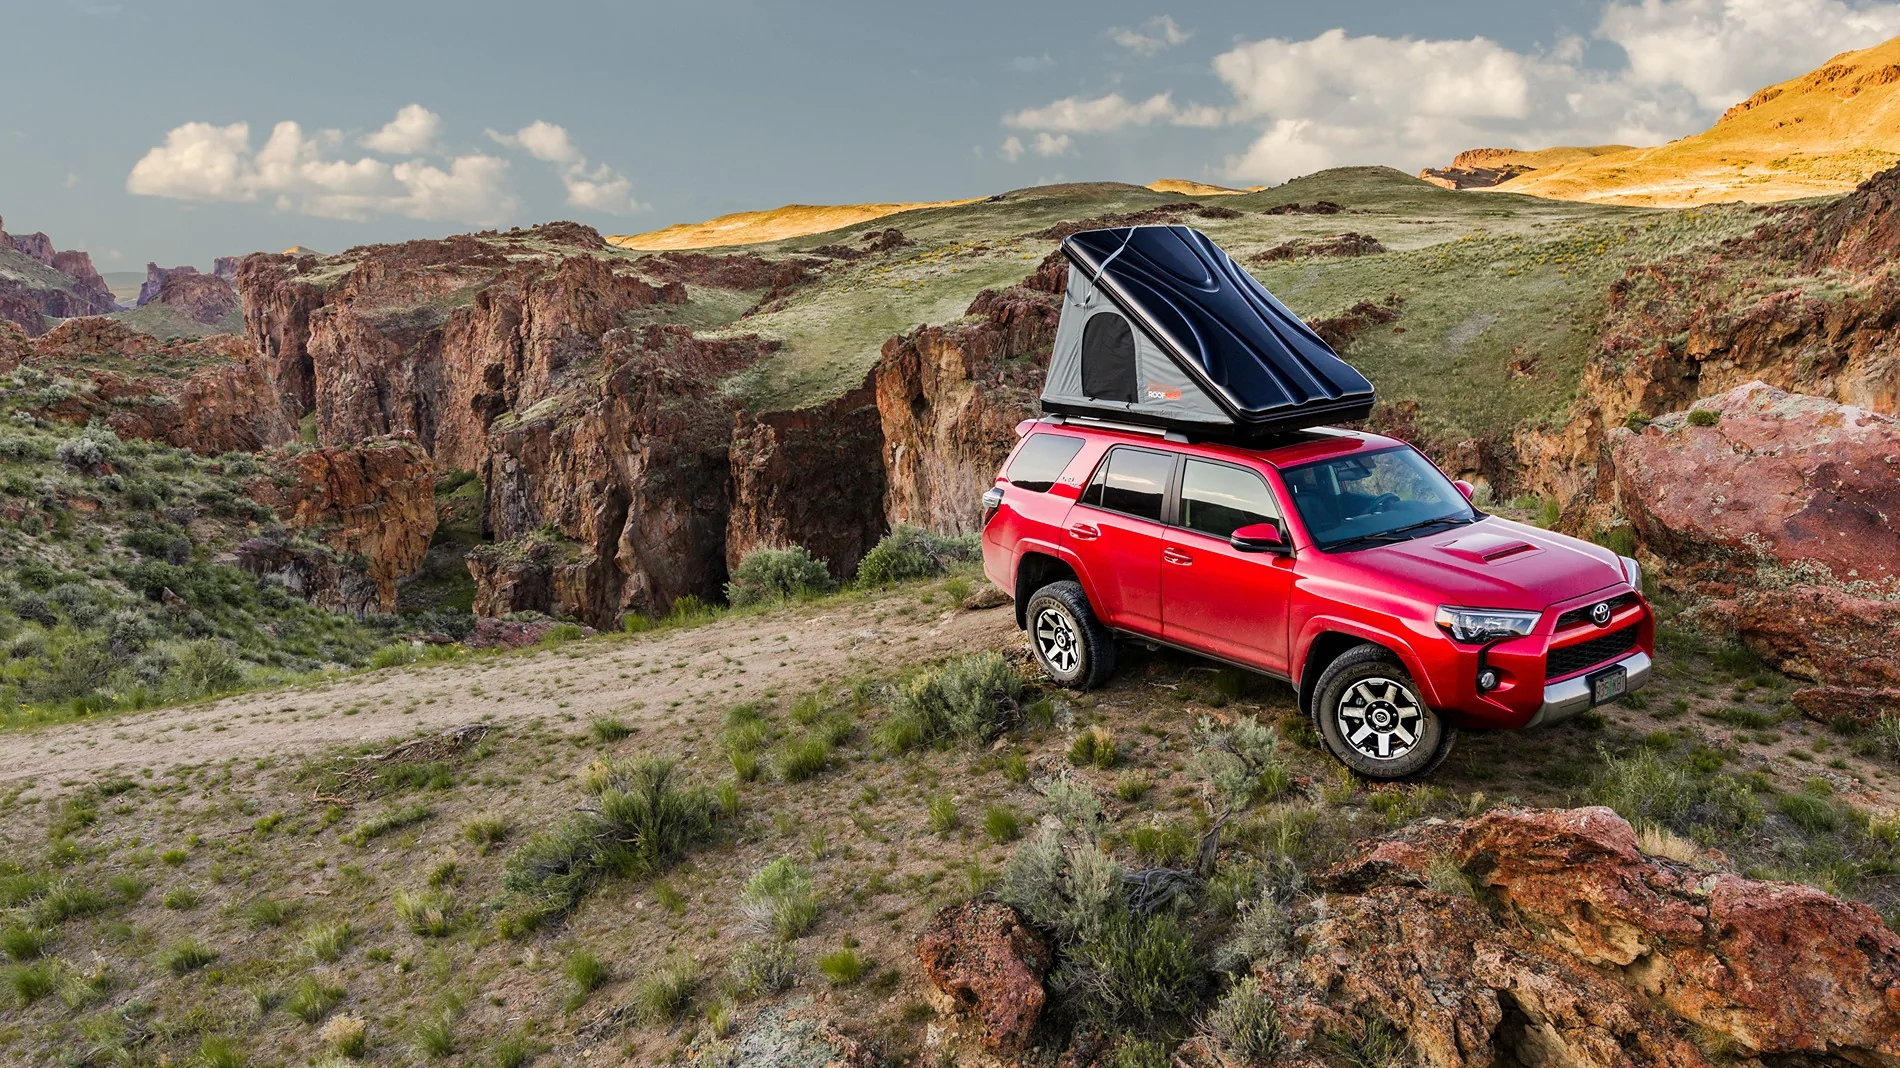
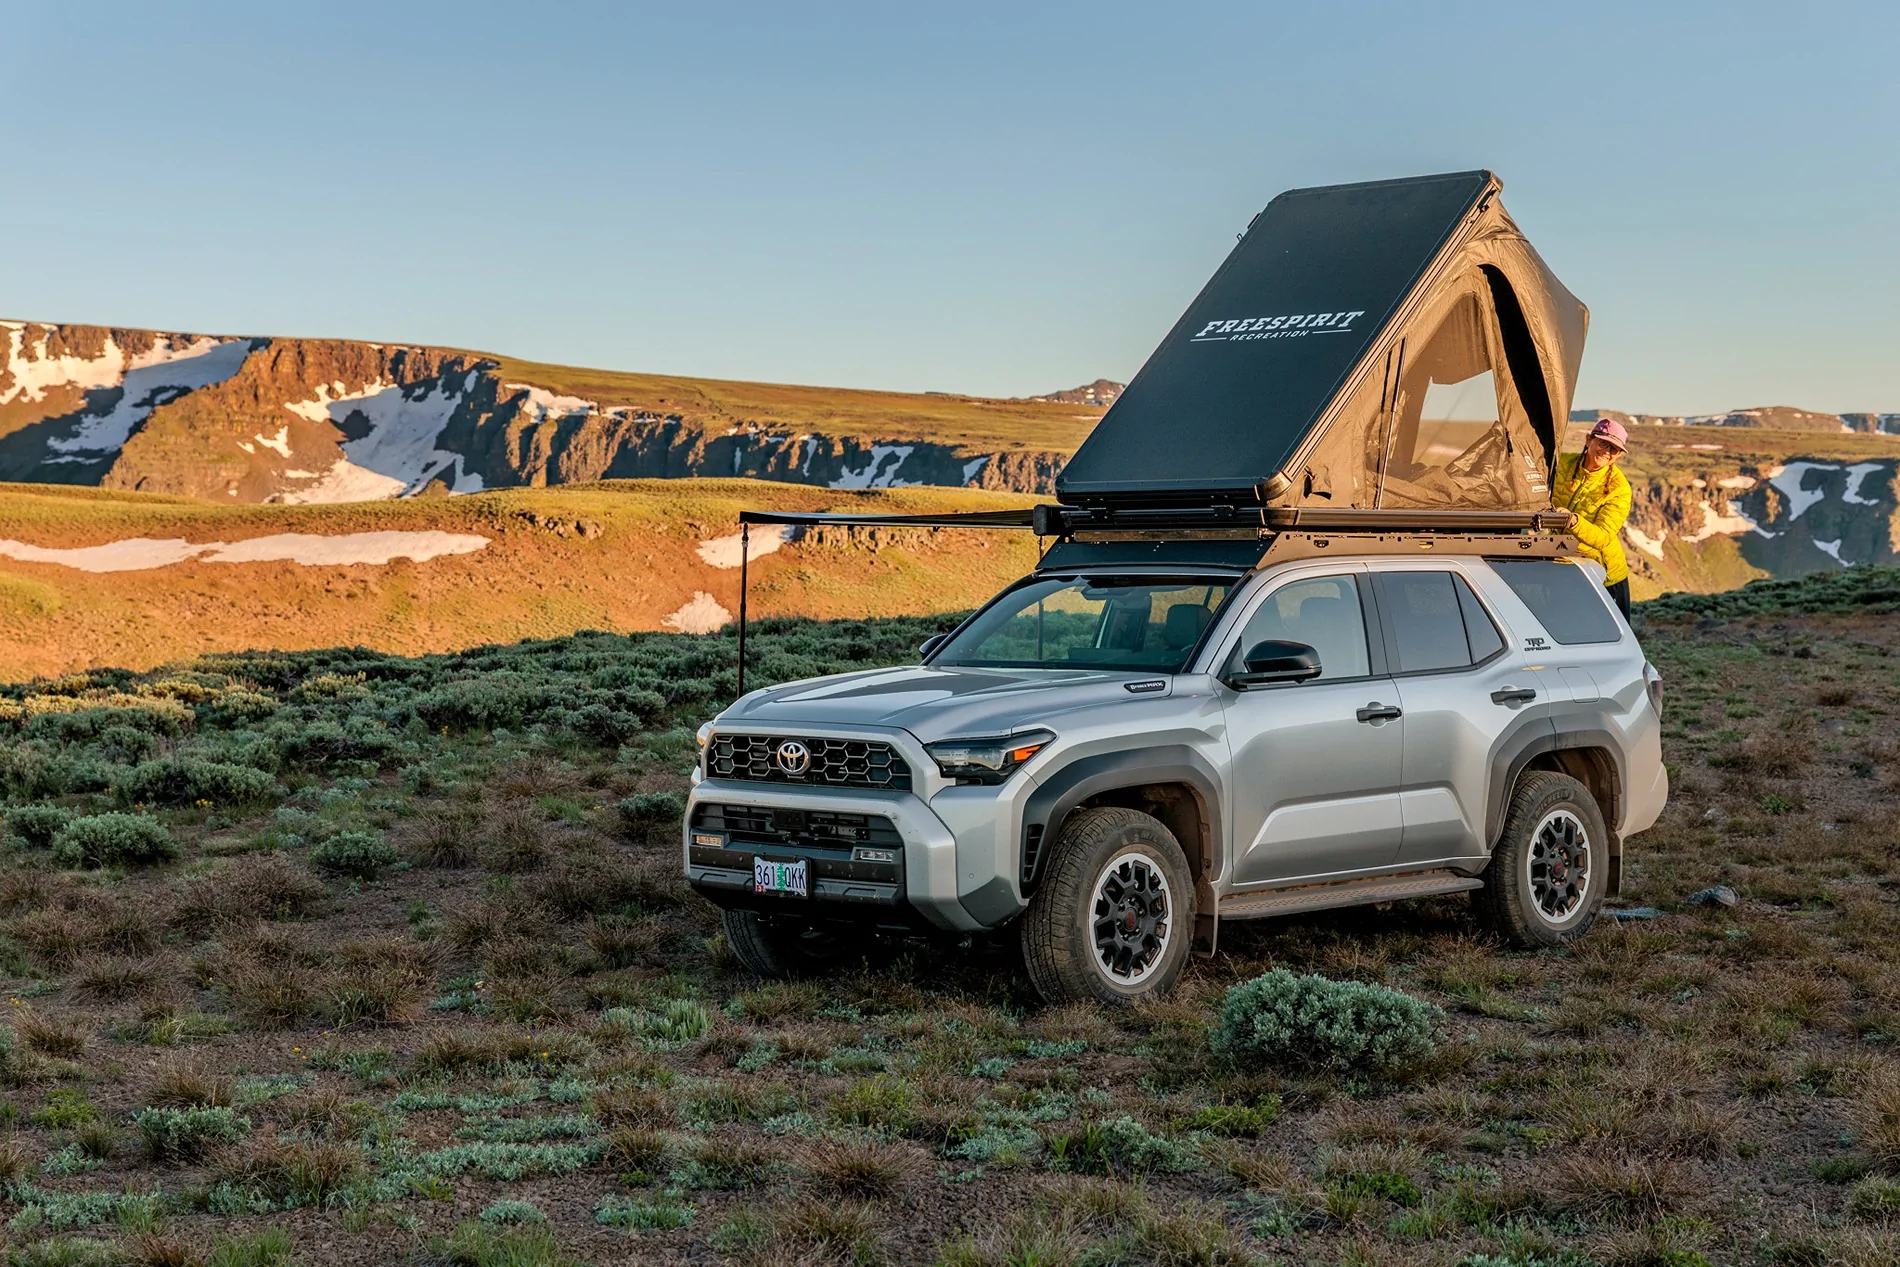
Free Spirit Recreation FSR Aspen V2 Rooftop Tent
I like this rooftop tent design a lot. Rather than just being a simple clamshell opening, there is a bar which folds out and extends the tent out over the entrance, which creates more headroom and makes it feel more spacious. The sidewalls are insulated, and it has a 3" inflatable memory foam mattress. It's quite comfortable for two people, and it's very easy to get in and out via the Westcott Designs Rear Hatch Ladder.
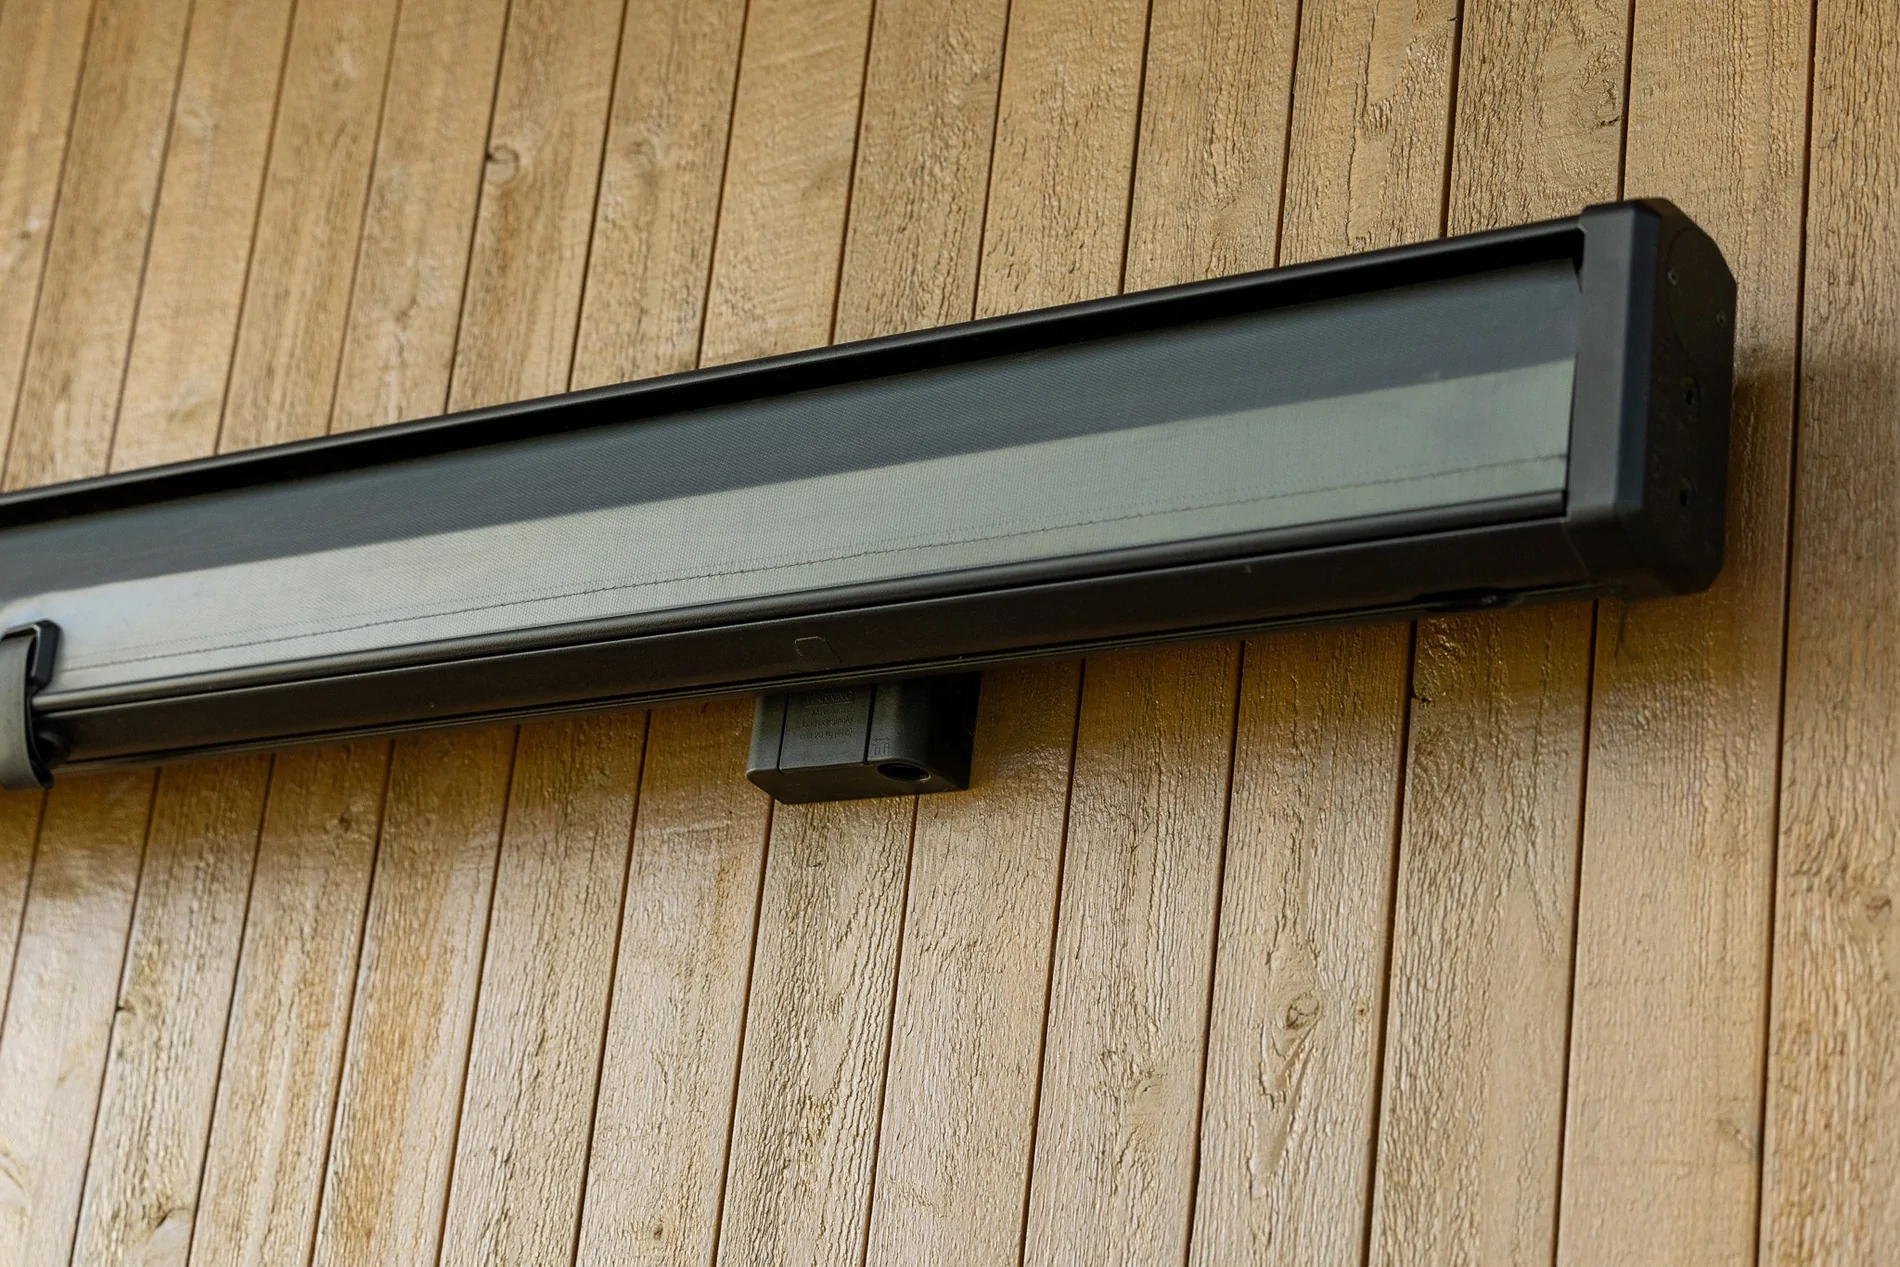
Kammok Crosswing Quick-deploy 7' Vehicle Awning (charcoal gray)
I love this thing! it is so easy to deploy and stow. It literally takes like 10 seconds. I have it mounted to the Sherpa Rack using a Rack Brax mount (see below) and it is very easy to take off and stow when I'm not using it. The awning is free-standing and self-supported, but I do have the Kammok Crosswing Telescoping Pole Set which I'll use if it's windy or if I need raise it up a few inches for someone who's really tall.

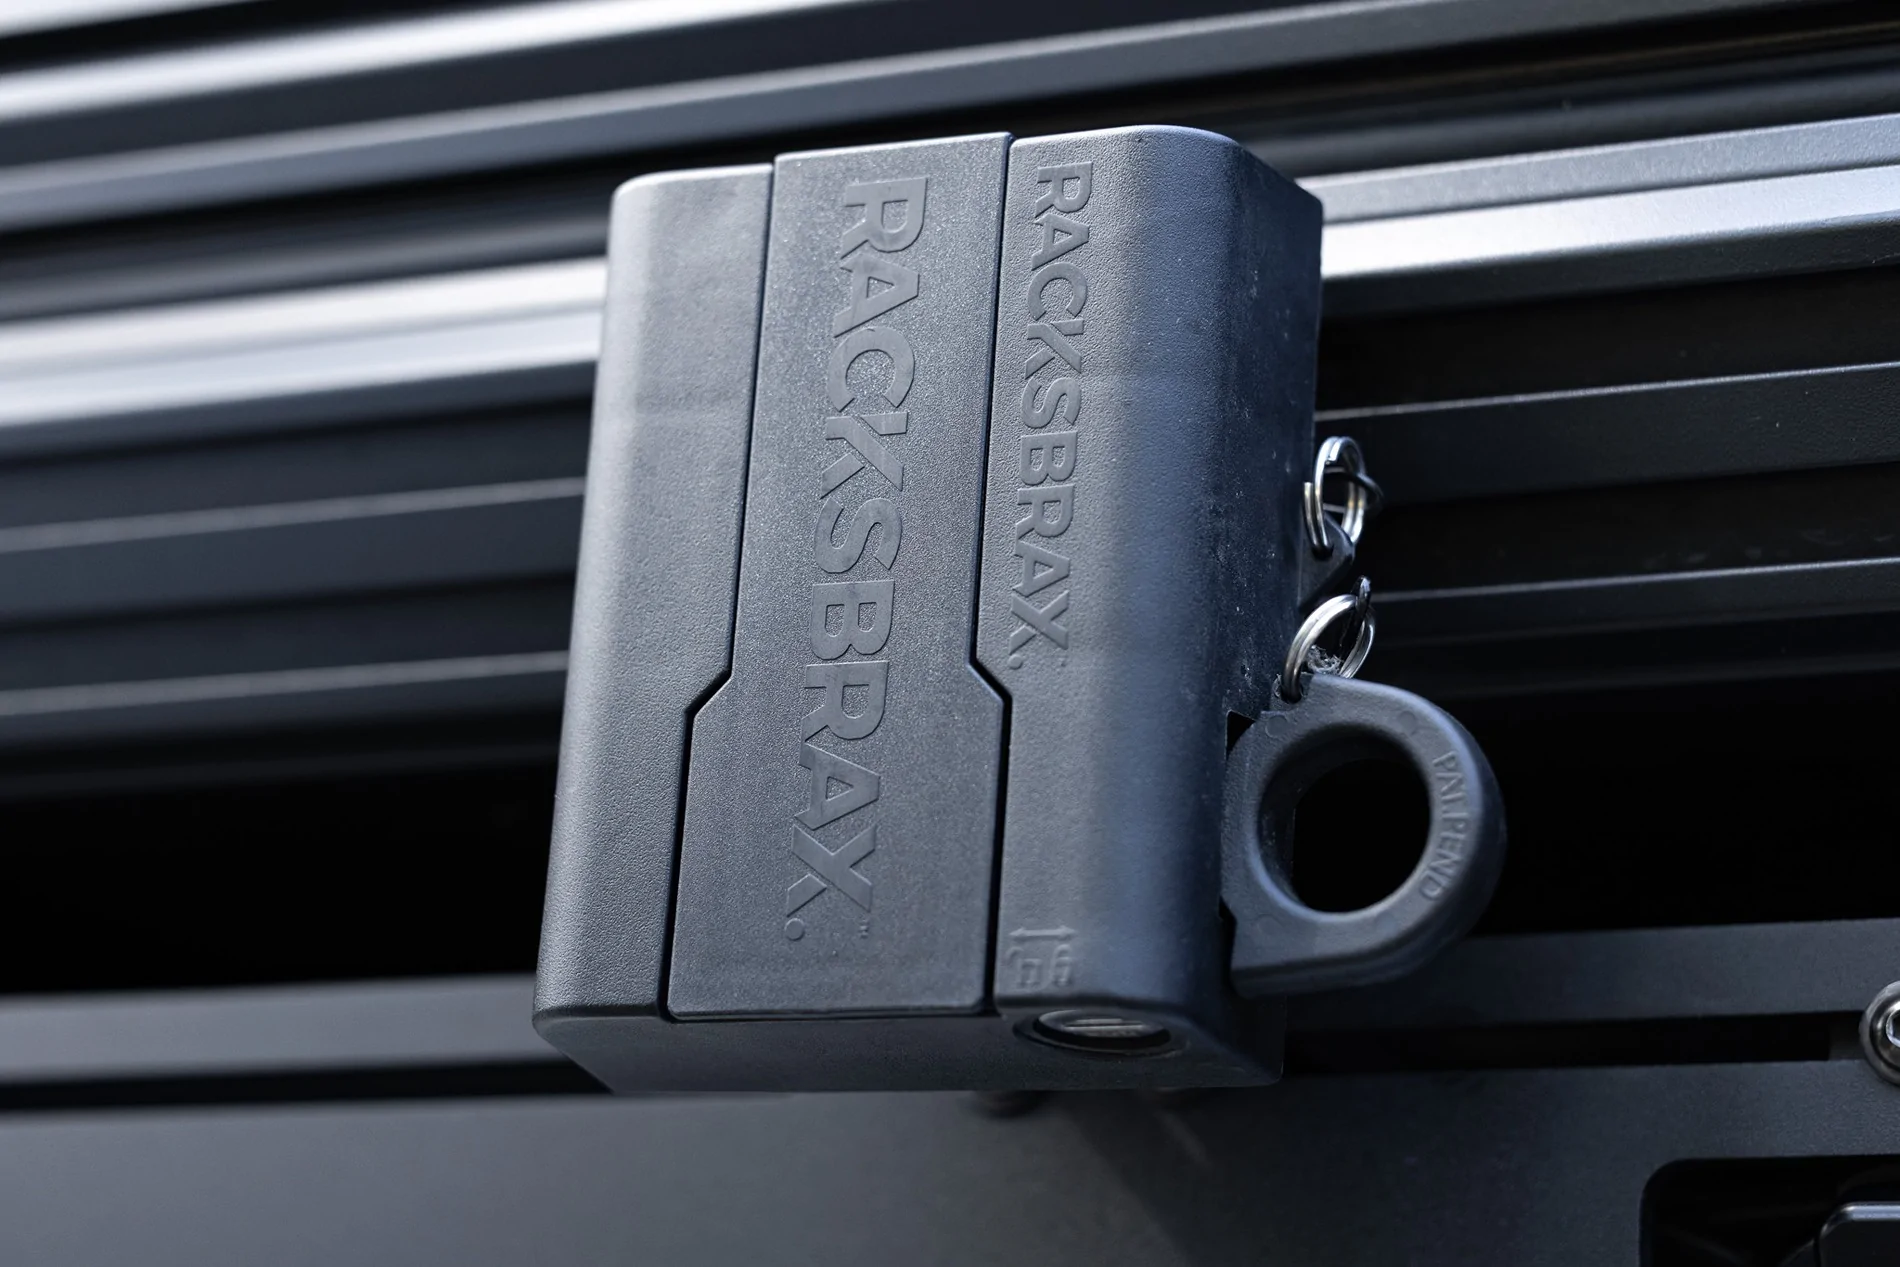
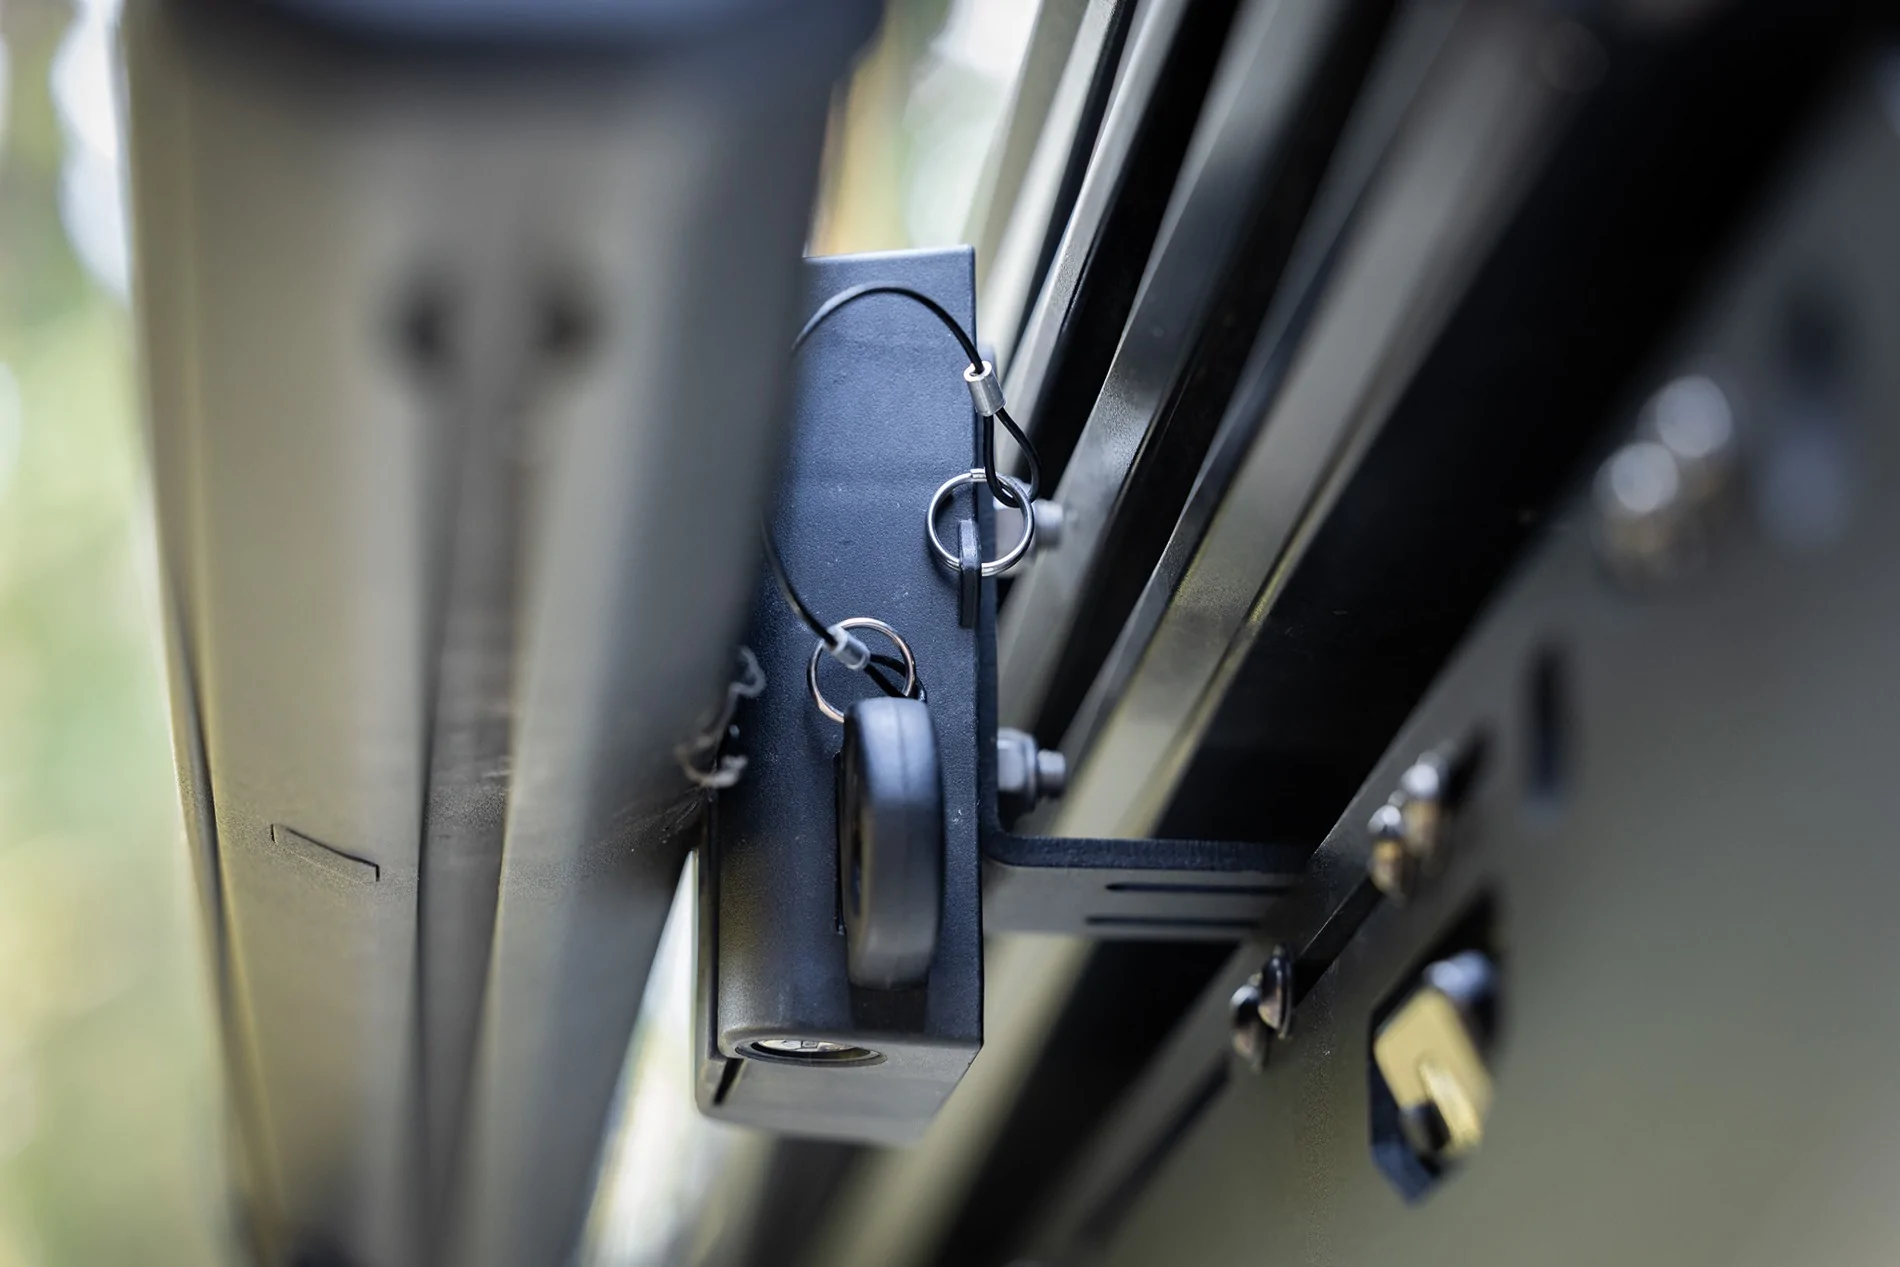
RacksBrax HD Awning Quick Release (Tradesman Double+)
Finding a good bracket and mounting system for your awning can be a challenge. I went through three different options before setting on the Racks Brax. I like it because it has a simple, drop-in mounting system that makes easy to mount and remove the awning, as needed. It also has good security features with a locking pin and keyed lock. I recommend getting the Tradesman Double set, which has a second set of mounting blocks. You can put them up on the wall to store your awning when it's not on your rig. I highly recommend this one.
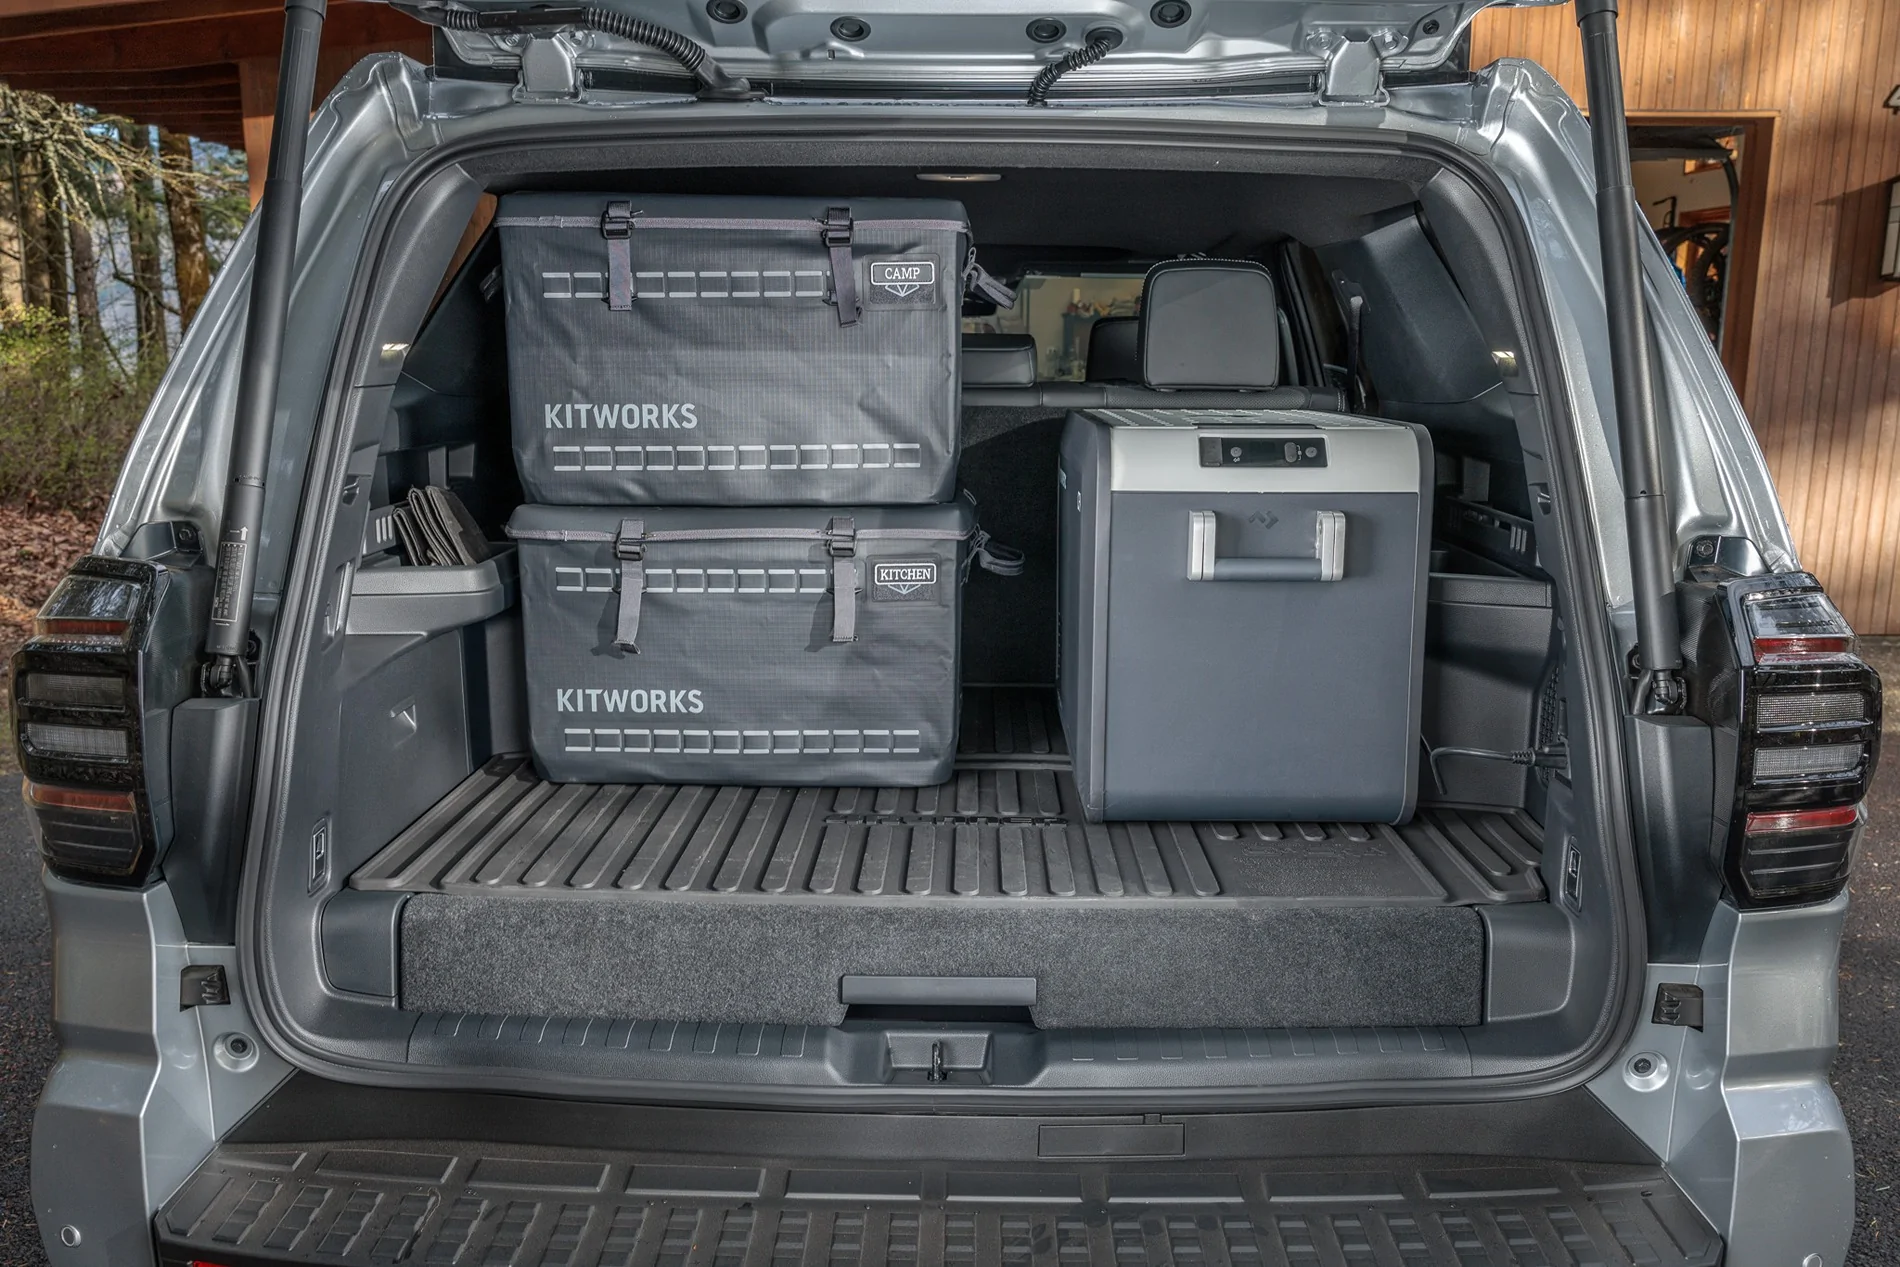
Dometic CFX3 45 Electric Cooler
I initially thought I’d power the Dometic refrigerator using the 2400W AC outlet in the trunk, but it’s only power on when the engine is running and you’ve depressed the AC 120 V switch on the dash. You can see my initial install and thinking here. The Dometic is very energy efficient and keeps thing cold for days. The internal layout and organizers work really well, too.
 - 2025 4Runner TRD ORP Hybrid Build _W0A3485-Edit")
Once I realized the limitations for powering the fridge while in camp, I eventually switched over to powering the Dometic from the EcoFlow Delta Plus 3 Power Station by running a 12V power cable from the cargo area, under the rear seats, to the EcoFlow sitting in the footwell behind the passenger seat. This allows me to power the fridge for 2-3 days straight without starting the engine. Awesome!! More details can be found here.
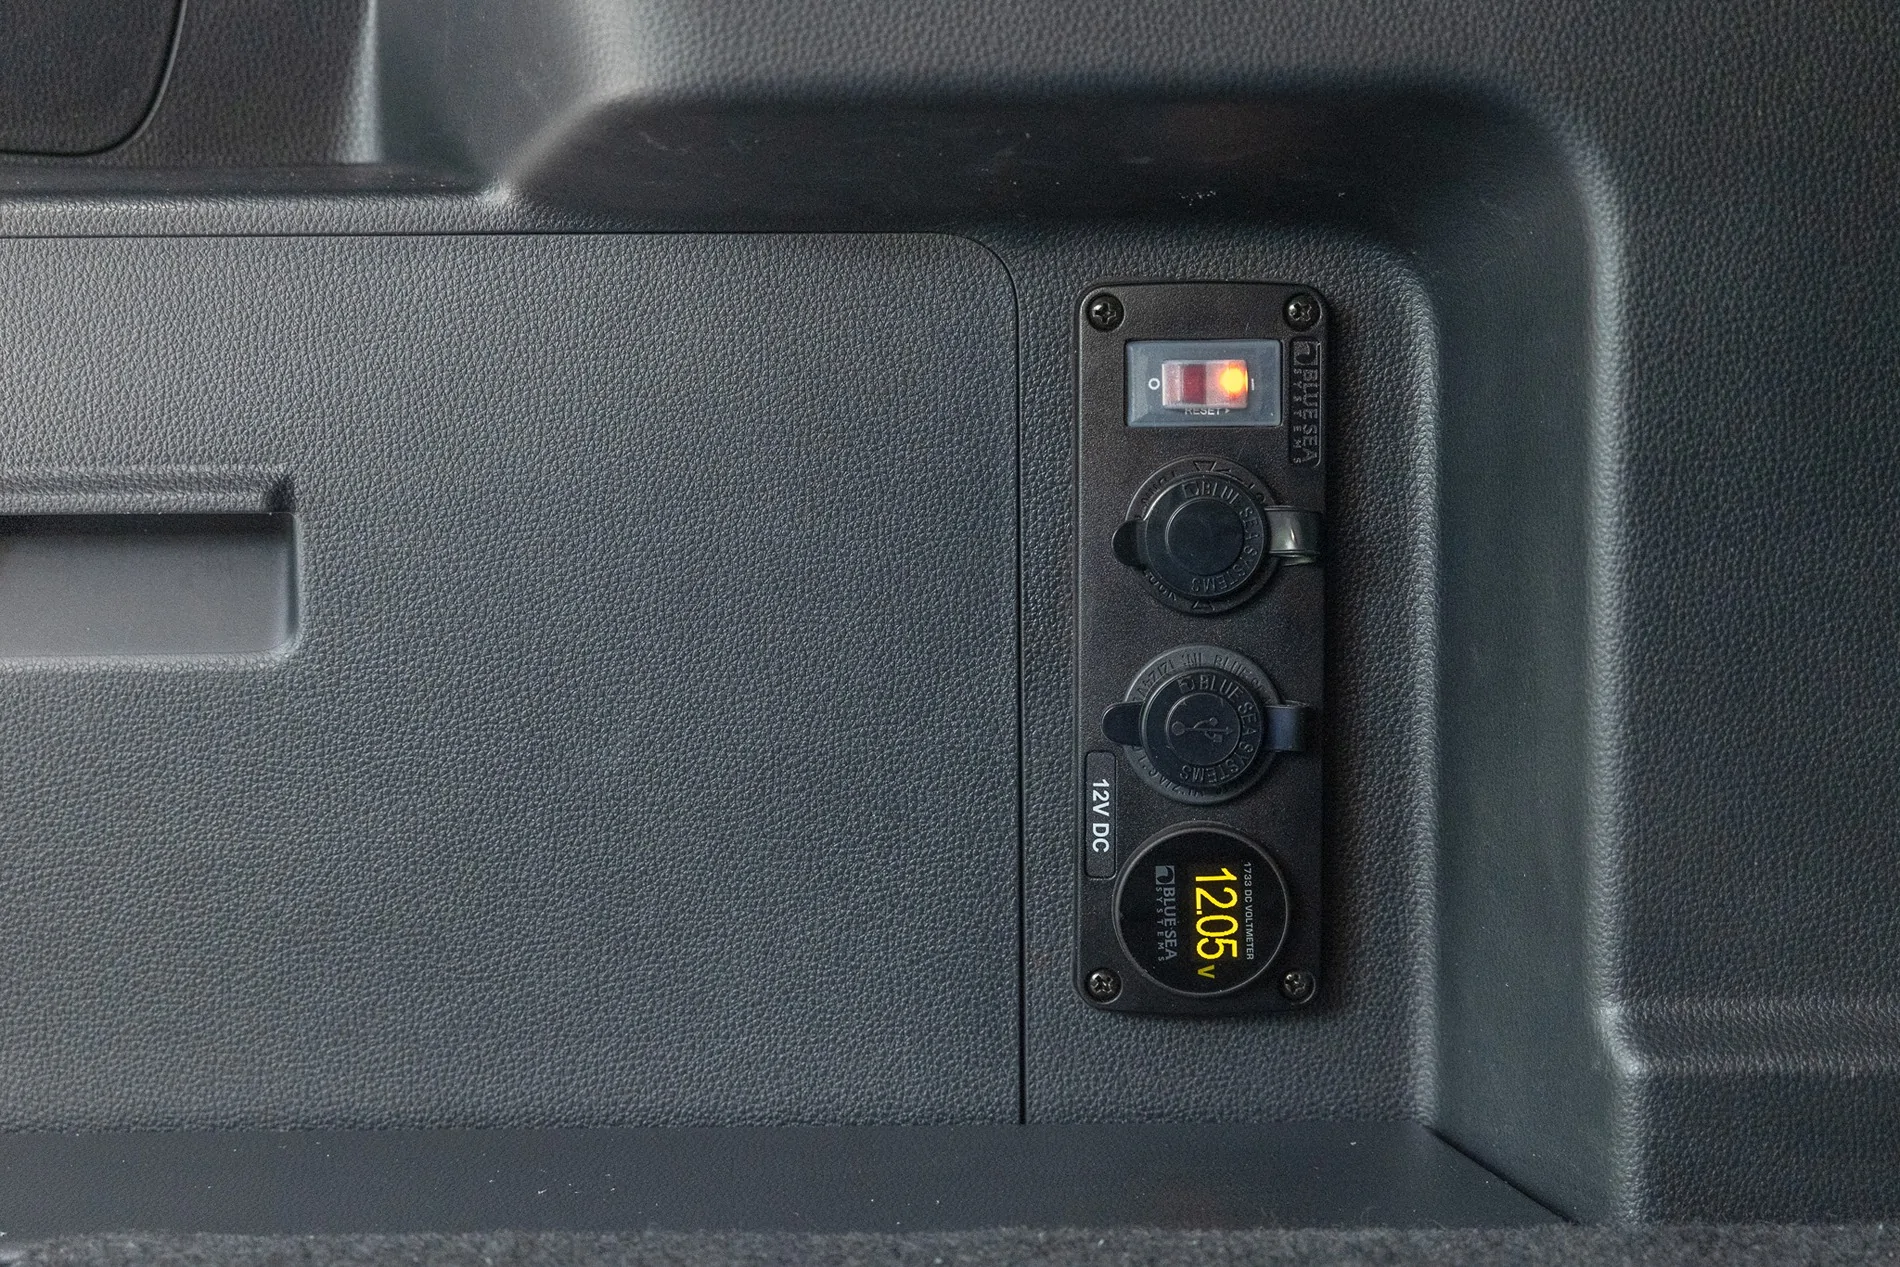
Blue Sea Systems Hardwiring Kit 12V DC
Because I often have the rear hatch open around camp and like to be able to power a laptop, charge phones, and conveniently run other 12V devices, I decided to install the Blue Sea Systems 3-socket 12V Power Panel directly adjacent to the battery compartment. I love this because, (1) the panel is recessed in beneath the shelf too protect the connectors, and allow room for the cable connectors, (2) it includes a digital voltmeter to monitor the battery status, and (3) it has a built-in switch to disconnect and disable the ports entirely to avoid the potential for any phantom draw.
Dometic Hydration 11L Water Jug
Nothing too complicated here, but it is super convenient. The Dometic 11L water jug is easy to fill, fits well in the cargo area when I’m packing for a trip, and works with the Dometic Recon Water Faucet which allows you to get water without having to tip the jug or pour it. The Water Faucet has a rechargeable Lithium-Ion battery and activates with the touch of a button, and has a small LED task light to illuminate the area when you’re getting water after dark. You can see it on the picnic table on the far-right corner.
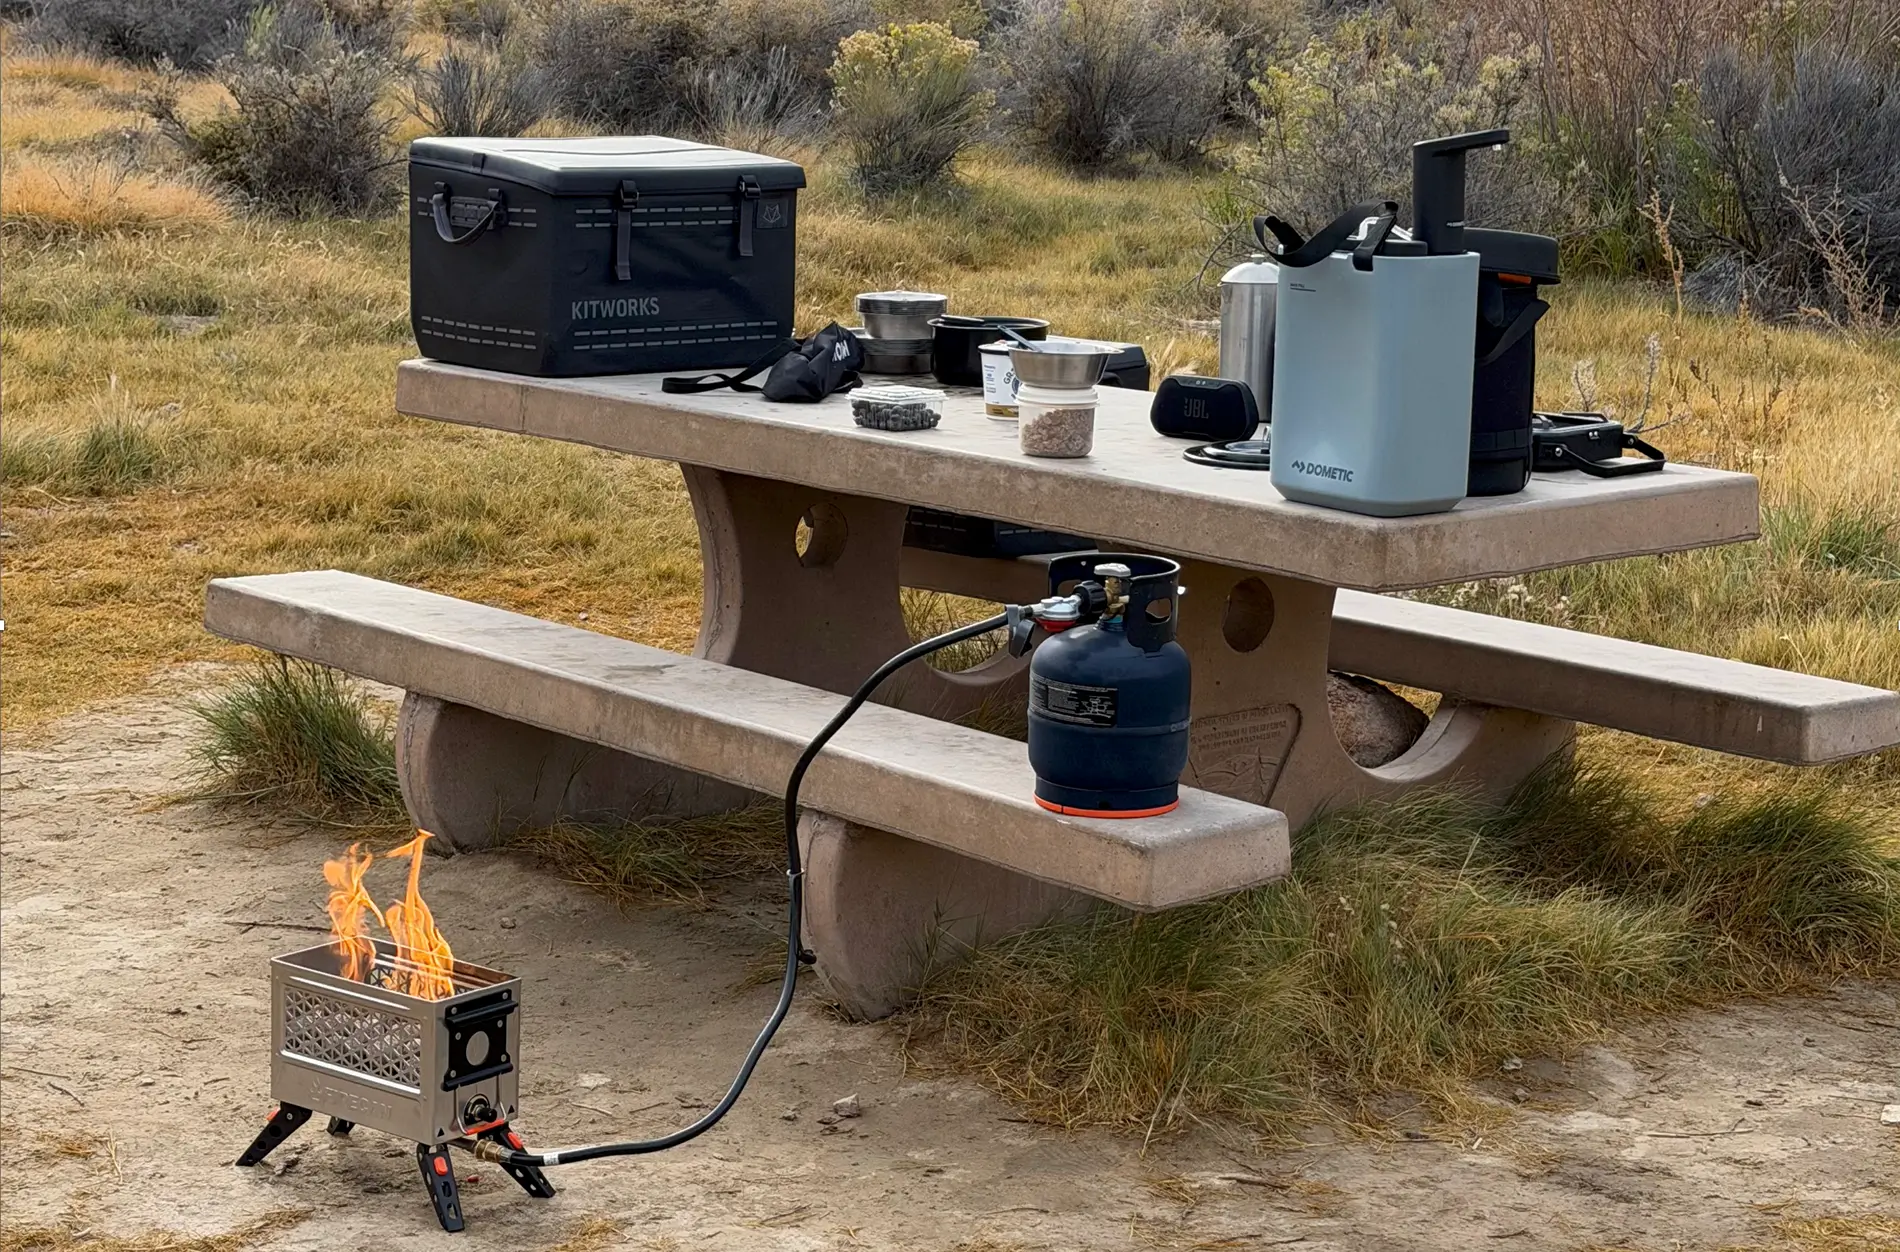
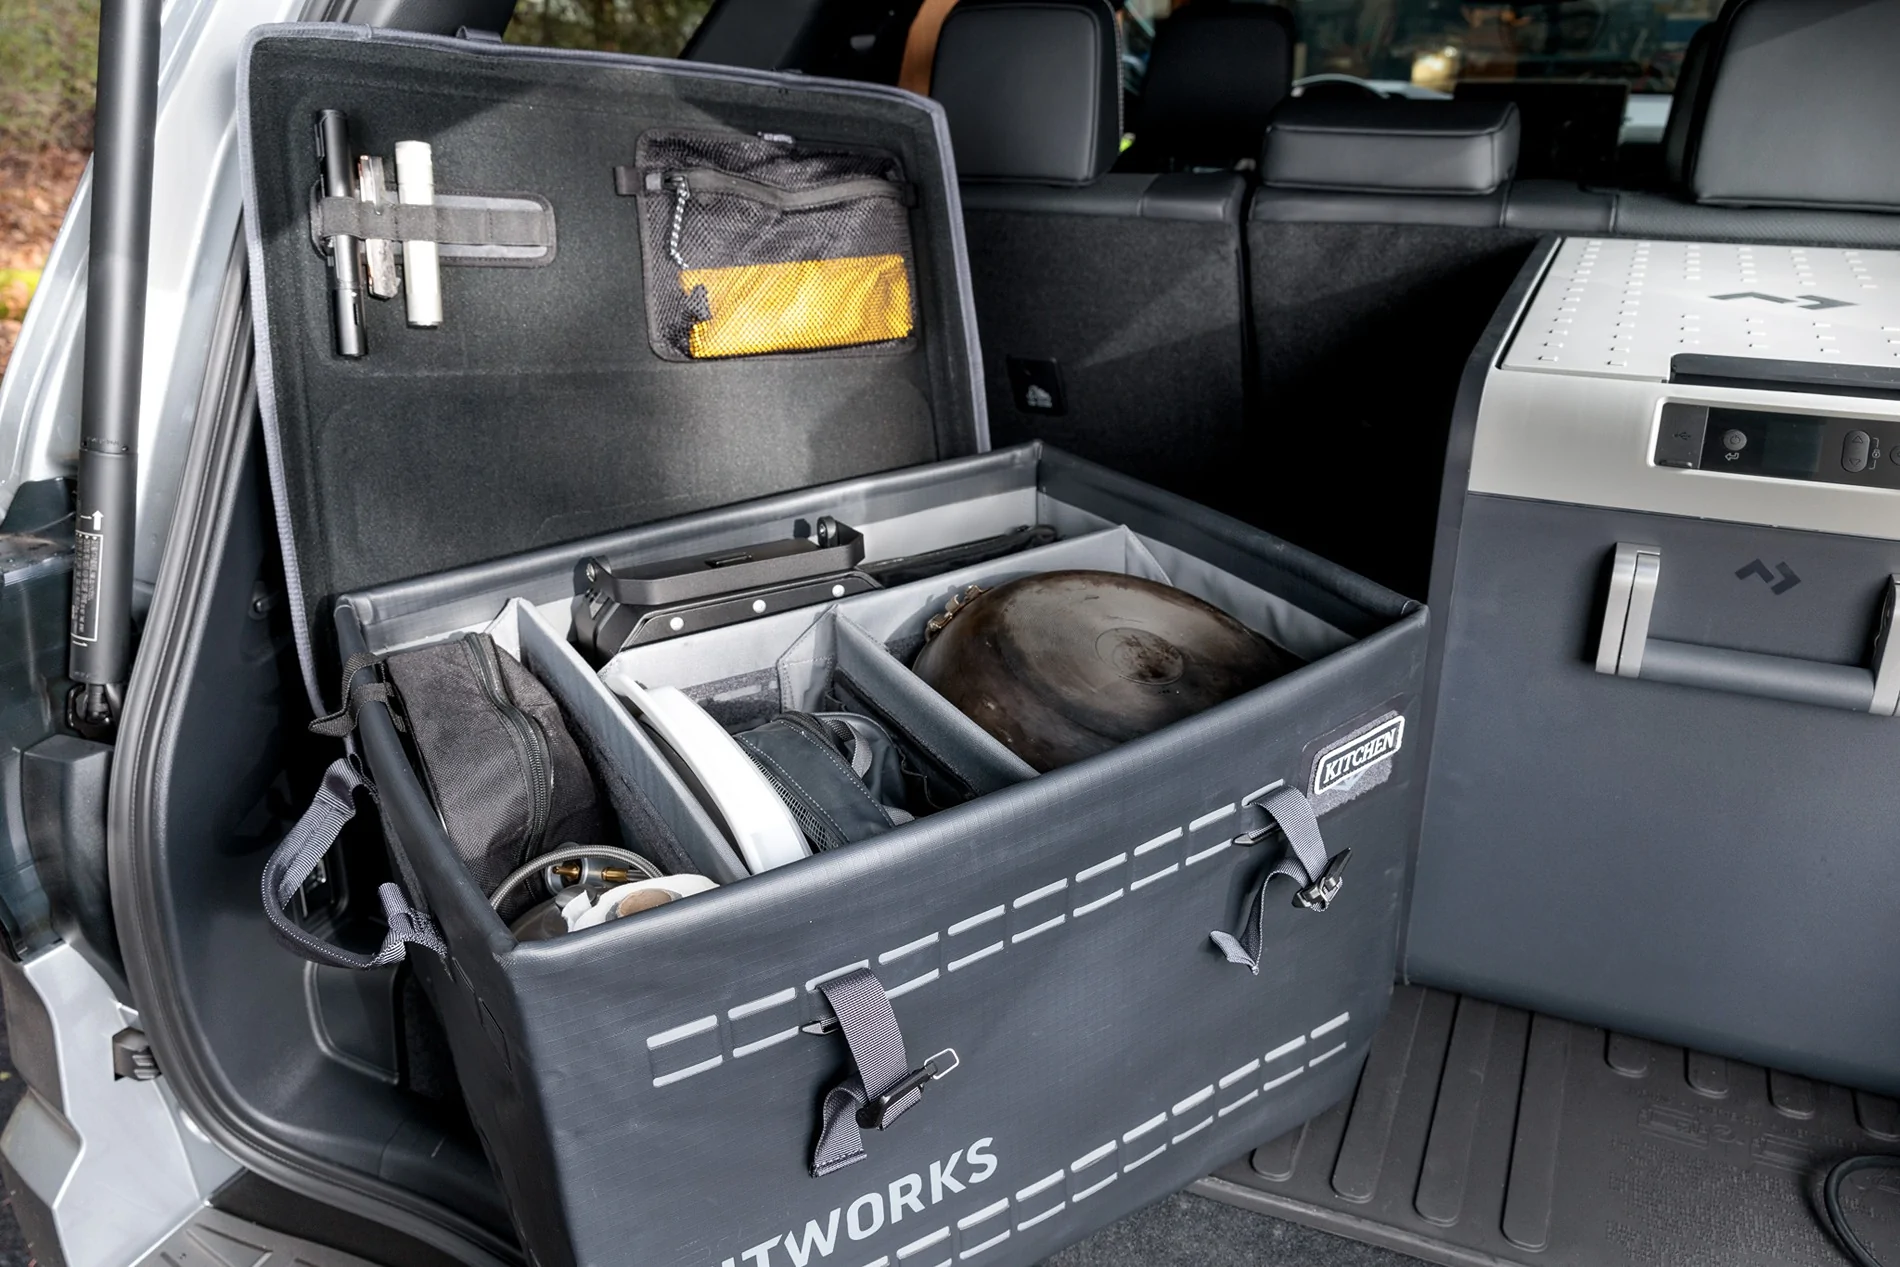
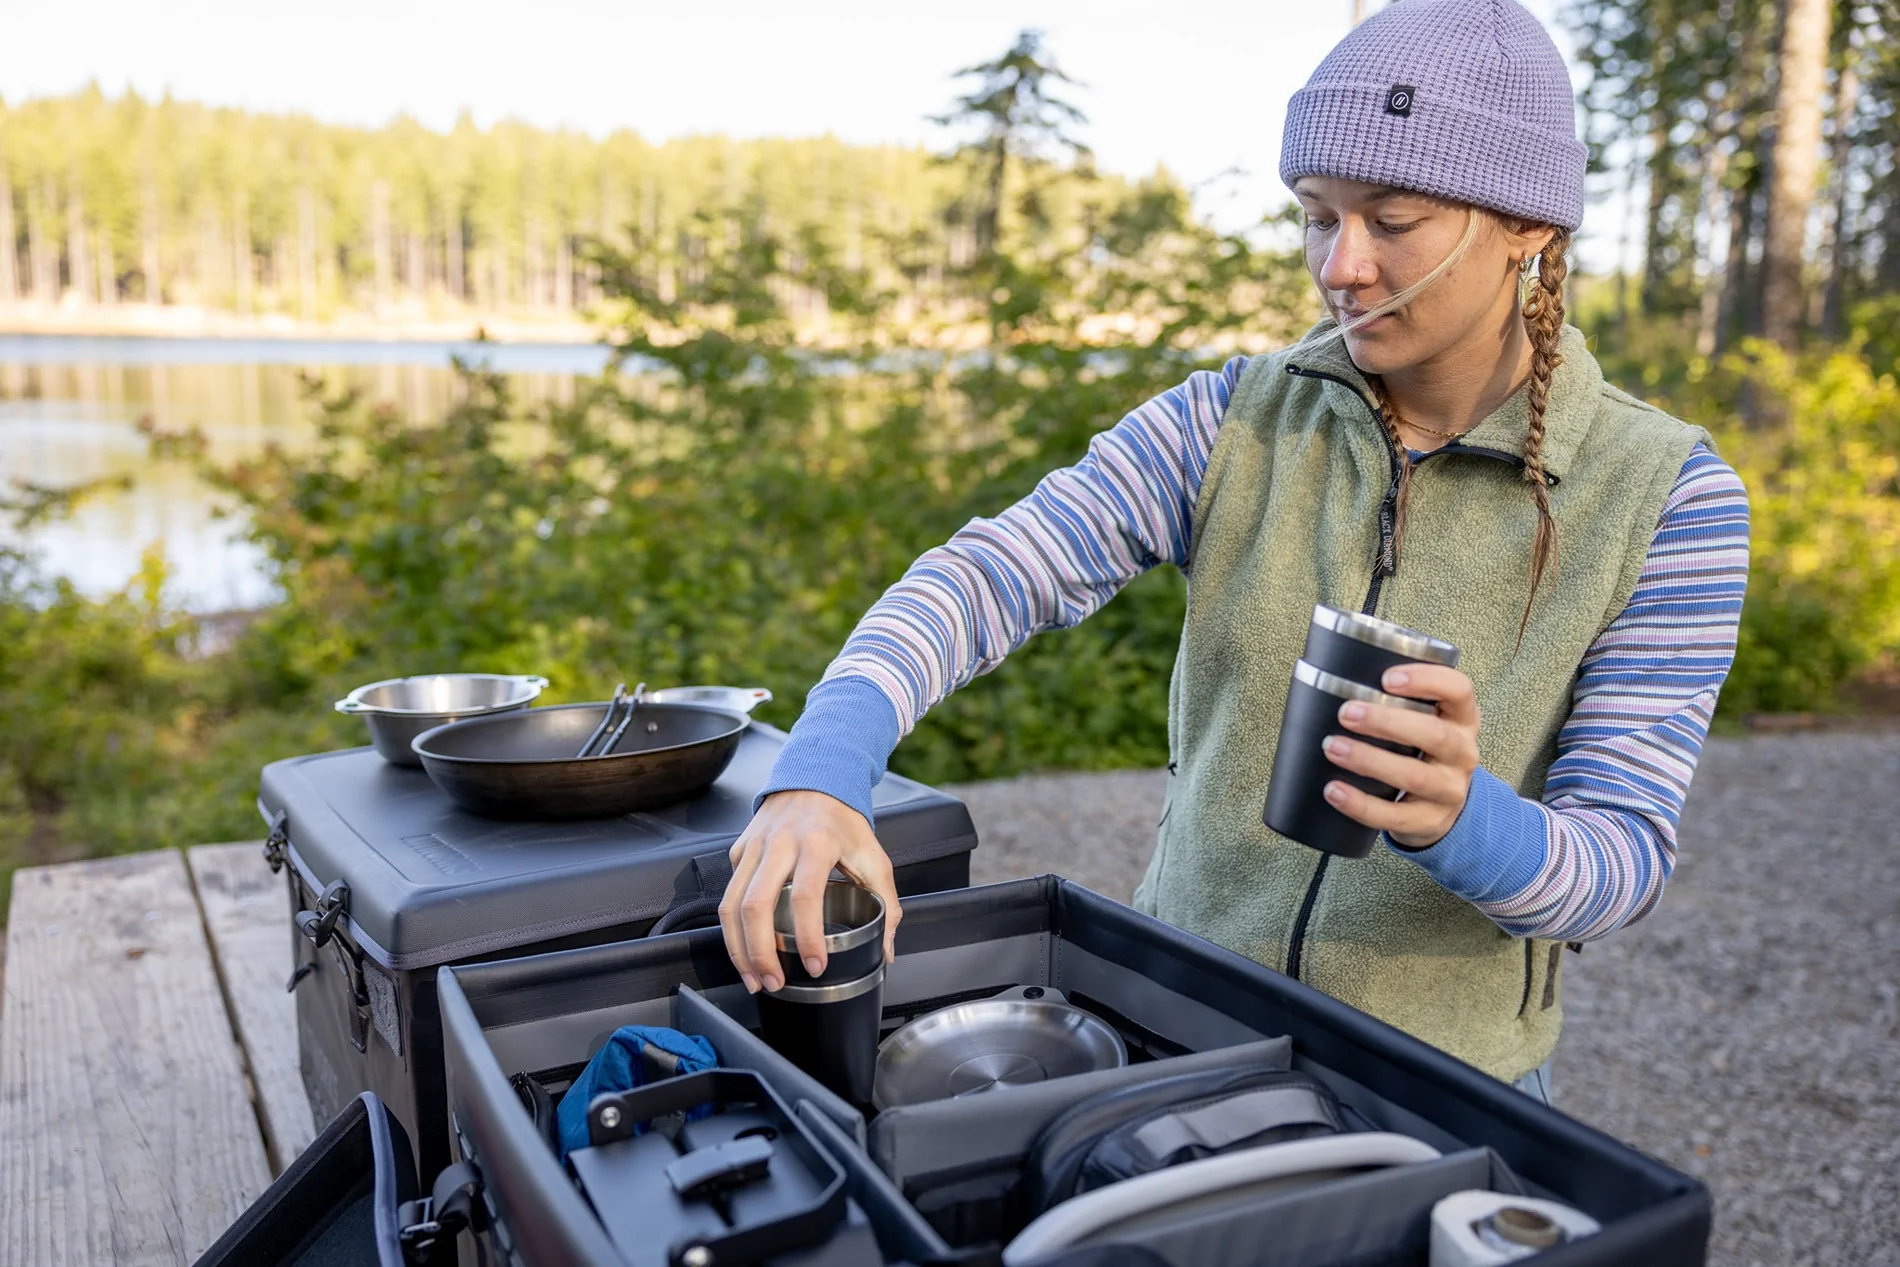
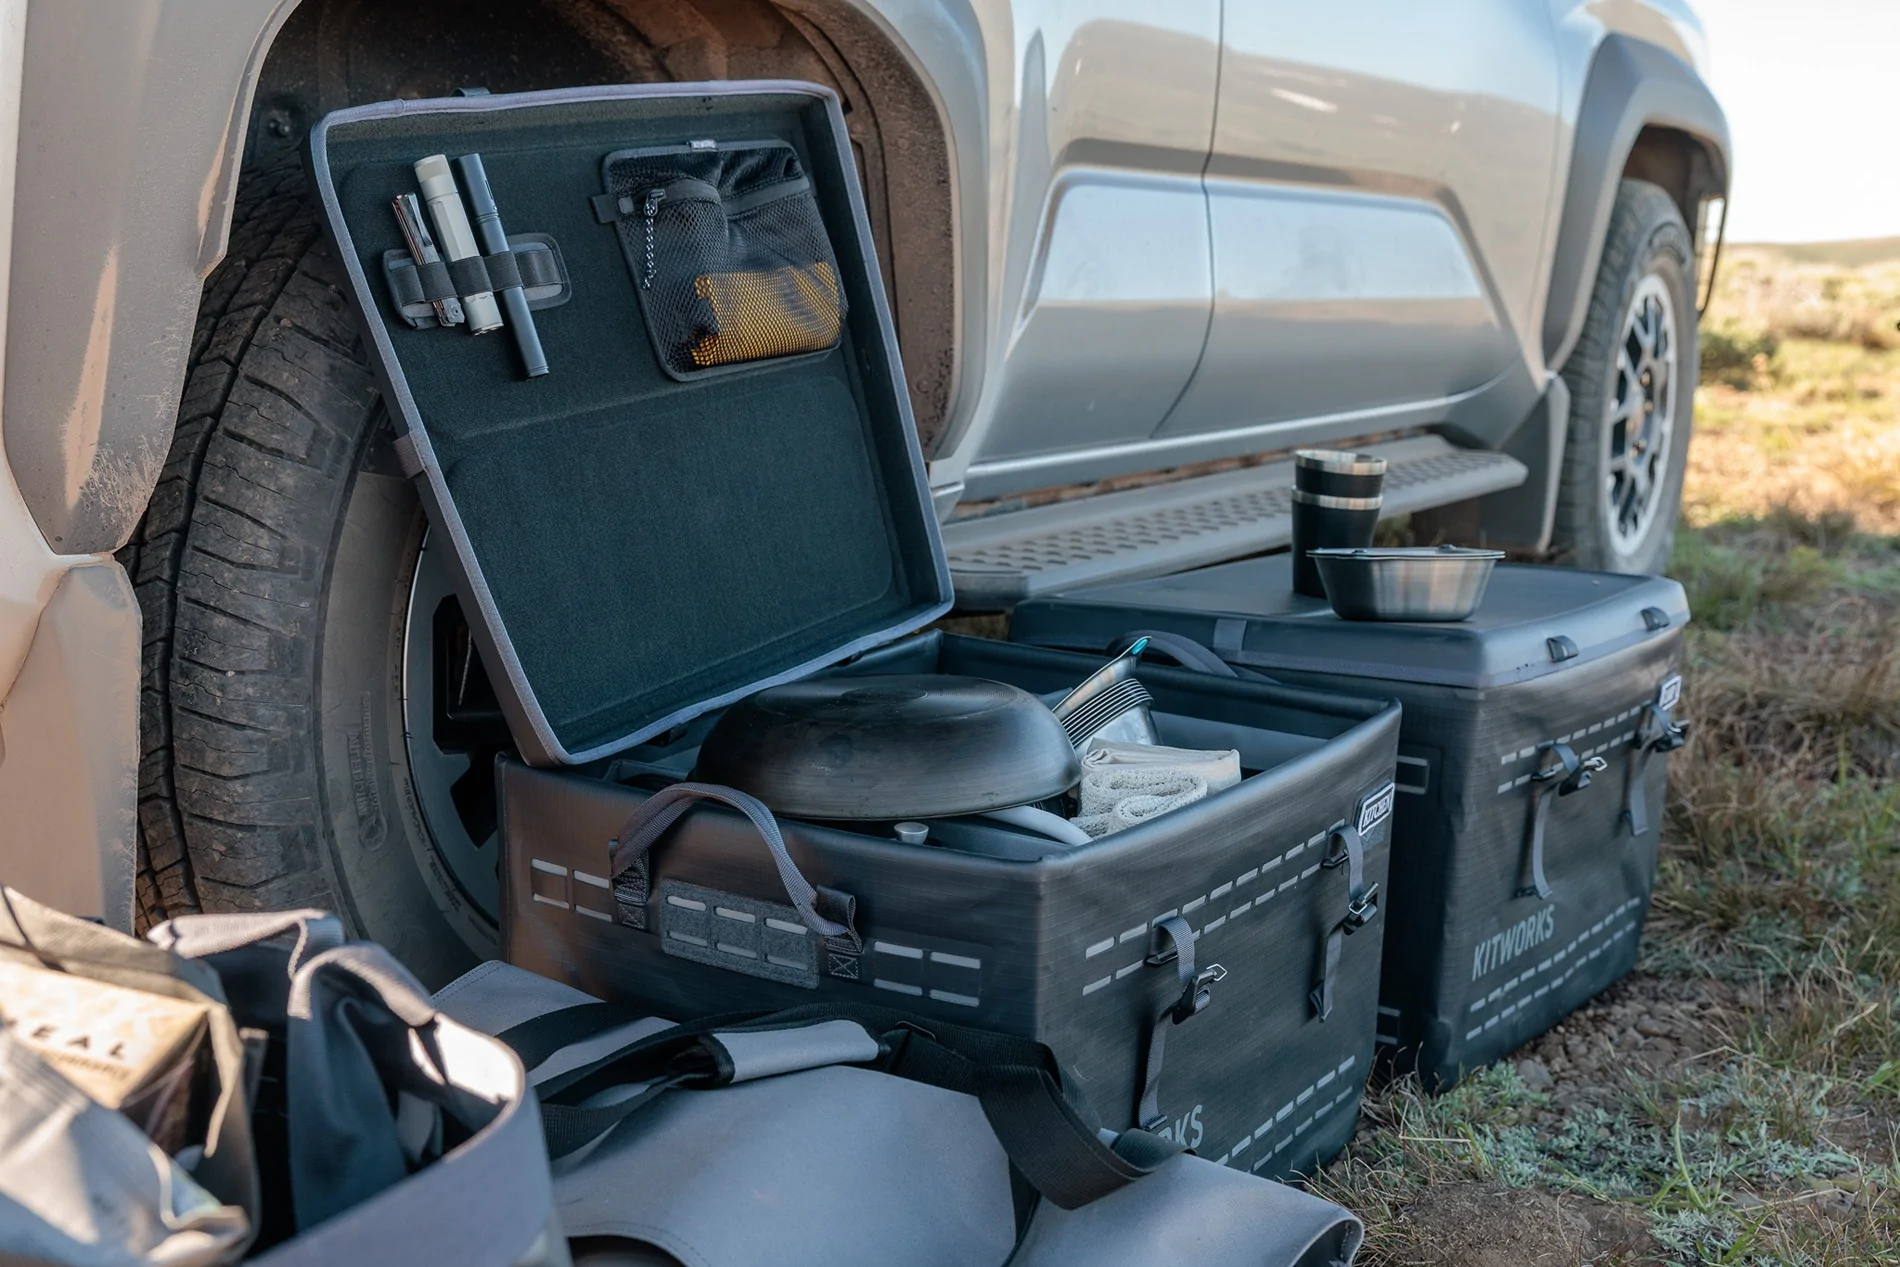
Kitworks Camp Kitchen Organizer
I love these Kitworks Gear Box organizers! They are sturdy, infinitely configurable, fit perfectly in the cargo area when stacked two-high, and can be used as seats around the campfire. I did a more in-depth review of them here.
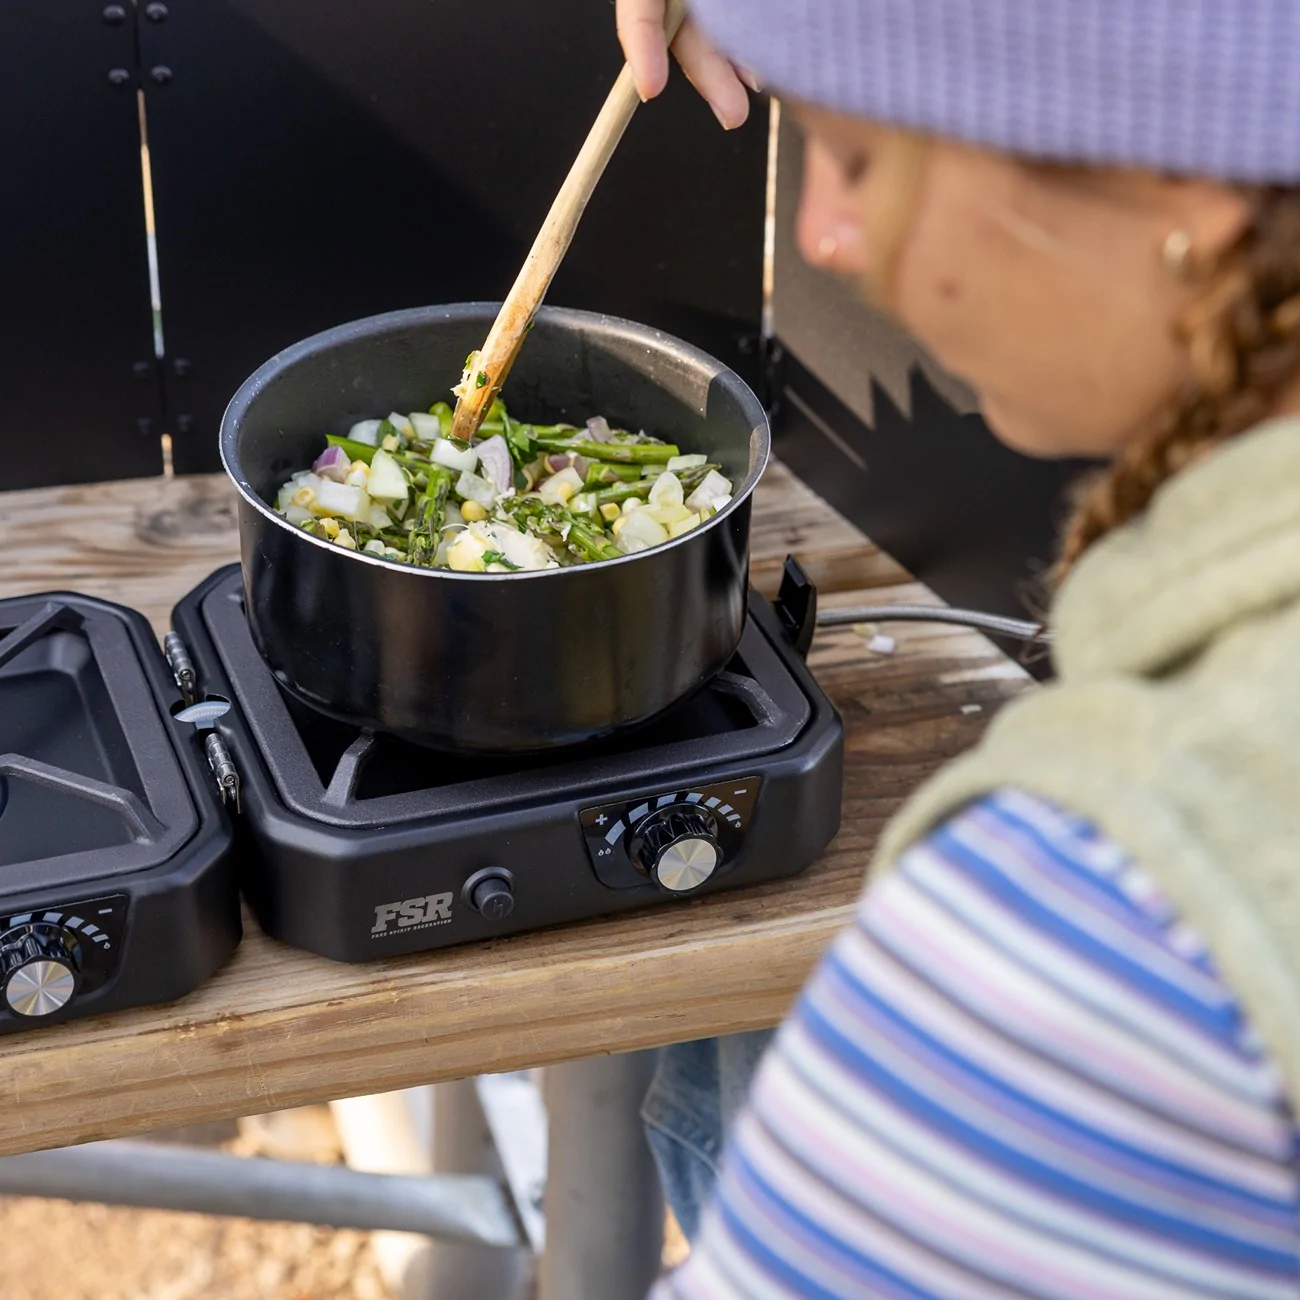
FSR Portable 2 Burner Camp Stove & Wind Screen
This little stove packs down small but has all the simmer control and advantages of a full-size Coleman two-burner.
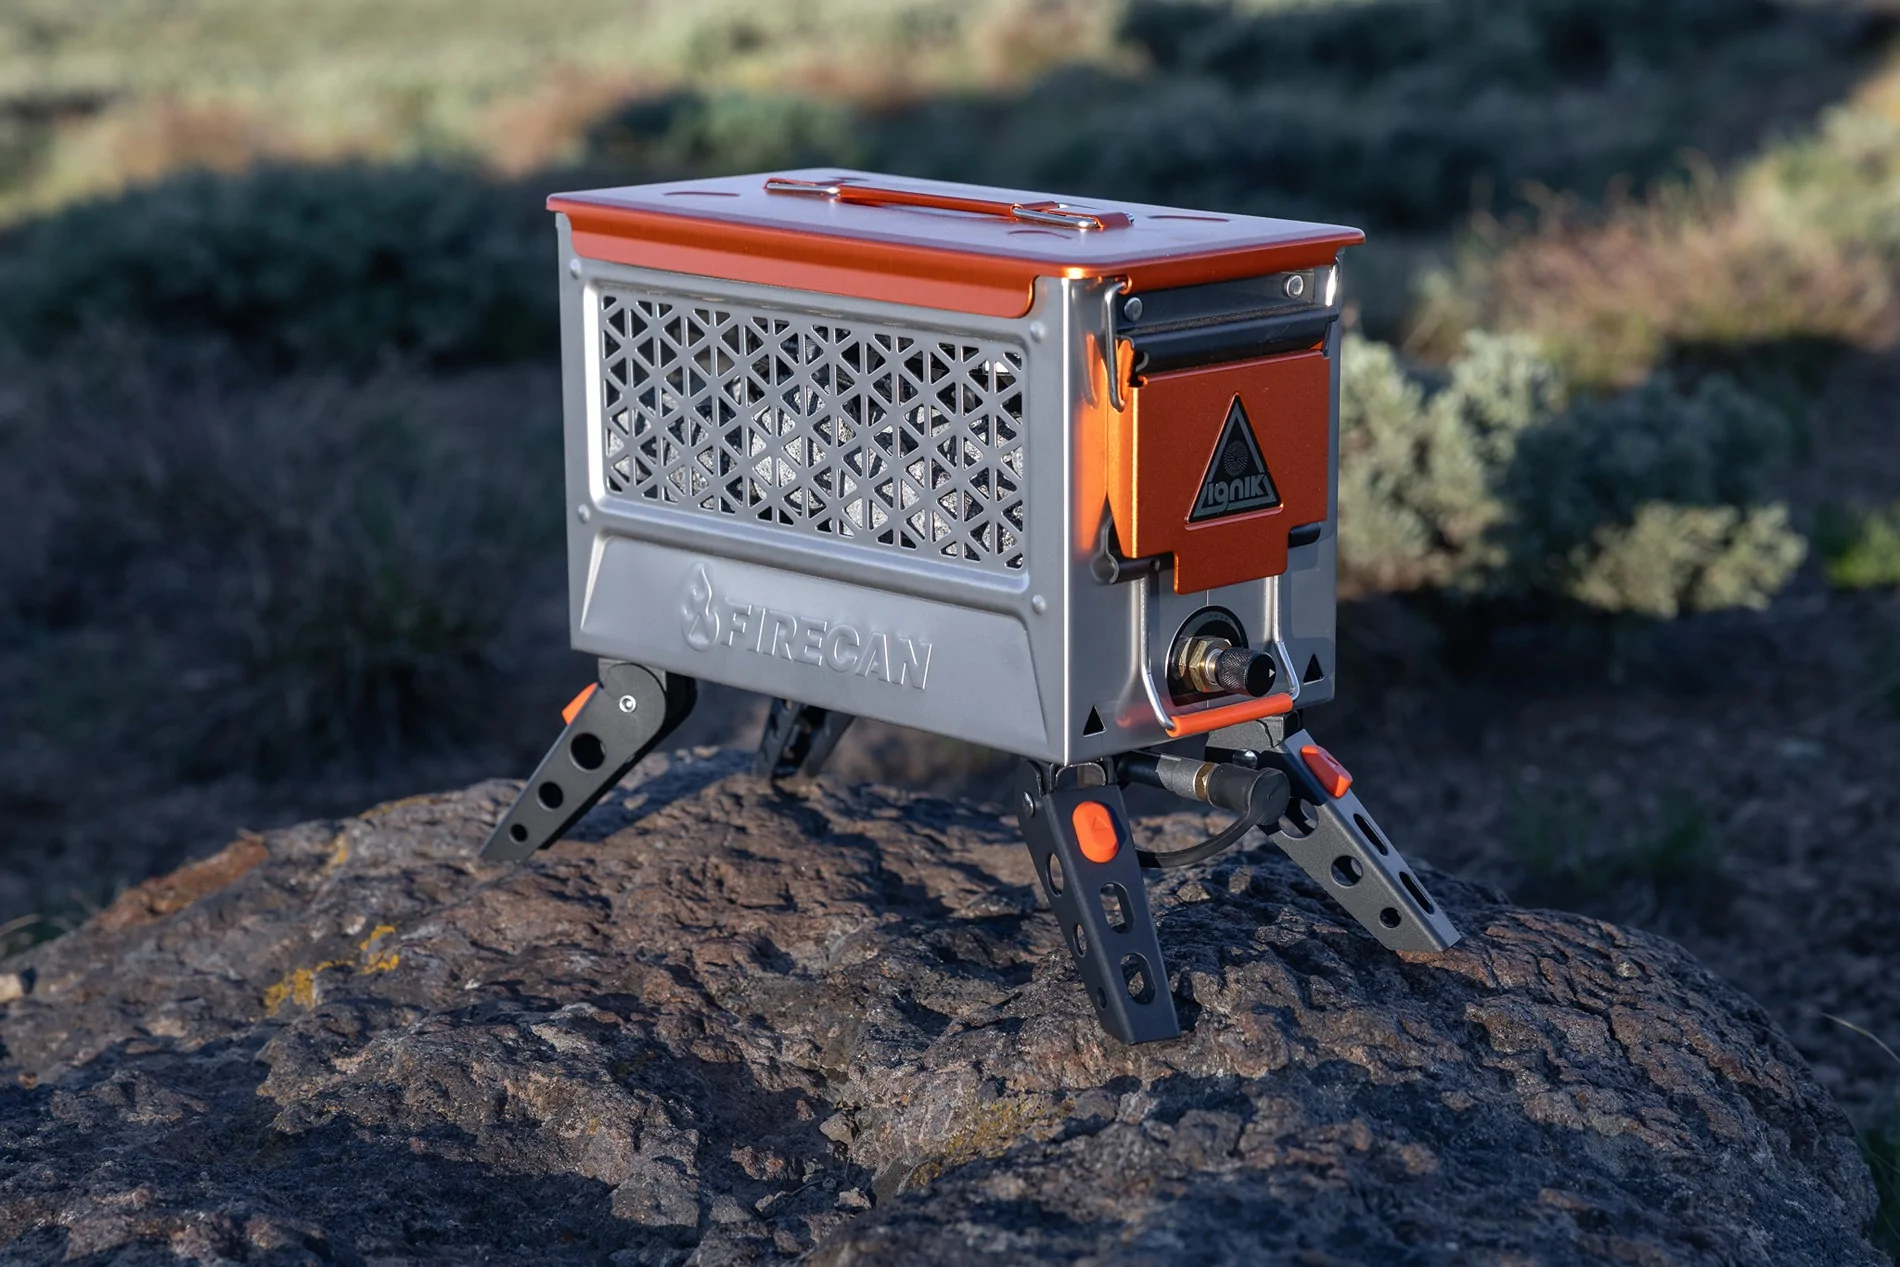
Ignik FireCan Elite Propane Firepit with Radiant Firepit Lava Stones and Ignik 5-Pound Gas Growler Deluxe Propane Tank
This is a great alternative to a standard campfire, and is permitted in situations where burn bans are in effect that would otherwise prohibit having one. The 5-Pound tank will keep it going for 10-12 hours of high output use. The flames are nice and the lava stones build up thermal energy and radiate heat to keep everyone nice and warm.
BIKE RACK SYSTEM
1Up Super Duty Bike Rack (in black with 2 trays & accessories)
I posted some photos of my 1Up Super Duty bike rack installed on my 4Runner here. You’ll also find my observations about how the rack affects the collision avoidance system when you have bikes on the rack, or when the rack is folder up in the thread here.
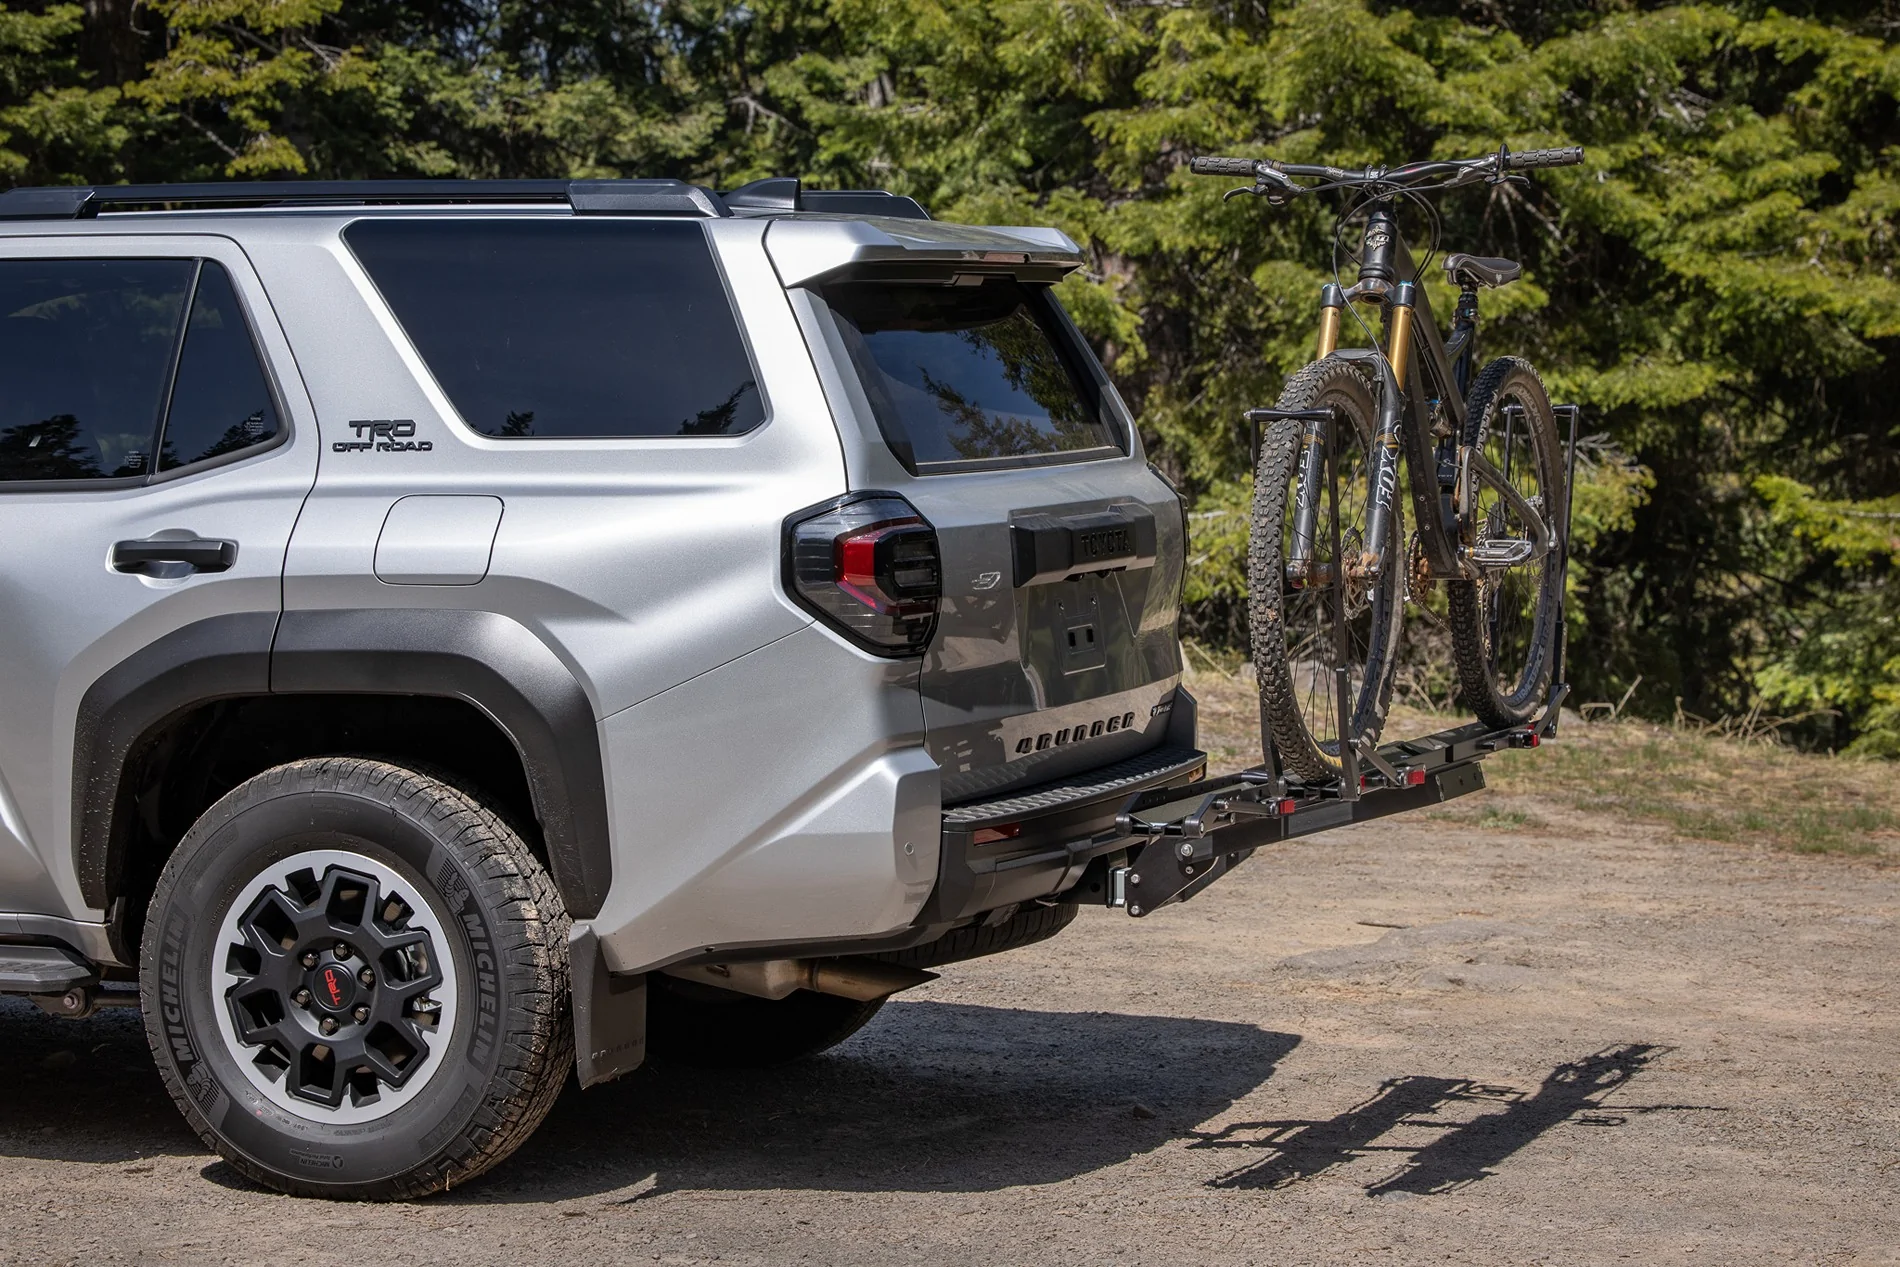
Kuat Pivot V2 hitch swing (driver side version)
No photos, but adding the Kuat Pivot between the hitch receiver and the 1Up rack allows you to swing the bike(s) out of the way easily. By choosing the “driver side pivot” version, you can swing them away from the area where the Kammok awning is, making it easy to work back and forth between the cargo area and the covered area. You can learn more about it here.
MISCELLANEOUS GEAR
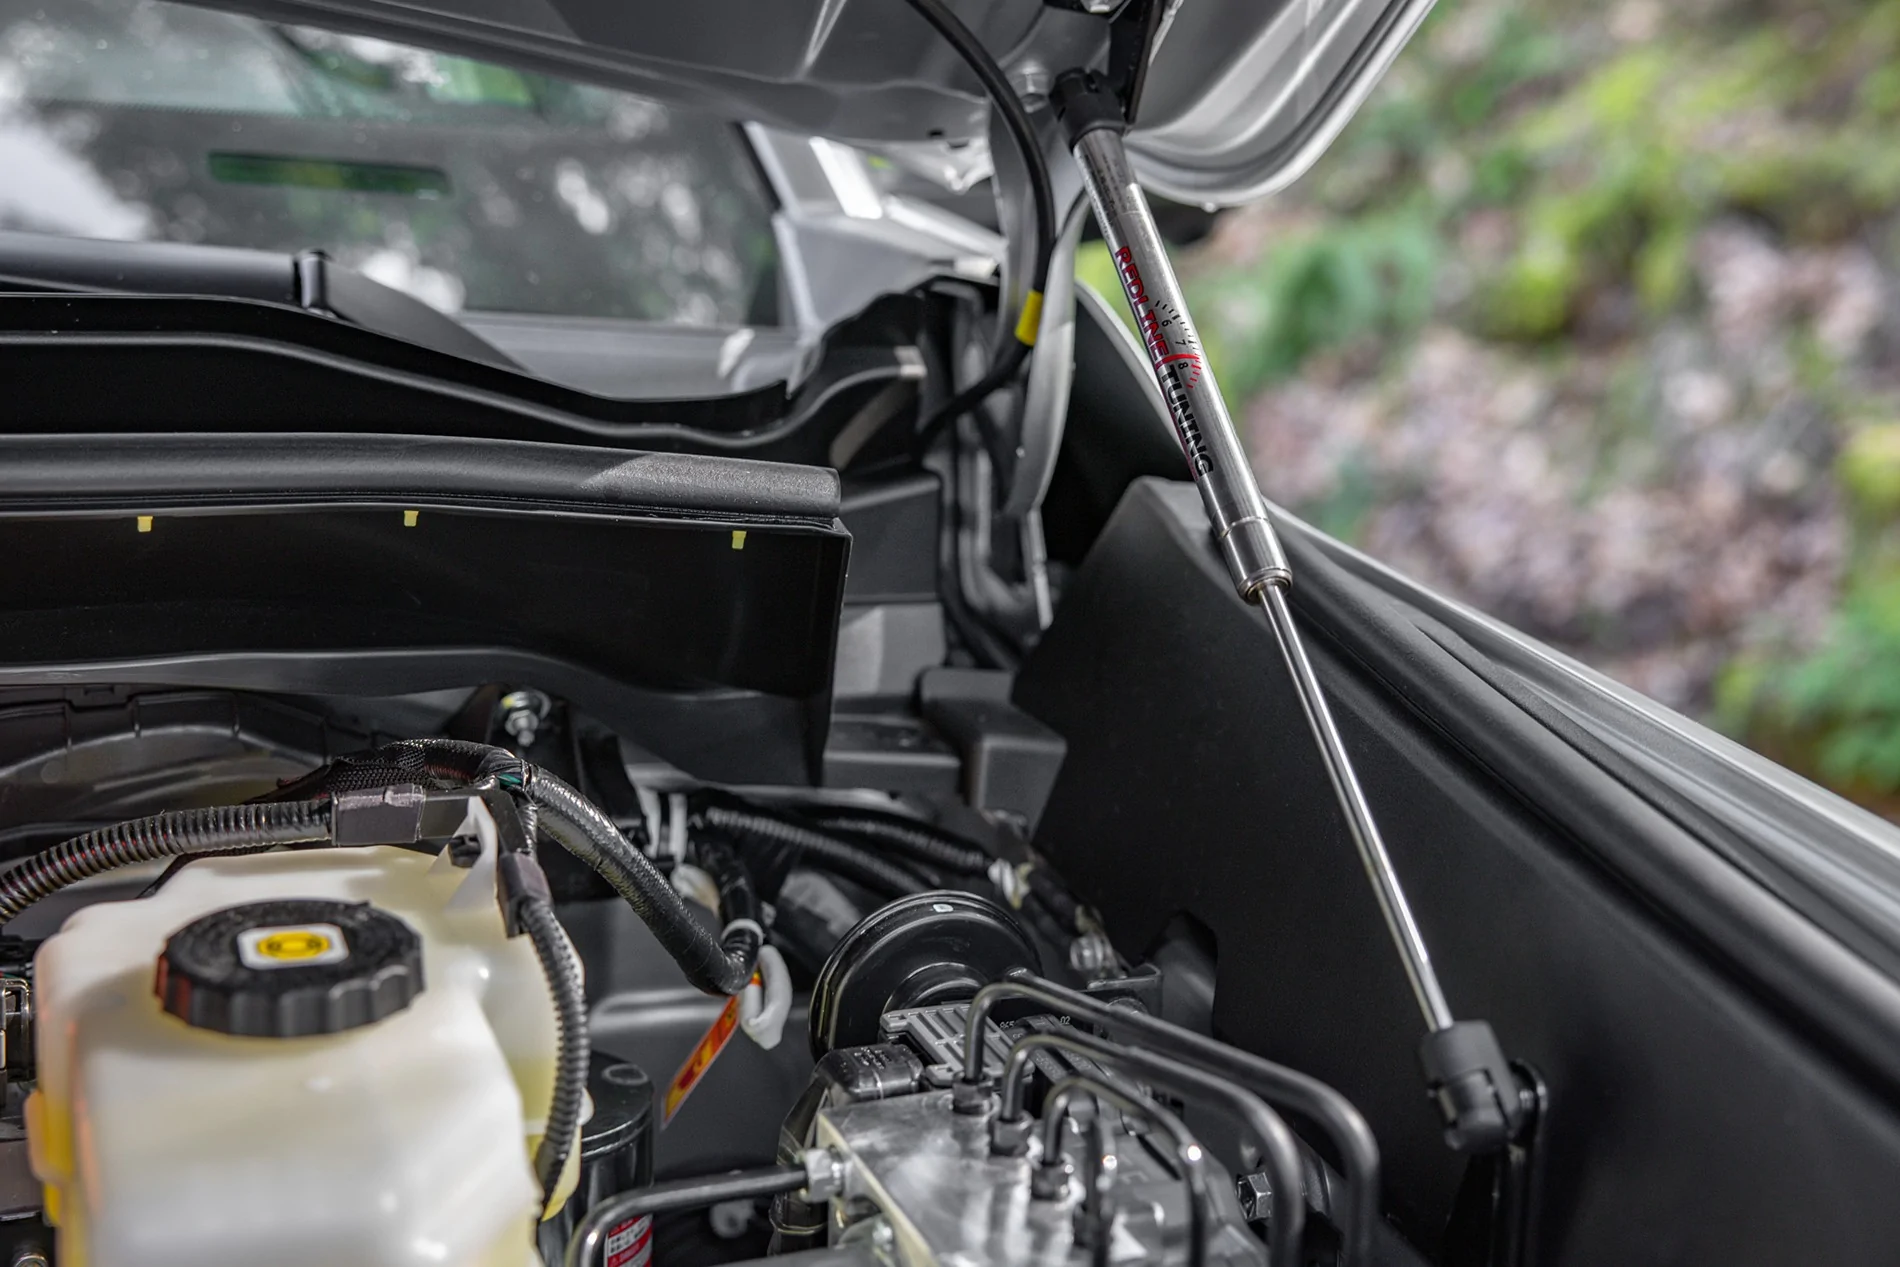
Redline Tuning 2024+ Toyota Hood QuickLIFT Elite
This hydraulic hood lift replaces the factory rod to make the hood self-supporting. It's inexpensive, easy to install, and totally worth it.
CONCLUSION
So that's it. Little by little, I've built a 6th Gen rig that serves my needs well. I don't have any other major mods on the horizon, other than possibly installing the EcoFlow 800W Alternator Charger. This would be useful because it allows me to connect my EcoFlow Power Station directly to the starter battery in the cargo area, and safely provide a Reverse Charge Mode where the EcoFlow can deliver supplemental voltage to keep the starter battery topped up at 13.8V to power my camp lights and appliances while I'm in camp, and provides a secondary way to charge the EcoFlow off the alternator while I'm driving.
I'm happy with how everything's working and grateful for all the great ideas and support I've received here on the 4Runner6G forums.
Best,
Vince
Sponsored
Last edited:


") .
.