- Thread starter
- #1
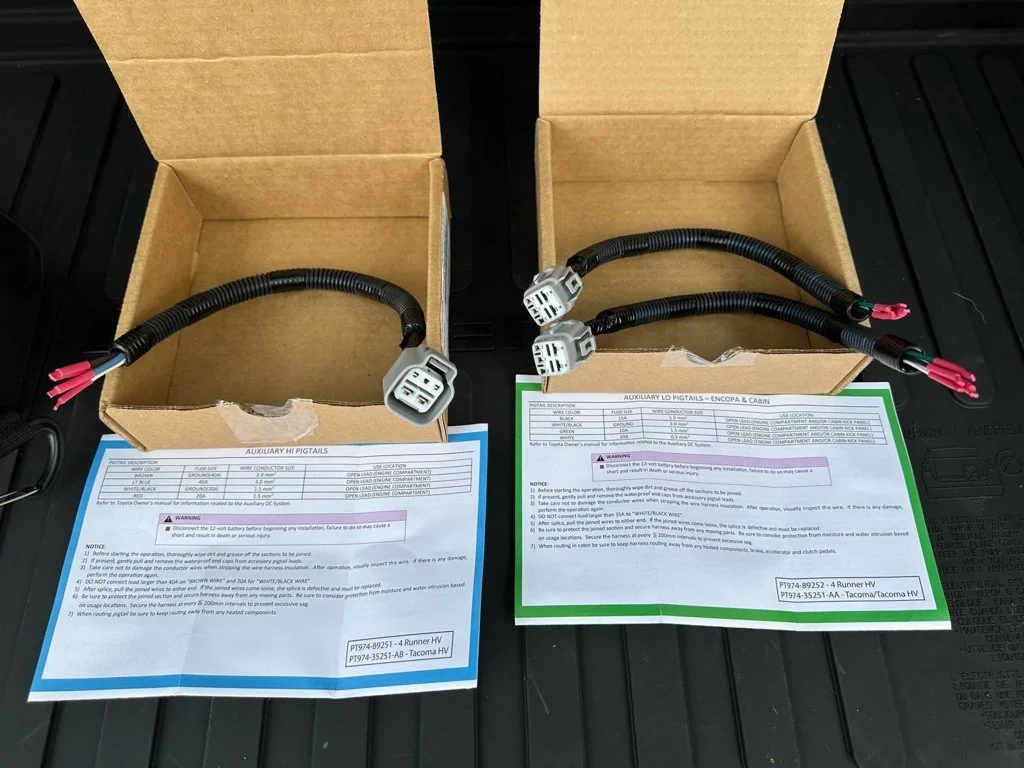
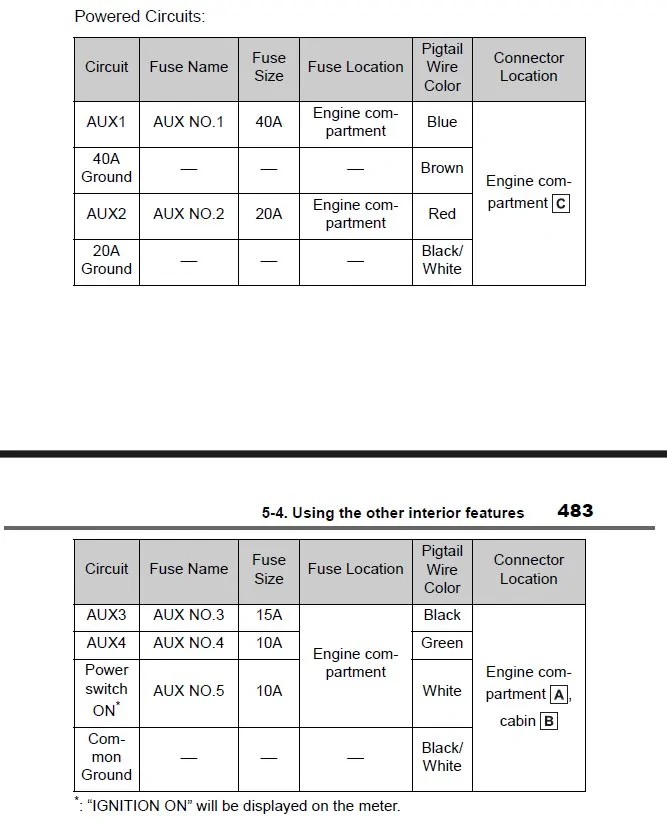
Using the pre-wired auxiliary switches made this super easy. Here are the pages from the manual.

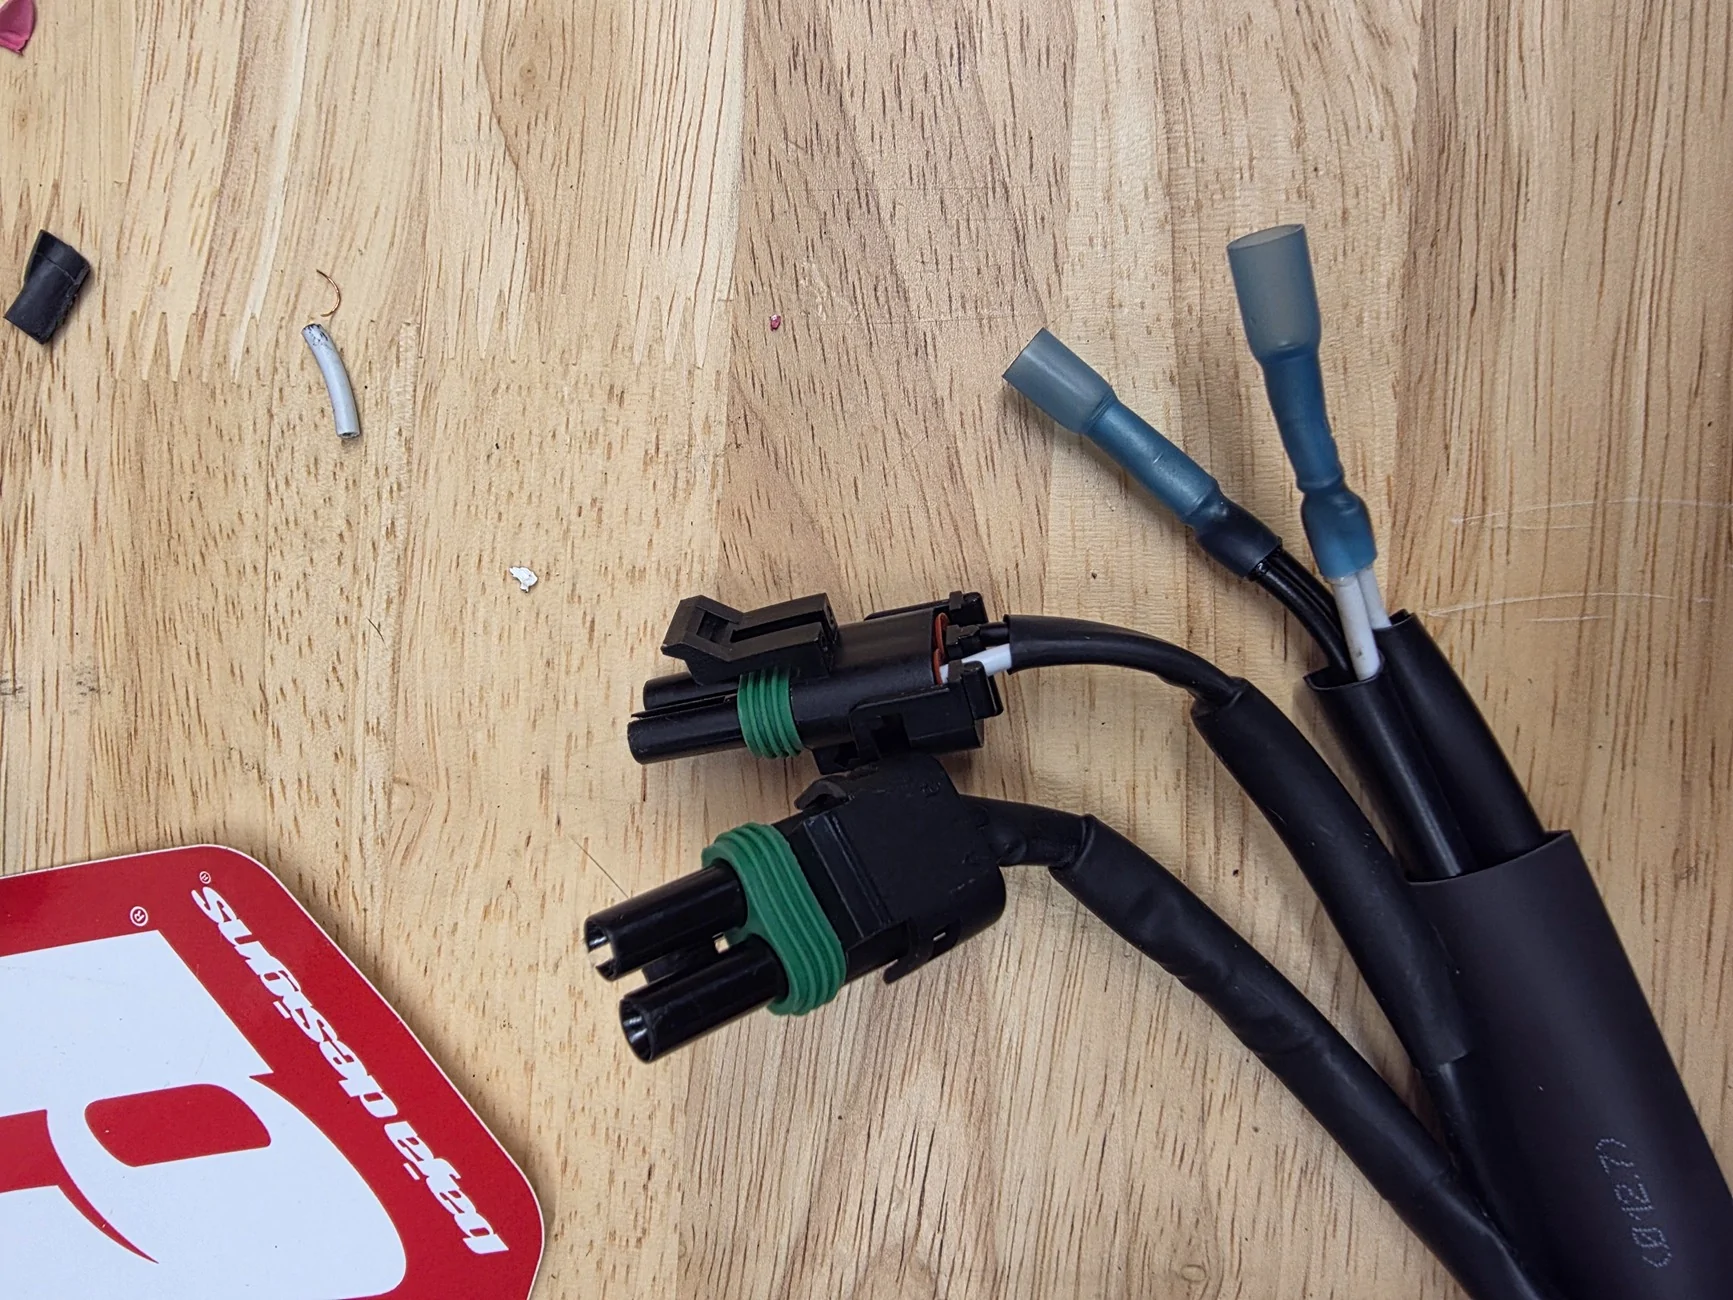
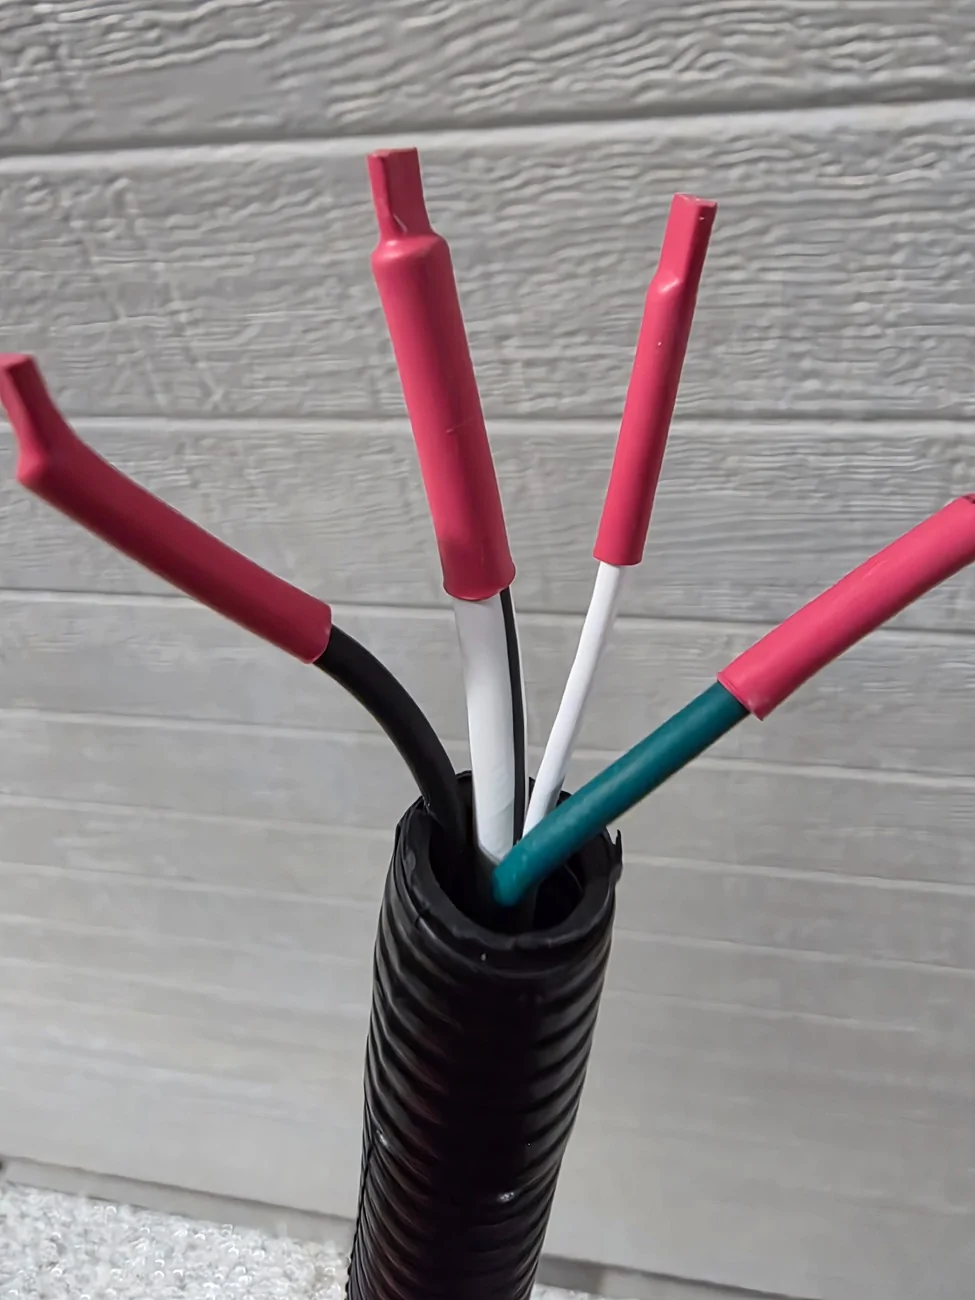
1 - Cut the 2 light connector wires away from the rest of the harness
2 - Connect white to white (hot) and black to black (ground). The pick below is both ends of the light connector wires. Thos are all the connections you need to get power through the OEM pigtail.

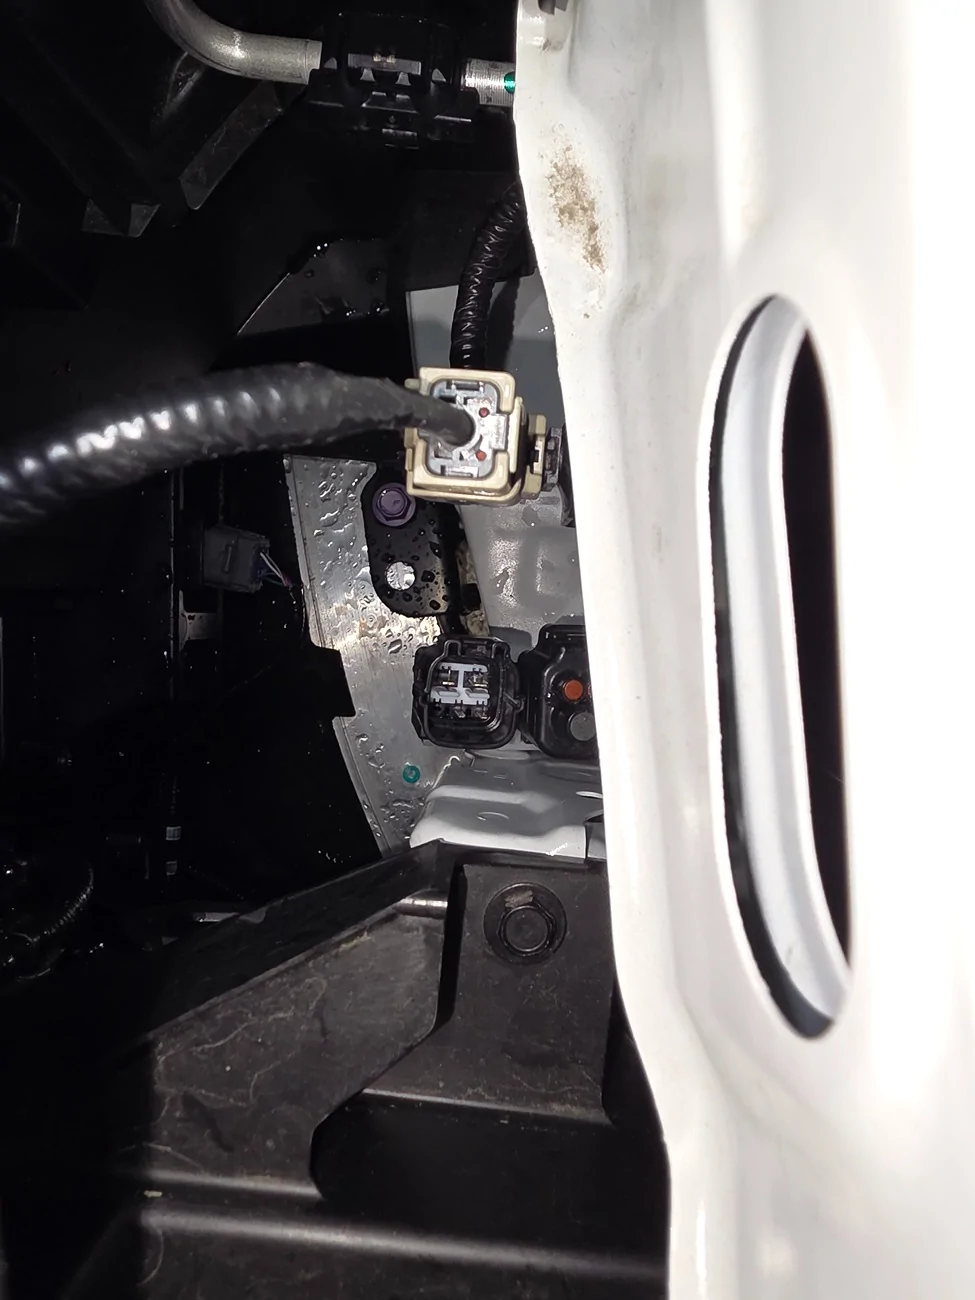
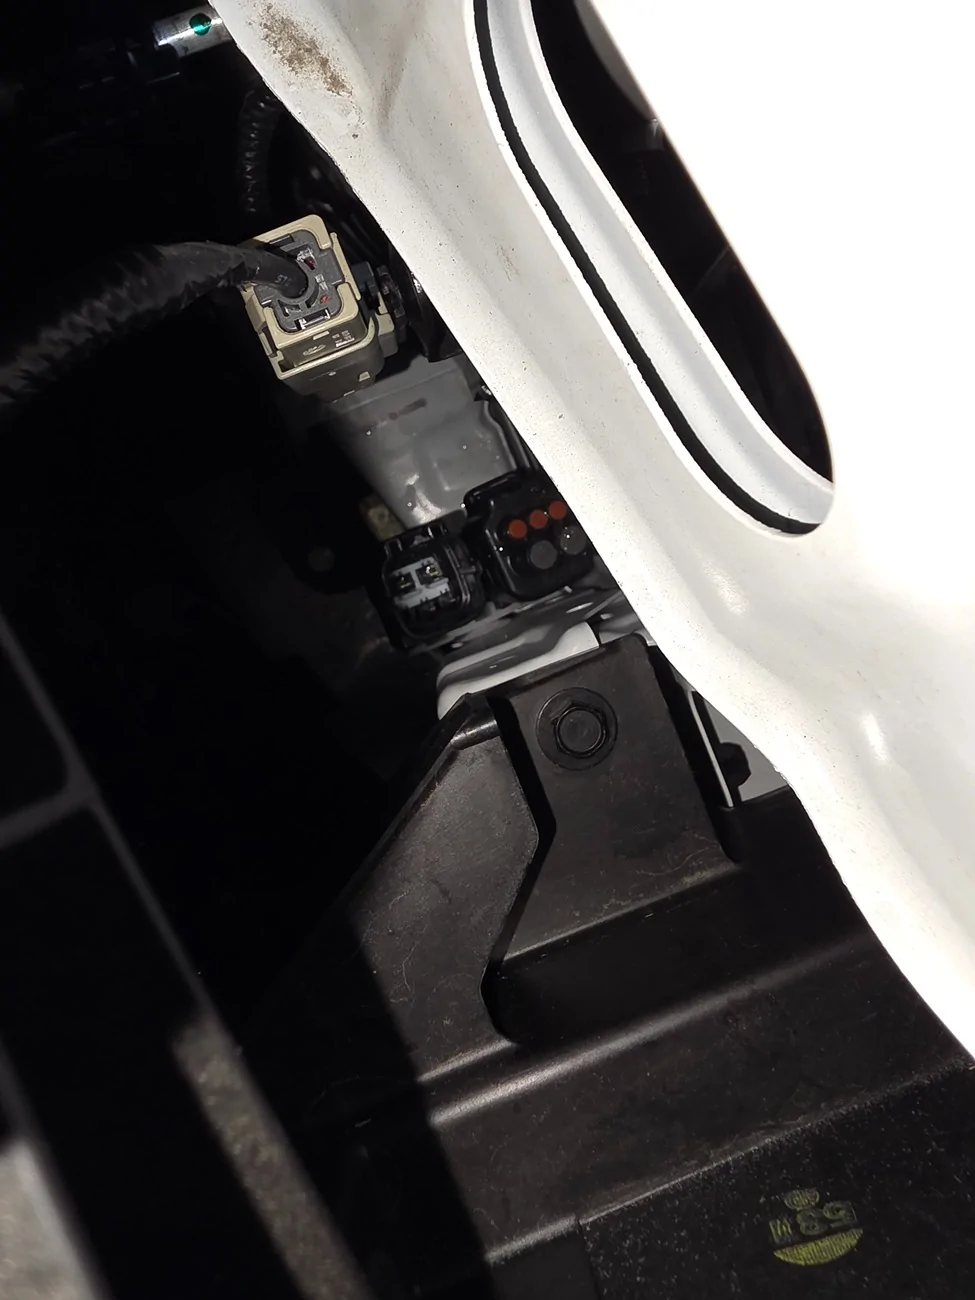
3 - Connect the wires to the pigtail of your choice. I used the smaller pigtail, plugged into port "A" near the washer fluid reservoir. I connected white to green for hot and black to black/white for ground. This means I will be using the "Aux 4" switch which has a 10A fuse. I'll use the other switches for bigger or more power hungry equipment later.

(If your lights have a backlight function you'll typically have 2 hot wires and a ground. If that were the case I would wire my primary light function to the black wire on the pigtail, the backlights wire to the green wire, and the grounds to black/white. This would give you primary lights on "Aux 3" and backlights on "Aux 4")
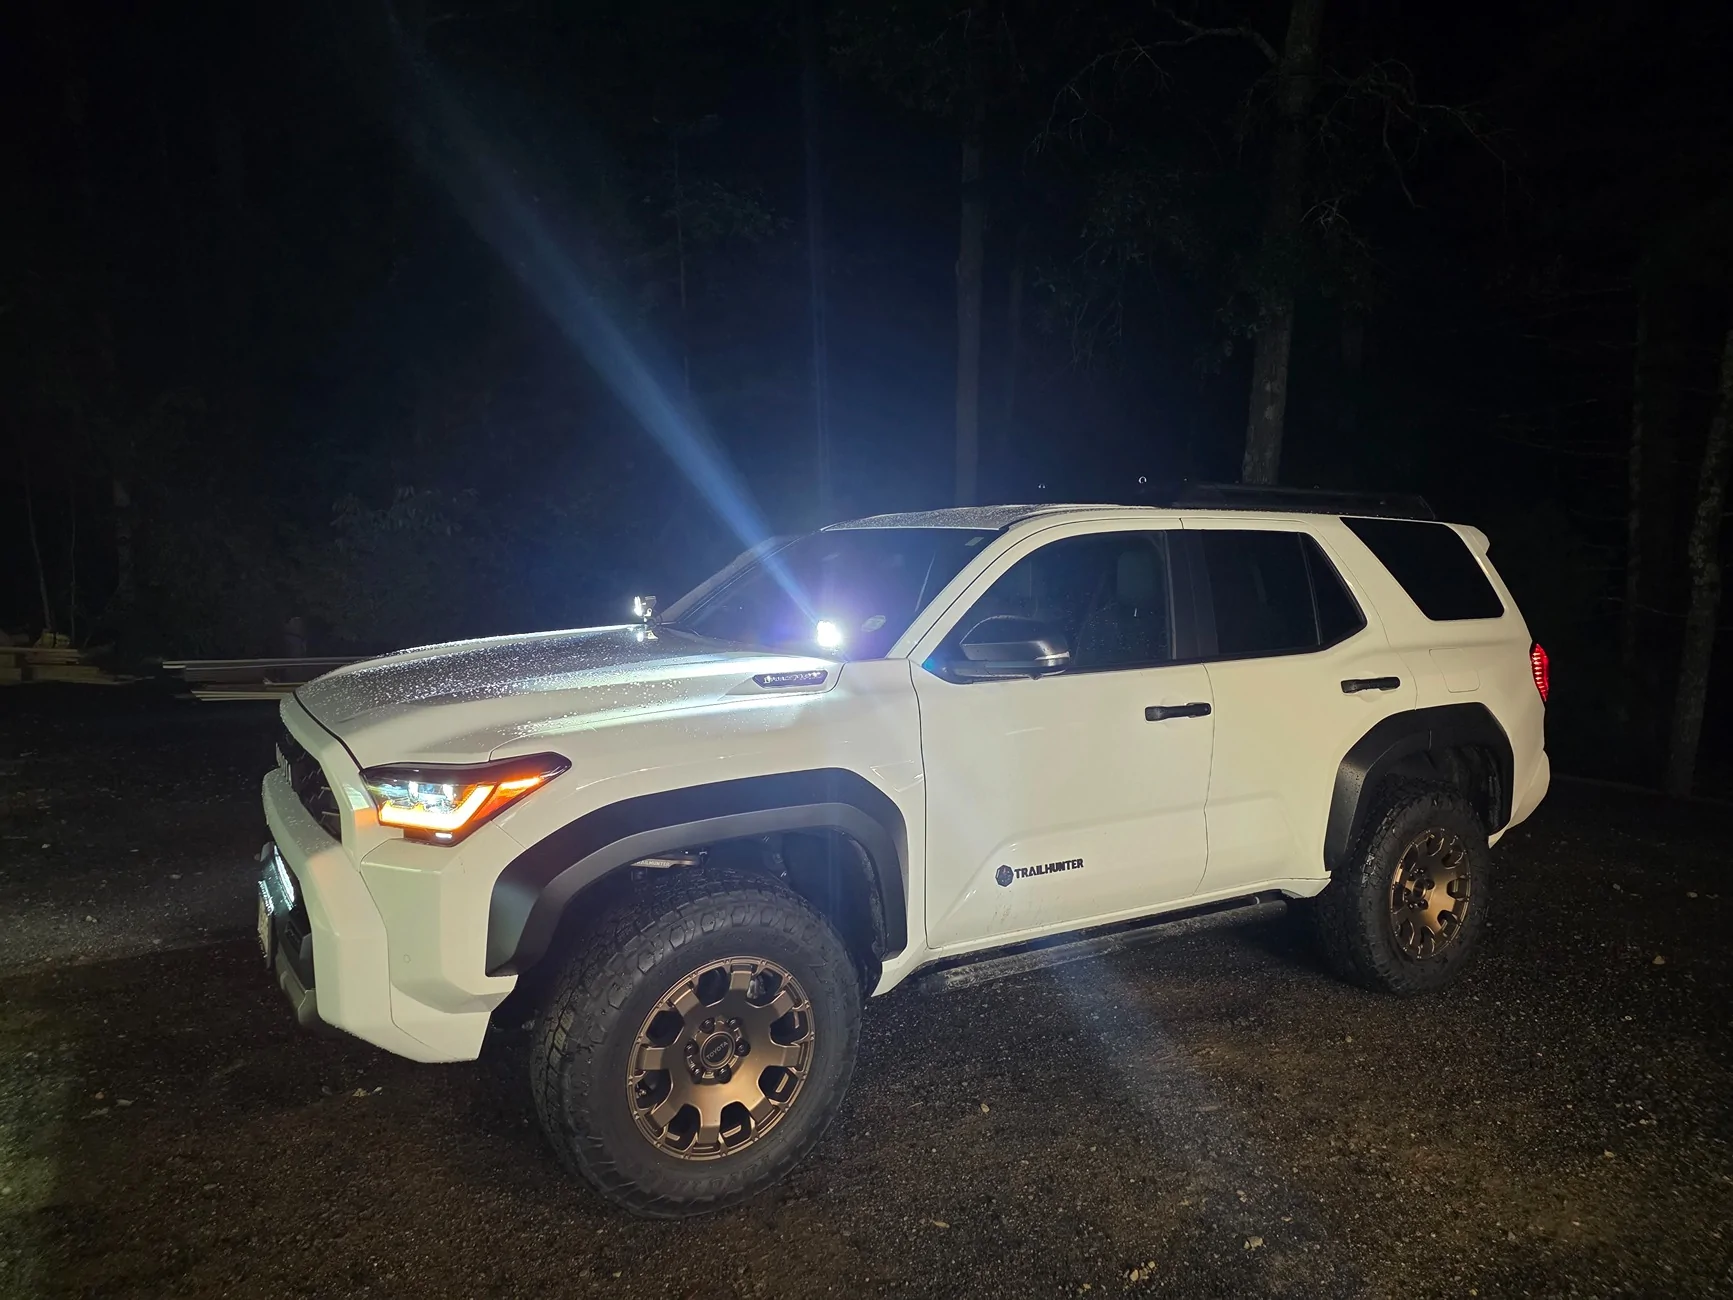
4 - Test and make sure everything lights up
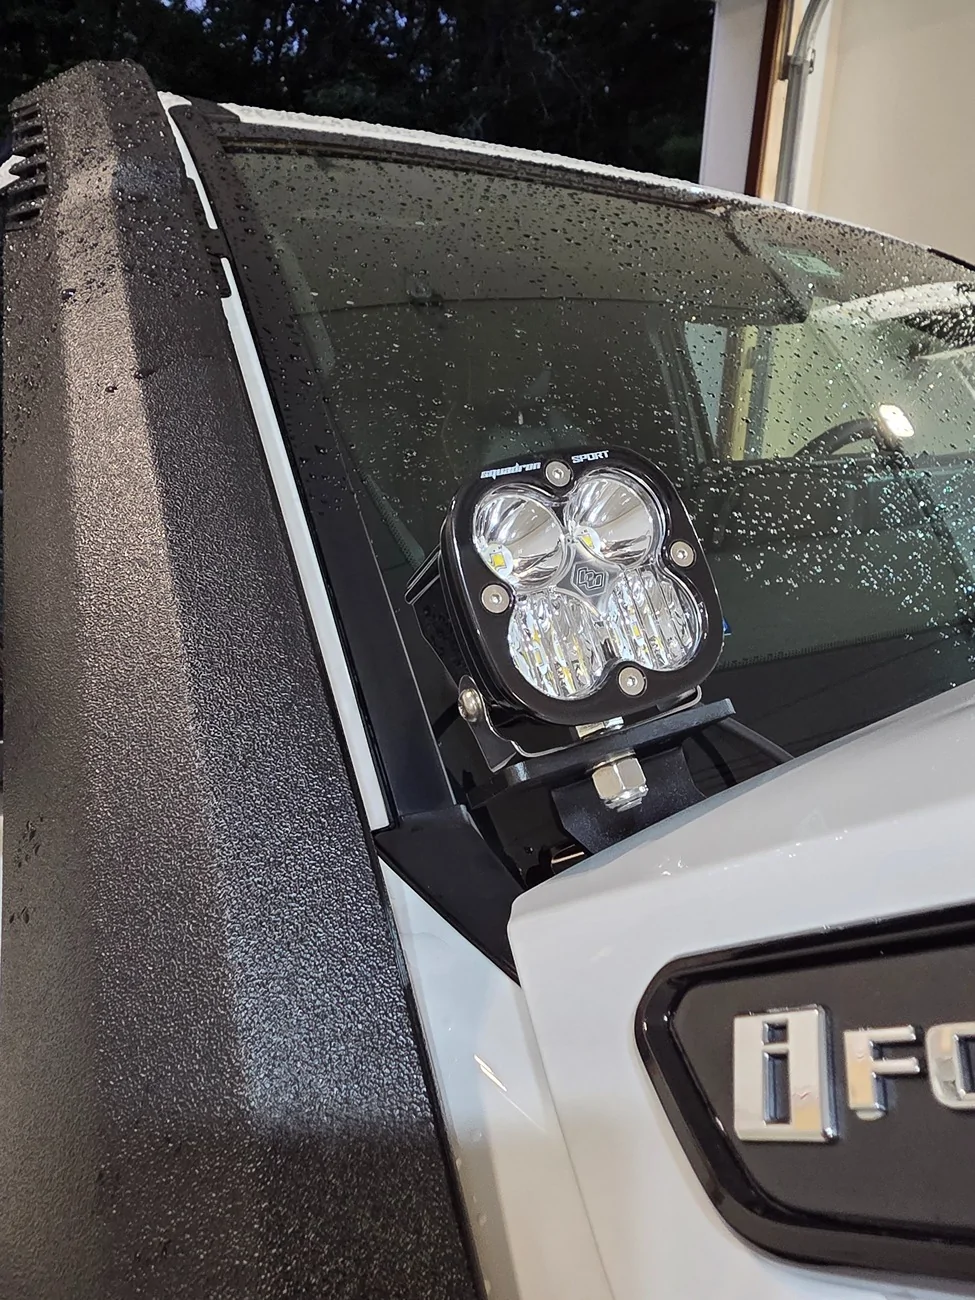
5 - Mount the brackets and lights per the instructions. I saw that some folks were worried about the snorkel interfering with the light when the hood is open. As you can see the light is no where near the snorkel and my hood is open at the higher setting in the pic.
6 - Route your wires and secure with cable ties to your preference and enjoy
1 - Cut the 2 light connector wires away from the rest of the harness
2 - Connect white to white (hot) and black to black (ground). The pick below is both ends of the light connector wires. Thos are all the connections you need to get power through the OEM pigtail.
3 - Connect the wires to the pigtail of your choice. I used the smaller pigtail, plugged into port "A" near the washer fluid reservoir. I connected white to green for hot and black to black/white for ground. This means I will be using the "Aux 4" switch which has a 10A fuse. I'll use the other switches for bigger or more power hungry equipment later.
(If your lights have a backlight function you'll typically have 2 hot wires and a ground. If that were the case I would wire my primary light function to the black wire on the pigtail, the backlights wire to the green wire, and the grounds to black/white. This would give you primary lights on "Aux 3" and backlights on "Aux 4")
4 - Test and make sure everything lights up
5 - Mount the brackets and lights per the instructions. I saw that some folks were worried about the snorkel interfering with the light when the hood is open. As you can see the light is no where near the snorkel and my hood is open at the higher setting in the pic.
6 - Route your wires and secure with cable ties to your preference and enjoy
Sponsored