
- Thread starter
- #1
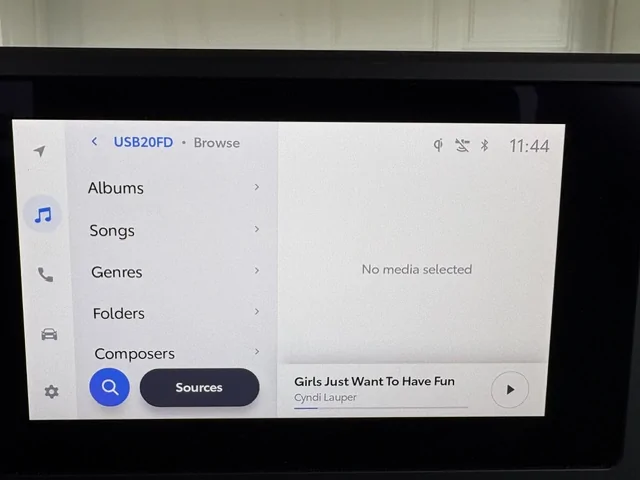
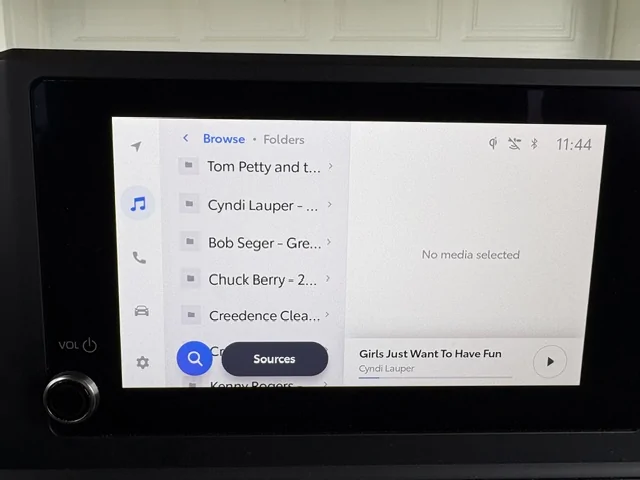
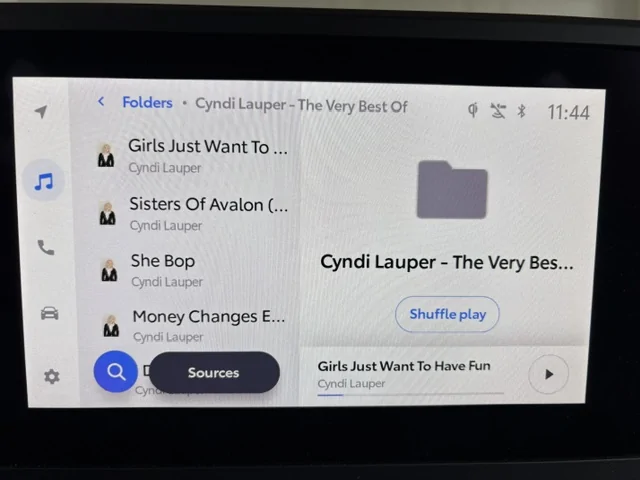
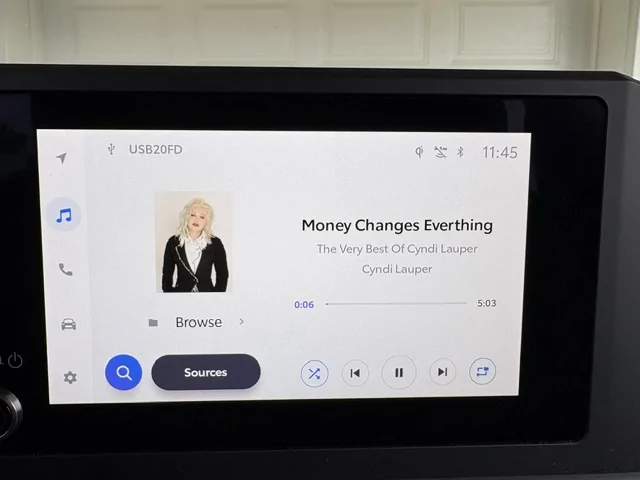
Thanks to Ross for posting about hooking up a CD player to his 6th gen 4runner. Others pointed out it might be better to rip the CDs to a medium such as a jump drive. Having never "ripped" anything in my life, it took maybe an hour to figure out how to do it right. I've now got 15 albums ripped to a 32GB jump drive, and couldn't be happier with the results. Here's a summary of the steps, followed by a set of pics outlining the procedure from ripping the CDs to playing them in the truck.
You'll probably need an external CD drive since computers rarely have internal ones these days. The one I used advertises 24X read capability. Its output is USB-2 (so is my laptop's) so a USB to USB-C converter was required in order to plug the end result into the infotainment's USB-C slot. Amazon has them for around $7.
Web searches said for Windows users to use Windows Media Player to do the ripping. I'm a Linux user and have near zero tolerance for anything Windows, but I tried the suggestion anyway. It couldn't find the metadata for the albums and songs. This metadata is VERY important for a usable end product so I gave up on Windows.
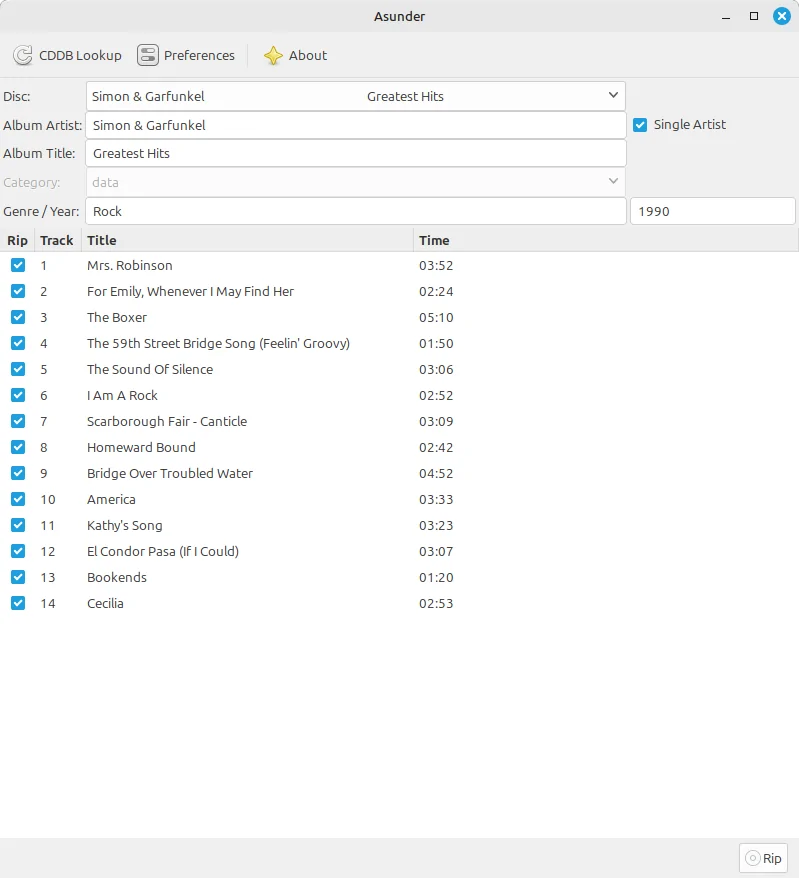
Off to Linux and there's a free tool called "asunder" that just works. I've included some screenshots below. To get the metadata, asunder goes online, defaulting to gnudb.gnudb.org I don't know what Windows Media Player tried but whatever it was didn't work.
Asunder automatically found the metadata and filled it in. I went into "Preferences" and told it to only produce MP3 files. It chose a default bitrate of 190 Kbps which I didn't dare touch. Hit the "rip" button (bottom right of 1st pic) and it took about 8 minutes per CD to complete writing to disk. Probably writing directly to the jump drive would work, but I chose to write to disk then copy to the jump drive which went very fast.
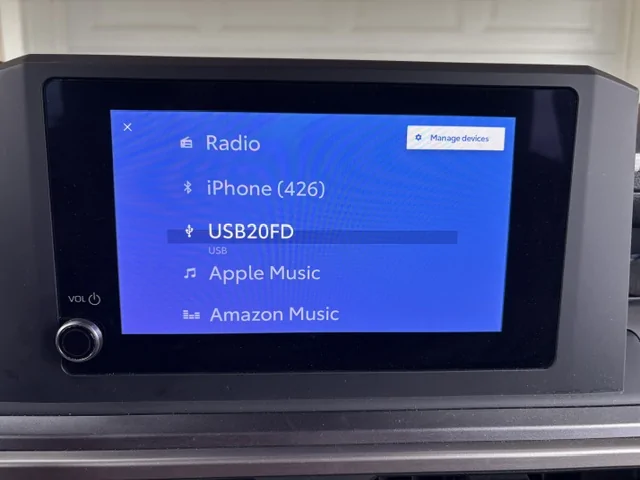
Now plug the jump drive into the infotainment (with USB->USBC converter if necessary) and enjoy your music.


You'll probably need an external CD drive since computers rarely have internal ones these days. The one I used advertises 24X read capability. Its output is USB-2 (so is my laptop's) so a USB to USB-C converter was required in order to plug the end result into the infotainment's USB-C slot. Amazon has them for around $7.
Web searches said for Windows users to use Windows Media Player to do the ripping. I'm a Linux user and have near zero tolerance for anything Windows, but I tried the suggestion anyway. It couldn't find the metadata for the albums and songs. This metadata is VERY important for a usable end product so I gave up on Windows.
Off to Linux and there's a free tool called "asunder" that just works. I've included some screenshots below. To get the metadata, asunder goes online, defaulting to gnudb.gnudb.org I don't know what Windows Media Player tried but whatever it was didn't work.
Asunder automatically found the metadata and filled it in. I went into "Preferences" and told it to only produce MP3 files. It chose a default bitrate of 190 Kbps which I didn't dare touch. Hit the "rip" button (bottom right of 1st pic) and it took about 8 minutes per CD to complete writing to disk. Probably writing directly to the jump drive would work, but I chose to write to disk then copy to the jump drive which went very fast.
Now plug the jump drive into the infotainment (with USB->USBC converter if necessary) and enjoy your music.
Sponsored