- First Name
- Nathan
- Joined
- Jun 22, 2024
- Threads
- 21
- Messages
- 111
- Reaction score
- 169
- Location
- St. Peters, MO
- Vehicle(s)
- 2025 TRD Sport Premium
- Thread starter
- #1
I've had these parts waiting around for a couple months and I finally had a free day to spend on diving in to this project. If you ever did a grille swap on a 5th gen, throw out everything you know. This requires nearly a full disassembly of the front bumper, so set aside a few hours if you plan on doing this. If you're not handy, this probably isn't a project for you.

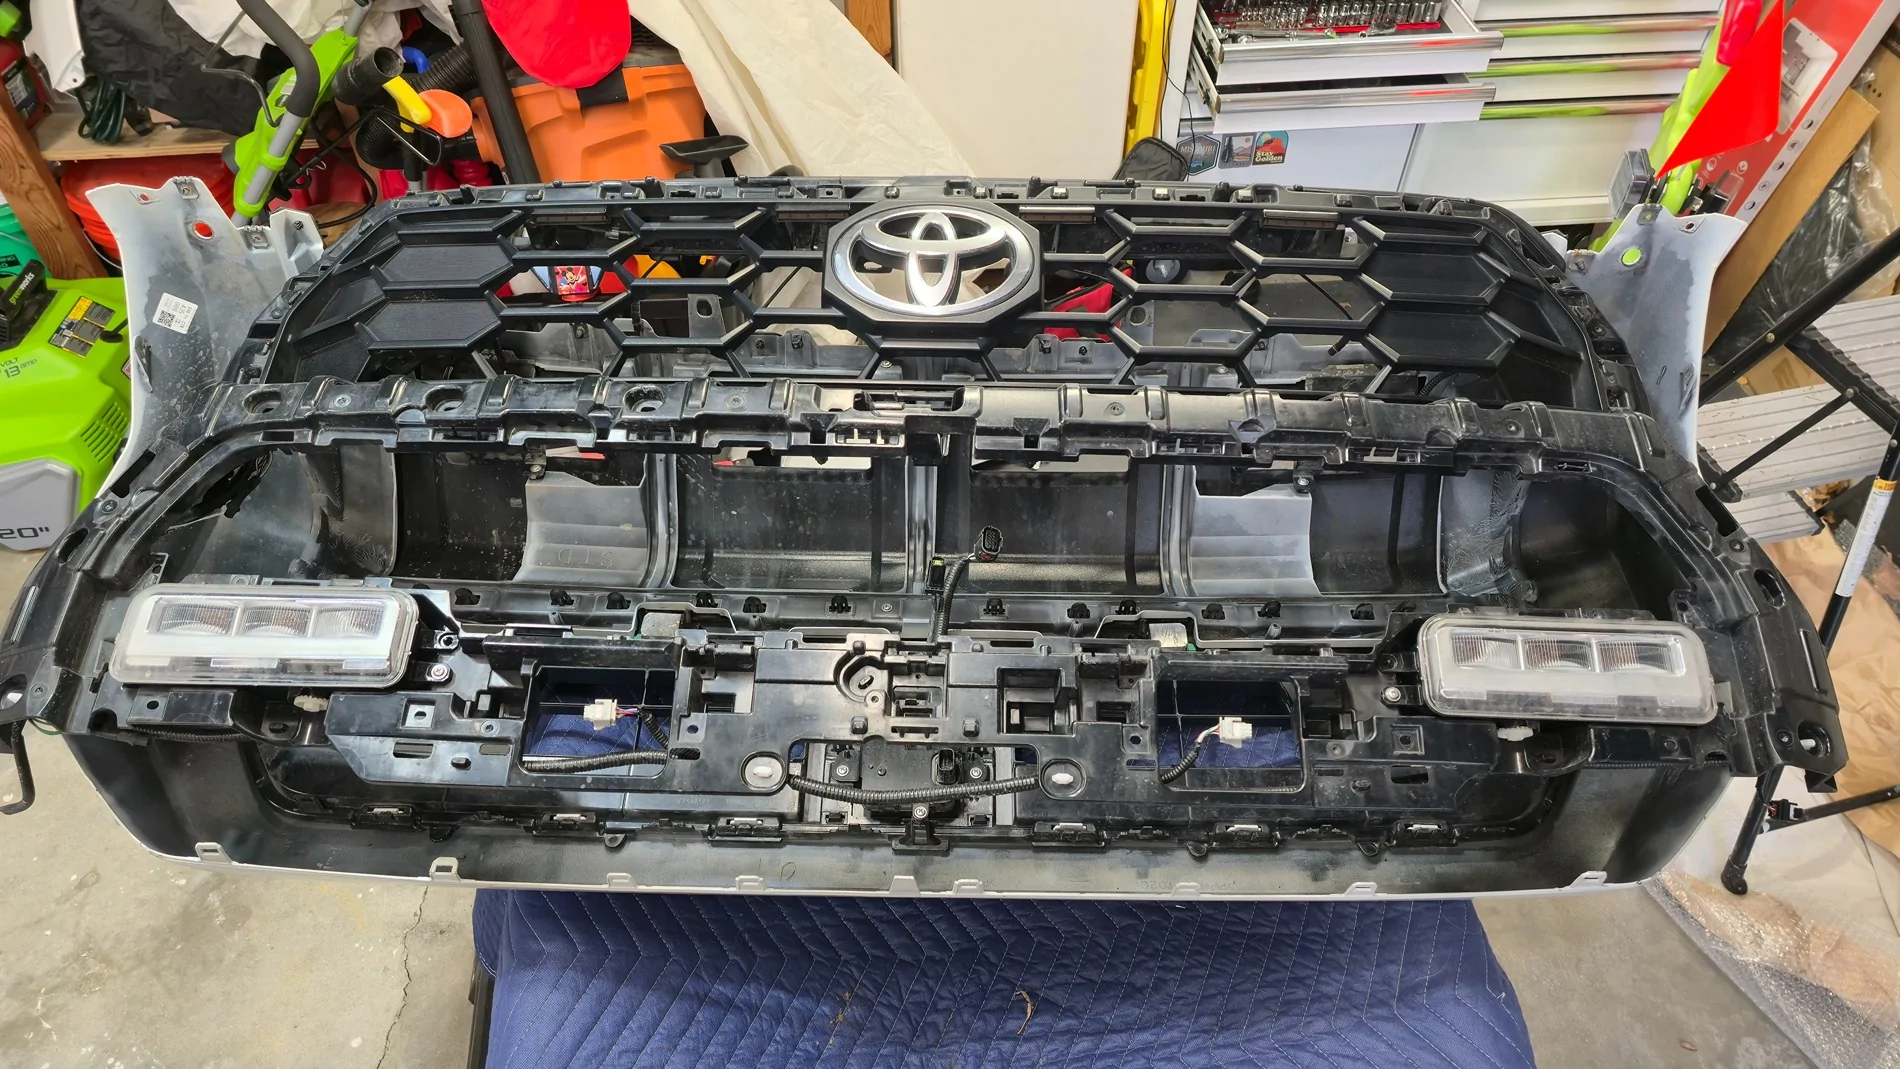
There are several videos out there showing how to remove the front bumper (also the easiest part), so I'll skip that. After removing, I set the bumper face down on a moving blanket on top of two sawhorses. You'll definitely want to be able to put it somewhere that's easy to access.

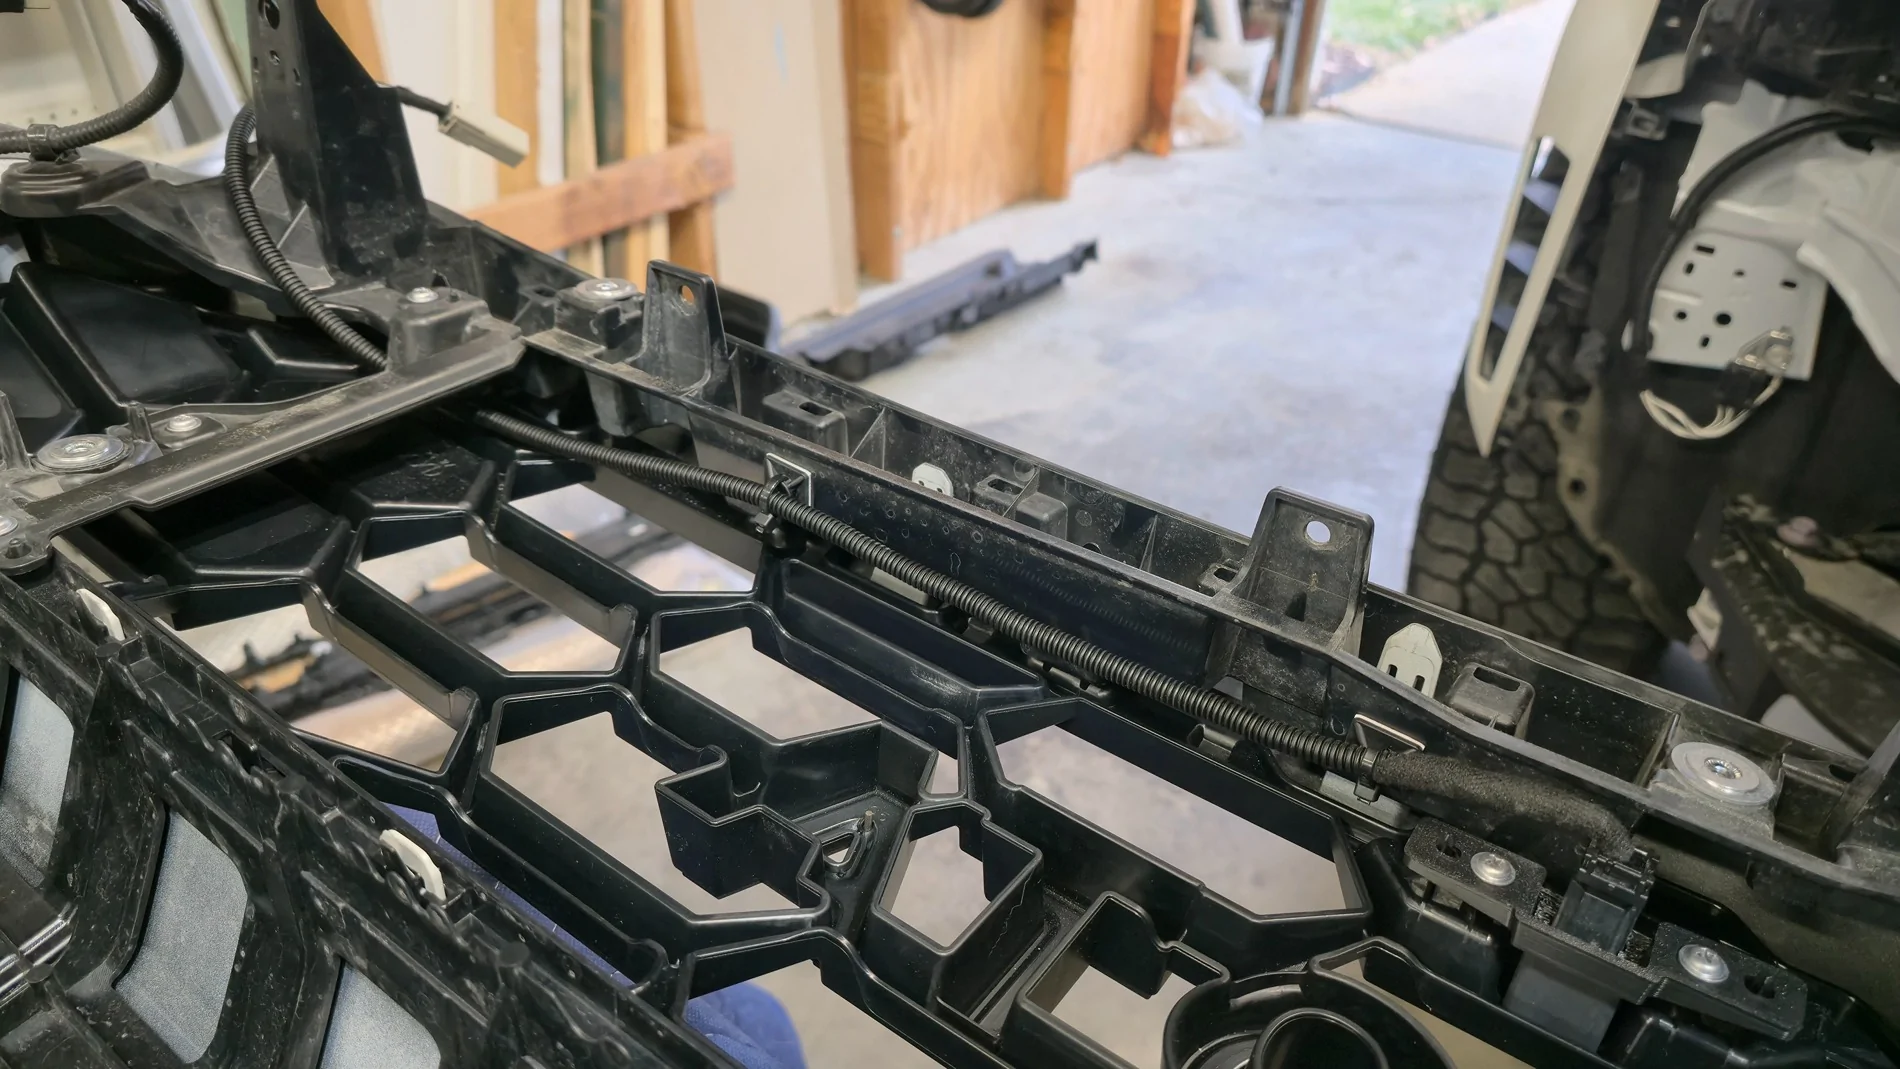
First, remove the active shutters. 6 10mm fasteners. You'll want to fully remove this from the assembly. The clip holding the plug to the assembly is tricky. I ended up mangling mine to get it off after trying to blindly find the hidden release for 5 minutes. The plug itself was unscathed. After fiddling around trying to do the swap in sections, I realized that you need to remove the entire large black assembly. The grille sections are sandwiched between this frame and the bumper cover itself. There are roughly 32 Phillips head screws holding this on, as well as endless clips. Trim removal tools and a small flathead screwdriver are your friends here. I also suggest removing the outer sections of the bumper to make it a little easier to maneuver, it's just a couple extra clips on each side.

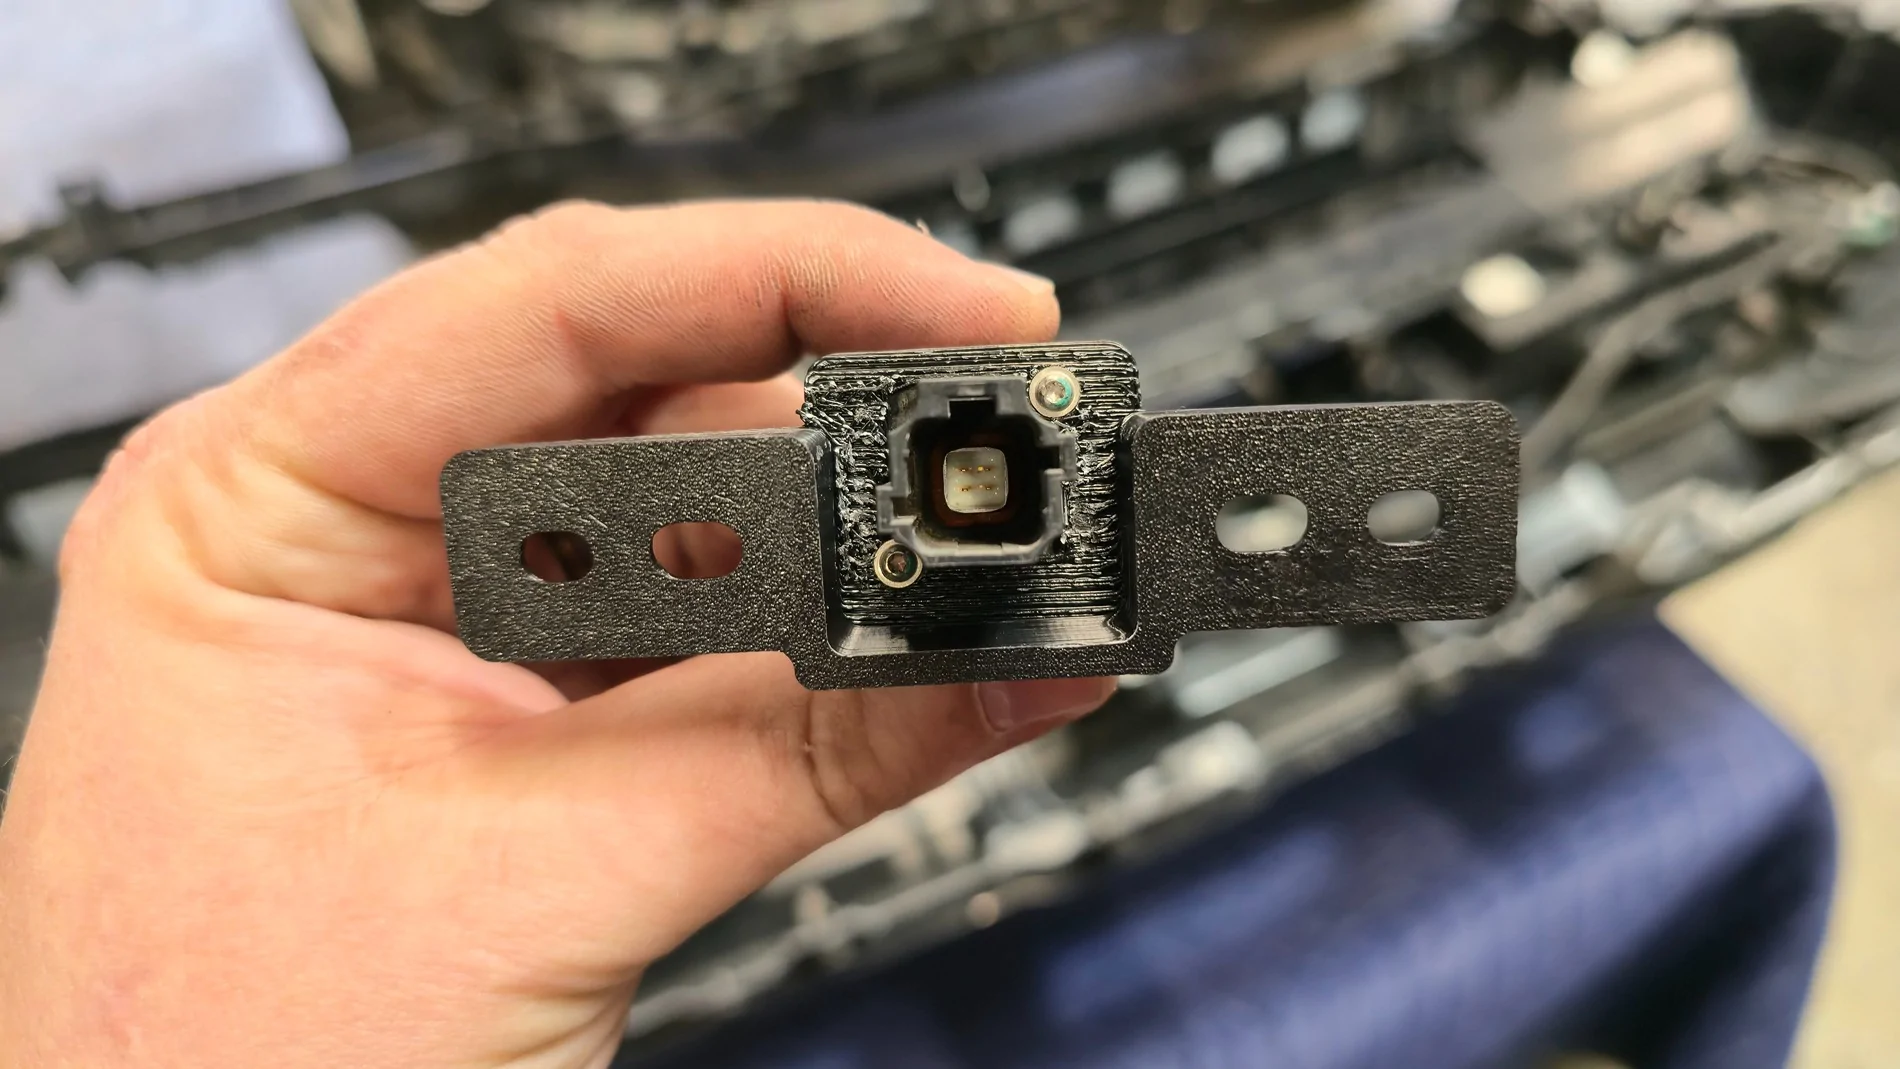
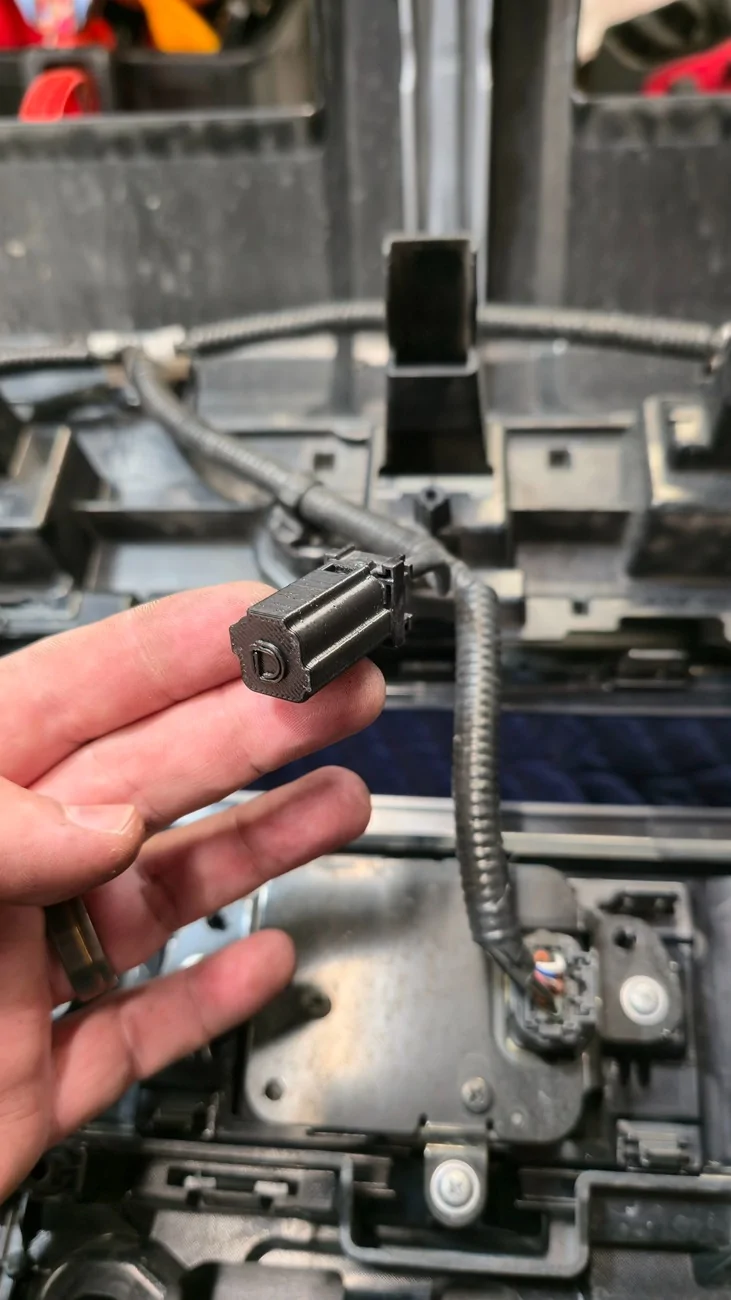
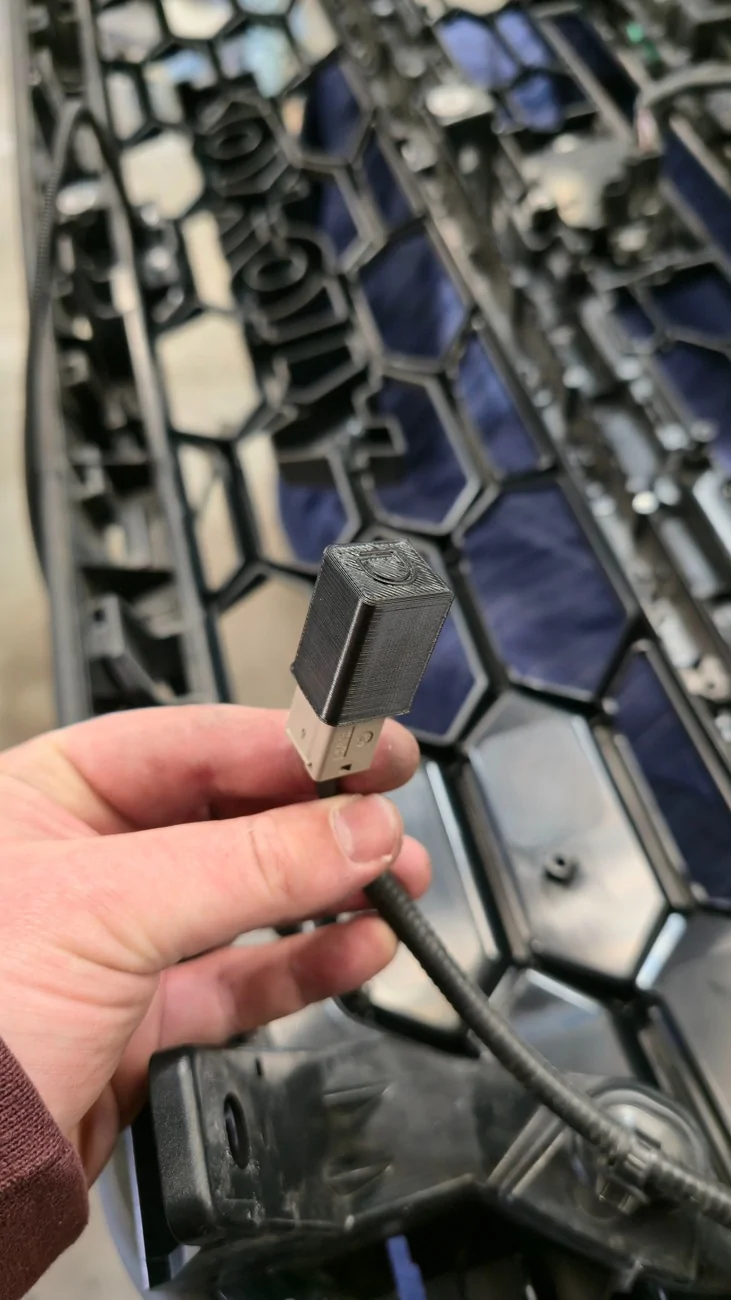
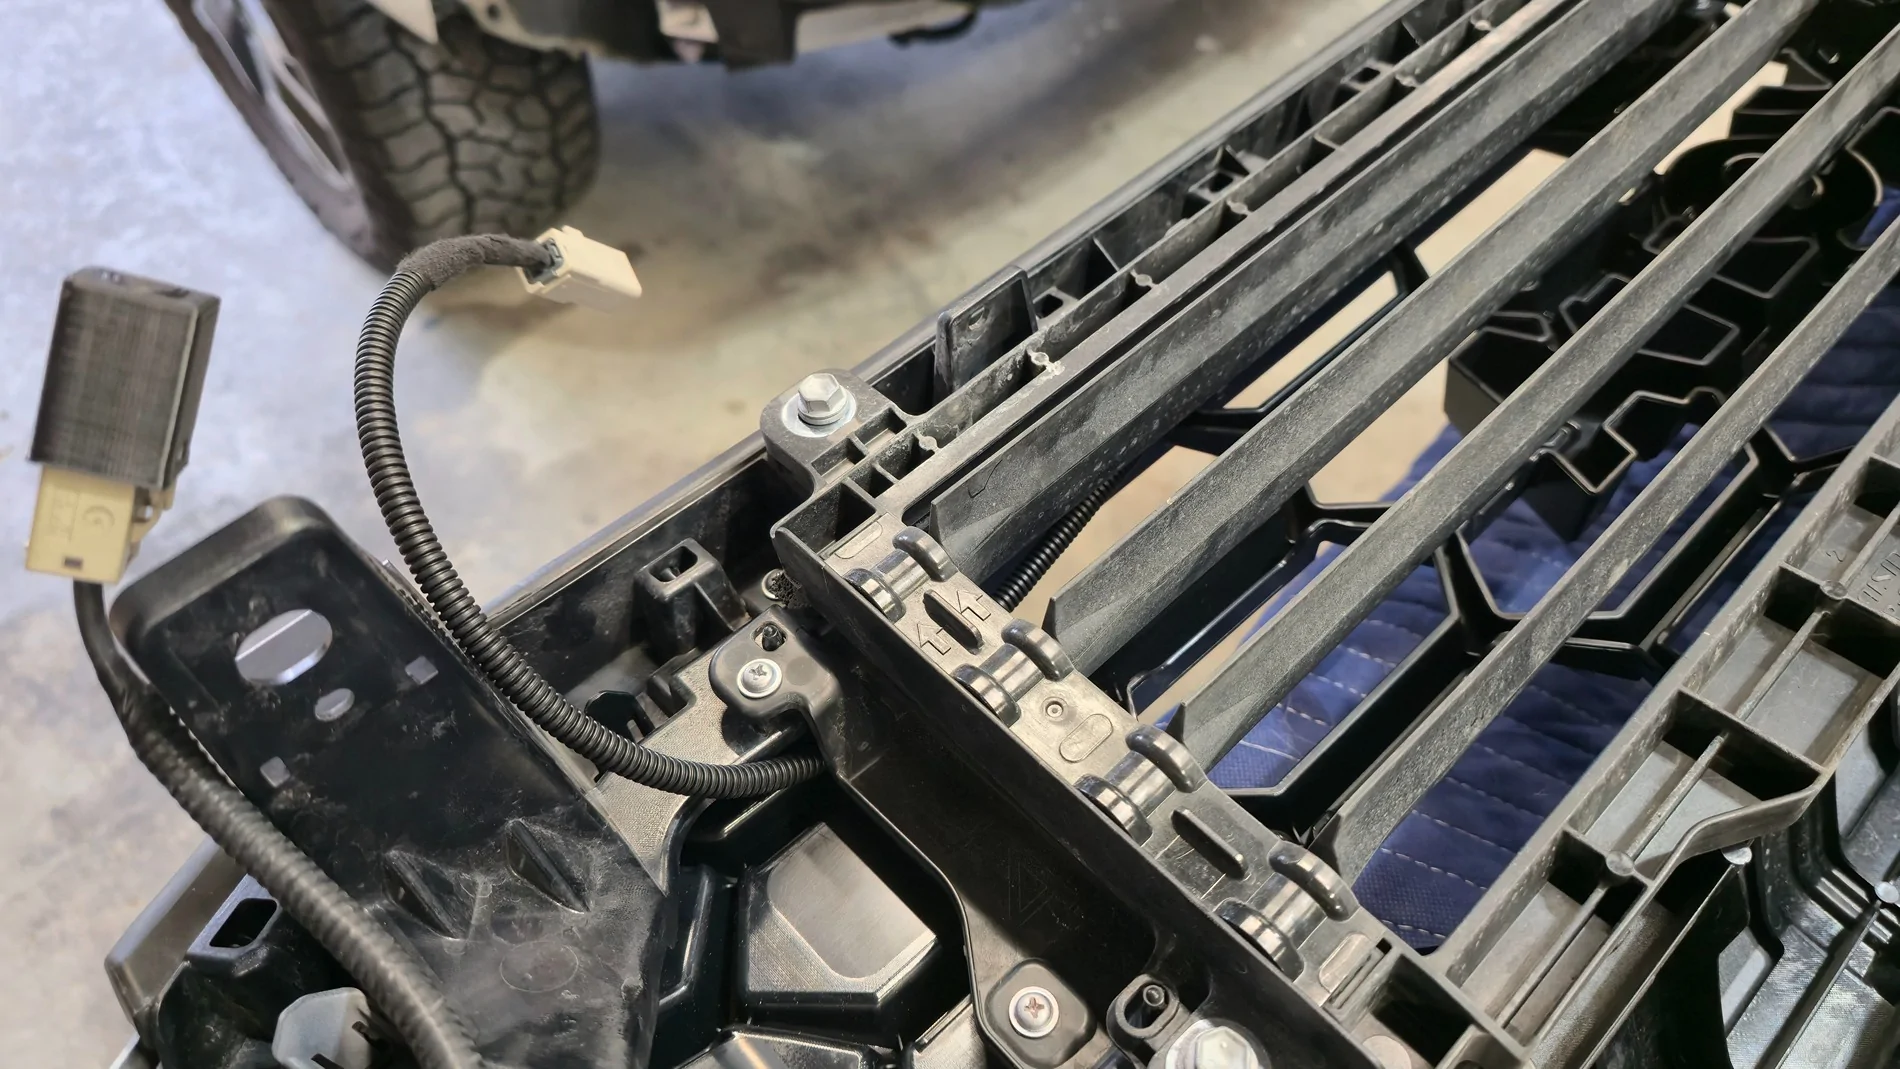
Once you tediously work your way around all the clips, you can separate the bumper cover from the inside assembly. Don't forget to disconnect all the sensors before trying to separate everything. You can continue your unclipping journey to separate the grille sections from the assembly. The Diode Dynamics kit provides plug dust covers for the camera plugs since it will be relocated to the upper grille and use a new harness. They also include a new camera bracket.
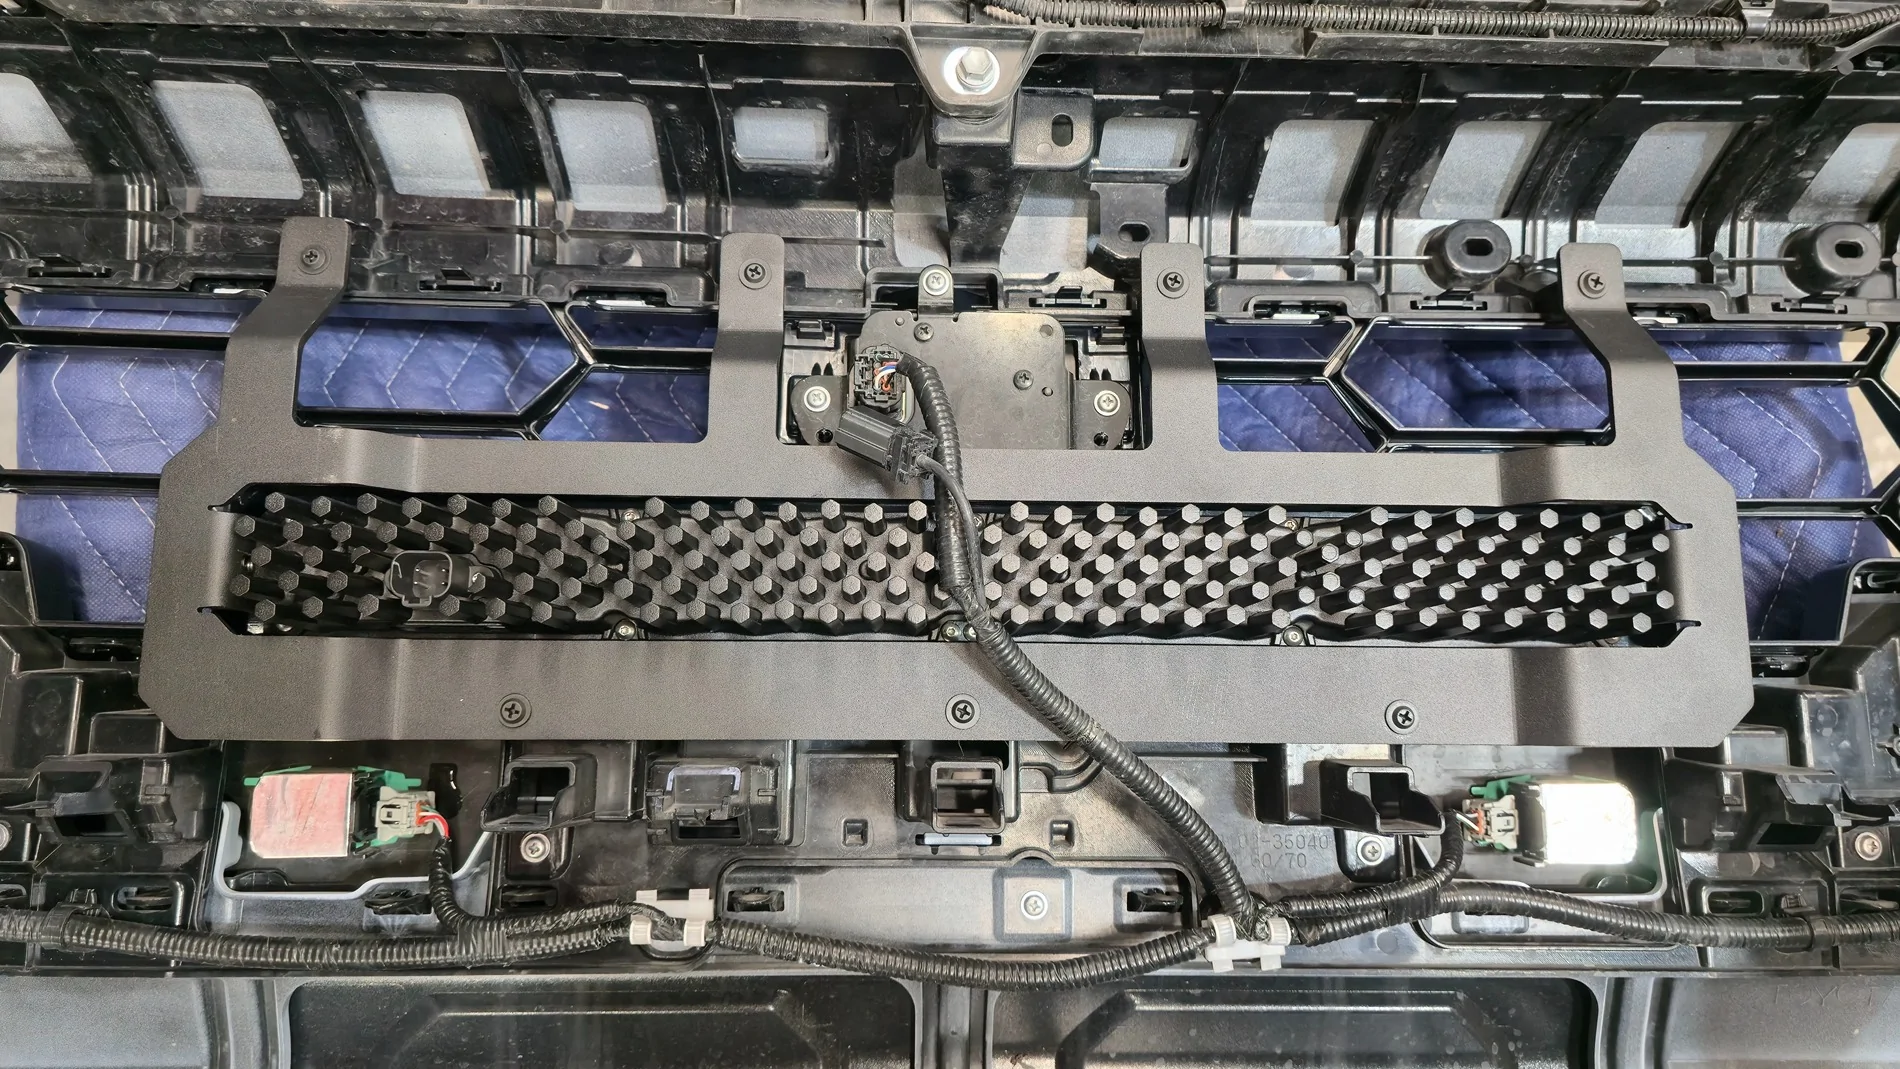
The TSS module gets relocated to the new lower grille section along with the original cover. Pretty self explanatory there. After you get the camera and sensor swapped over, you can start clipping the new grille sections into place. After you get it all clipped in, you can start getting the inner assembly mated back to the bumper cover and the outer bumper sections if removed. I broke a couple clips during this process, so just take your time and don't rush it back together. Install the new camera harness before reinstalling the shutters. Secure the harness so that it won't interfere with the shutters.
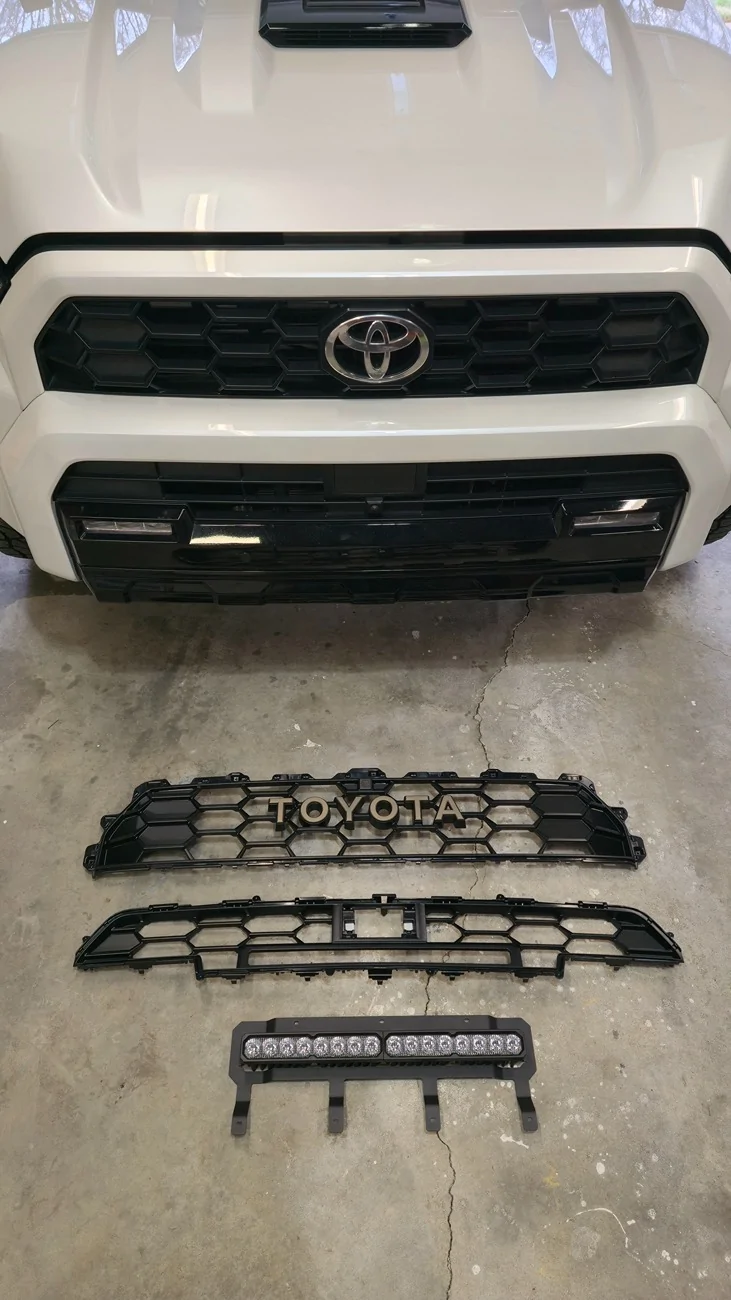
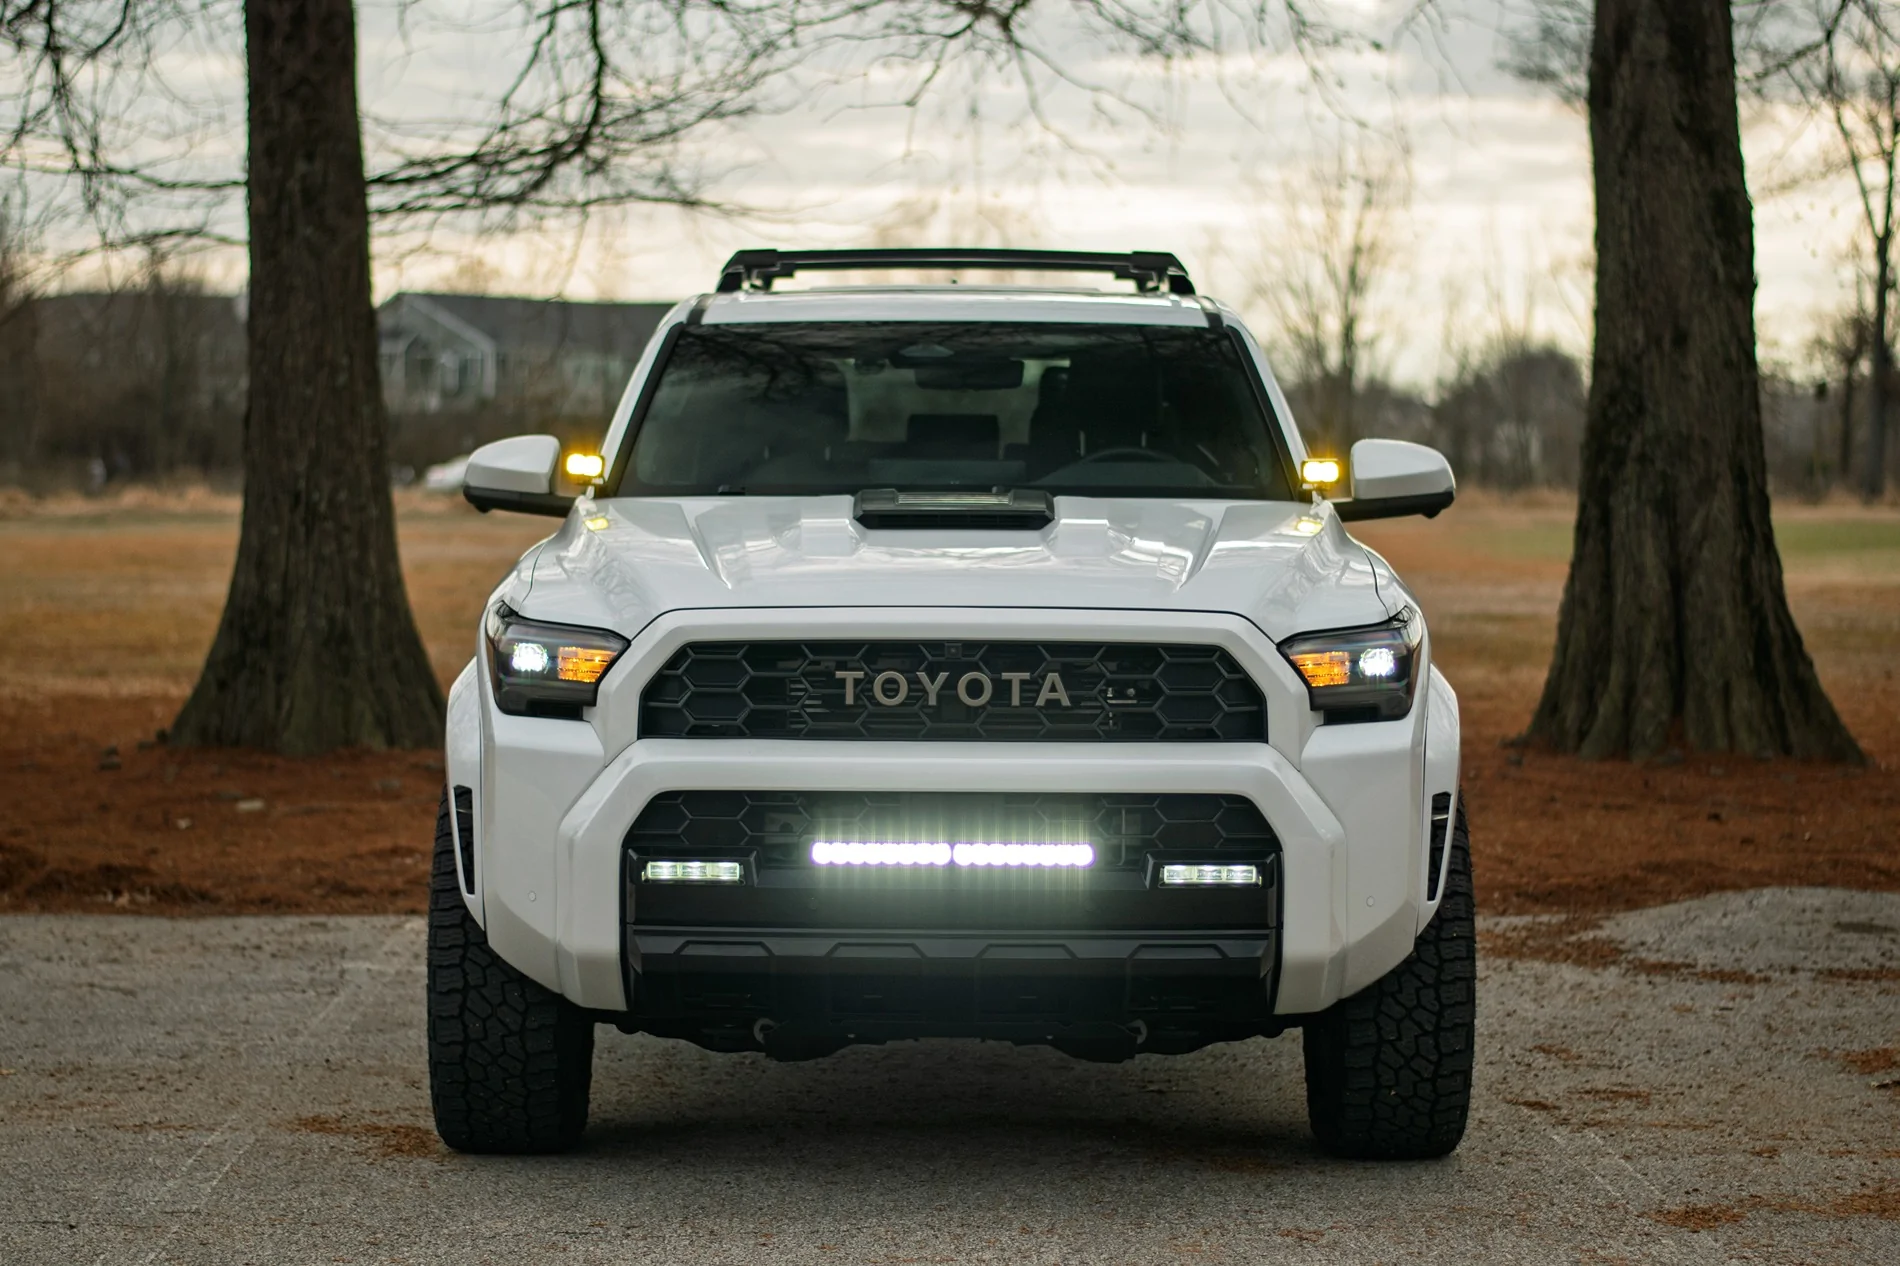
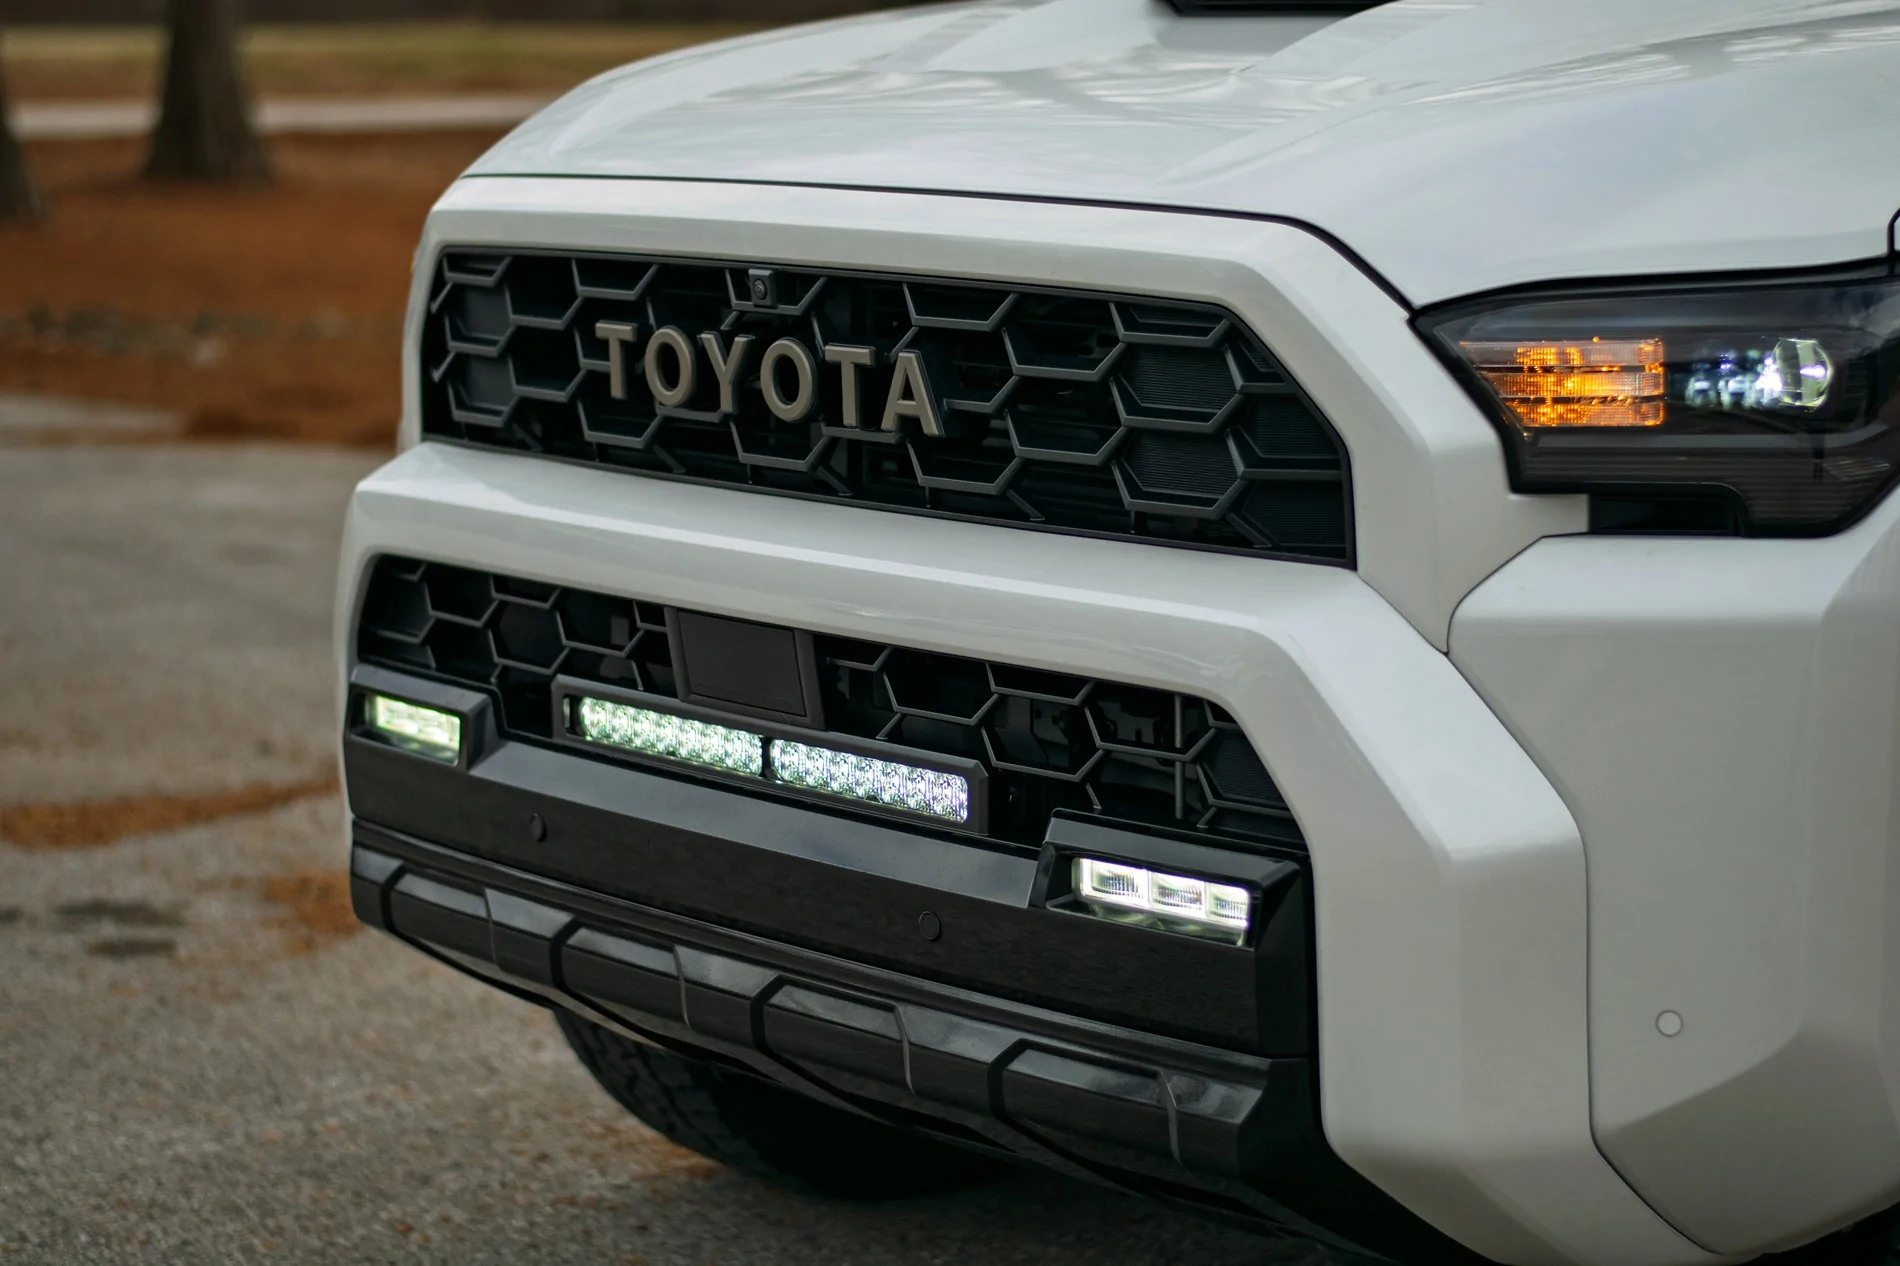
Reinstall all of the silver Phillips head screws. Reconnect all the sensors you previously unplugged. The bracket for the Diode Dynamics bracket screws into factory blank holes in the bumper cover. Install the light bar into the bracket before installing the bracket. It won't fit if you try to install the light bar afterwards. You'll need to clip the zip tie attaching the harness for the TSS sensor before installing the bracket and light bar.
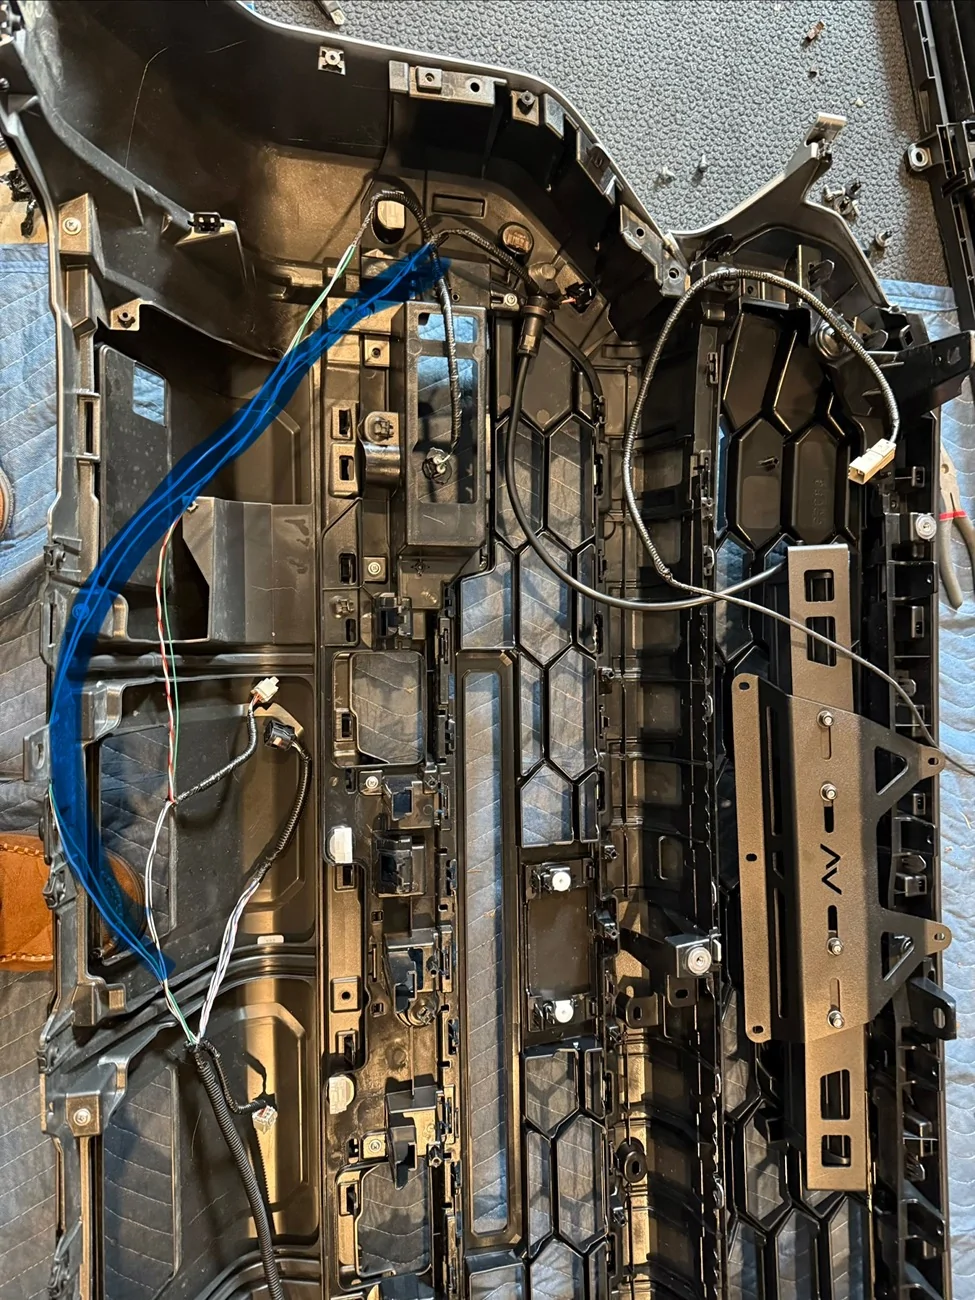
The bolts for the light bar are accessible after the bumper is reinstalled, so don't worry about getting them too snug at this point. I routed the light bar harness along the OEM sensor harness.
It should end up right at the top of the bumper by the camera harness plug. Double check that all your screws are reinstalled and everything is clipped, and you can reinstall the bumper cover. Before fully reinstalling, plug the harness back in and turn the vehicle on to make sure there's no errors from any sensors you may have forgotten to plug back in. If everything checks out, continue to reinstall. If you need to realign the camera, here's the thread detailing how to access the service menu to do so: https://www.4runner6g.com/forum/threads/service-menu-access-procedure-how-to-instructions.7043/
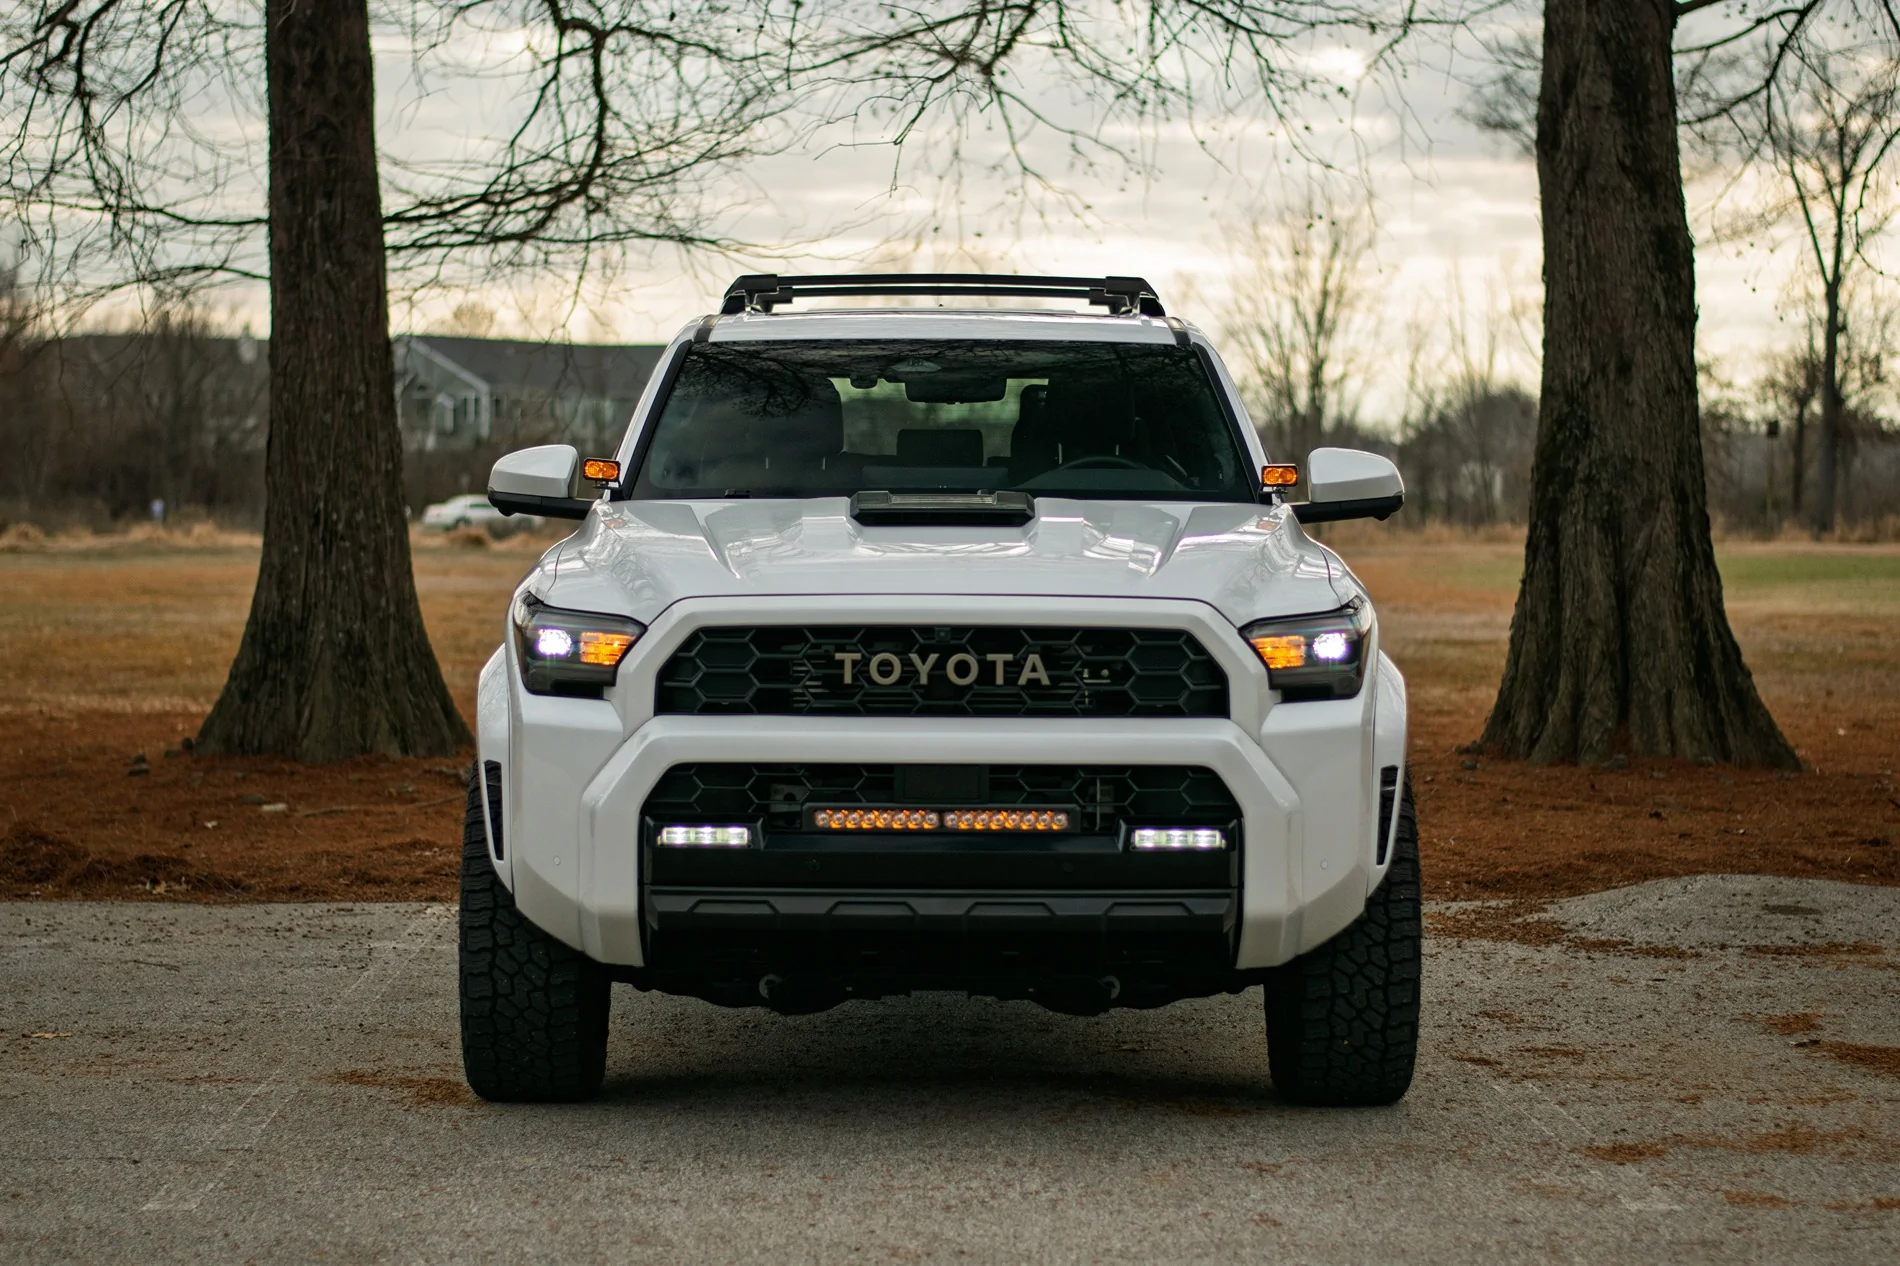
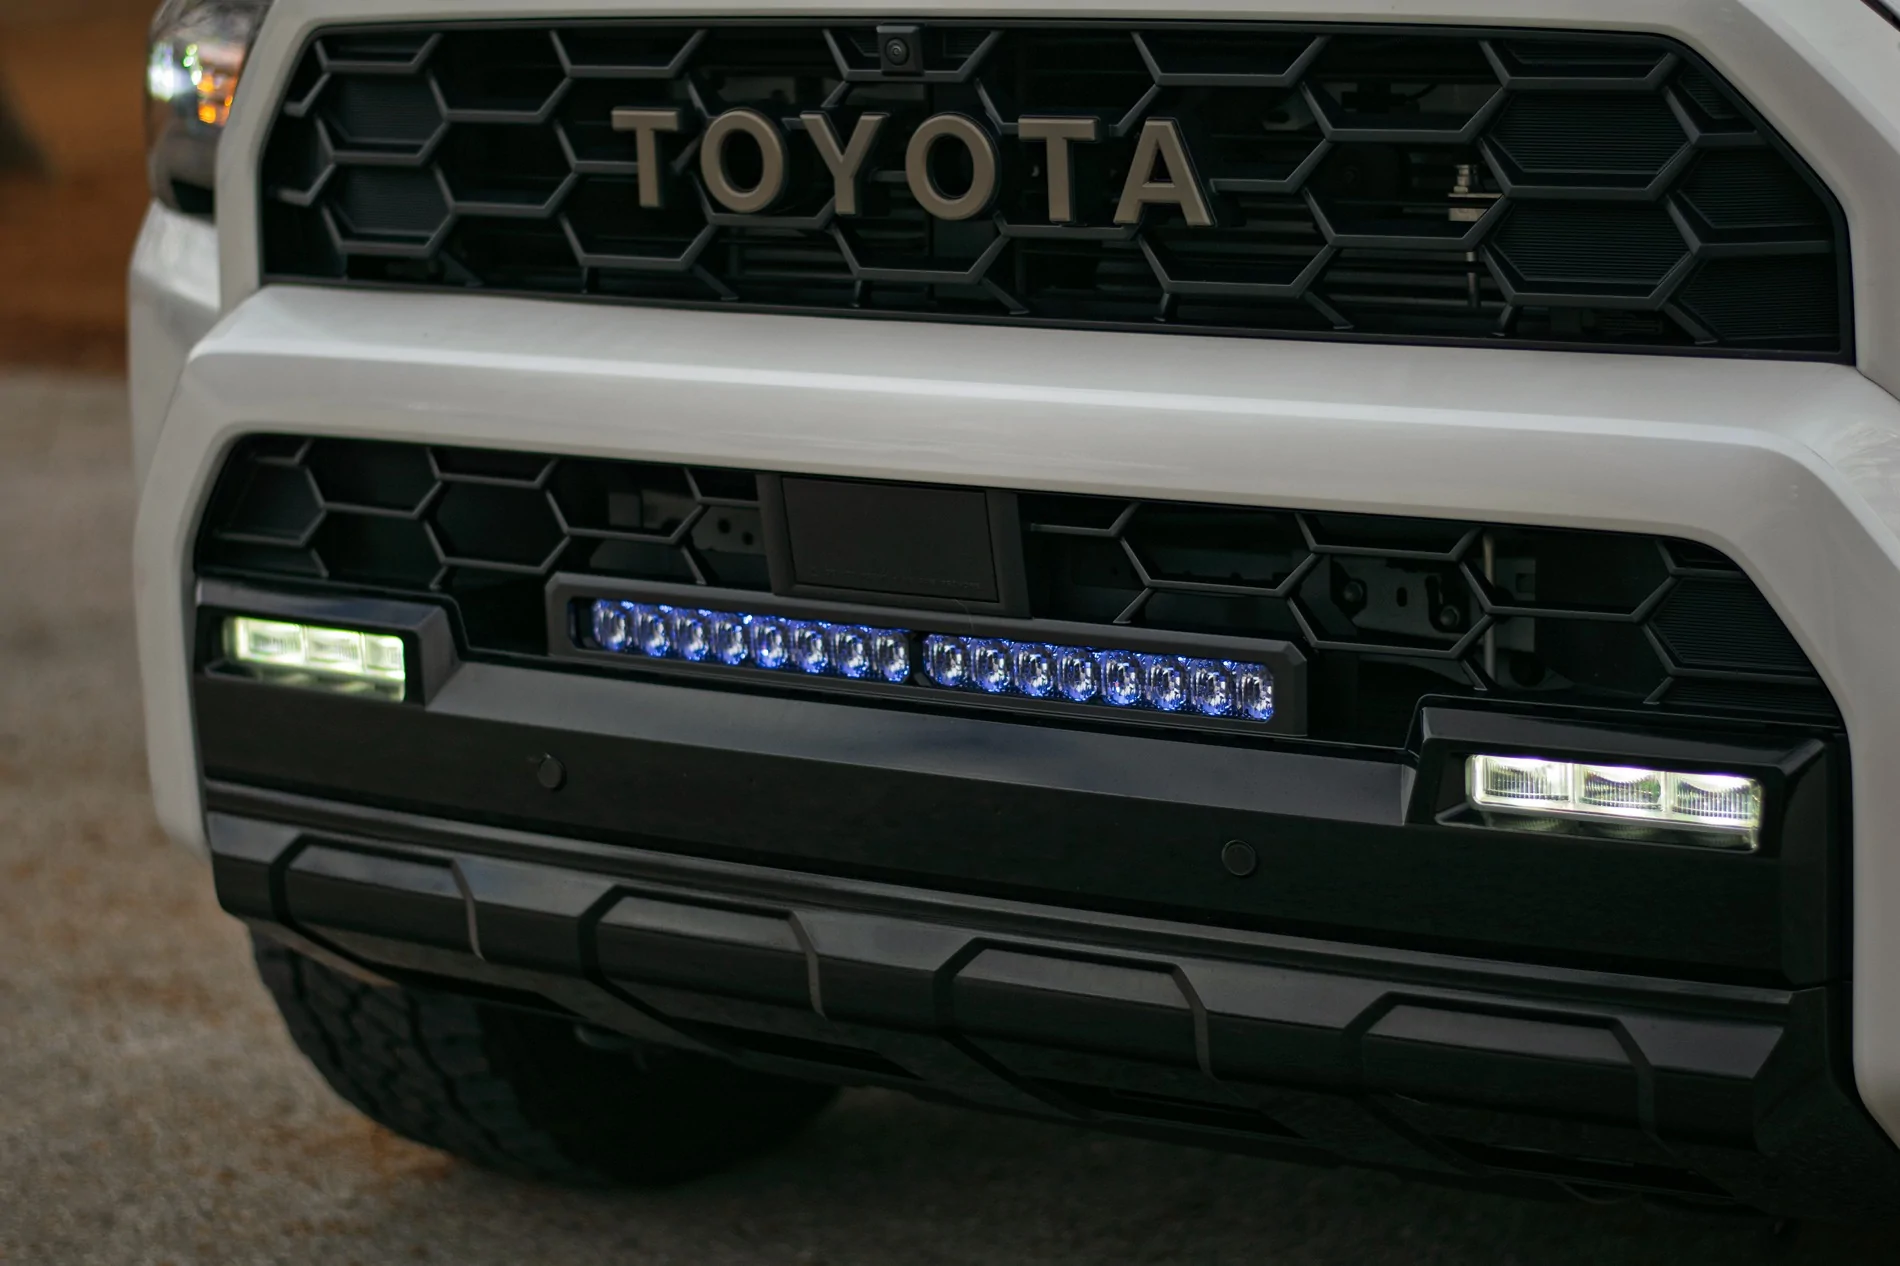
Install the provided harness for the light bar as you see fit. I am personally running OEM style switches from StickerFab for my ditch lights, so I spliced the new harness into what I already had set up.

Overall, this took roughly 5 hours for me from start to finish. If I had to do it again, I could probably shave an hour off knowing what I know now.
Link to the Diode Dynamics kit: https://www.diodedynamics.com/trd-p...filiate_code=ngfilla94&referring_service=link
Grille Part Numbers:
Bronze Heritage Upper 53101-35160
Heritage Lower 53113-35030
There are several videos out there showing how to remove the front bumper (also the easiest part), so I'll skip that. After removing, I set the bumper face down on a moving blanket on top of two sawhorses. You'll definitely want to be able to put it somewhere that's easy to access.
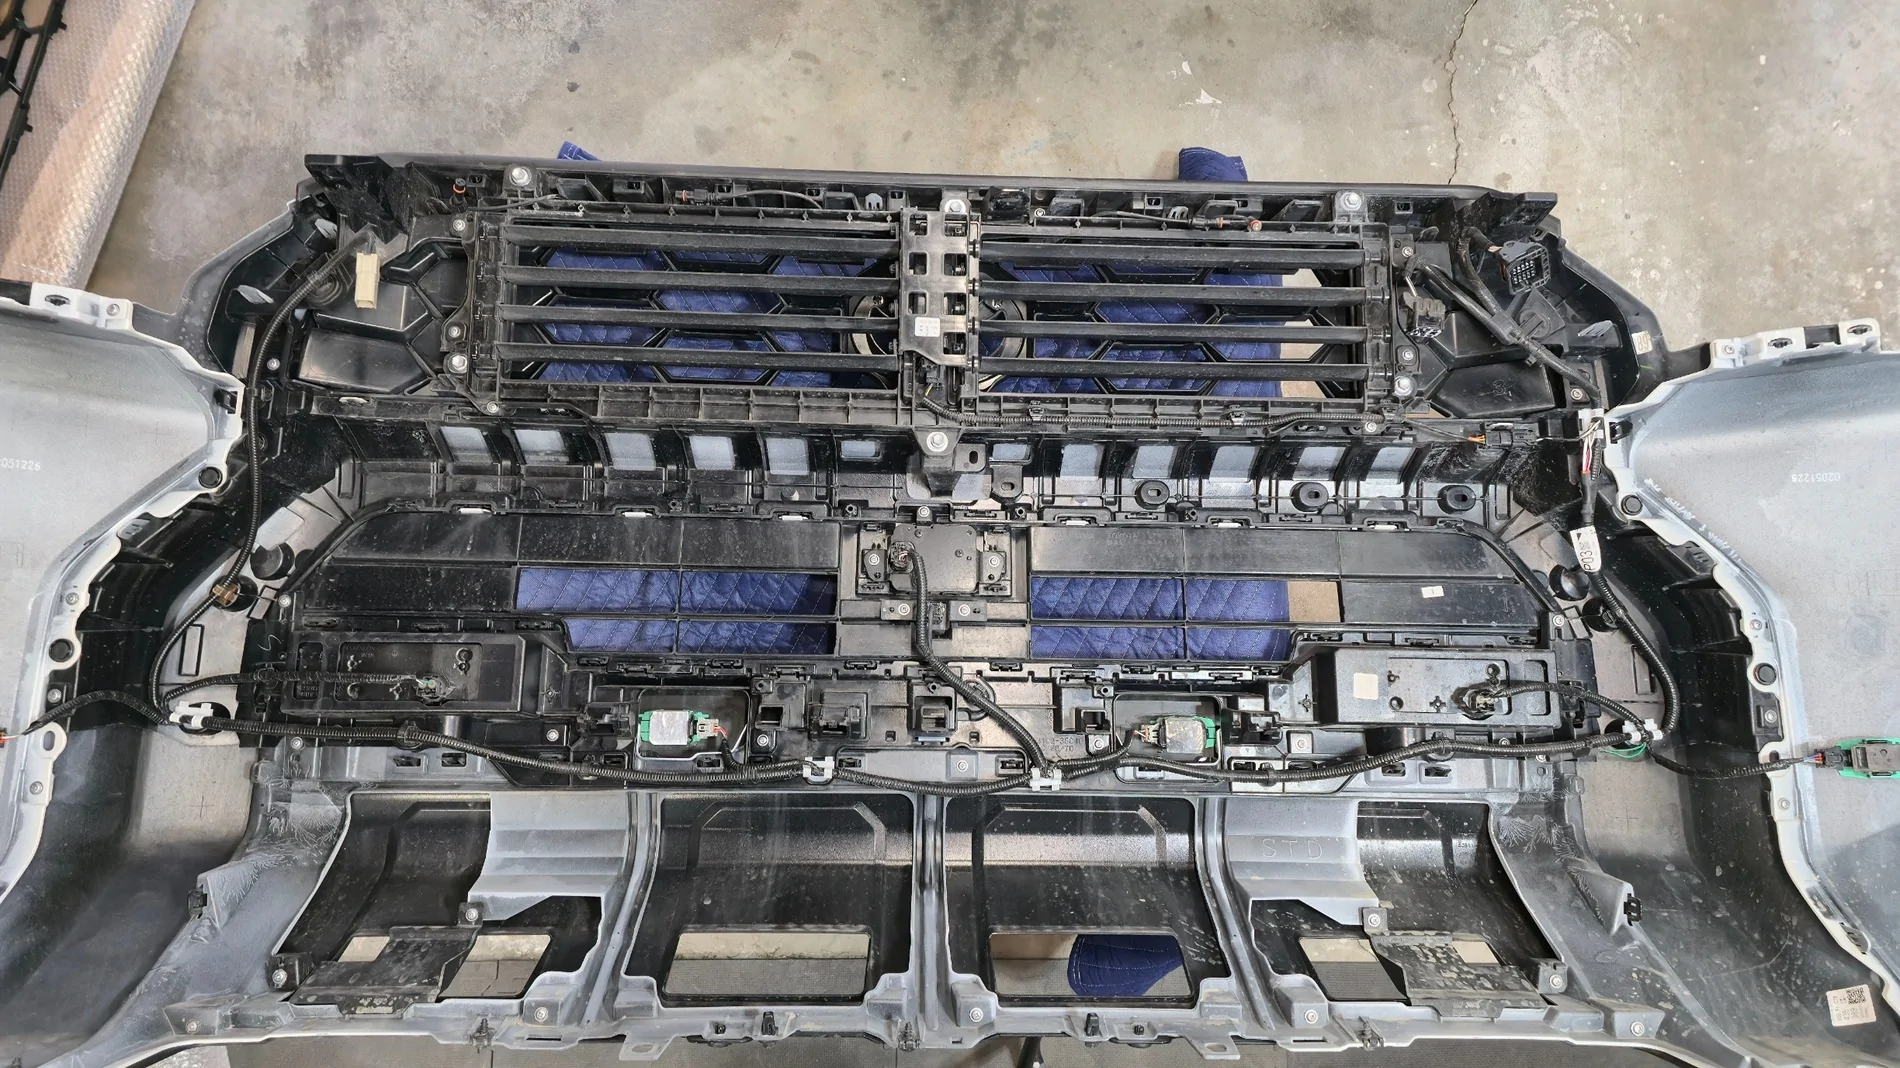
First, remove the active shutters. 6 10mm fasteners. You'll want to fully remove this from the assembly. The clip holding the plug to the assembly is tricky. I ended up mangling mine to get it off after trying to blindly find the hidden release for 5 minutes. The plug itself was unscathed. After fiddling around trying to do the swap in sections, I realized that you need to remove the entire large black assembly. The grille sections are sandwiched between this frame and the bumper cover itself. There are roughly 32 Phillips head screws holding this on, as well as endless clips. Trim removal tools and a small flathead screwdriver are your friends here. I also suggest removing the outer sections of the bumper to make it a little easier to maneuver, it's just a couple extra clips on each side.
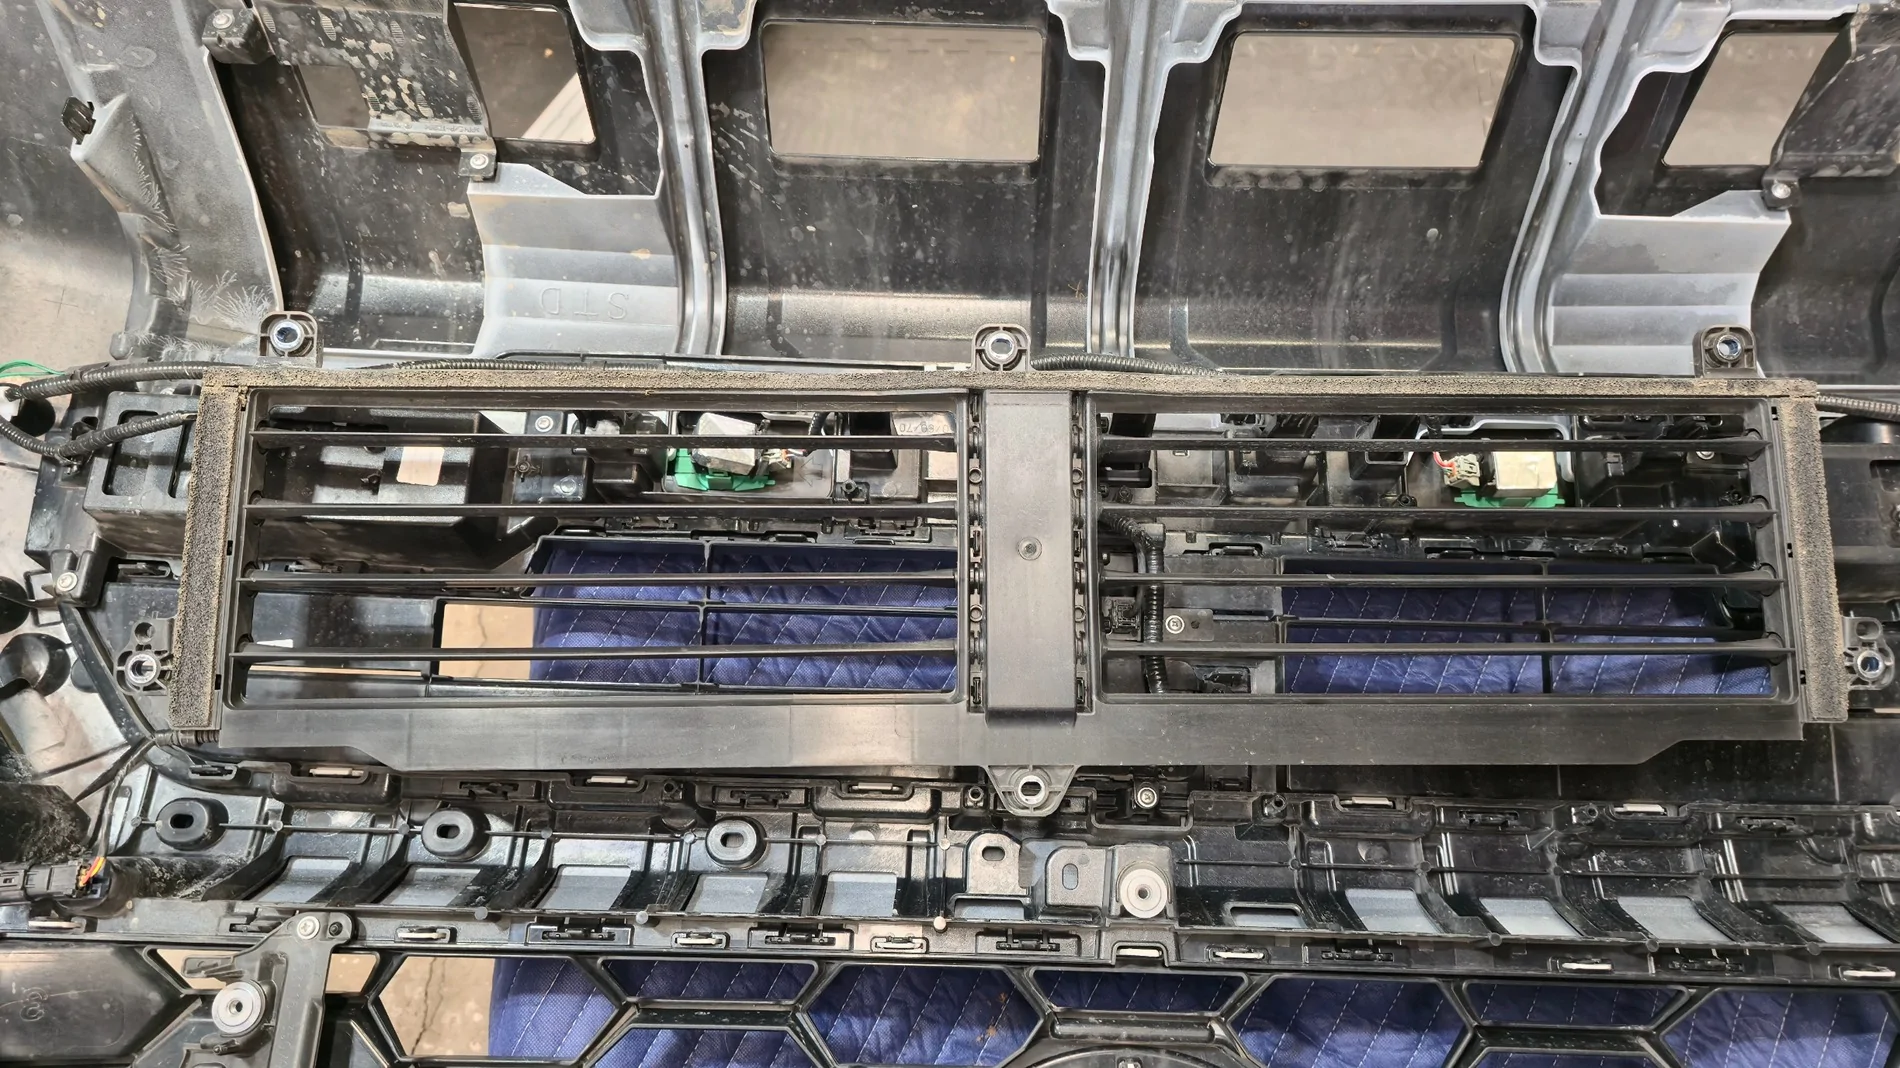
Once you tediously work your way around all the clips, you can separate the bumper cover from the inside assembly. Don't forget to disconnect all the sensors before trying to separate everything. You can continue your unclipping journey to separate the grille sections from the assembly. The Diode Dynamics kit provides plug dust covers for the camera plugs since it will be relocated to the upper grille and use a new harness. They also include a new camera bracket.

The TSS module gets relocated to the new lower grille section along with the original cover. Pretty self explanatory there. After you get the camera and sensor swapped over, you can start clipping the new grille sections into place. After you get it all clipped in, you can start getting the inner assembly mated back to the bumper cover and the outer bumper sections if removed. I broke a couple clips during this process, so just take your time and don't rush it back together. Install the new camera harness before reinstalling the shutters. Secure the harness so that it won't interfere with the shutters.
Reinstall all of the silver Phillips head screws. Reconnect all the sensors you previously unplugged. The bracket for the Diode Dynamics bracket screws into factory blank holes in the bumper cover. Install the light bar into the bracket before installing the bracket. It won't fit if you try to install the light bar afterwards. You'll need to clip the zip tie attaching the harness for the TSS sensor before installing the bracket and light bar.
The bolts for the light bar are accessible after the bumper is reinstalled, so don't worry about getting them too snug at this point. I routed the light bar harness along the OEM sensor harness.
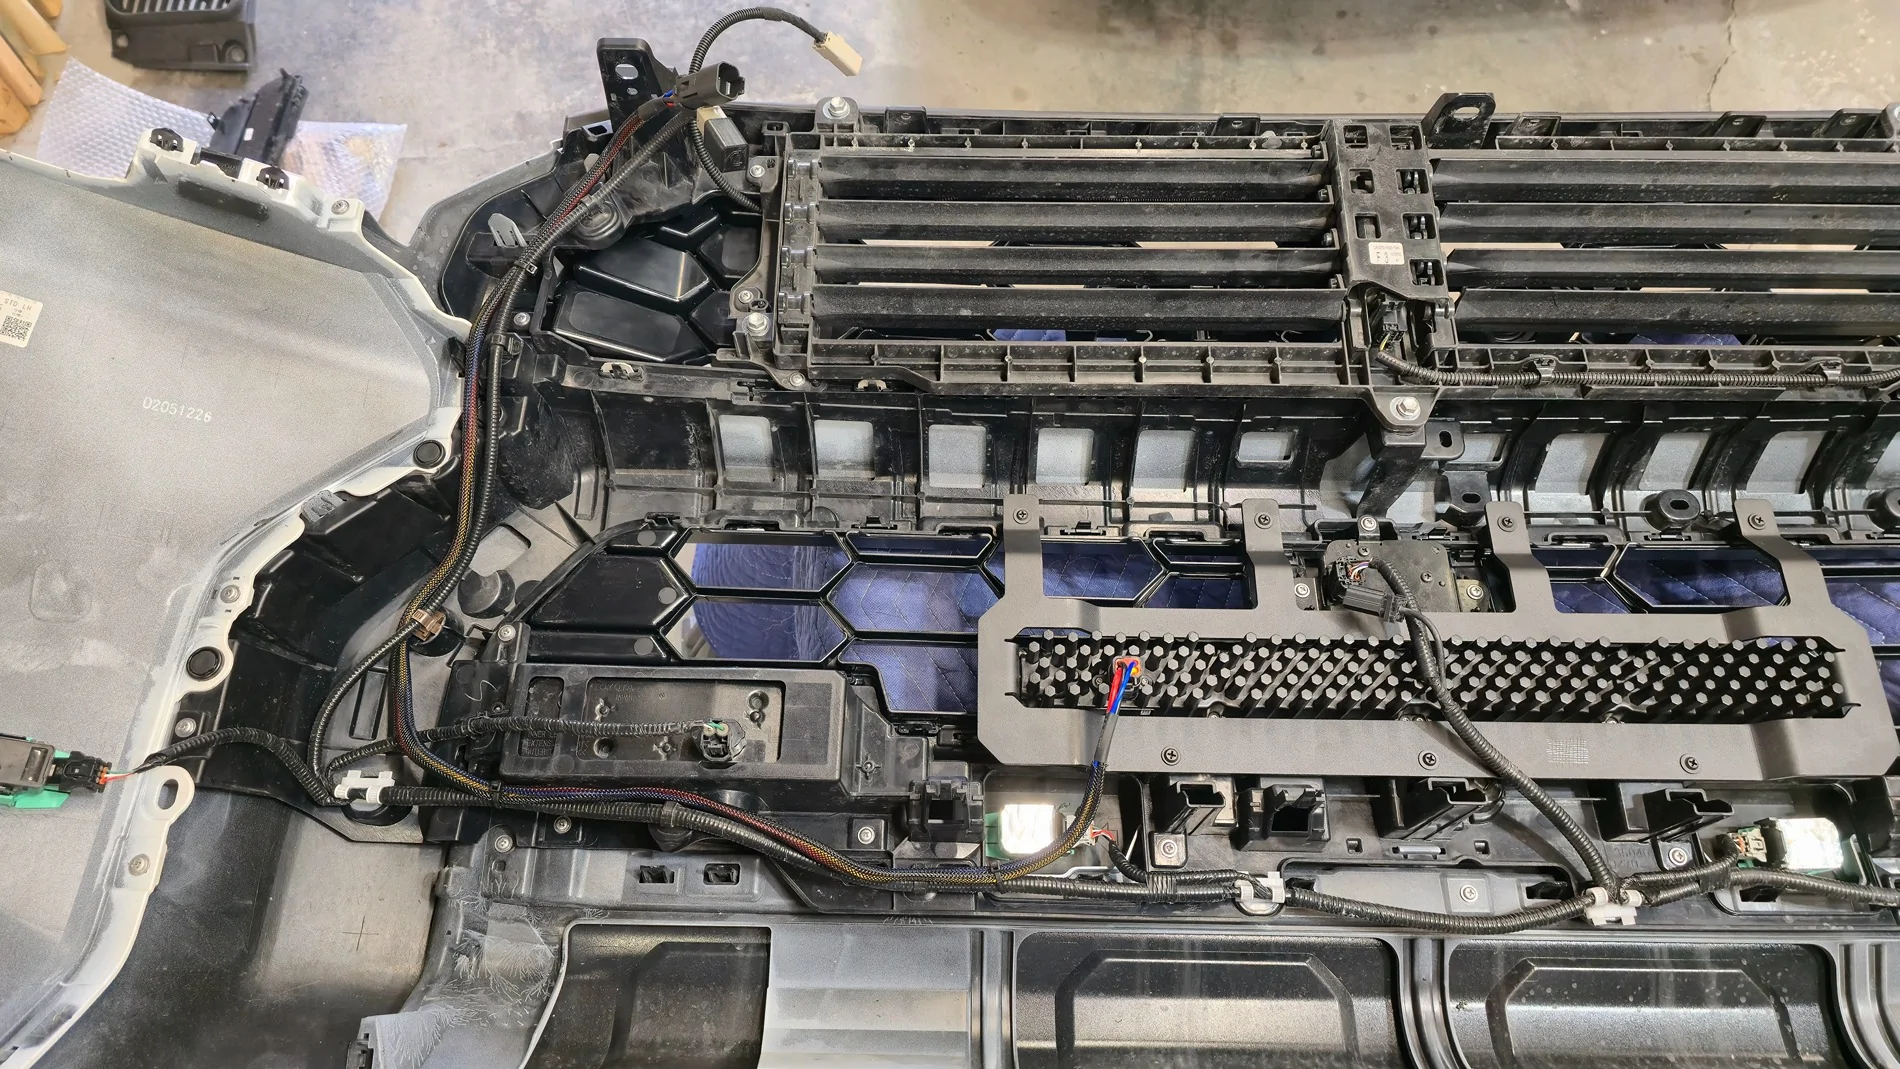
It should end up right at the top of the bumper by the camera harness plug. Double check that all your screws are reinstalled and everything is clipped, and you can reinstall the bumper cover. Before fully reinstalling, plug the harness back in and turn the vehicle on to make sure there's no errors from any sensors you may have forgotten to plug back in. If everything checks out, continue to reinstall. If you need to realign the camera, here's the thread detailing how to access the service menu to do so: https://www.4runner6g.com/forum/threads/service-menu-access-procedure-how-to-instructions.7043/
Install the provided harness for the light bar as you see fit. I am personally running OEM style switches from StickerFab for my ditch lights, so I spliced the new harness into what I already had set up.
Overall, this took roughly 5 hours for me from start to finish. If I had to do it again, I could probably shave an hour off knowing what I know now.
Link to the Diode Dynamics kit: https://www.diodedynamics.com/trd-p...filiate_code=ngfilla94&referring_service=link
Grille Part Numbers:
Bronze Heritage Upper 53101-35160
Heritage Lower 53113-35030
Sponsored
Last edited: