

- First Name
- Mike
- Joined
- Apr 23, 2025
- Threads
- 42
- Messages
- 563
- Reaction score
- 567
- Location
- Orwigsburg, Pa.
- Vehicle(s)
- 2025 4 Runner TRD Pro
- Thread starter
- #1
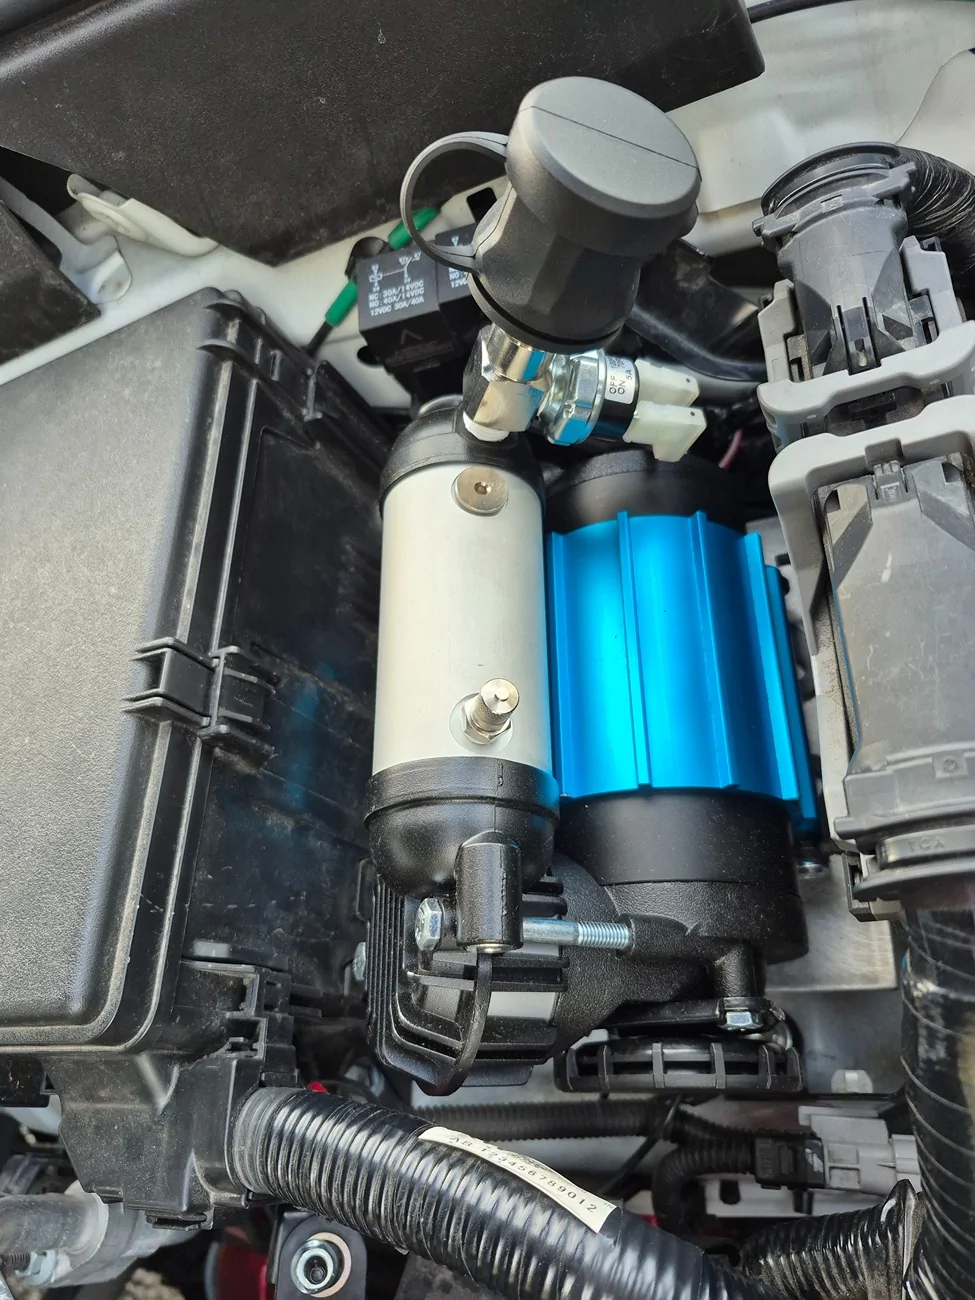
Had some time to install this ARB Single Compressor https://store.arbusa.com/single-motor-onboard-12v-air-compressor-ckma12/
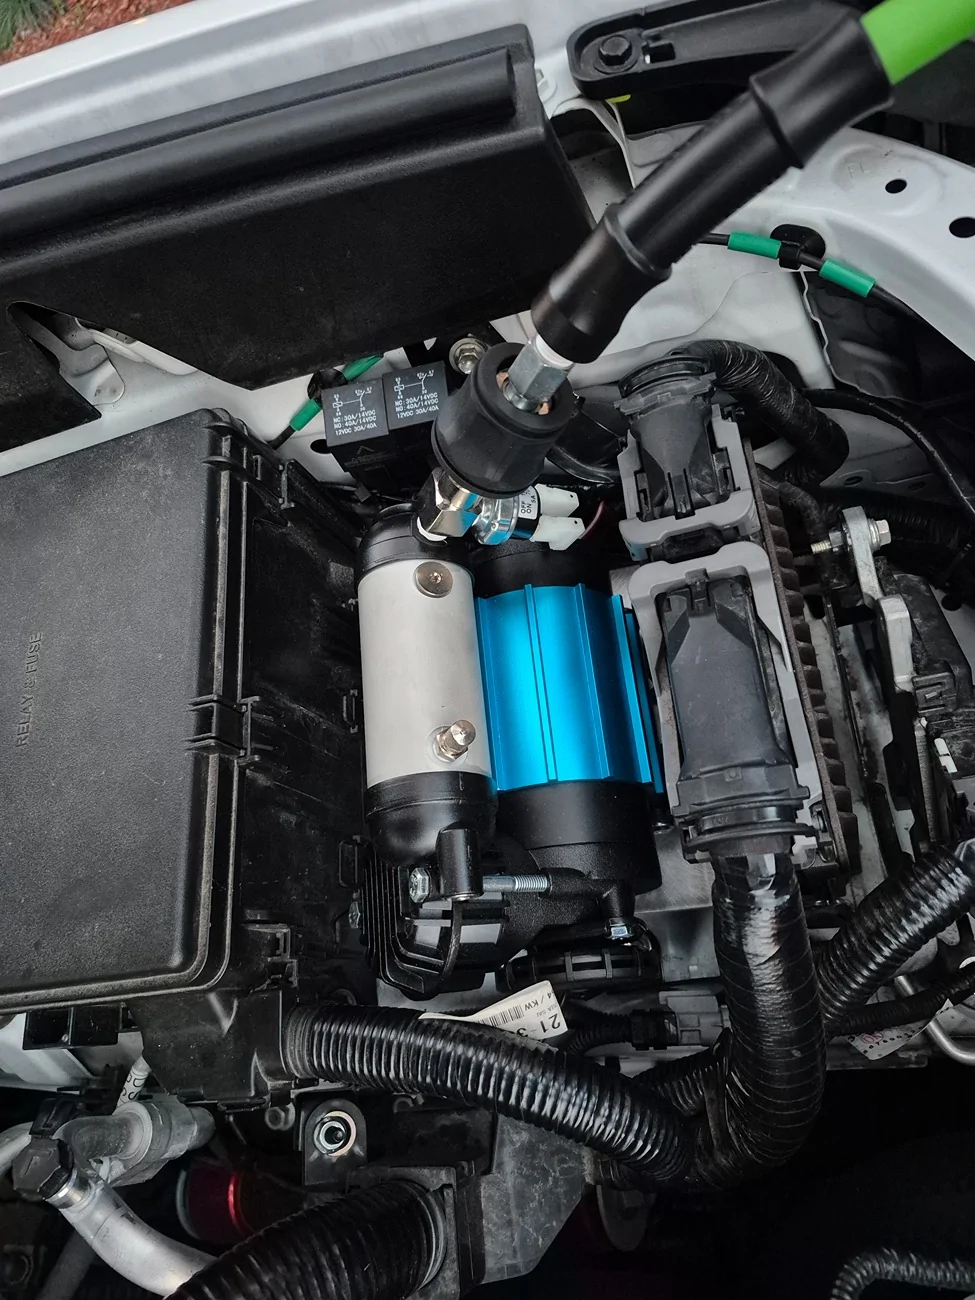
I was going back and forth from installing it under the hood or where the OEM compressor comes installed, landed on under the hood. Great spot and makes it very easy to install and easy to get to.
I don't have a before pic but if you look at the location I installed this in, you can look down and see 5 OEM nutserts in the body panel above the fender well . These nutserts don't have anything behind them within 2" so I got 5 pieces of threaded stock and screwed them down until they were fairly level with each other.
I then took a piece of cardboard cut it out roughly to fit the space the compressor was going to sit on and pressed the cardboard down onto the threaded stock to make an impression into the cardboard. I then transferred that to my piece of 3/16" aluminum as a template to come up with this.

Because the space where I mounted it is not even and each nutsert is at a different height I used neoprene shaft collars I had laying around over the threaded stock and cut them to the height I needed to make the plate level. Once I had the plate drilled and in place I set my compressor on top of it and marked where it will be mounted to the plate. I then mounted the compressor to the plate with the supplied hardware.
I removed the threaded stock from the nutserts and replaced them with appropriate length bolts and lock washers, threaded them through the plate into the neoprene collars and into OEM nutserts and tightened it all down.. I used stainless for the rust prevention.
Once mounted I started the wiring, I wasn't going to be running lockers so I stripped the wires down and only used the ones I needed. There's a bunch of video's already out there to show you which wires you'll need depending on what your doing with your compressor.
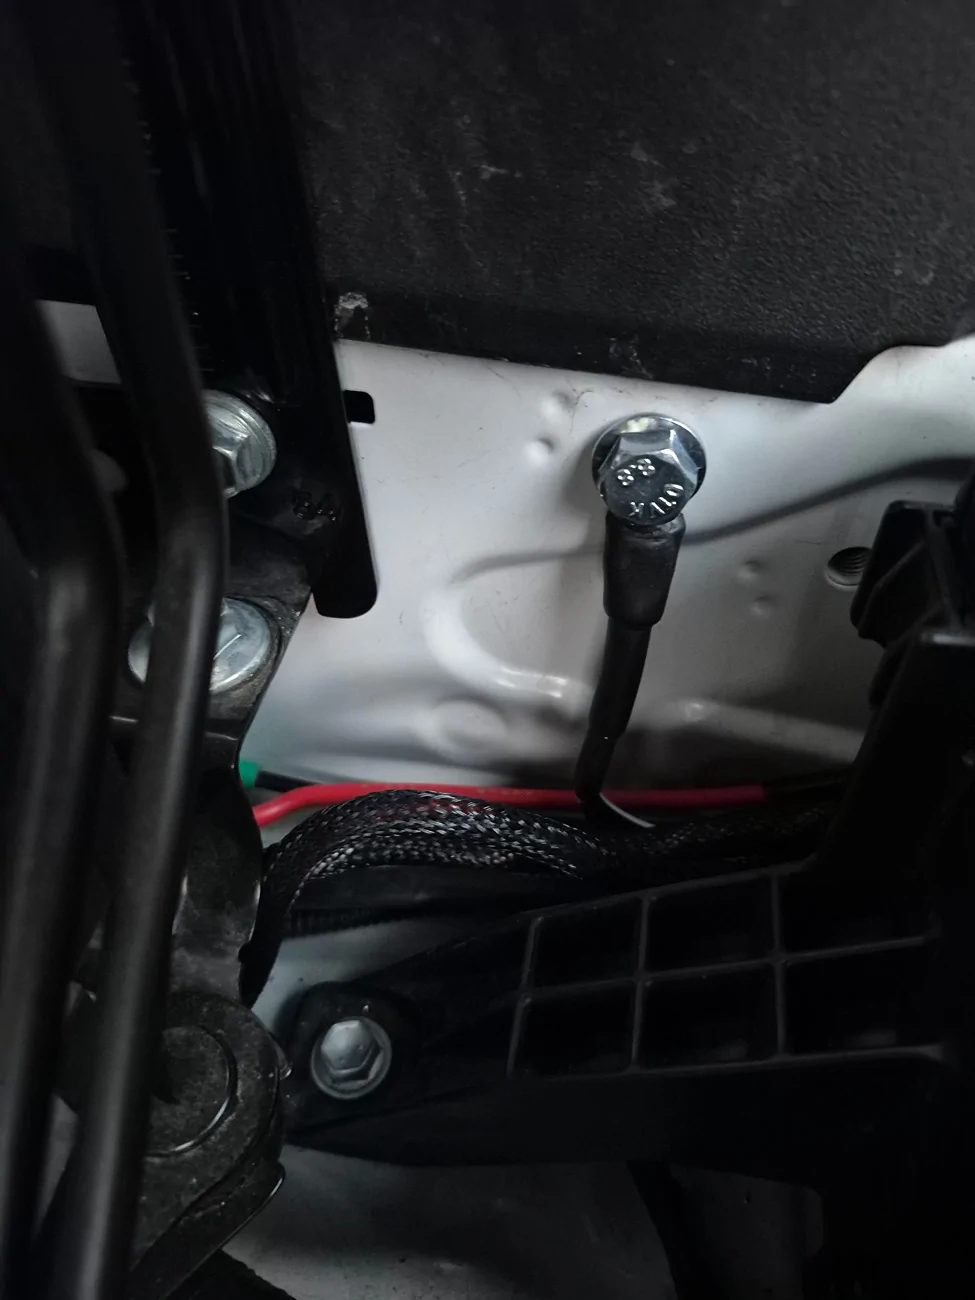
I combined the 2 grounds and mounted them behind the fuse box which again has an open OEM nutsert to use, I had a left over bolt from when I installed the RedLine hood struts so I used that.
I used #3 AUX switch to activate the compressor and ran the power wire across the engine bay and used the fuse box on that side to jump on the main 12V.

Red Arrow indicates where I came in at.
There is a tube where that small white wire bundle is that has a channel to the outside of the fusebox and will keep it as water tight as OEM which allows up to a #8 wire to sneak in and not have to alter the fuse box at all. Just push that wire bundle back slightly and have a light below and you can actually see all the way through to the engine bay. Here's a closer pic.
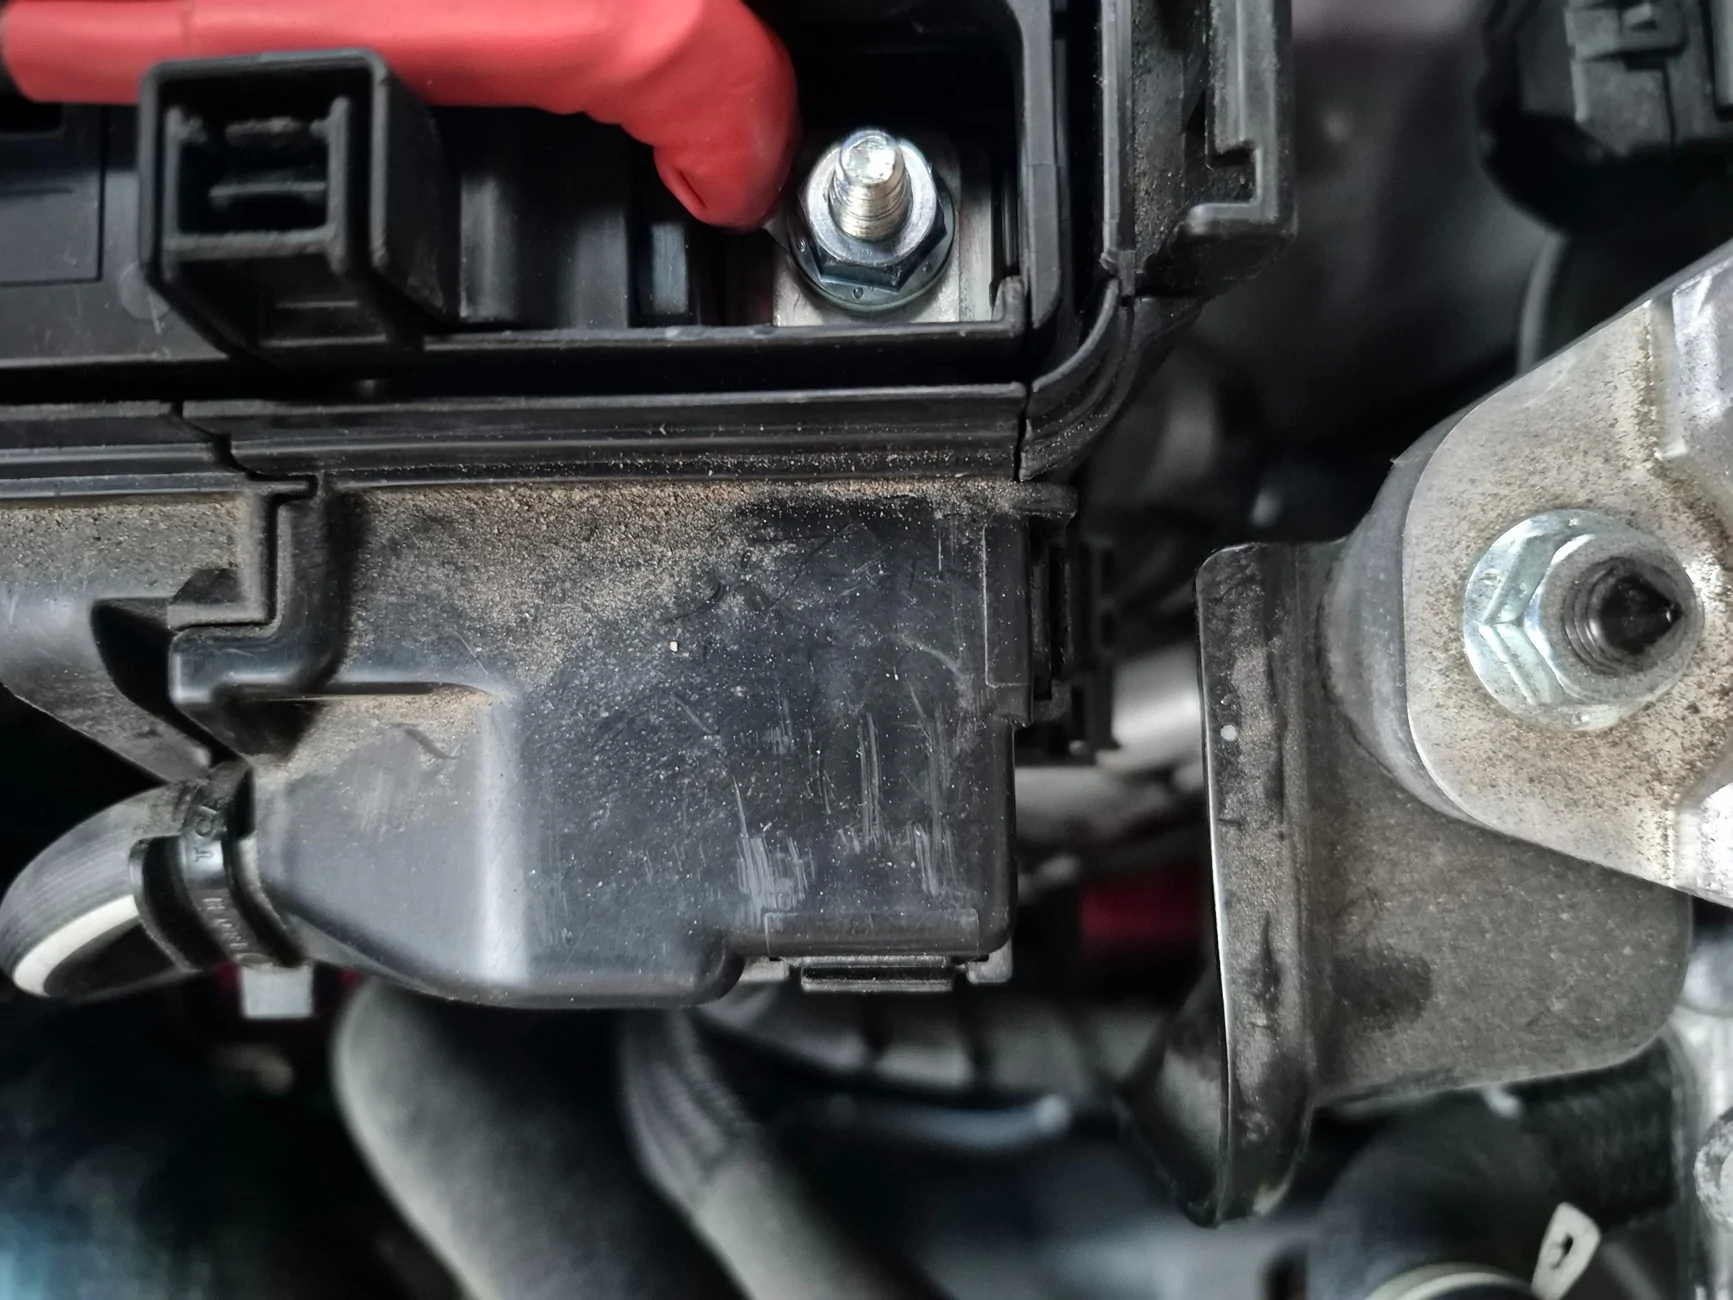
And here's a close up of the 12V positive main hookup.
.
All done and pumpin' air....
I was going back and forth from installing it under the hood or where the OEM compressor comes installed, landed on under the hood. Great spot and makes it very easy to install and easy to get to.
I don't have a before pic but if you look at the location I installed this in, you can look down and see 5 OEM nutserts in the body panel above the fender well . These nutserts don't have anything behind them within 2" so I got 5 pieces of threaded stock and screwed them down until they were fairly level with each other.
I then took a piece of cardboard cut it out roughly to fit the space the compressor was going to sit on and pressed the cardboard down onto the threaded stock to make an impression into the cardboard. I then transferred that to my piece of 3/16" aluminum as a template to come up with this.

Because the space where I mounted it is not even and each nutsert is at a different height I used neoprene shaft collars I had laying around over the threaded stock and cut them to the height I needed to make the plate level. Once I had the plate drilled and in place I set my compressor on top of it and marked where it will be mounted to the plate. I then mounted the compressor to the plate with the supplied hardware.
I removed the threaded stock from the nutserts and replaced them with appropriate length bolts and lock washers, threaded them through the plate into the neoprene collars and into OEM nutserts and tightened it all down.. I used stainless for the rust prevention.
Once mounted I started the wiring, I wasn't going to be running lockers so I stripped the wires down and only used the ones I needed. There's a bunch of video's already out there to show you which wires you'll need depending on what your doing with your compressor.
I combined the 2 grounds and mounted them behind the fuse box which again has an open OEM nutsert to use, I had a left over bolt from when I installed the RedLine hood struts so I used that.
I used #3 AUX switch to activate the compressor and ran the power wire across the engine bay and used the fuse box on that side to jump on the main 12V.
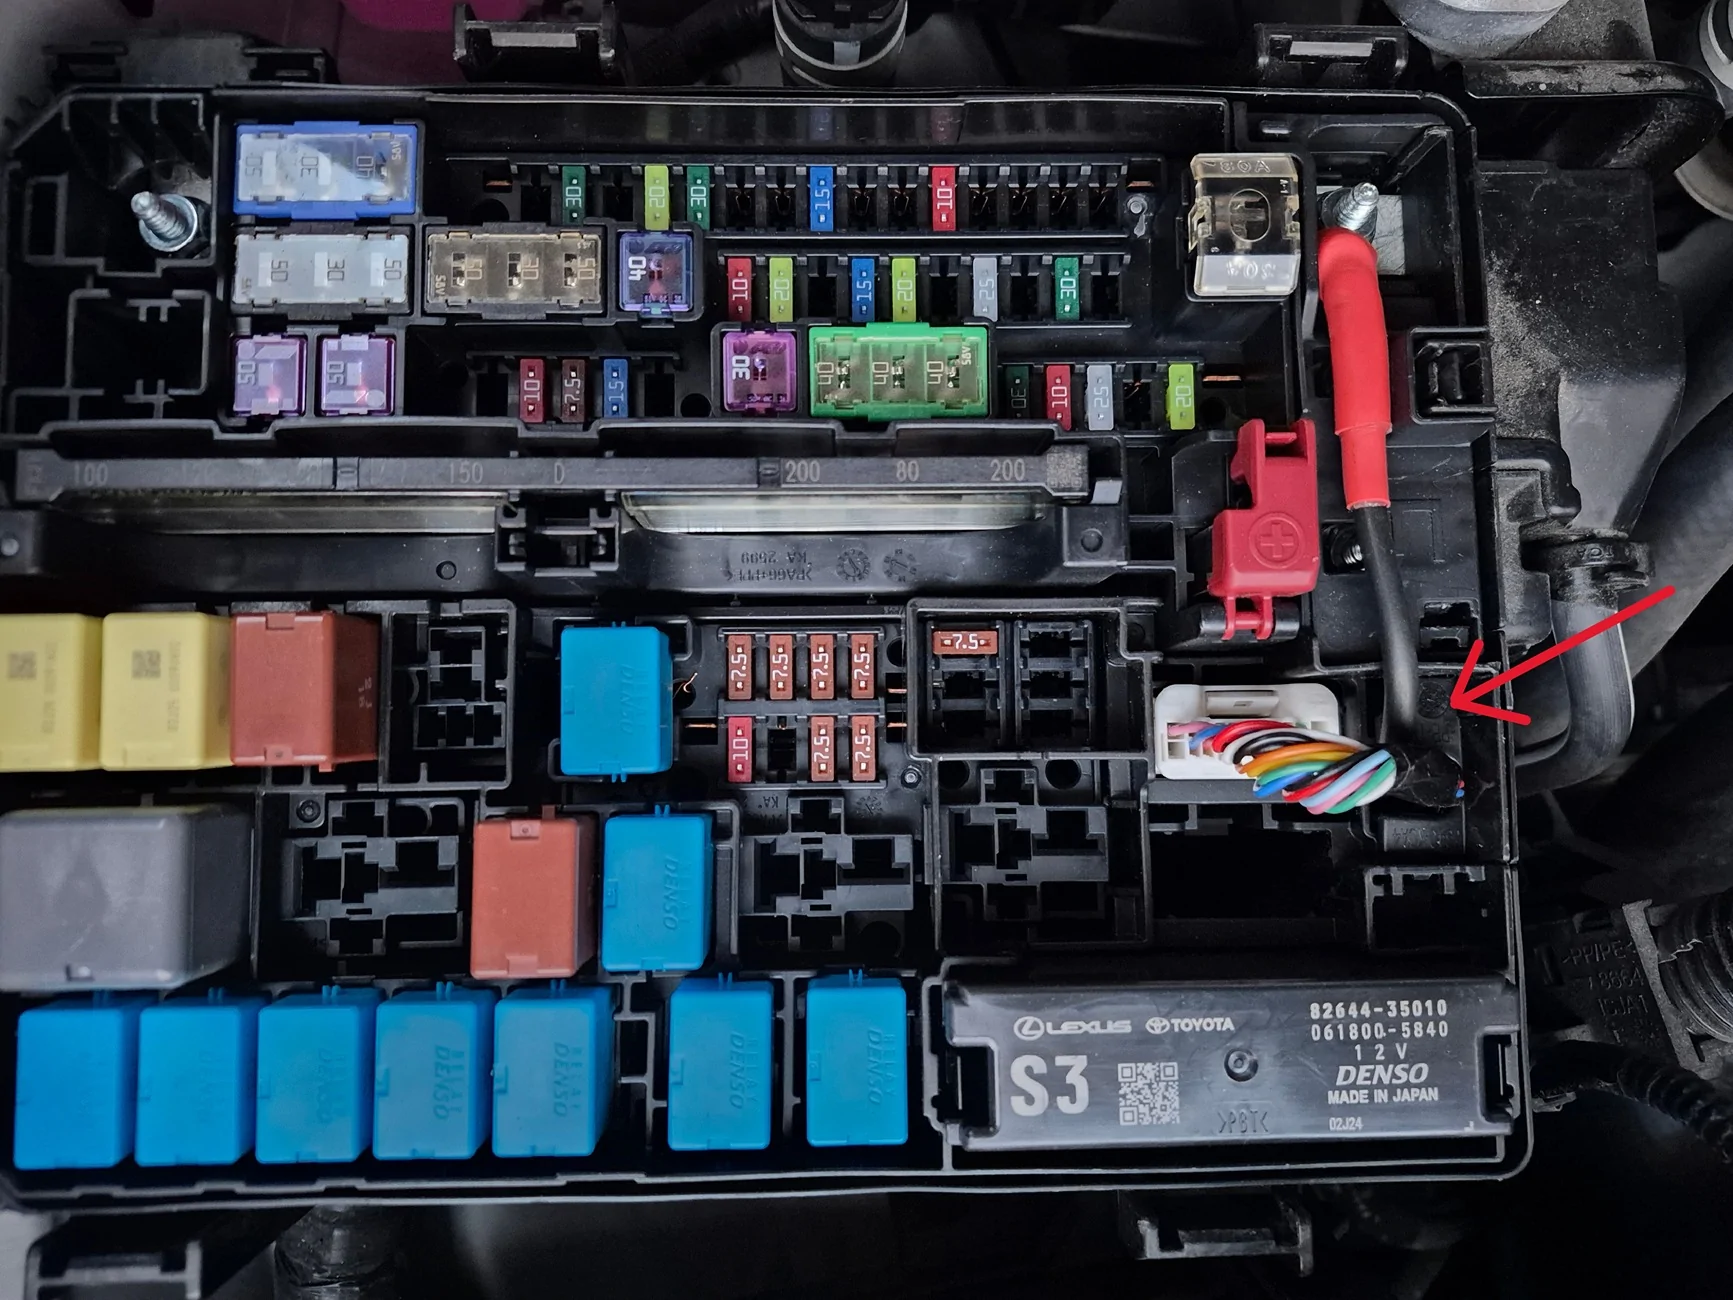
Red Arrow indicates where I came in at.
There is a tube where that small white wire bundle is that has a channel to the outside of the fusebox and will keep it as water tight as OEM which allows up to a #8 wire to sneak in and not have to alter the fuse box at all. Just push that wire bundle back slightly and have a light below and you can actually see all the way through to the engine bay. Here's a closer pic.

And here's a close up of the 12V positive main hookup.
.
All done and pumpin' air....
Sponsored

