- Thread starter
- #1
Recently purchased/installed the 32" Lo Pro Grille LED Light Bar Kit from @Cali Raised LED recently released for the 6th gen 4Runner (https://caliraisedled.com/products/32-lo-pro-grille-led-light-bar-kit-for-2025-toyota-4runner) on my ORP and thought I'd share my install process and what I think of the lightbar so far.
To preface this, I had a 2016 Tacoma that I installed a very similar kit from CaliRaised which held up extremely well for the entire 8+ years and was still working perfectly when I sold the Taco. I realize some people may have had other results with lightbars from CaliRaised, but for the price/performance compared to more expensive options and my prior experience, I went with them again.
Now for the install:
Step 1 - Preparing the wiring:
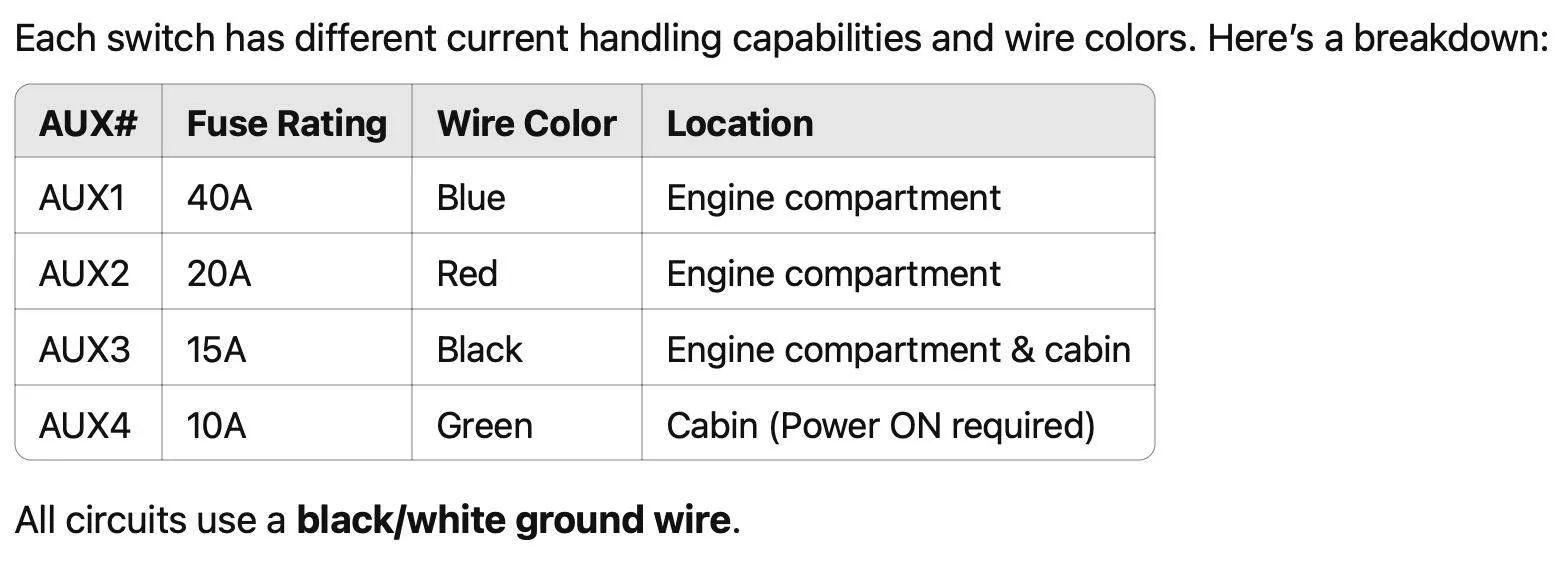
My truck came with the factory wired AUX option so my plan was to wire the lightbar using the factory pigtail into the pre-installed switches. According to my reseach, the lightbar can pull up to ~30 amps so I used the AUX 1 connector to ensure I don't blow any fuses:

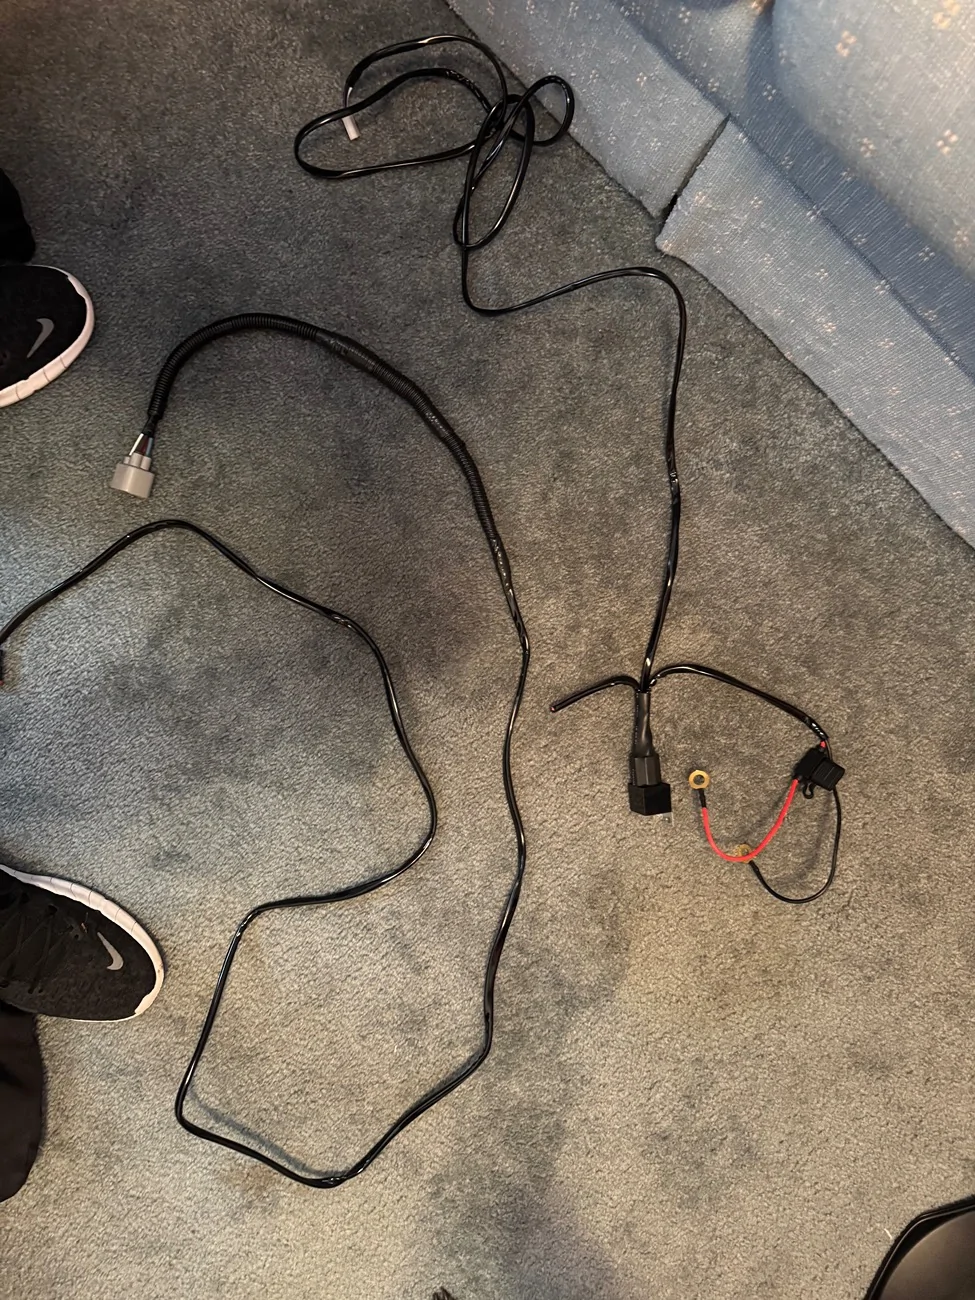
I snipped the light bar provided wiring harness before its relay, then used some waterproof heat-shrink crimp connectors to connect it to the factory AUX 1 pigtail. I then covered the connection with some more wiring conduit to protect the connectors/make it pretty. You can see in the pic below the finished product, and where I clipped the provided wiring harness:

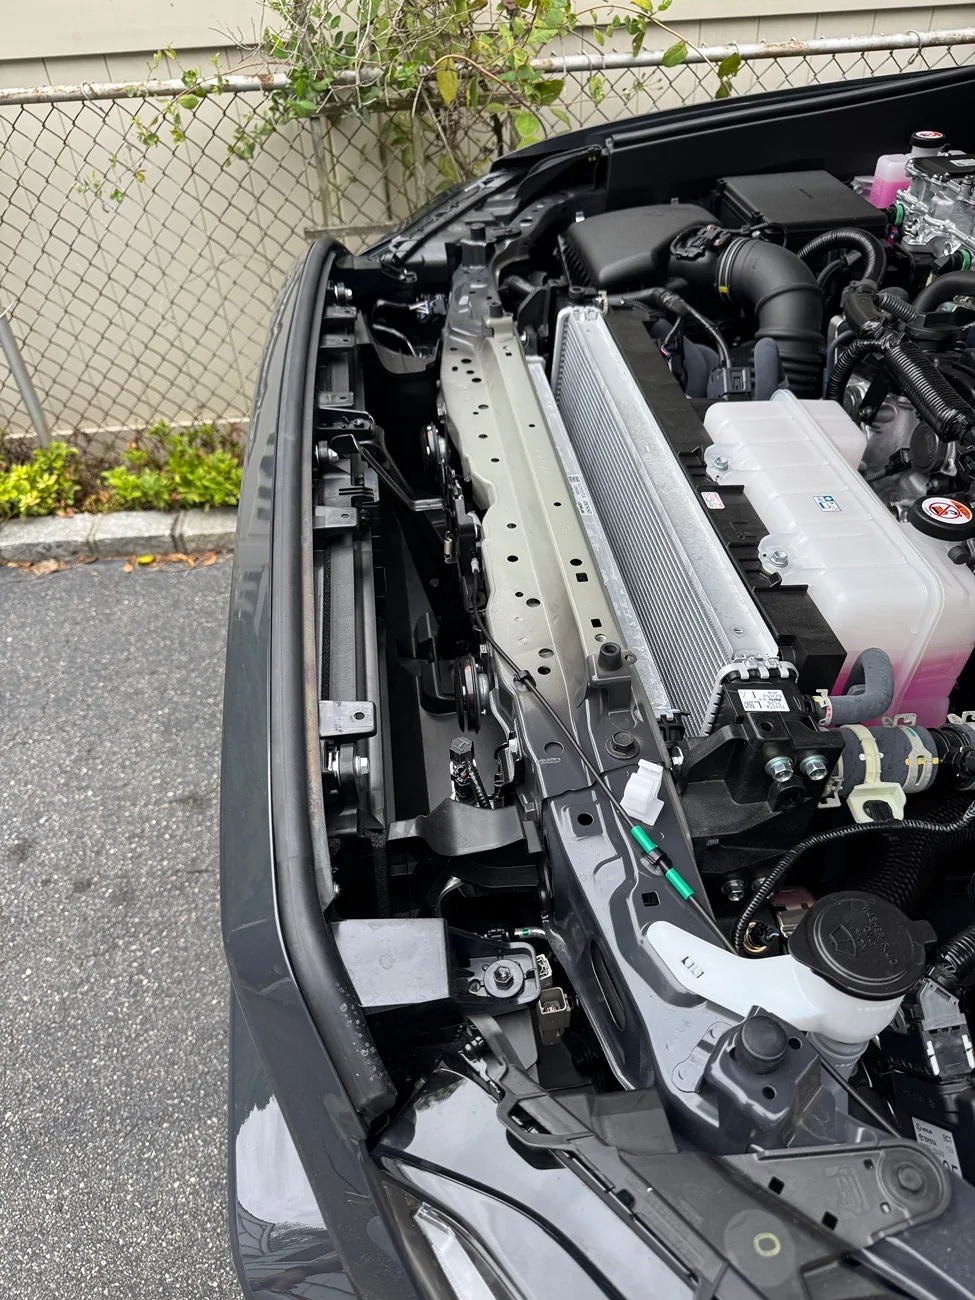
Step 2 - Removing the bumper:
I mostly followed the instructions in the video below from CaliRaised but the video isn't 100% (at least for my truck) and I'll go over that below:
While the instructions provided get you most of the way there, there are some notes that I would add when attempting this. At least for my truck, there is another connection on the right driver side that needs to be disconnected in addition to the two connections on the passanger side. Additionally, it seemed like there were extra screws/fastners in both wheel wells that need to be removed before the bumper would come free.
Biggest tip: Be very careful when removing disconnecting/connecting the passanger side connectors. I didn't seat the connections properly when reconnecting, bending a pin and causing EVERY CHECK SYSTEM WARNING to come on once everything was buttoned back up. After having a small panic attack thinking I messed up my brand new truck, I brought it straight to Toyota as my 40 dollar amazon OBD2 scanner wouldn't cut it. After a day of fearing Toyota was going to tell me they needed to change ever sensor for massive amount of money, they reseatted the connector and reset the codes. Stupid tax paid, but as I said, Be very careful when removing disconnecting/connecting the passanger side connectors.
Some pics of that process:

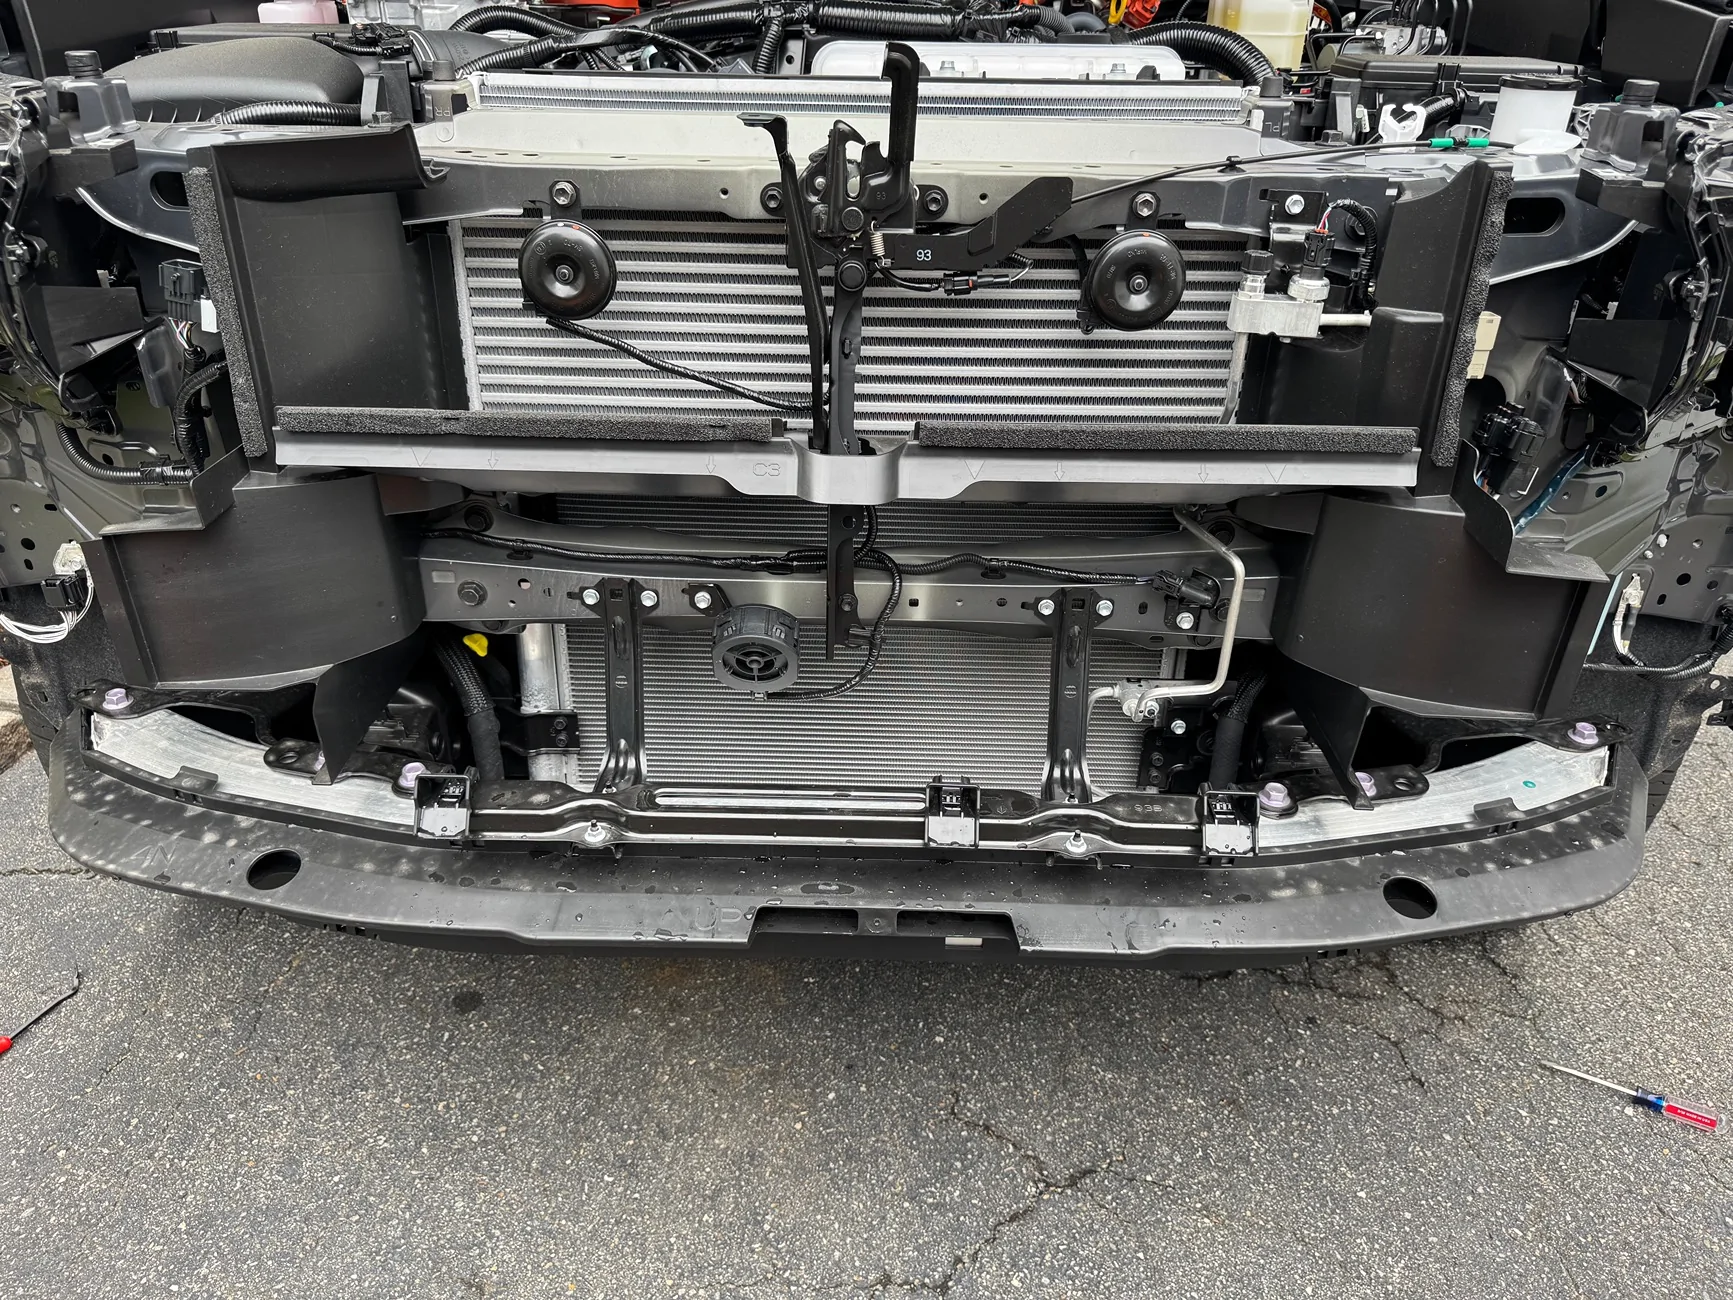
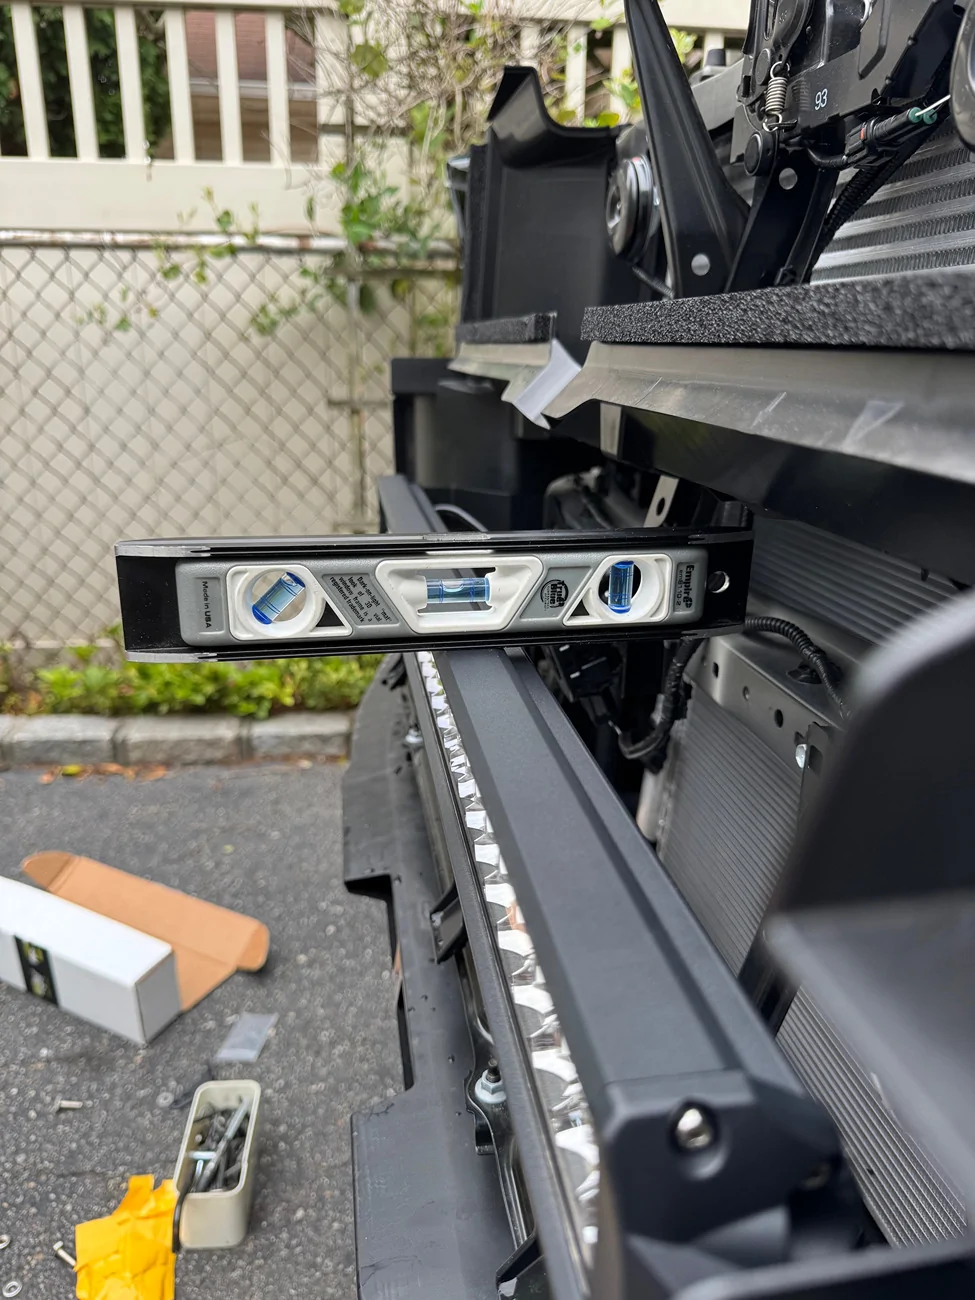
Step 3 - Installing the Lightbar:
This was actually extremely easy and have to give all credit to CaliRaised for a well designed bracket. I followed the video below, but again this was super quick, cleared everything including that weird black circle thing (anyone know what that is?), and didn't require any cutting/drilling/etc. whatsoever.
Only additional suggestion here is to dab a small amount of blue loctite where the lightbar connects to the bracket. There is no I can figure to get at the adjustment after installing short of removing the entire bumper again.
Once its all assembled it's just a matter of plugging the wiring harness into the Aux 1 connector on the passanger side of the radiator. Note - Its the rear one not the front one.
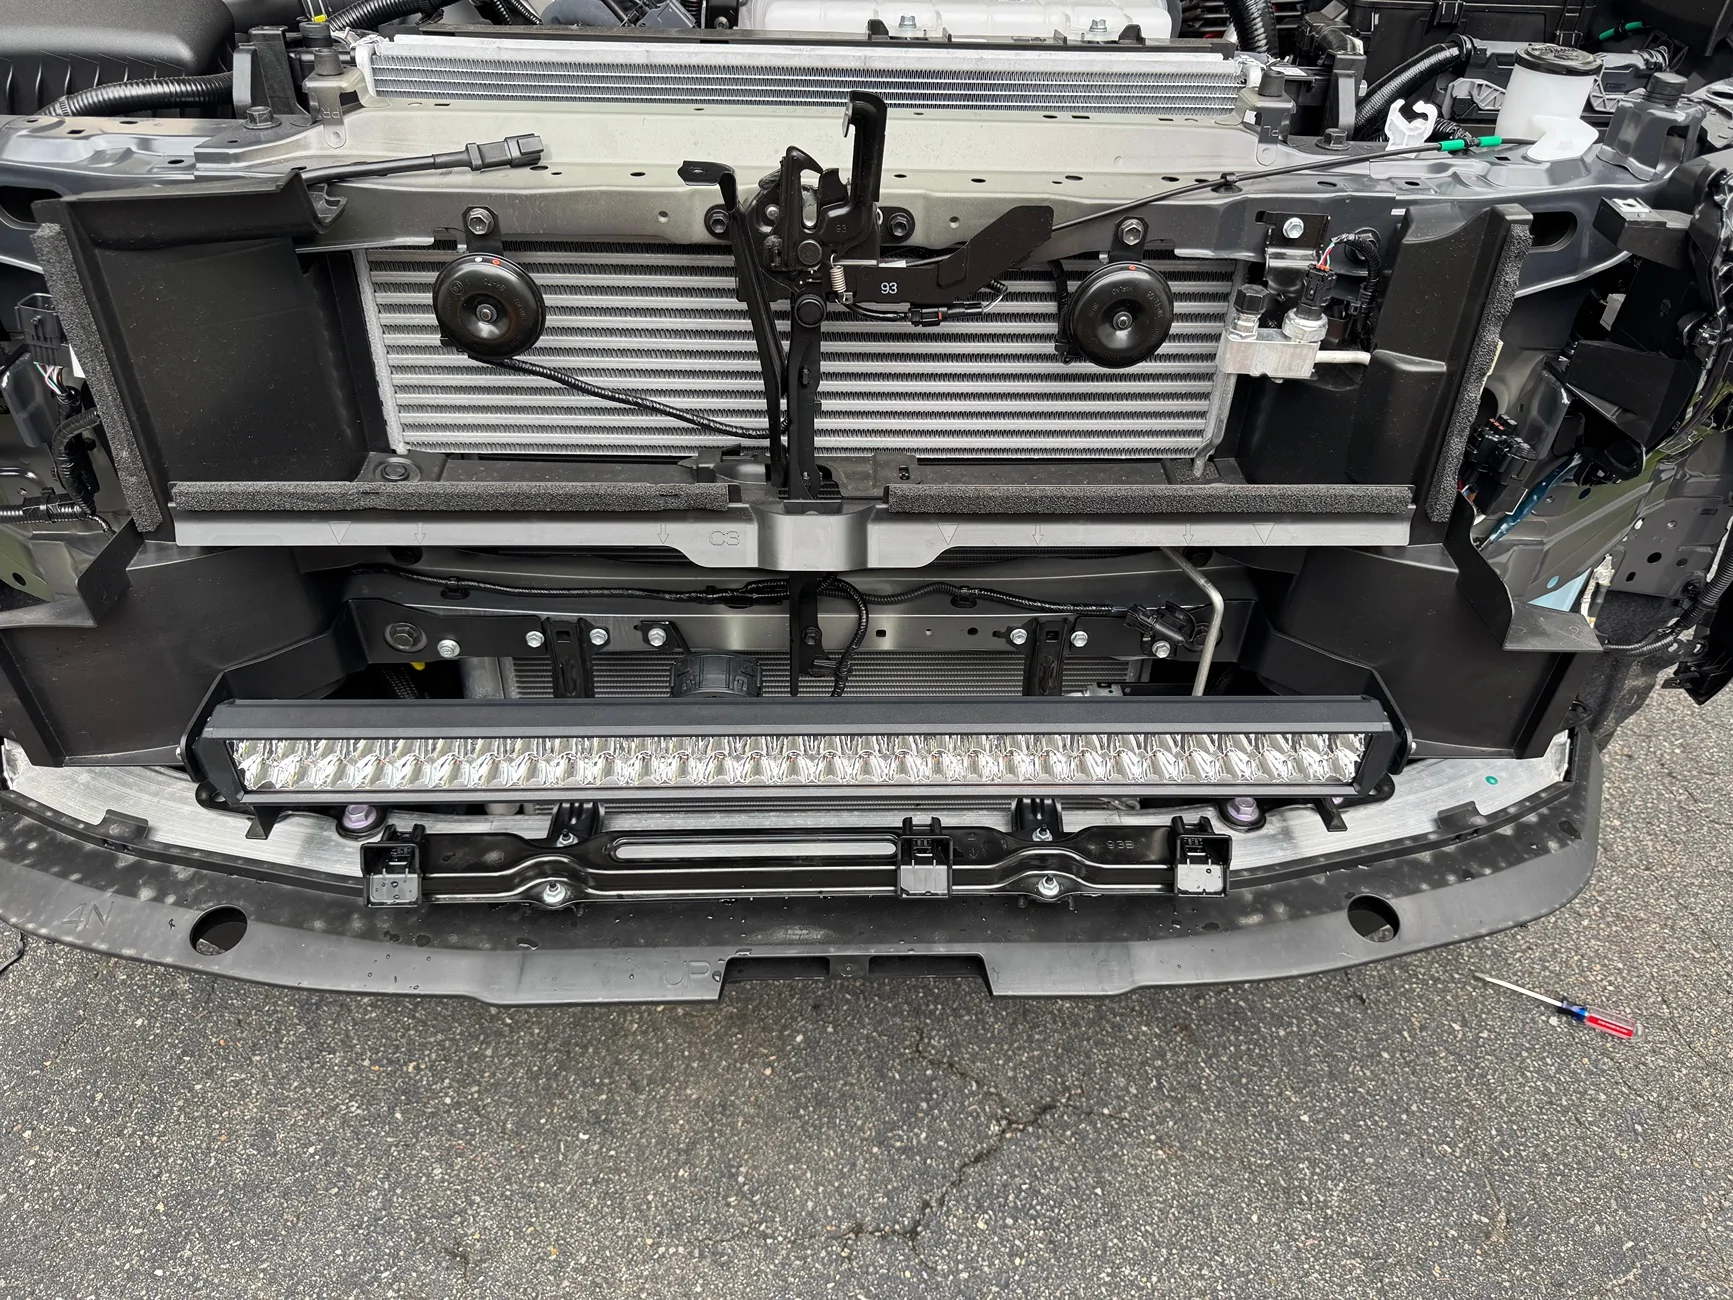
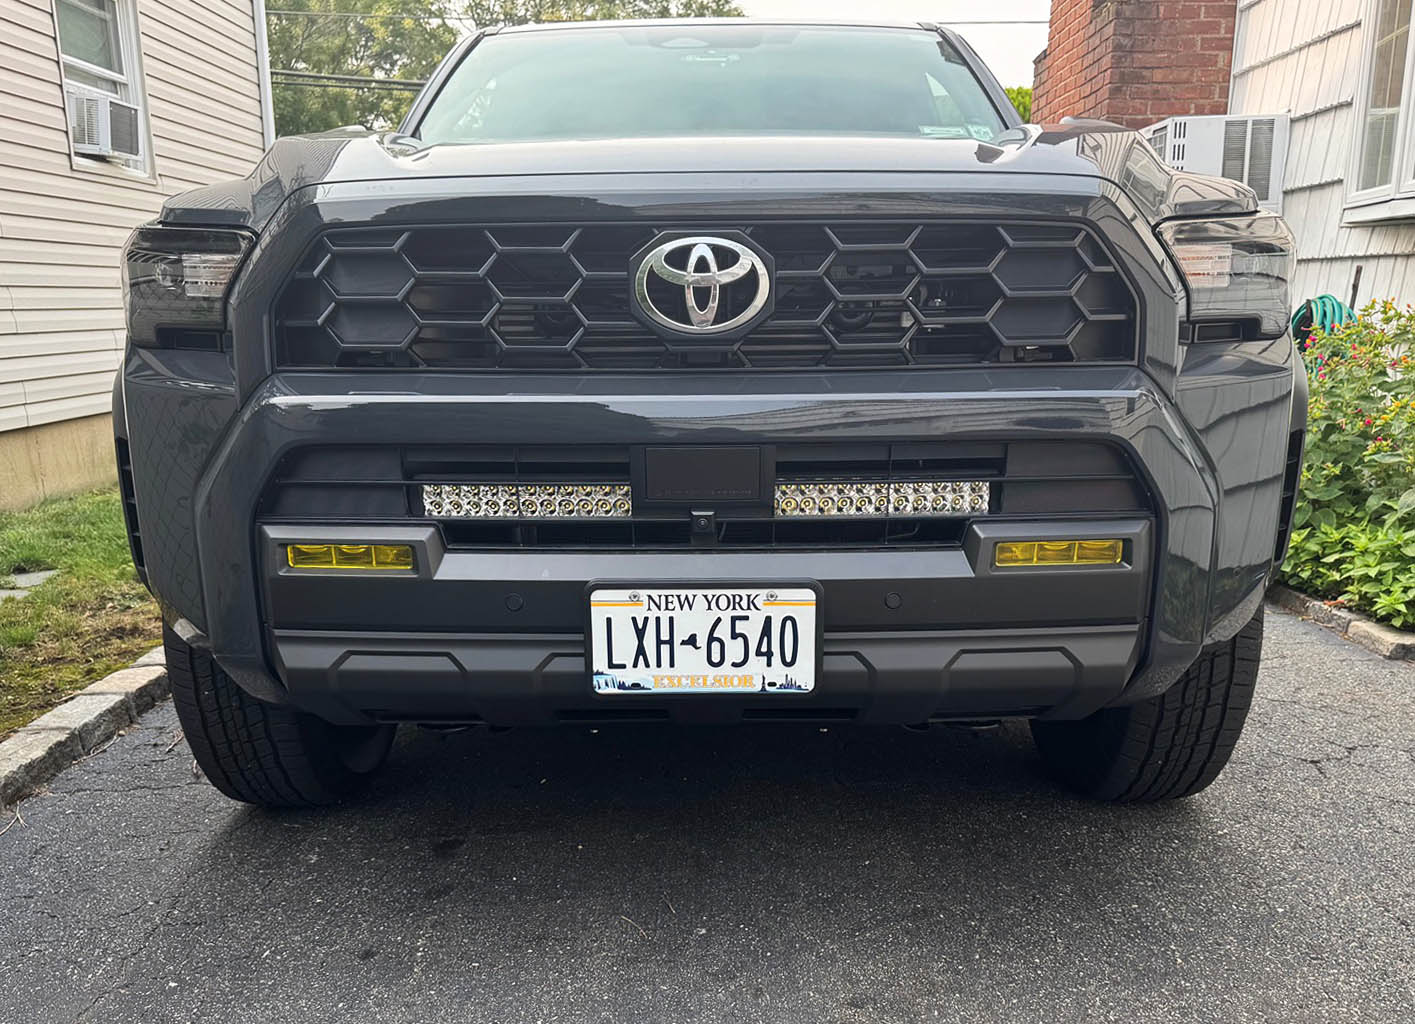
Pics of the lightbar installed:
Step 4 - Put it back together:
I actually don't have any pictures of the bumper reinstallition, but just do the opposite of before. And please heed my warning of Be very careful when removing disconnecting/connecting the passanger side connectors.
Finished product:

Final Thoughts:
Beside the ordeal with the connectors and having to bring the truck to Toyota to reset the codes, I'm super happy with how everything came out. The bar is extremely bright (brighter then the one on my Taco - even with the middle blocked) and looks amazingly clean in my opinion.
Everything (radar/crusise controller/lane assist/cameras/etc.) still works perfectly from what i've seen so far and I can't wait to try it out on some more backroads/trails where it really comes in useful.
Hope this was helpful and if anyone has any questions about the lightbar or install process please feel free to ask away!
To preface this, I had a 2016 Tacoma that I installed a very similar kit from CaliRaised which held up extremely well for the entire 8+ years and was still working perfectly when I sold the Taco. I realize some people may have had other results with lightbars from CaliRaised, but for the price/performance compared to more expensive options and my prior experience, I went with them again.
Now for the install:
Step 1 - Preparing the wiring:
My truck came with the factory wired AUX option so my plan was to wire the lightbar using the factory pigtail into the pre-installed switches. According to my reseach, the lightbar can pull up to ~30 amps so I used the AUX 1 connector to ensure I don't blow any fuses:
I snipped the light bar provided wiring harness before its relay, then used some waterproof heat-shrink crimp connectors to connect it to the factory AUX 1 pigtail. I then covered the connection with some more wiring conduit to protect the connectors/make it pretty. You can see in the pic below the finished product, and where I clipped the provided wiring harness:
Step 2 - Removing the bumper:
I mostly followed the instructions in the video below from CaliRaised but the video isn't 100% (at least for my truck) and I'll go over that below:
While the instructions provided get you most of the way there, there are some notes that I would add when attempting this. At least for my truck, there is another connection on the right driver side that needs to be disconnected in addition to the two connections on the passanger side. Additionally, it seemed like there were extra screws/fastners in both wheel wells that need to be removed before the bumper would come free.
Biggest tip: Be very careful when removing disconnecting/connecting the passanger side connectors. I didn't seat the connections properly when reconnecting, bending a pin and causing EVERY CHECK SYSTEM WARNING to come on once everything was buttoned back up. After having a small panic attack thinking I messed up my brand new truck, I brought it straight to Toyota as my 40 dollar amazon OBD2 scanner wouldn't cut it. After a day of fearing Toyota was going to tell me they needed to change ever sensor for massive amount of money, they reseatted the connector and reset the codes. Stupid tax paid, but as I said, Be very careful when removing disconnecting/connecting the passanger side connectors.
Some pics of that process:
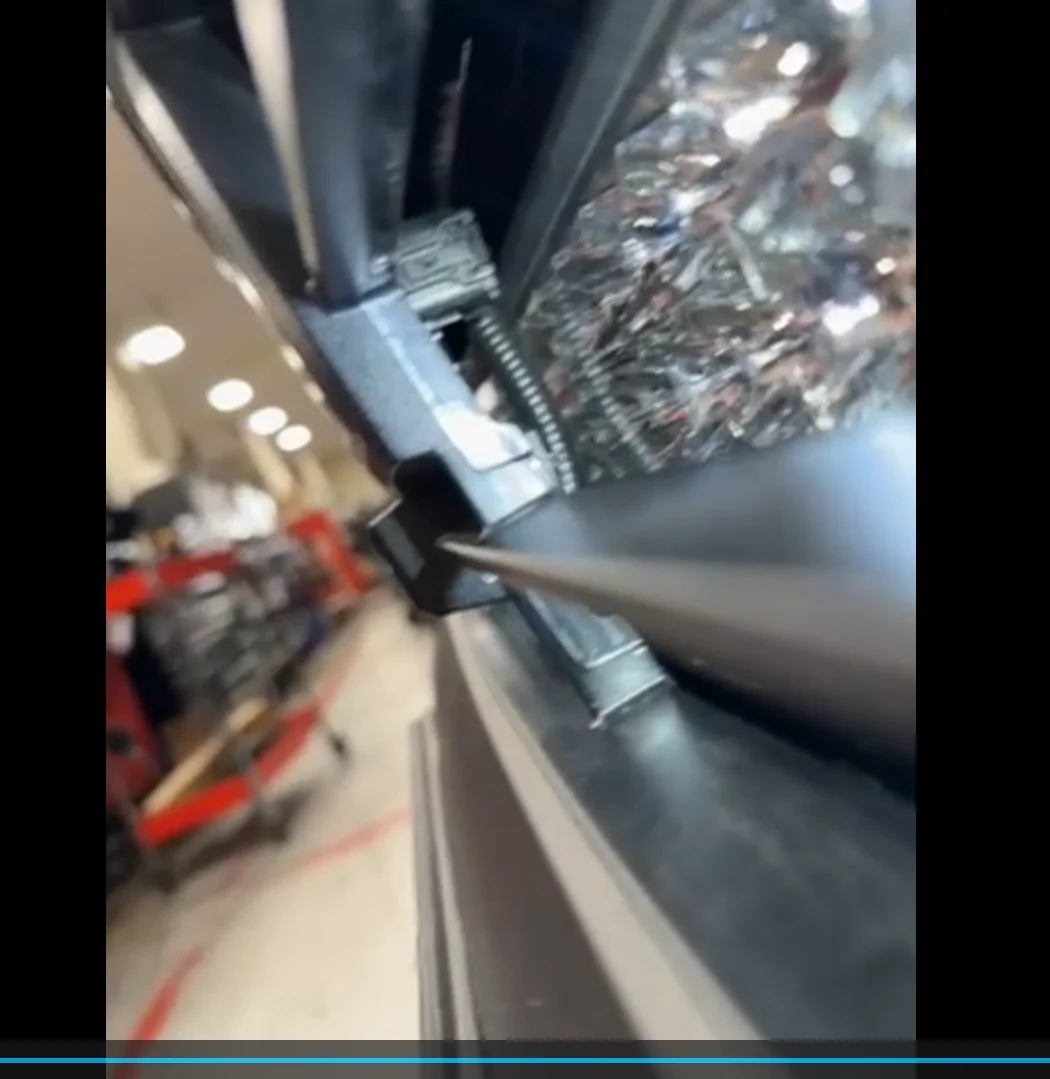
Step 3 - Installing the Lightbar:
This was actually extremely easy and have to give all credit to CaliRaised for a well designed bracket. I followed the video below, but again this was super quick, cleared everything including that weird black circle thing (anyone know what that is?), and didn't require any cutting/drilling/etc. whatsoever.
Only additional suggestion here is to dab a small amount of blue loctite where the lightbar connects to the bracket. There is no I can figure to get at the adjustment after installing short of removing the entire bumper again.
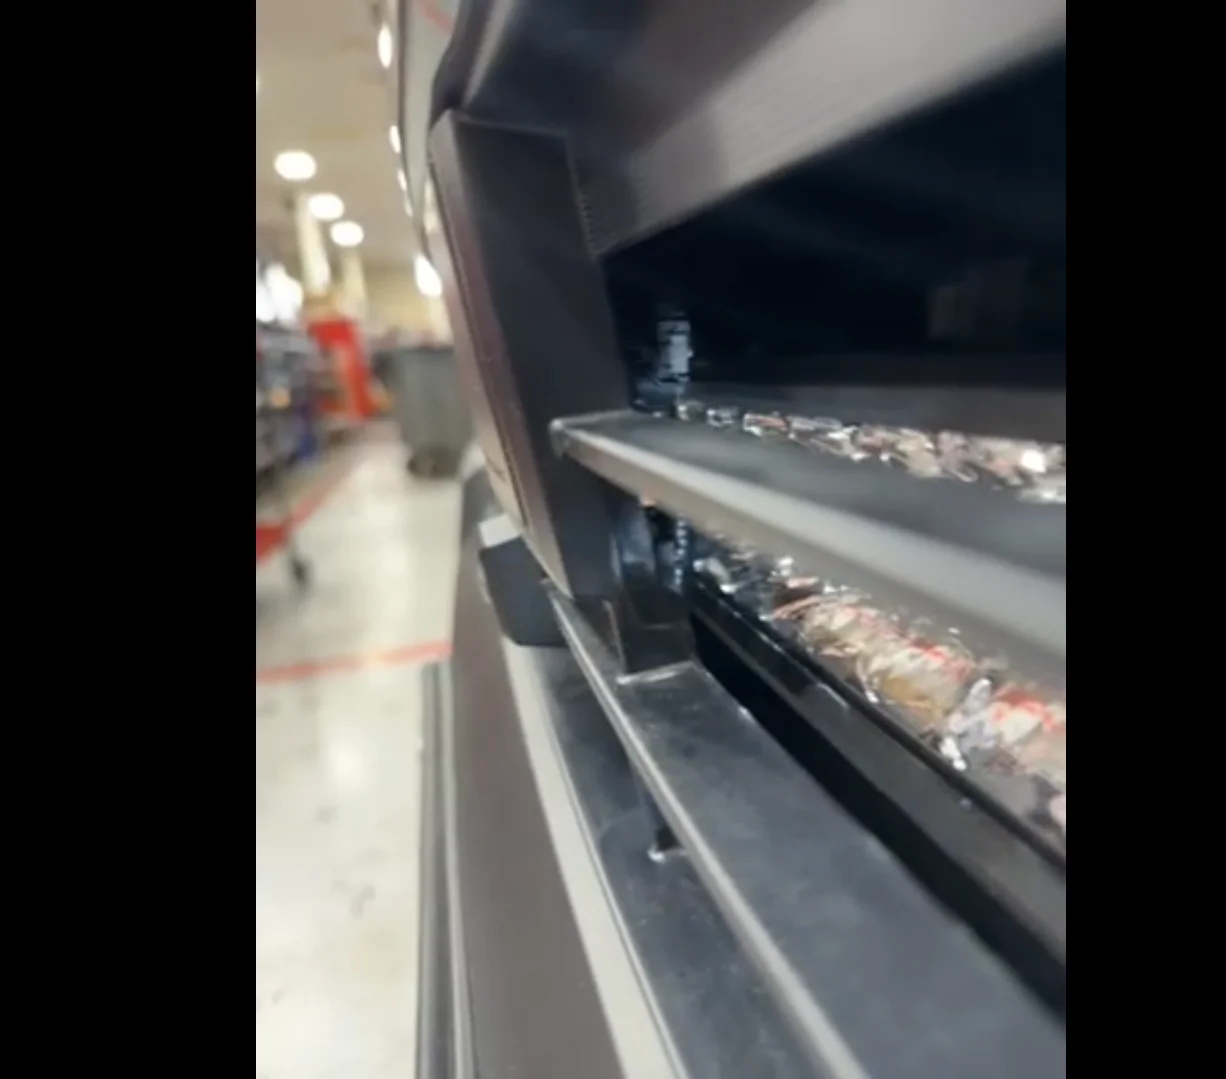
Once its all assembled it's just a matter of plugging the wiring harness into the Aux 1 connector on the passanger side of the radiator. Note - Its the rear one not the front one.
Pics of the lightbar installed:
Step 4 - Put it back together:
I actually don't have any pictures of the bumper reinstallition, but just do the opposite of before. And please heed my warning of Be very careful when removing disconnecting/connecting the passanger side connectors.
Finished product:
Final Thoughts:
Beside the ordeal with the connectors and having to bring the truck to Toyota to reset the codes, I'm super happy with how everything came out. The bar is extremely bright (brighter then the one on my Taco - even with the middle blocked) and looks amazingly clean in my opinion.
Everything (radar/crusise controller/lane assist/cameras/etc.) still works perfectly from what i've seen so far and I can't wait to try it out on some more backroads/trails where it really comes in useful.
Hope this was helpful and if anyone has any questions about the lightbar or install process please feel free to ask away!
Sponsored