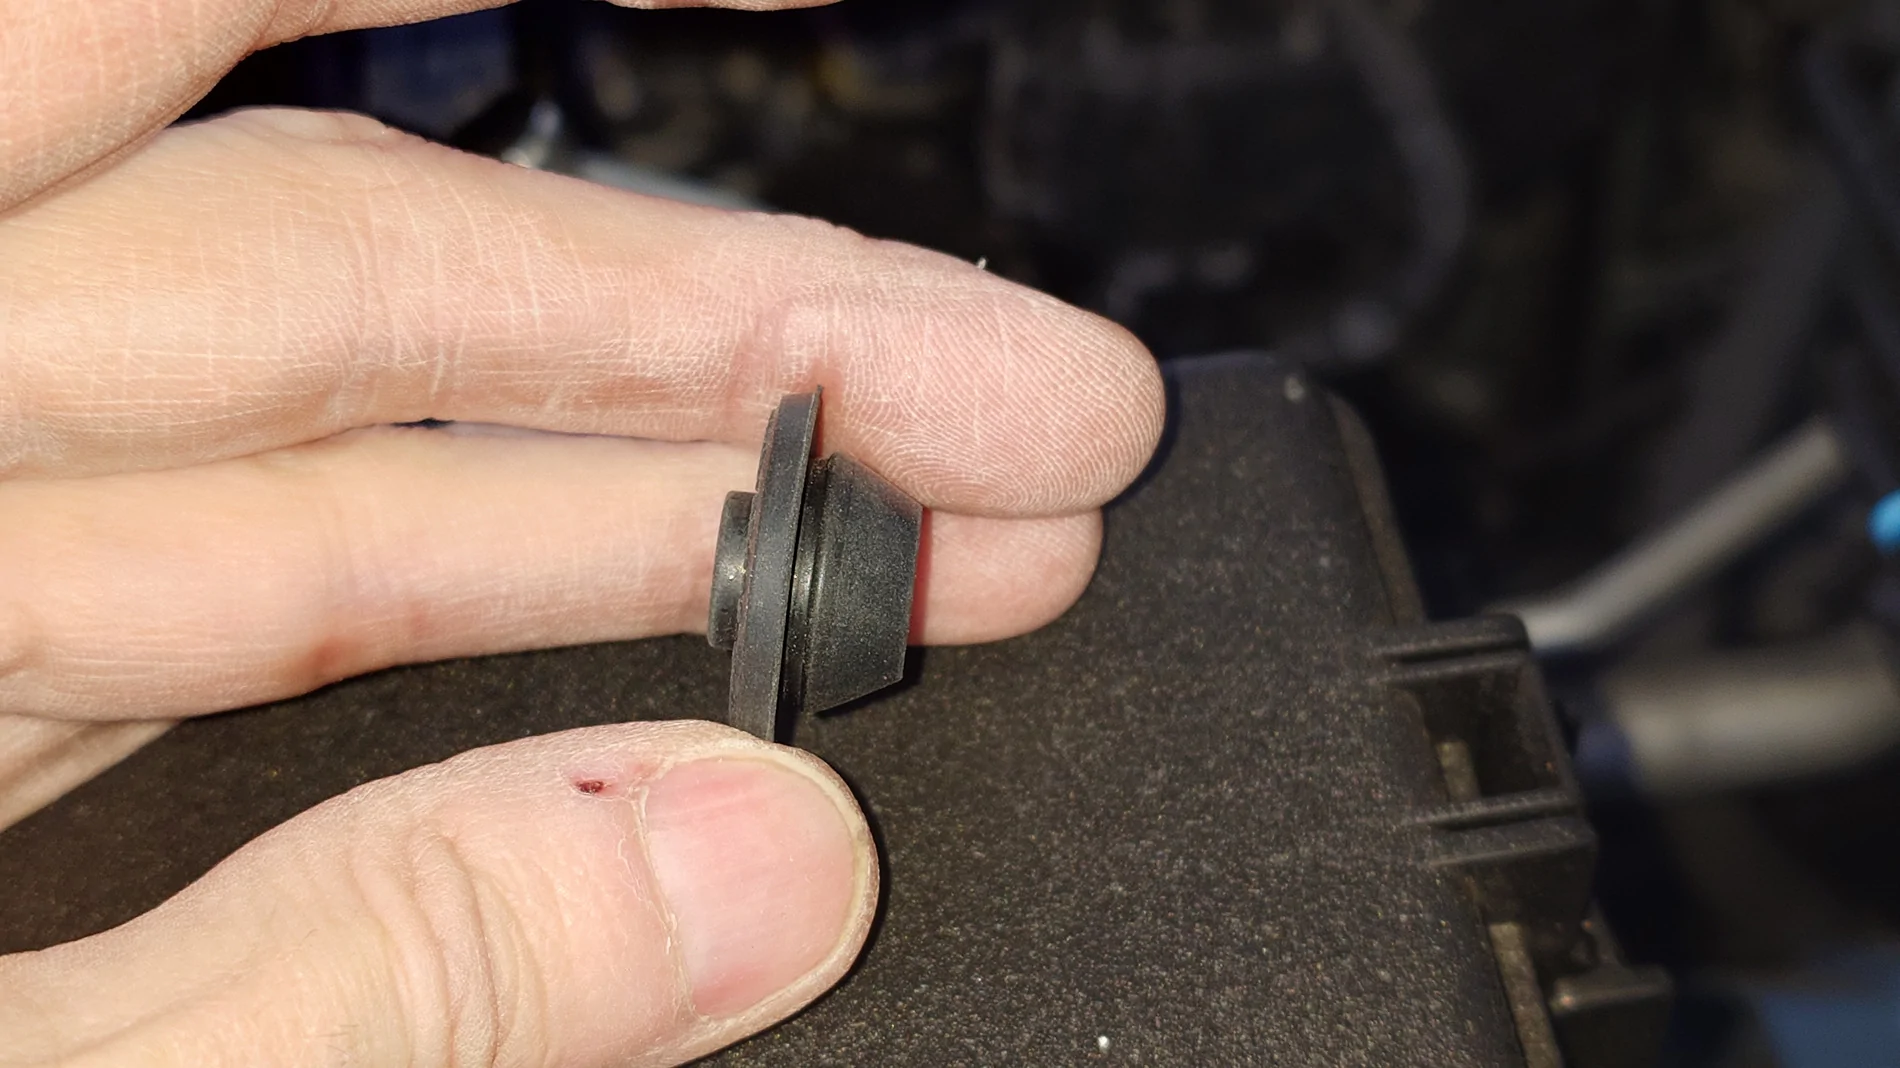
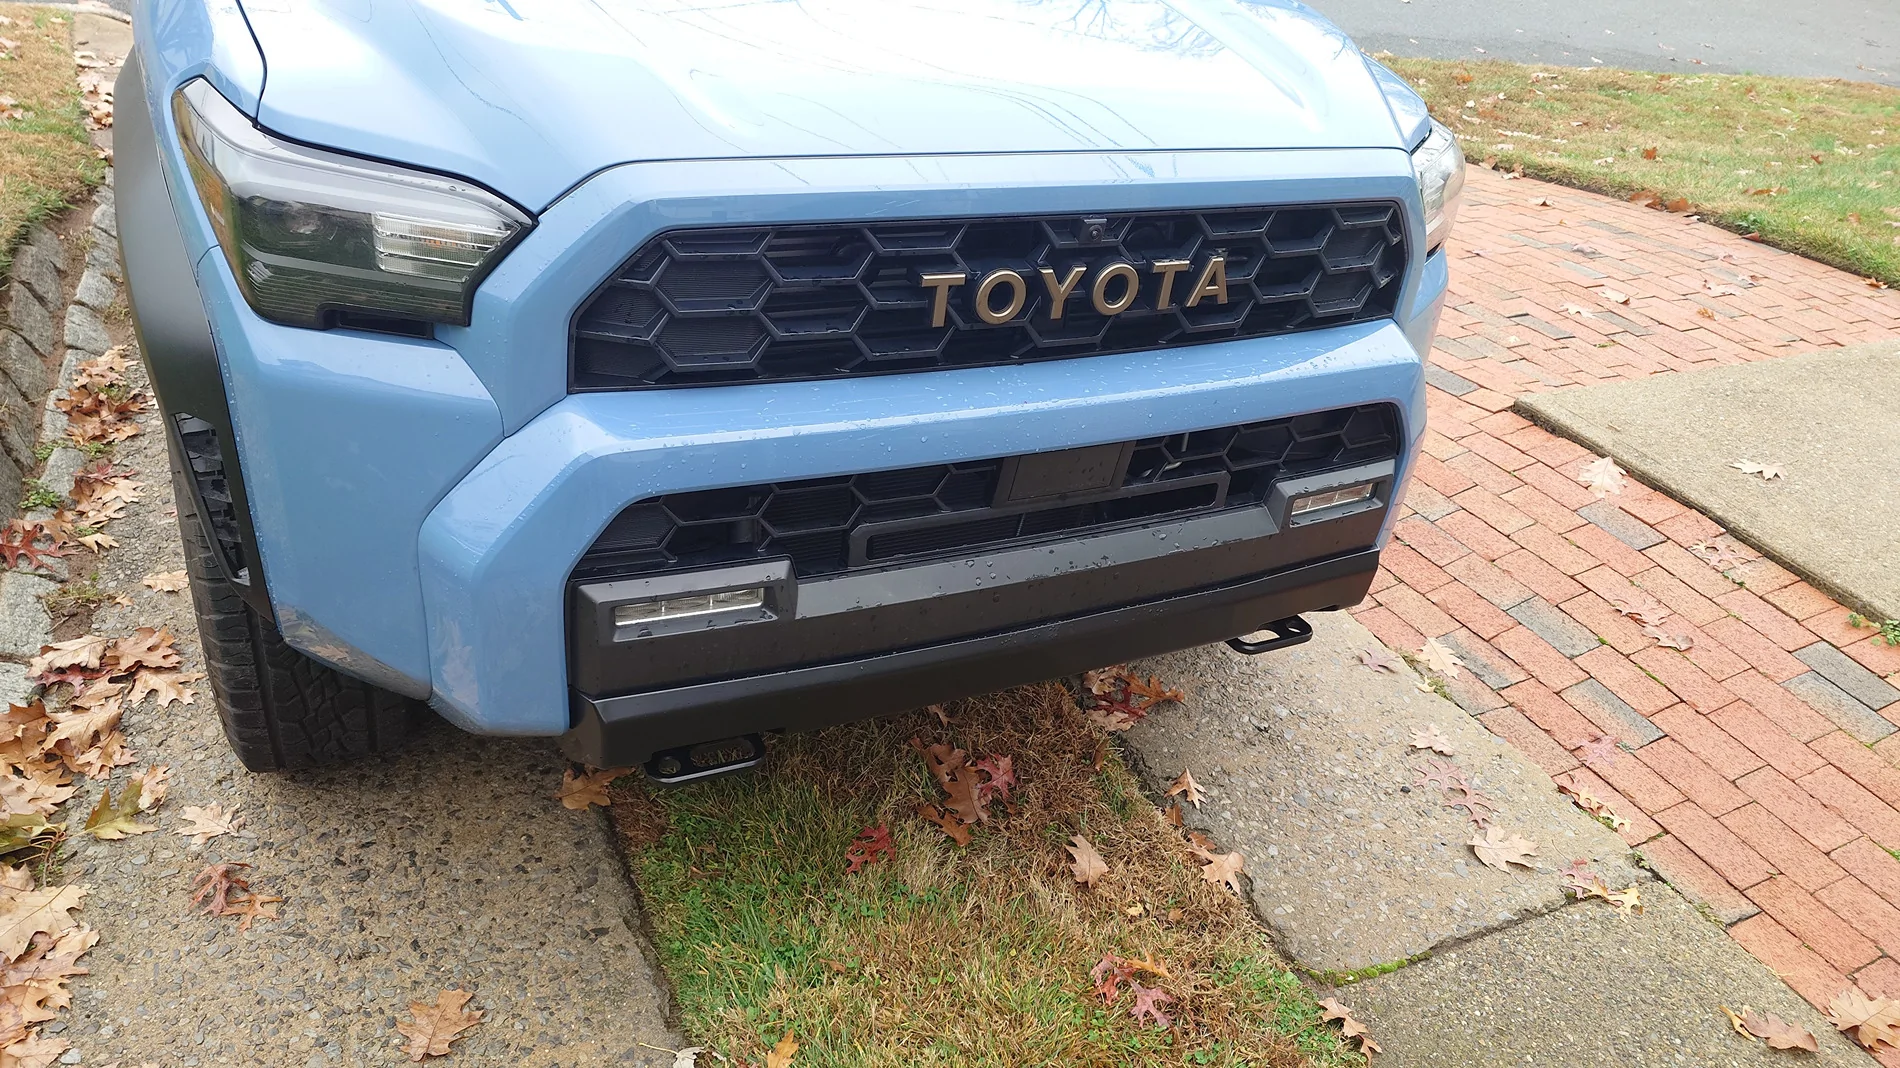
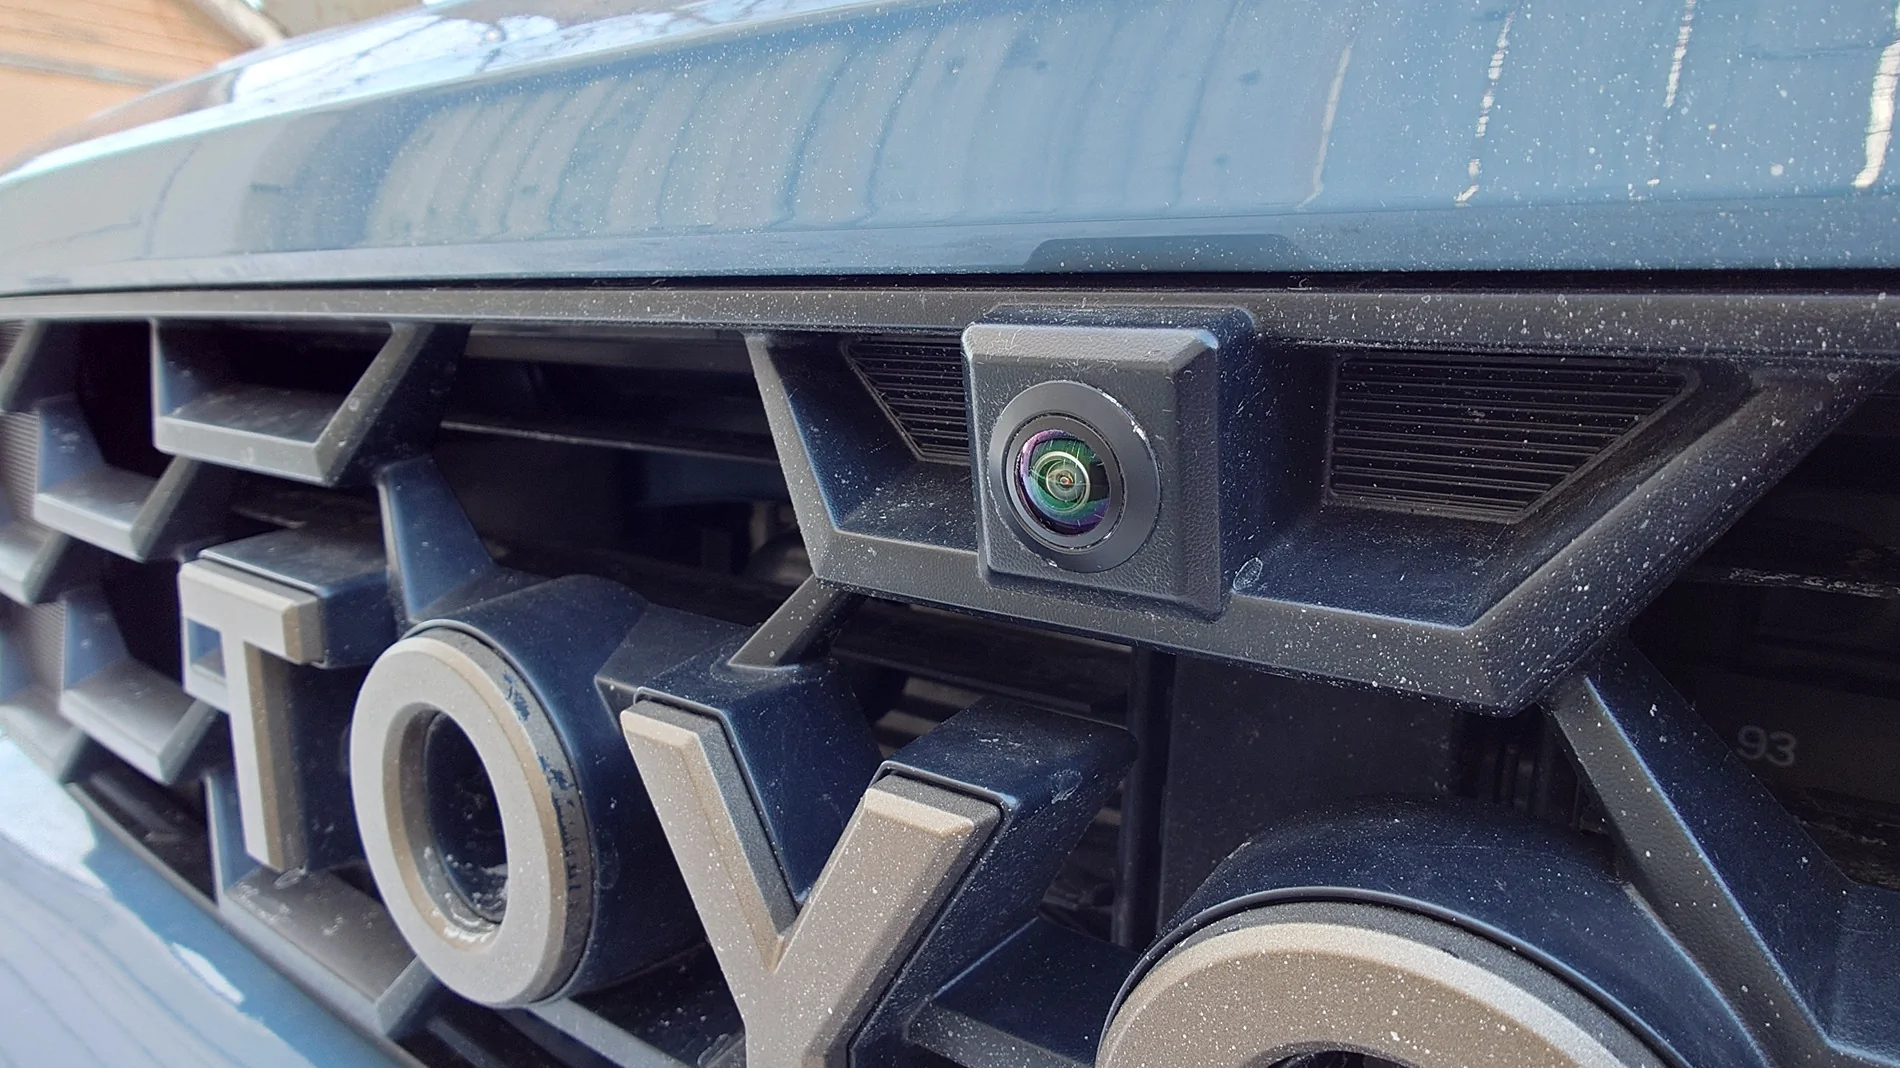
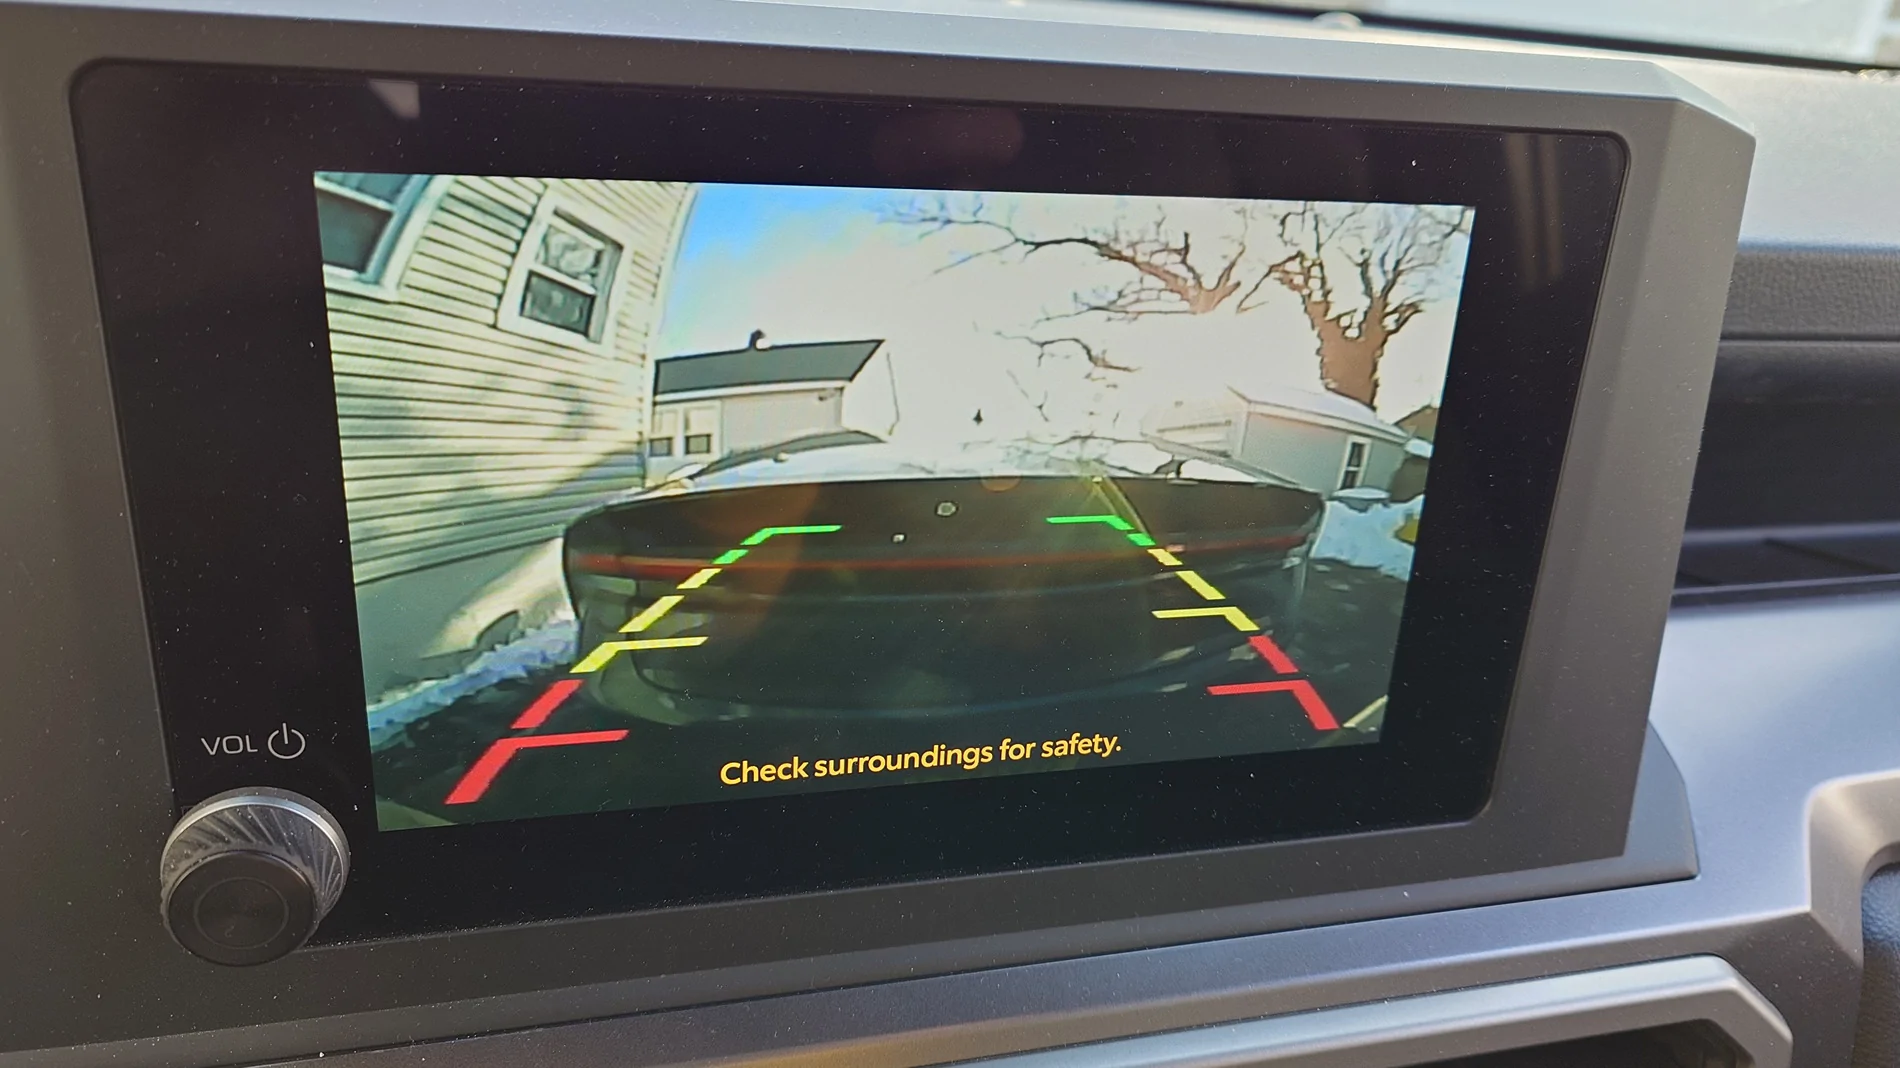
If you are able could you please show a video of how it works. I’m curious about how it works and interested in buying the kit. Thanks.The Beatsonic kit works. A plain old NTSC camera displays right on the factory screen.
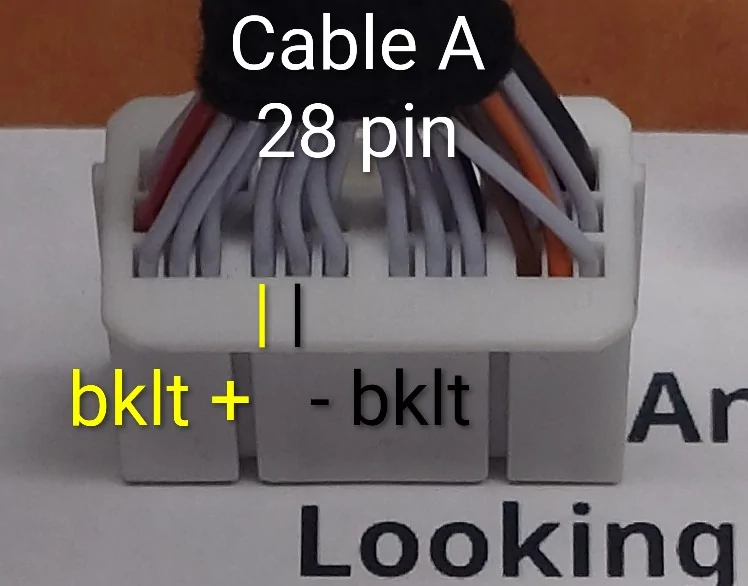
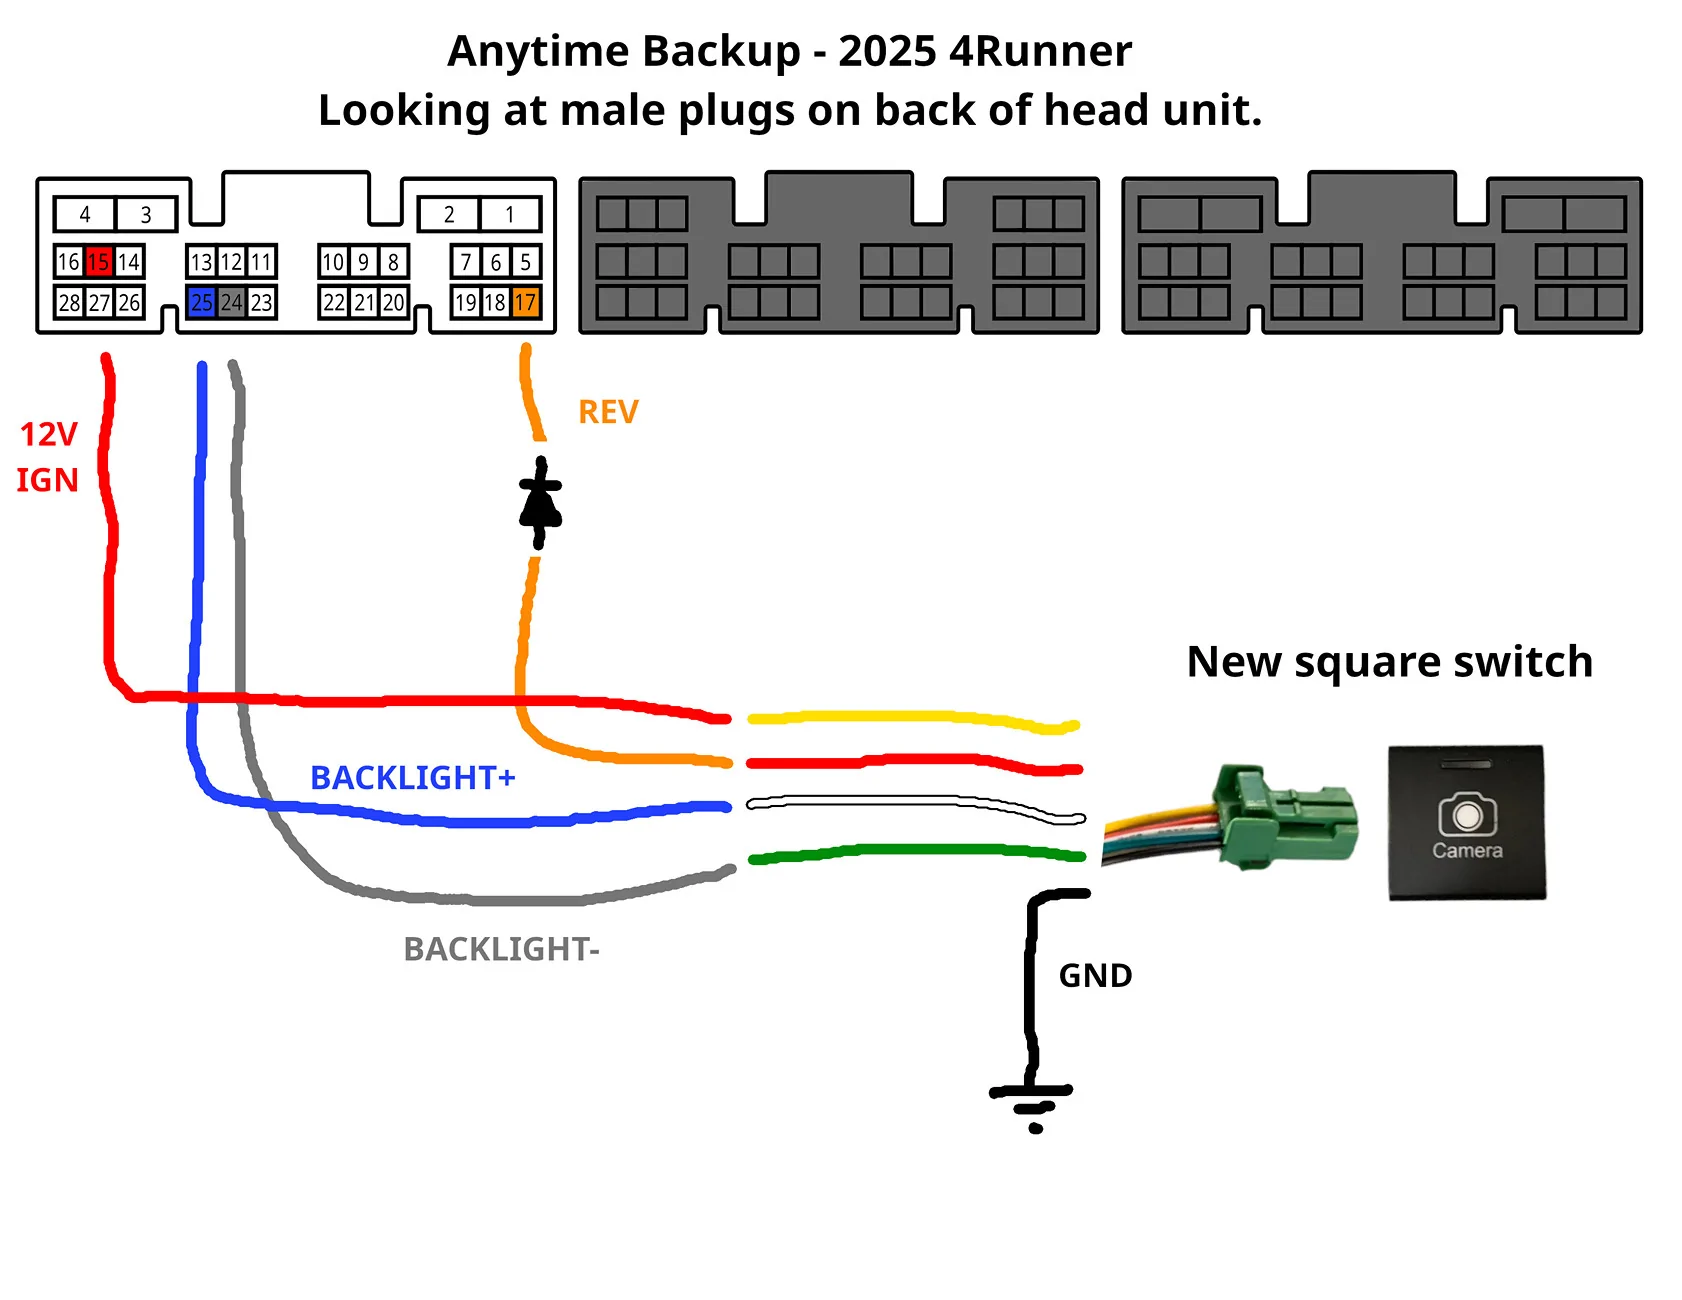
There are a few annoyances though. They didn't hook up the backlight wires even though they could have, the pins are available in one of the connectors they tap into, and the camera turns itself back off after only 15 seconds.
But the important thing works.
Sponsored