

- Thread starter
- #1
Evening,
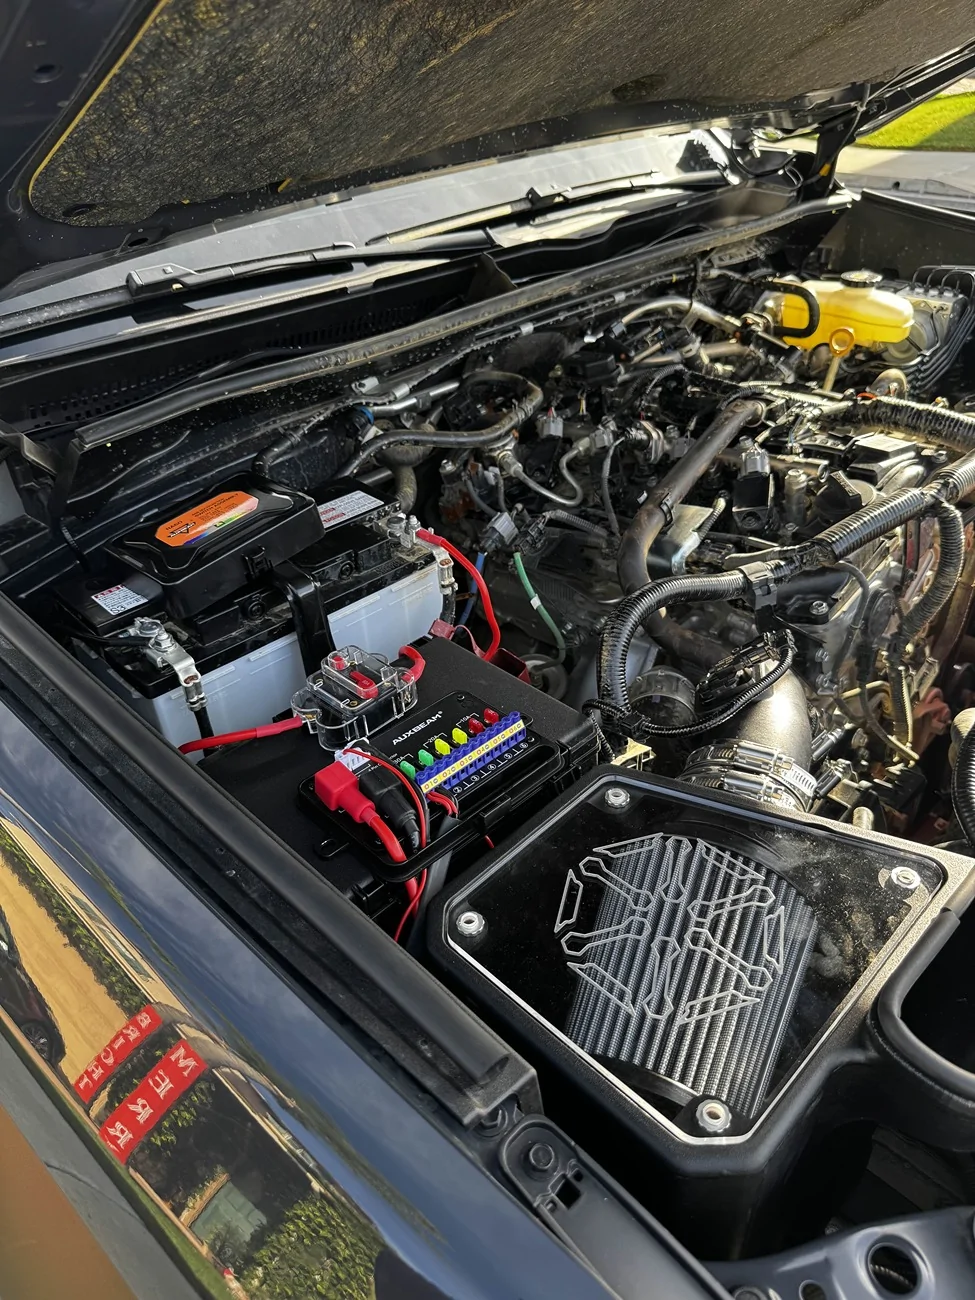
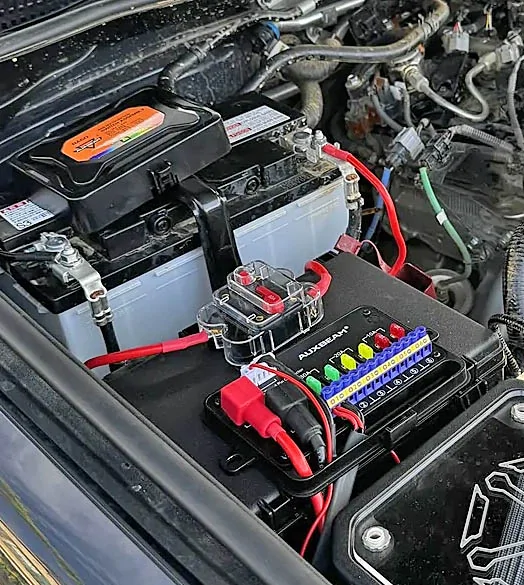
I just wrapped up installing the Auxbeam RA60 switch panel on my 4runner. The install was very straight forward, maybe took me 1-3 hours including planning where I'd put the switch panel at, where the wires would go, how to make it clean and then ultimately installing it. I mounted my switch panel on the fuse box directly in front of the battery. I originally wanted to mount it on the other fuse box on the driver side but would've needed longer wires for all my connections. I didn't feel like doing all of that cause, I have no idea what I'm doing when it comes to wiring. I didn't drill into the fuse box just in case someone makes a bracket for the switch panel and the breaker down the road. For the time being, I just used 3M double sided tape to mount the panel and the breaker.
Running the wires was fairly easy after a couple of Youtube videos, I put a picture down below so you can get an idea of where the wires go. You can see that one positive wire runs from the battery to the breaker, and then to the switch panel. The negative runs from the switch panel to the battery.
The red wire is the fuse tap, which I connected it to the radio fuse in the fuse box. Now, If I had the extra length for all my wires, I would've gone to the other one and tapped into an ignition fuse but ultimately settled on the radio fuse. That fuse is always powered since it's used to save your Bluetooth settings, radio settings, car play, and your infotainment. I've had this sit overnight for more than 8 hours over multiple days and haven't had any issues yet.


Also got the SXTH Element intake on this thing too, I LOVE IT!!
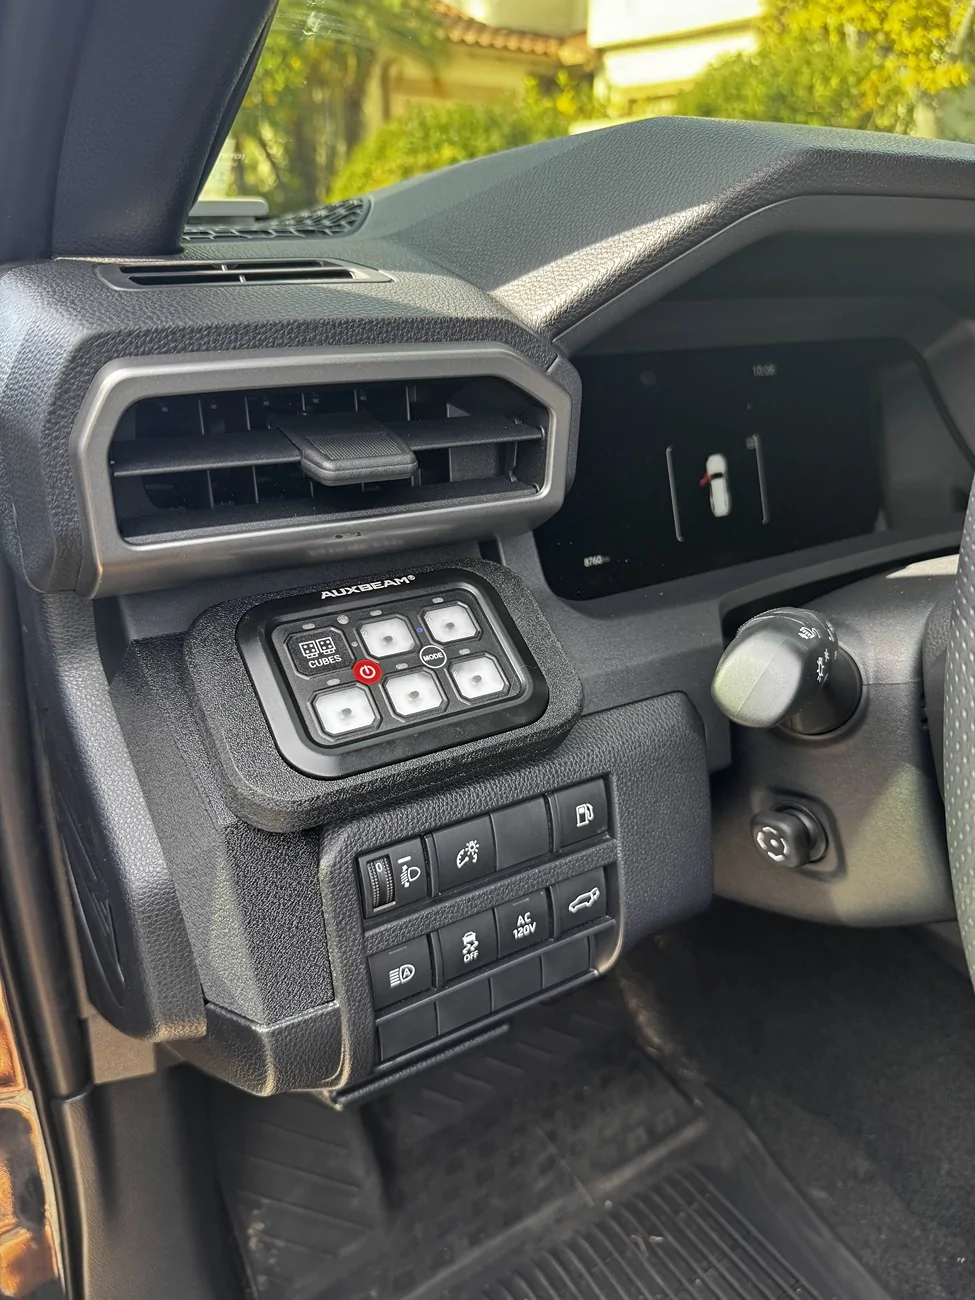
The black wire is the cord that actually powers the switch panel itself that's in the cab. I ran it along the cowling of the hood and then through the firewall on the driver side, up towards the air vent to the switch panel itself which sits in a 4Runner lifestyle mount just below the airvent. It replaces that grey trim piece, just have to take the clips off the old trim and transfer them over. It's easy to get the wire through the fire wall, just a pain in the ass to get the rubber off so you can stick it inside there, but after that, you'll be able to pull it straight out and up to the switch panel.
Here's the mount for the switch panel. I know some may ask why I didn't just get the switches and run the wiring there. The truth is because I got sent the Auxbeam switch panel and ditch lights for free. I wanted to do a switch panel anyways just for ease and peace of mind when I get other accessories down the road.
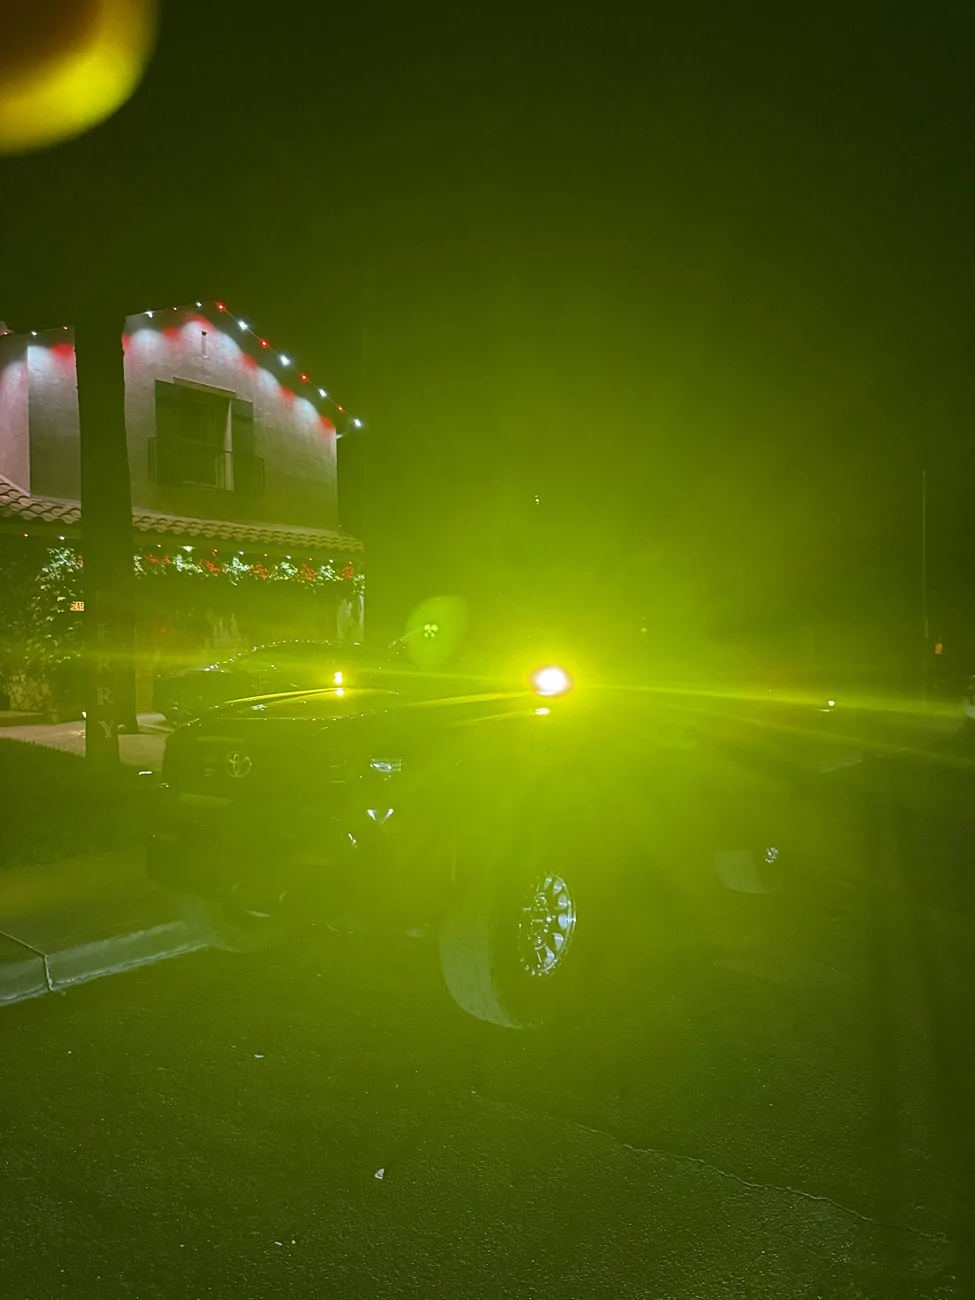
As for the lights, well I had my local offroad shop wire them up for me since I didn't want to mess it up. If you're in the San Diego area and need an offroad shop, Socal Suspension in El Cajon is my shop. Eric is a super cool guy, and has a rad truck (Vivian)
These 3' pod lights are surprisingly bright for how much they are. They are also mounted on Westcott Designs Ditch Bracket Lights Last I checked, you can snag a pair from amazon for $145 or on TikTok shop for just over $100. They ain't no Baja Designs but they'll be plenty enough for what I do.
Thanks Auxbeam again!
Overall, stoked with how everything came out.
If you have any questions, feel free to reach out
-T
I just wrapped up installing the Auxbeam RA60 switch panel on my 4runner. The install was very straight forward, maybe took me 1-3 hours including planning where I'd put the switch panel at, where the wires would go, how to make it clean and then ultimately installing it. I mounted my switch panel on the fuse box directly in front of the battery. I originally wanted to mount it on the other fuse box on the driver side but would've needed longer wires for all my connections. I didn't feel like doing all of that cause, I have no idea what I'm doing when it comes to wiring. I didn't drill into the fuse box just in case someone makes a bracket for the switch panel and the breaker down the road. For the time being, I just used 3M double sided tape to mount the panel and the breaker.
Running the wires was fairly easy after a couple of Youtube videos, I put a picture down below so you can get an idea of where the wires go. You can see that one positive wire runs from the battery to the breaker, and then to the switch panel. The negative runs from the switch panel to the battery.
The red wire is the fuse tap, which I connected it to the radio fuse in the fuse box. Now, If I had the extra length for all my wires, I would've gone to the other one and tapped into an ignition fuse but ultimately settled on the radio fuse. That fuse is always powered since it's used to save your Bluetooth settings, radio settings, car play, and your infotainment. I've had this sit overnight for more than 8 hours over multiple days and haven't had any issues yet.
Also got the SXTH Element intake on this thing too, I LOVE IT!!
The black wire is the cord that actually powers the switch panel itself that's in the cab. I ran it along the cowling of the hood and then through the firewall on the driver side, up towards the air vent to the switch panel itself which sits in a 4Runner lifestyle mount just below the airvent. It replaces that grey trim piece, just have to take the clips off the old trim and transfer them over. It's easy to get the wire through the fire wall, just a pain in the ass to get the rubber off so you can stick it inside there, but after that, you'll be able to pull it straight out and up to the switch panel.
Here's the mount for the switch panel. I know some may ask why I didn't just get the switches and run the wiring there. The truth is because I got sent the Auxbeam switch panel and ditch lights for free. I wanted to do a switch panel anyways just for ease and peace of mind when I get other accessories down the road.
As for the lights, well I had my local offroad shop wire them up for me since I didn't want to mess it up. If you're in the San Diego area and need an offroad shop, Socal Suspension in El Cajon is my shop. Eric is a super cool guy, and has a rad truck (Vivian)
These 3' pod lights are surprisingly bright for how much they are. They are also mounted on Westcott Designs Ditch Bracket Lights Last I checked, you can snag a pair from amazon for $145 or on TikTok shop for just over $100. They ain't no Baja Designs but they'll be plenty enough for what I do.
Thanks Auxbeam again!
Overall, stoked with how everything came out.
If you have any questions, feel free to reach out
-T
Sponsored