

- First Name
- Scott
- Joined
- Aug 24, 2025
- Threads
- 3
- Messages
- 14
- Reaction score
- 13
- Location
- Pittsburgh
- Vehicle(s)
- 26 4R Limited : 26 Volvo XC60 (wife's)
- Thread starter
- #1
There are a bunch of great posts regarding using the Dongar adapter to power your dash cam. But I couldn’t find a post that had the plastic tabs highlighted on how and what direction to pull the plastic around the mirror w/o snapping one of the clips.
This is likely my 10th vehicle where I’ve installed a dash cam. Thankfully…. Never had to use it but it’s insurance I’m hoping I won’t ever have to use.
This is one of the easier installs. This will only record when the vehicle is on. There are other kits that will record during “parking mode” (this install is not that).
Dongar Adapter: Dongar Dashcam Integrator (10-pin Type B). Compatible with Select Toyota, Lexus, Subaru Models. Power Adapter Connects to Rearview Mirror, Built-in USB-C https://a.co/d/0ixBxD23
The first thing you need to do is move your rear view mirror down to the floor to make it easier to gain access to the plastic shroud.
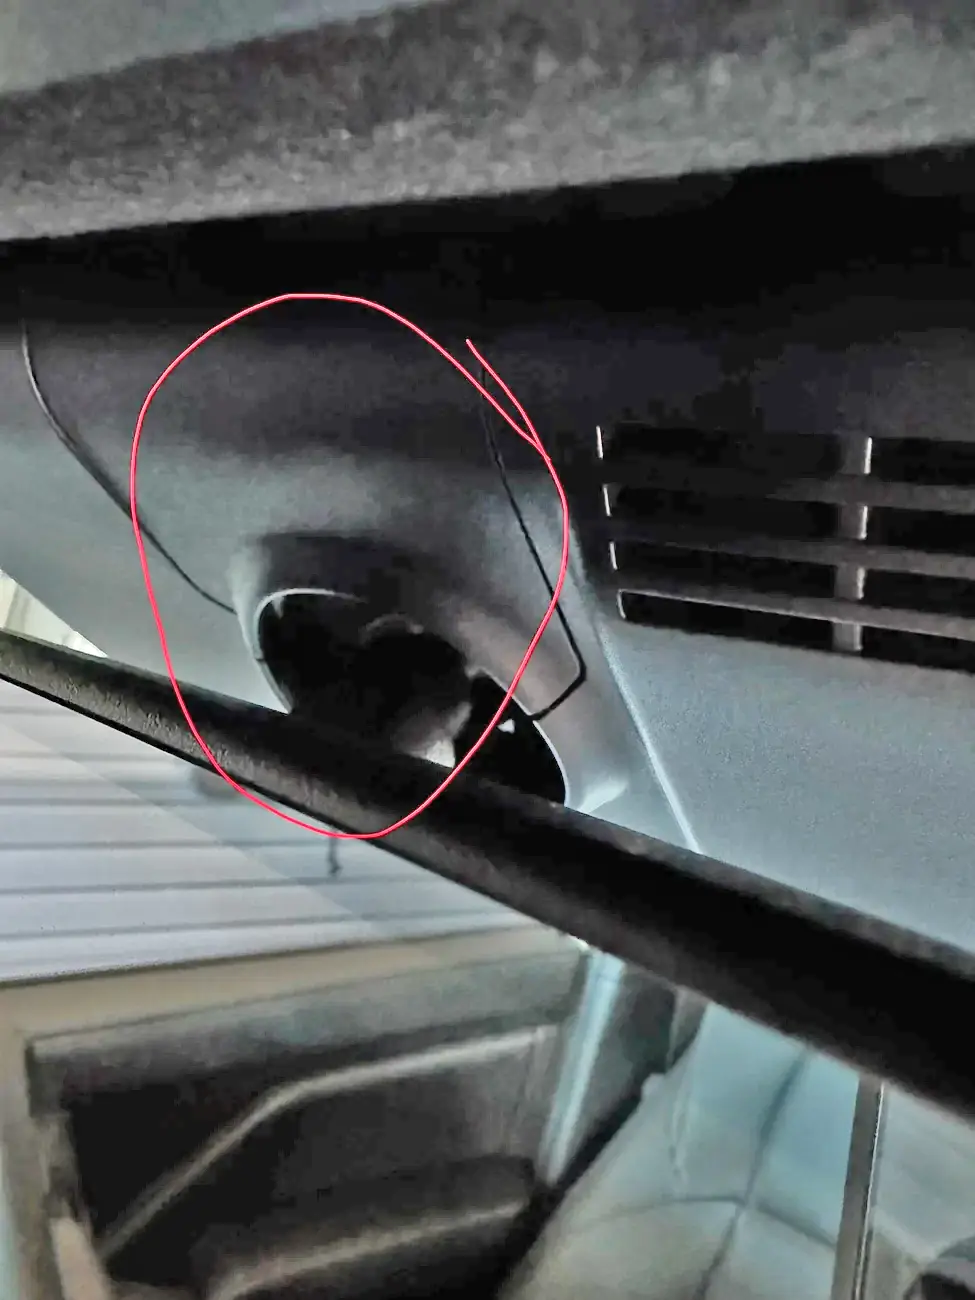
Pull straight down/towards you on this piece.

On the reverse side you can see this piece and the clips, plus the clips for the larger shroud.

Once that small piece is removed, next is to move the existing shroud down the windshield. The two pink/red clips in the above pic show the location and direction of the clips.
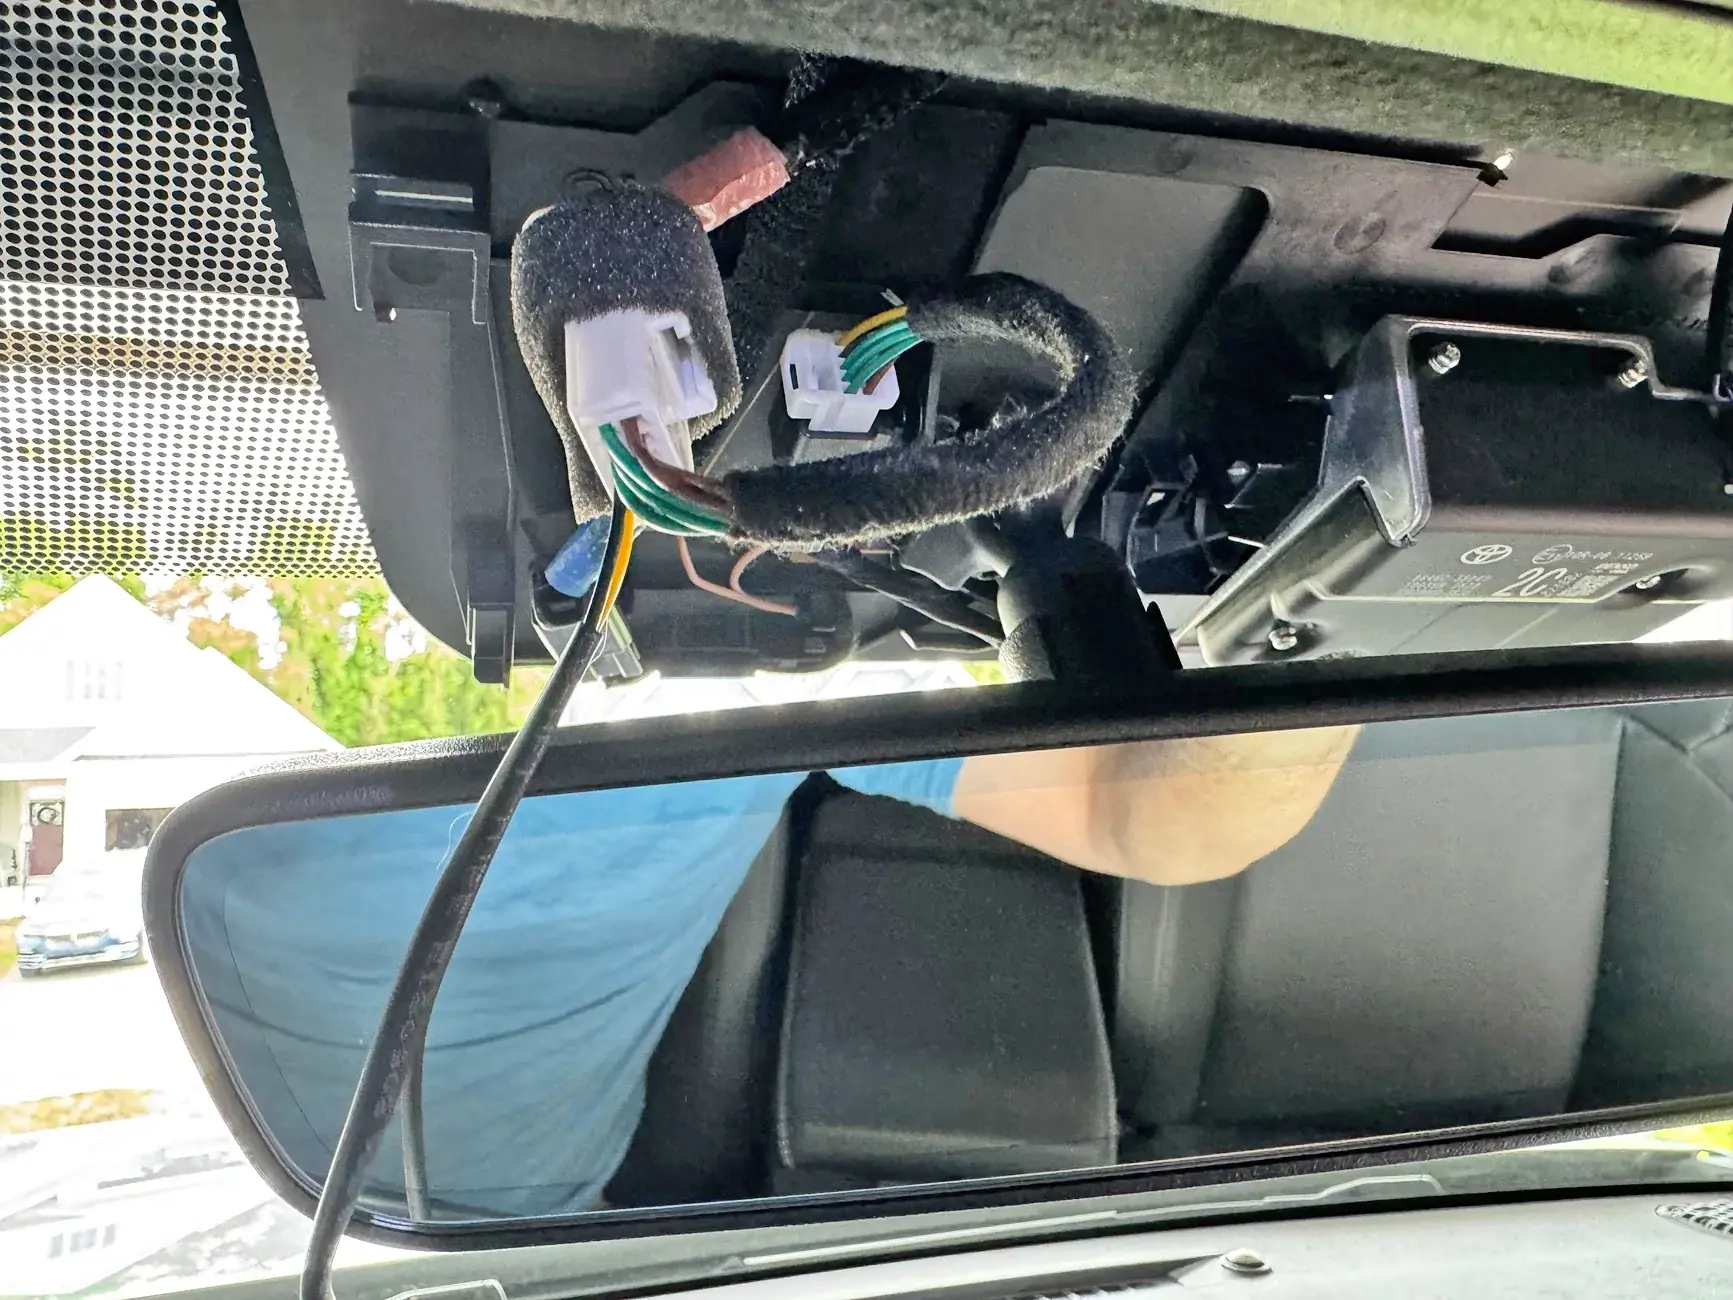
At this point the 2 pieces are removed and you now have access to the power supply. You want to remove the white clip and put the Dongar plug in that location. Then plug the truck’s white plug into the female side of the Dongar adapter. This pic has the Dongar plugged into the vehicle and the vehicle plug is now in the female receptor on the Dongar.
Now plug in the Dongar small 2 pin plug into the USB C adapter. Next… plug in the USB C to USB C cable. Dongar gives you a 90 degree to straight USB C cable. I used my own straight USB C to straight USB C cable because of my dash cam.
I installed some sound deadening foam I have around the Dongar USB adapter. I didn’t want to use the 3M tape they supplied to stick it anywhere.
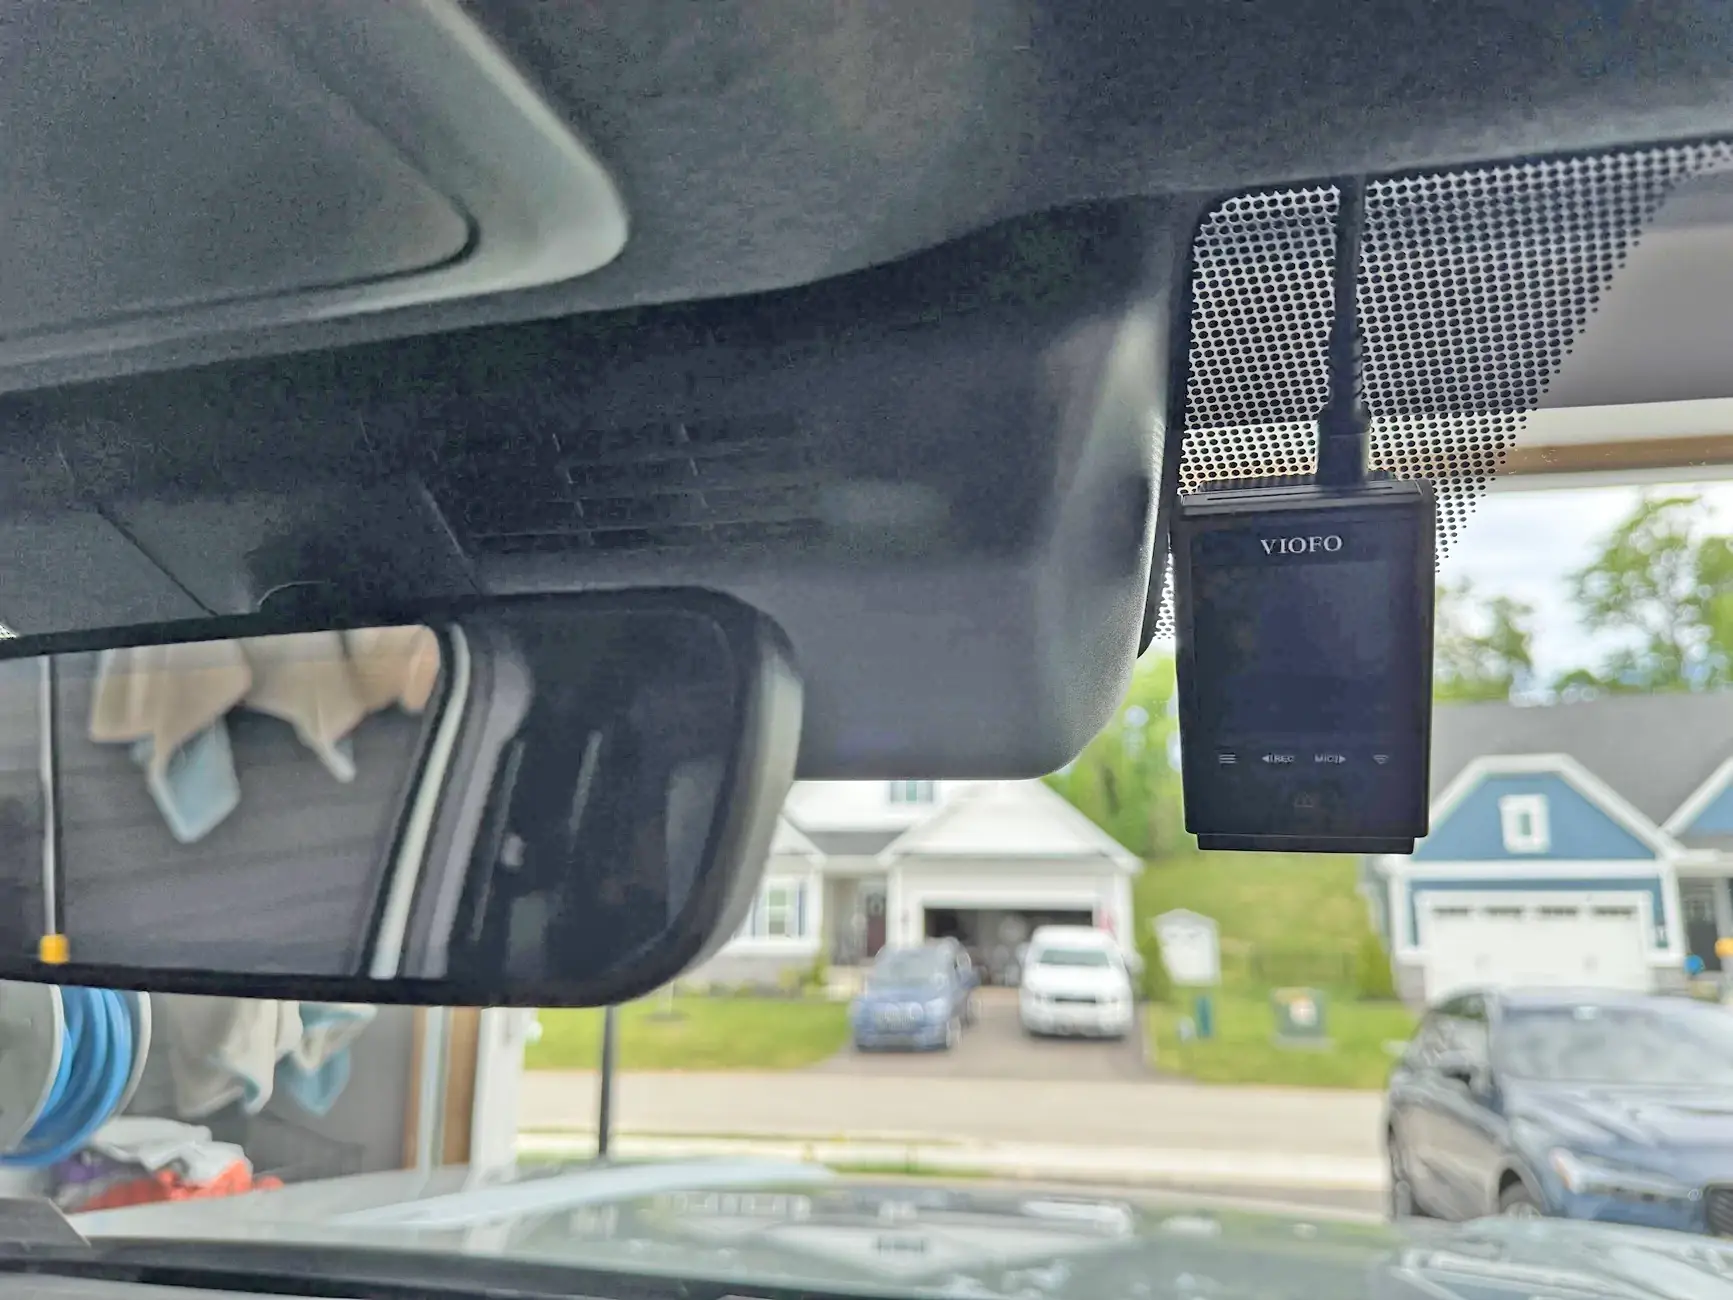
This is probably the most difficult part (but in the scheme of things… it’s pretty easy). For my installation where I wanted my camera I got the larger plastic shroud and installed it while holding the Dongar adapter so that it sat just to the left of the Toyota camera. Since I placed some sound deadening foam around it, there will be zero noise coming from it. The plastic shroud goes on exactly how it came off (but opposite). Slide the shroud up the windshield till the front pink/red clips engage. My USB C wire exited from the top by the headliner. You can see in this pic how I routed the wire from the adapter hidden in the shroud down into my dashcam.
Lastly… snap in the smaller plastic piece.
This is one of the easiest vehicles to put in a dash cam (ACC only dash cam at least) and Dongar makes a great product. Been using them for over a decade in different vehicles and they have come a long way in terms of product and packaging. Hope this helps some folks with their install.
This is likely my 10th vehicle where I’ve installed a dash cam. Thankfully…. Never had to use it but it’s insurance I’m hoping I won’t ever have to use.
This is one of the easier installs. This will only record when the vehicle is on. There are other kits that will record during “parking mode” (this install is not that).
Dongar Adapter: Dongar Dashcam Integrator (10-pin Type B). Compatible with Select Toyota, Lexus, Subaru Models. Power Adapter Connects to Rearview Mirror, Built-in USB-C https://a.co/d/0ixBxD23
The first thing you need to do is move your rear view mirror down to the floor to make it easier to gain access to the plastic shroud.
Pull straight down/towards you on this piece.
On the reverse side you can see this piece and the clips, plus the clips for the larger shroud.
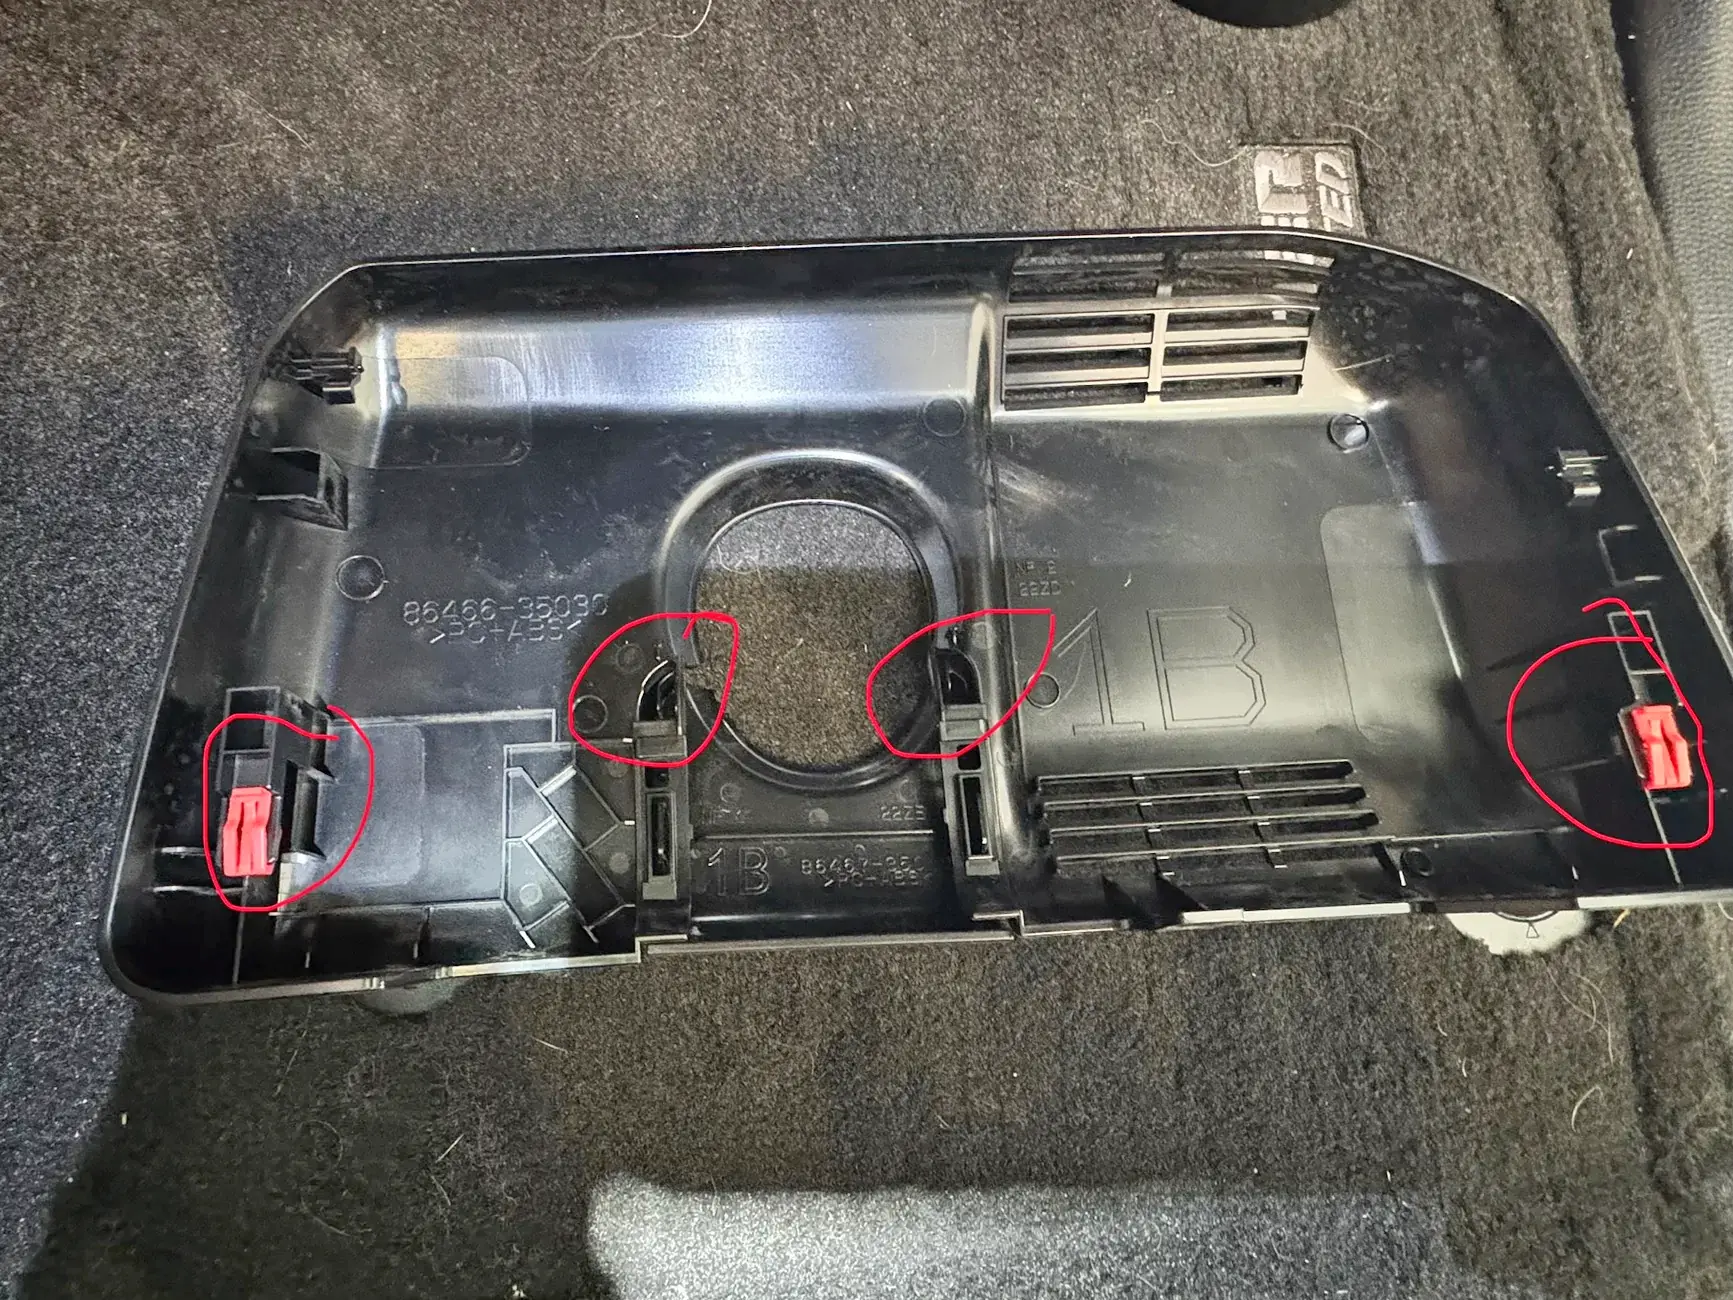
Once that small piece is removed, next is to move the existing shroud down the windshield. The two pink/red clips in the above pic show the location and direction of the clips.
At this point the 2 pieces are removed and you now have access to the power supply. You want to remove the white clip and put the Dongar plug in that location. Then plug the truck’s white plug into the female side of the Dongar adapter. This pic has the Dongar plugged into the vehicle and the vehicle plug is now in the female receptor on the Dongar.
Now plug in the Dongar small 2 pin plug into the USB C adapter. Next… plug in the USB C to USB C cable. Dongar gives you a 90 degree to straight USB C cable. I used my own straight USB C to straight USB C cable because of my dash cam.
I installed some sound deadening foam I have around the Dongar USB adapter. I didn’t want to use the 3M tape they supplied to stick it anywhere.
This is probably the most difficult part (but in the scheme of things… it’s pretty easy). For my installation where I wanted my camera I got the larger plastic shroud and installed it while holding the Dongar adapter so that it sat just to the left of the Toyota camera. Since I placed some sound deadening foam around it, there will be zero noise coming from it. The plastic shroud goes on exactly how it came off (but opposite). Slide the shroud up the windshield till the front pink/red clips engage. My USB C wire exited from the top by the headliner. You can see in this pic how I routed the wire from the adapter hidden in the shroud down into my dashcam.
Lastly… snap in the smaller plastic piece.
This is one of the easiest vehicles to put in a dash cam (ACC only dash cam at least) and Dongar makes a great product. Been using them for over a decade in different vehicles and they have come a long way in terms of product and packaging. Hope this helps some folks with their install.
Sponsored
