
- Thread starter
- #1
From the 2025 4Runner Owners Manual:
Jump-Starting the Battery
Battery Replacement Guidelines
Refer to pages 608–612 in the Owner’s Manual for illustrations of jumper cable connections and battery layout.

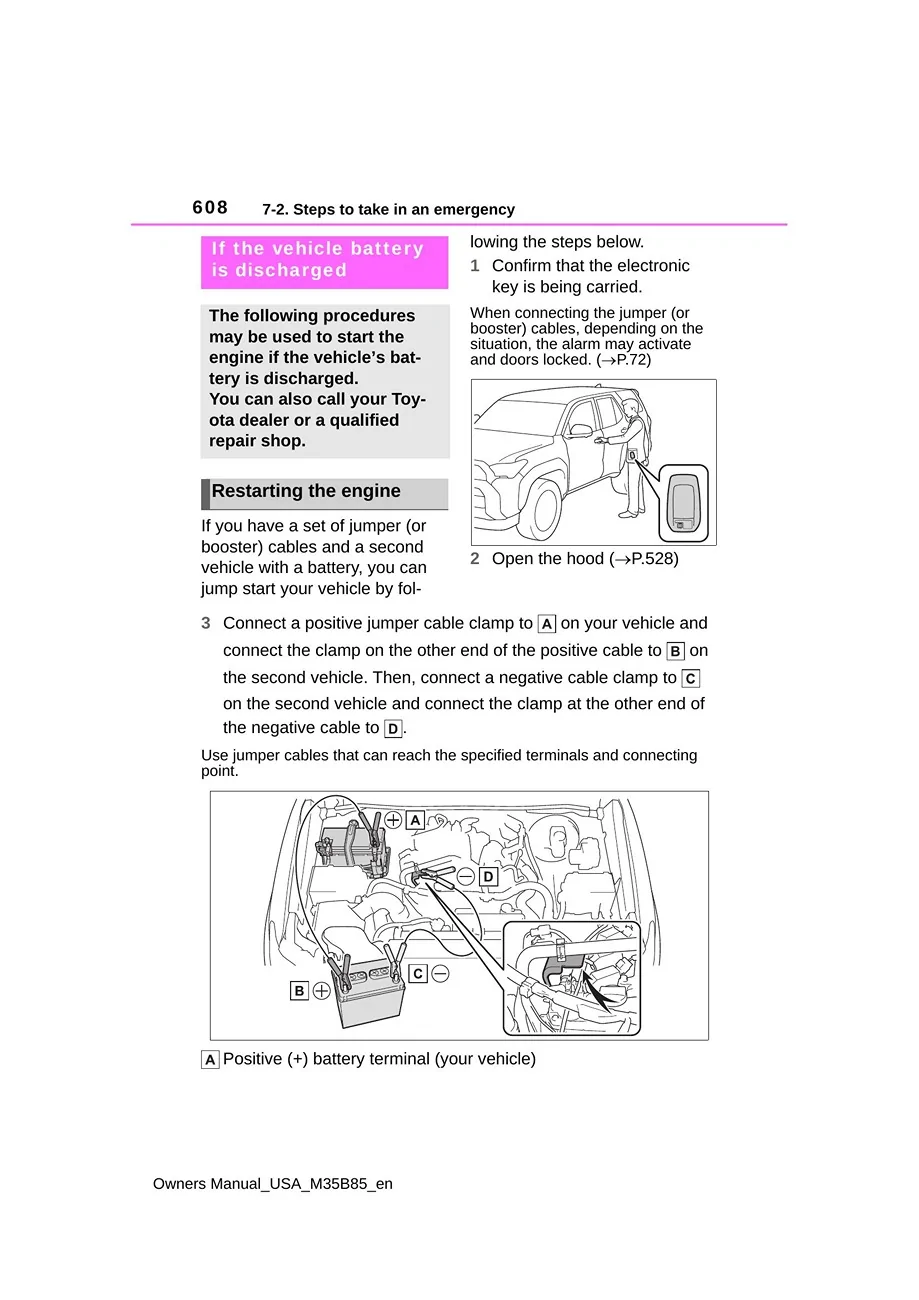
Jump-Starting the Battery
- Confirm that you have the smart key inside the vehicle
- Open the hood (pg. 528)
- Connect the jumper cables in this order:
- Positive (+) clamp to your 4Runner
- Positive (+) clamp to second vehicle
- Negative (–) clamp to second vehicle
- Final Negative (–) clamp to metallic grounding point on your 4Runner
- Start the engine of the second vehicle and maintain a slight throttle for ~5 minutes
- Open and close a door on the 4Runner with the engine switch OFF
- Attempt to start your 4Runner
- Once the engine is running, remove the jumper cables in reverse order
Battery Replacement Guidelines
- Battery location: driver side under the hood
- Use only the same size and rating battery:
- Type C (LN4): 75Ah (20HR) or greater, 776 CCA or greater
- Stop & Start Models require Toyota-approved batteries
- Remove the negative terminal first
- After reinstallation, the smart key, engine switch mode, and multimedia system may require re-initialization
- Never allow clamps to touch each other or other metal surfaces
- Wear gloves and eye protection when working near the battery
- Do not smoke or allow open flames nearby
- Electrolyte can cause severe burns—flush with water and seek medical attention if exposed
Refer to pages 608–612 in the Owner’s Manual for illustrations of jumper cable connections and battery layout.

Sponsored